

Workflows
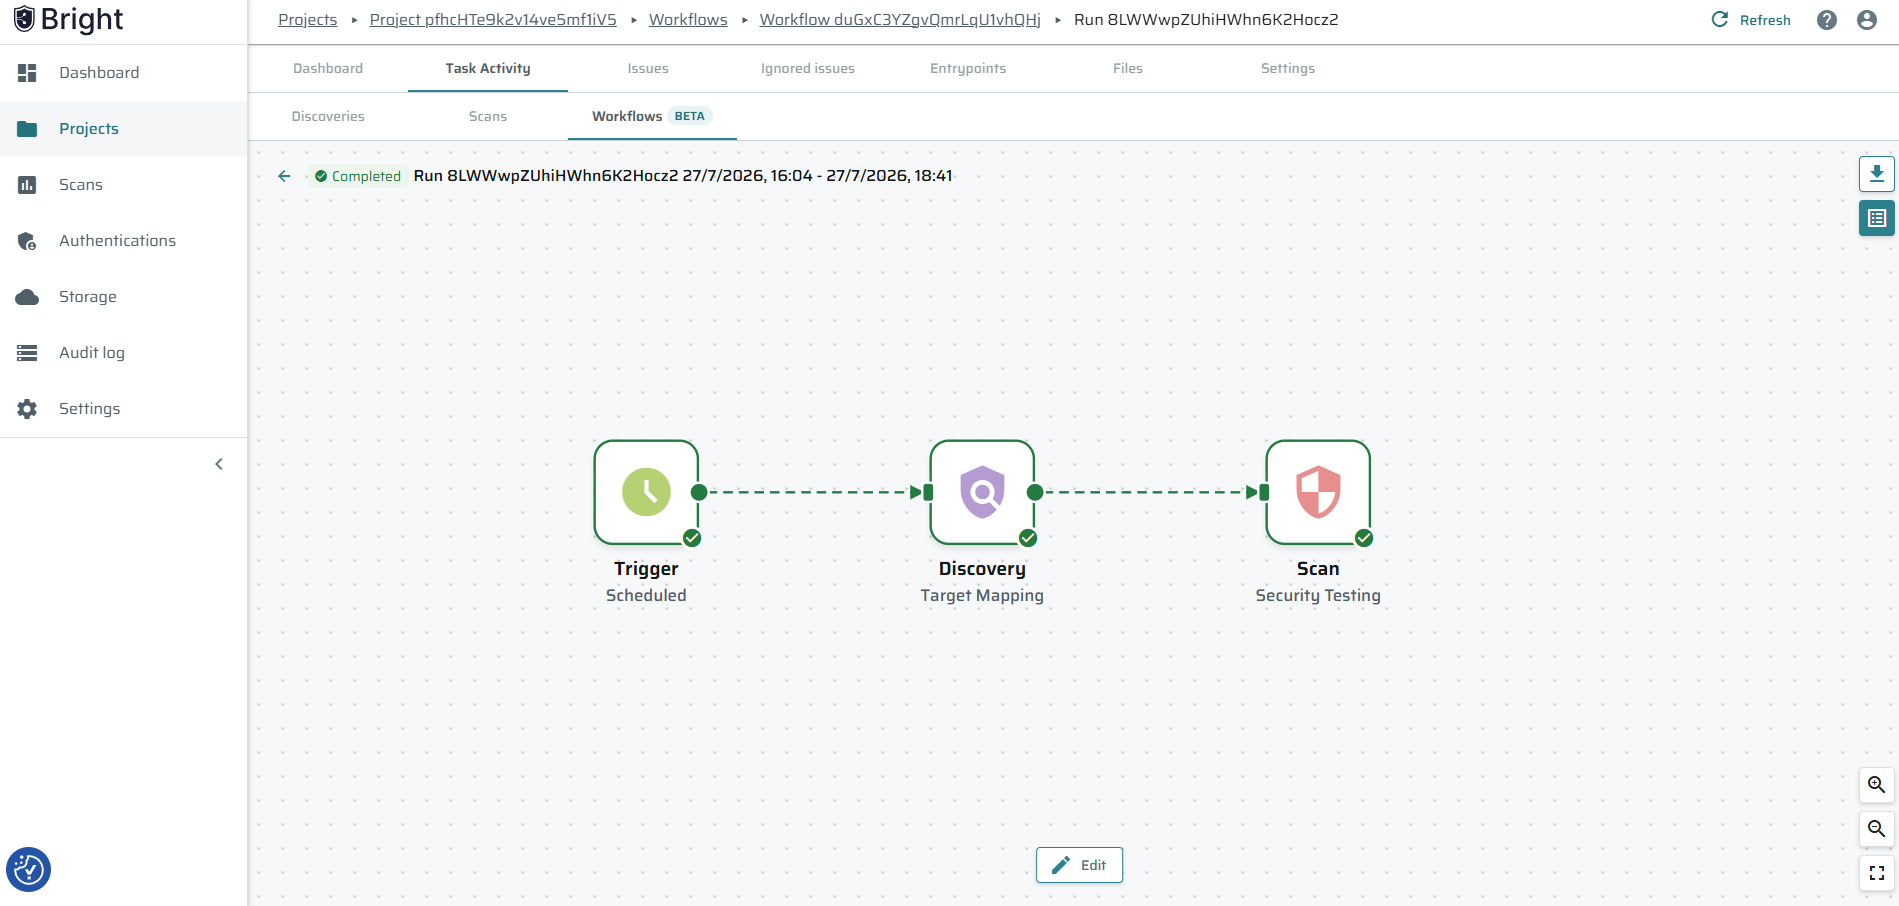
Workflows let you connect multiple Bright operations into a reusable execution flow. Instead of configuring and running each operation separately, you can define the flow once and run it manually or on a schedule.
A workflow can include:
- A trigger that determines when the workflow starts and how many times it should repeat
- A Discovery
- A Scan
Scopes
To activate and manage workflows, you should have the following scopes :
workflowsworkflows:deleteworkflows:manageworkflows:readworkflows:run
Create a workflow
- From a project view, go to Task Activity -> workflows
- Select Create workflow.
- Enter a name for the workflow.
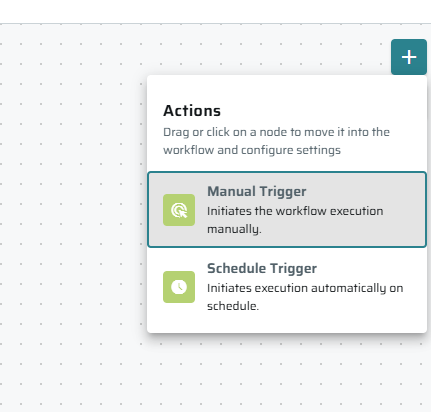
- From the right side, you will be required to select a
trigger:-
Manual trigger
Select Manual when you want users to start the workflow on demand.
After saving the workflow, you can run it from the Workflows page.
-
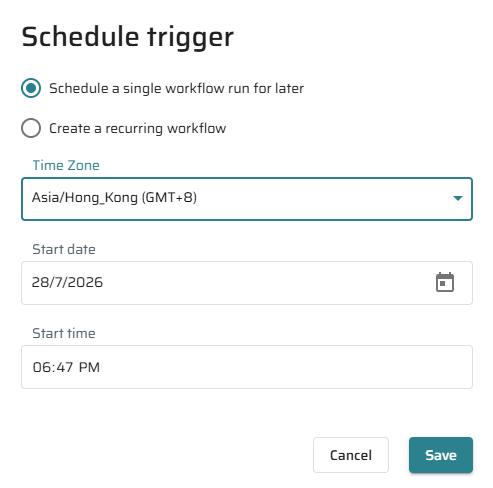
Scheduled trigger
Select Scheduled to run the workflow automatically.
Depending on the selected schedule type, you can configure:
- A one-time run
- A recurring run
- The start date and time
- The recurrence pattern
-
Review the configured time and time zone before saving the workflow.
- Add a
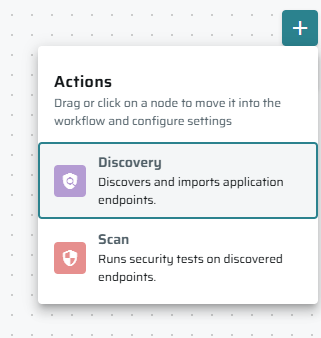
Discovery- Use a Discovery step to identify the entry points in an application before scanning them.- Configure the Discovery settings, including the target and discovery method.
- Select an Authentication Object if the target requires authentication.
- Review the configuration and save the step.
When the workflow runs, Bright executes the Discovery using the configuration saved in the workflow.
-
Add a
Scan- Use a Scan step to test the selected entry points for vulnerabilities.- Add a Scan step to the workflow.
- Configure the desired statuses.
- Select the security tests to run.
- Configure authentication and optimization settings when required.
When a Scan follows a Discovery, Bright starts the Scan only after the Discovery step is completed successfully.
Important: If a step fails, dependent steps are not started.
-
Click on Run or Save
For a workflow with a manual trigger:-
You can run the workflow immediately
OR save it for later
-
Once you save a workflow, its status will be "Ready"
-
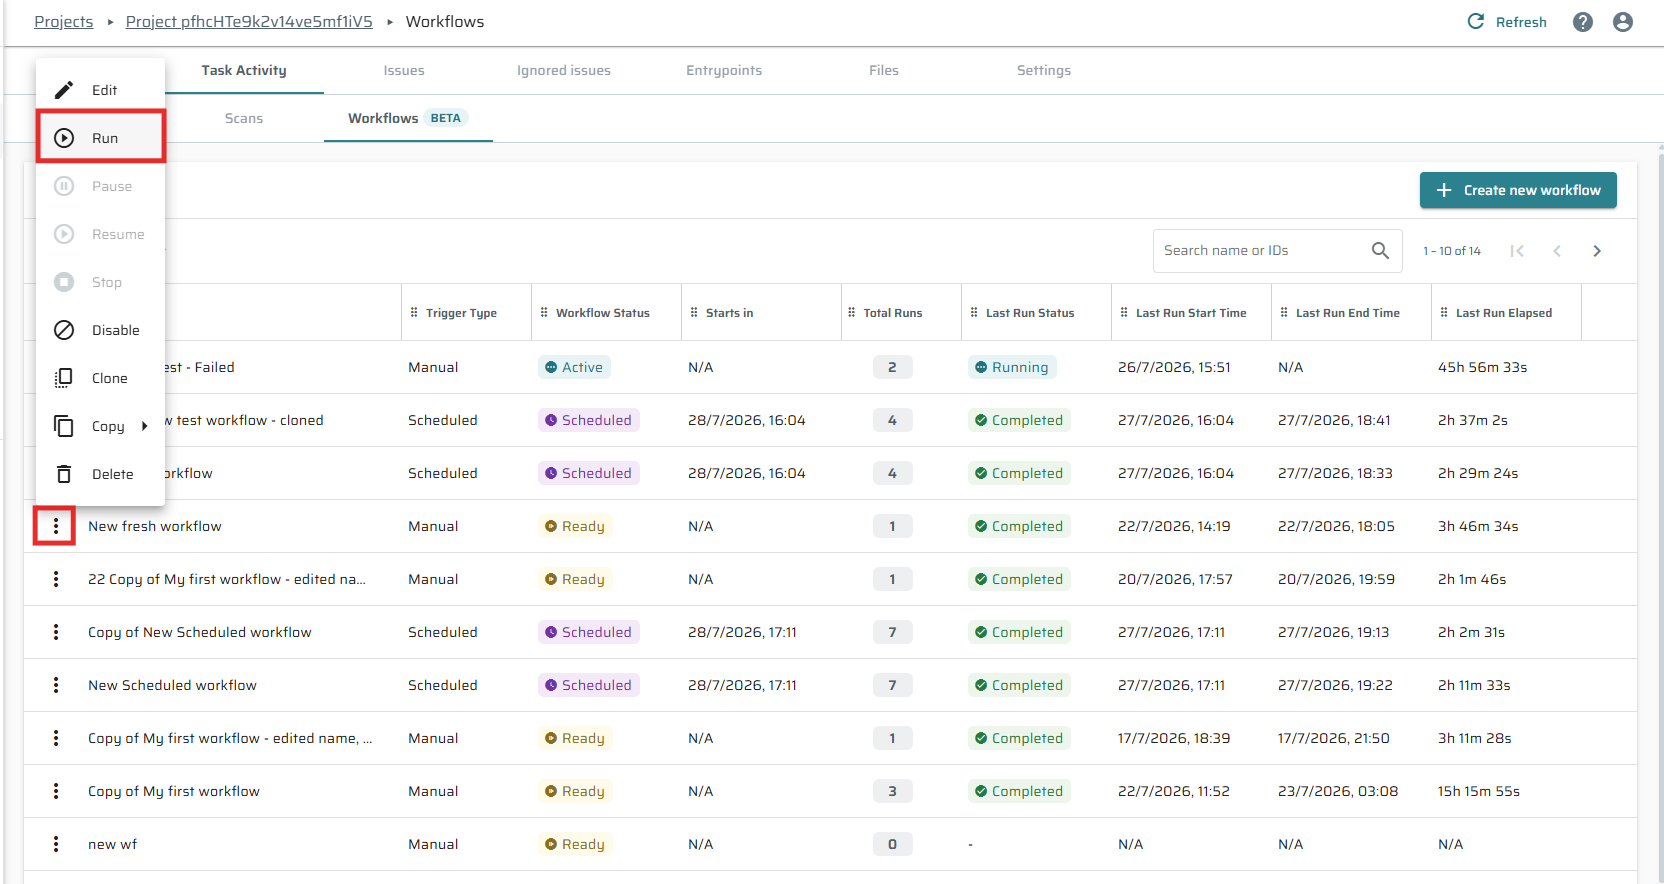
Find the workflow you want to run in the workflows table.
-
Select Run.
 For a scheduled workflow
Bright starts the workflow according to its configured schedule.
- Each execution uses a snapshot of the workflow configuration at the time the run starts. Changes made later do not affect an active or completed run.
-
Monitor workflow execution
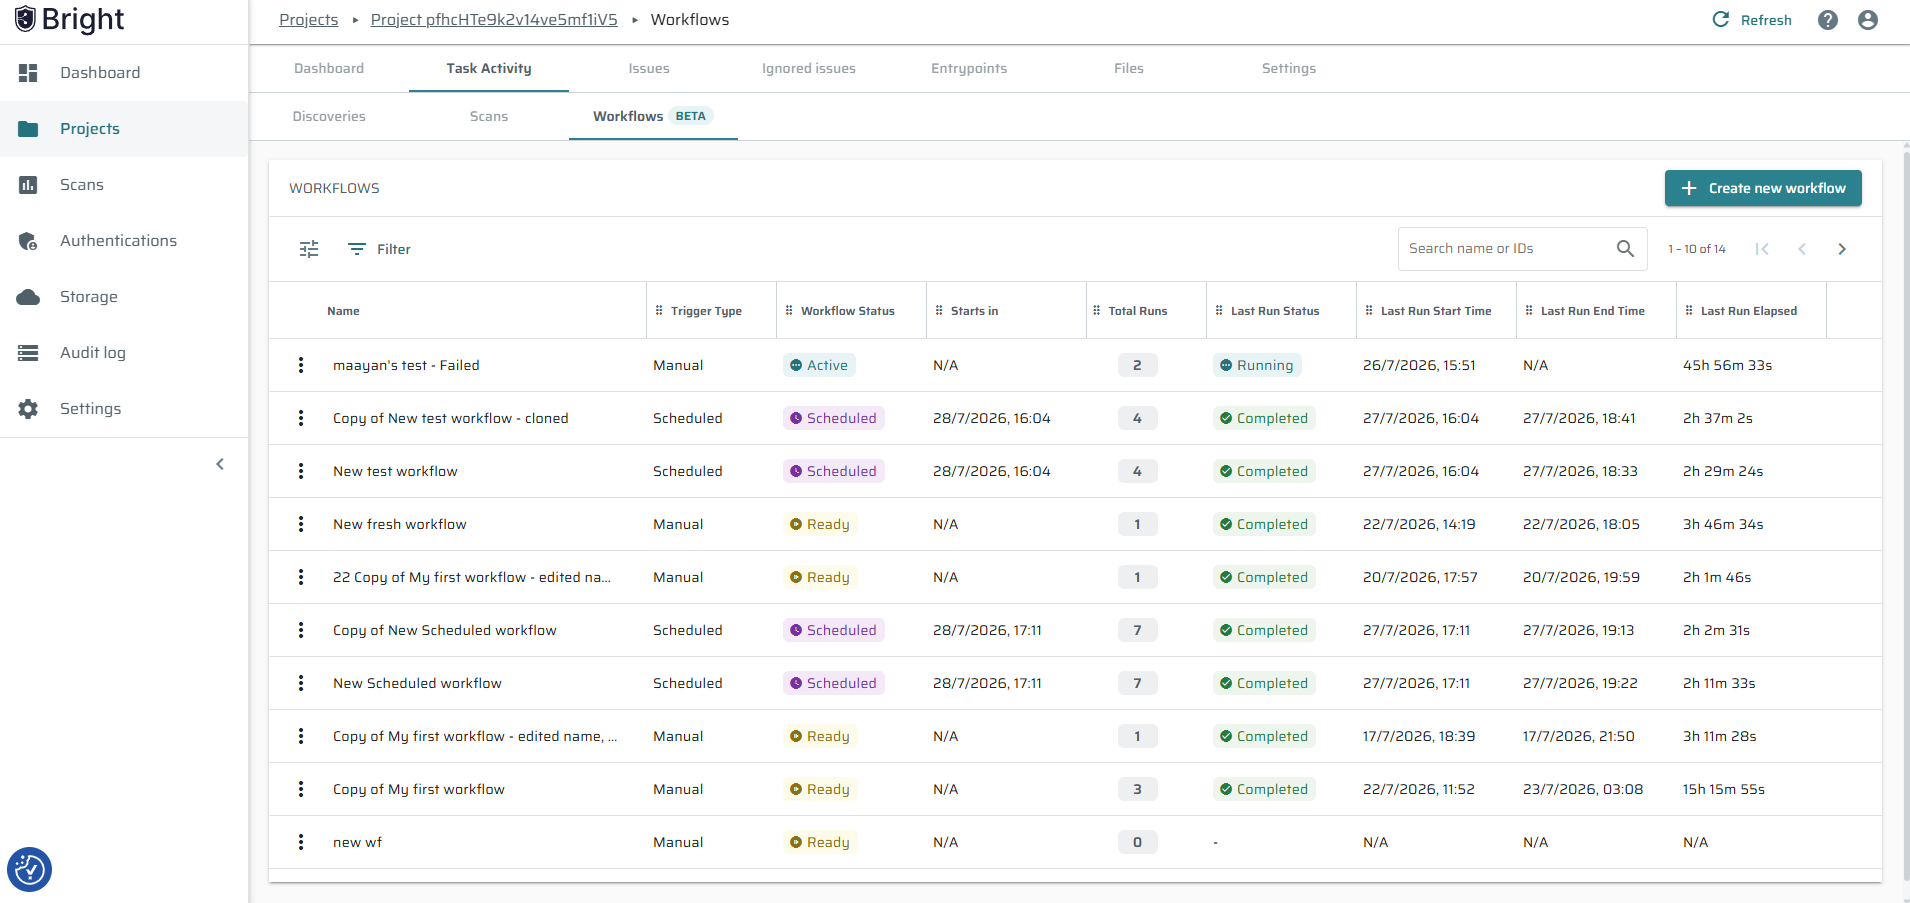
The Workflows page shows the configuration and execution state of each workflow.
The table includes:
| Column | Description |
|---|---|
| Name | The workflow name |
| Trigger | Whether the workflow is started manually or on a schedule |
| Workflow Status | The current state of the workflow configuration |
| Execution Status | The state of the current or most recent run |
| Starts In | The time remaining until the next scheduled run |
| Total Runs | The total number of workflow executions |
Workflow status
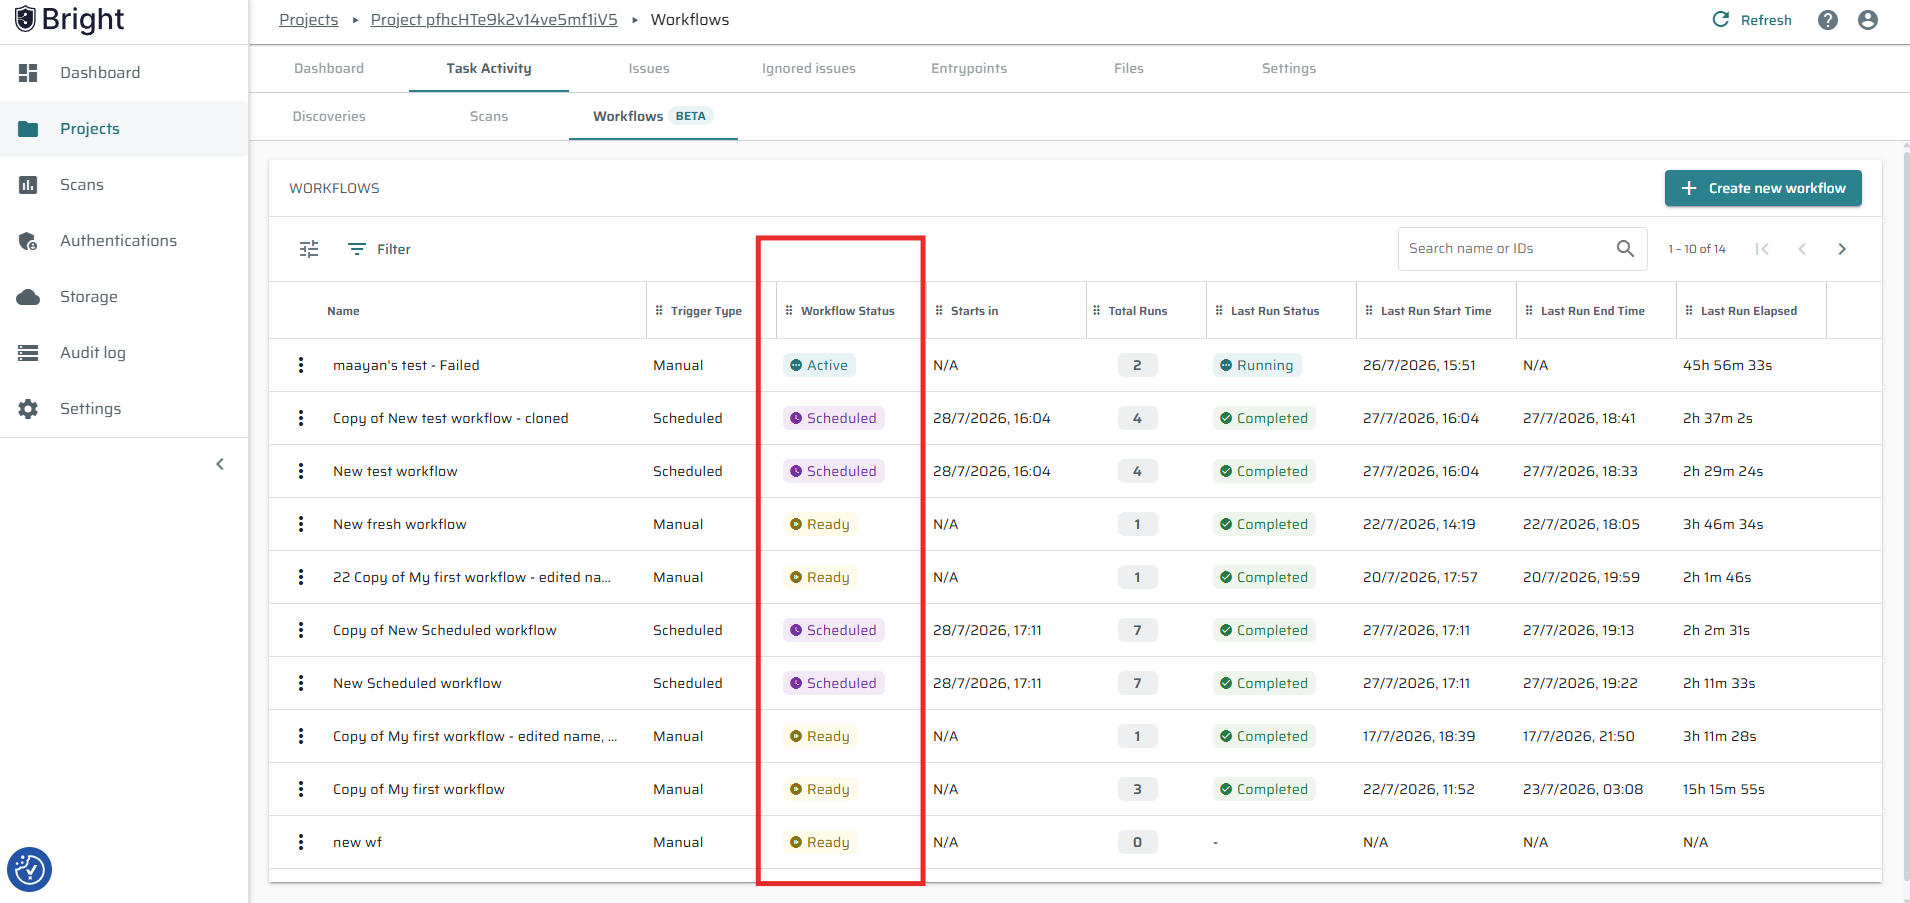
The workflow status describes whether the workflow configuration is ready and eligible to run.
Possible statuses include:
| Status | Description |
|---|---|
| Ready | The workflow is configured and can be run manually |
| Scheduled | The workflow has an active schedule |
| Pending | The workflow is waiting for a required or state change |
| Active | The workflow is currently active |
| Disabled | The workflow is disabled and cannot start |
| Expired | The configured schedule is no longer active |
Execution status
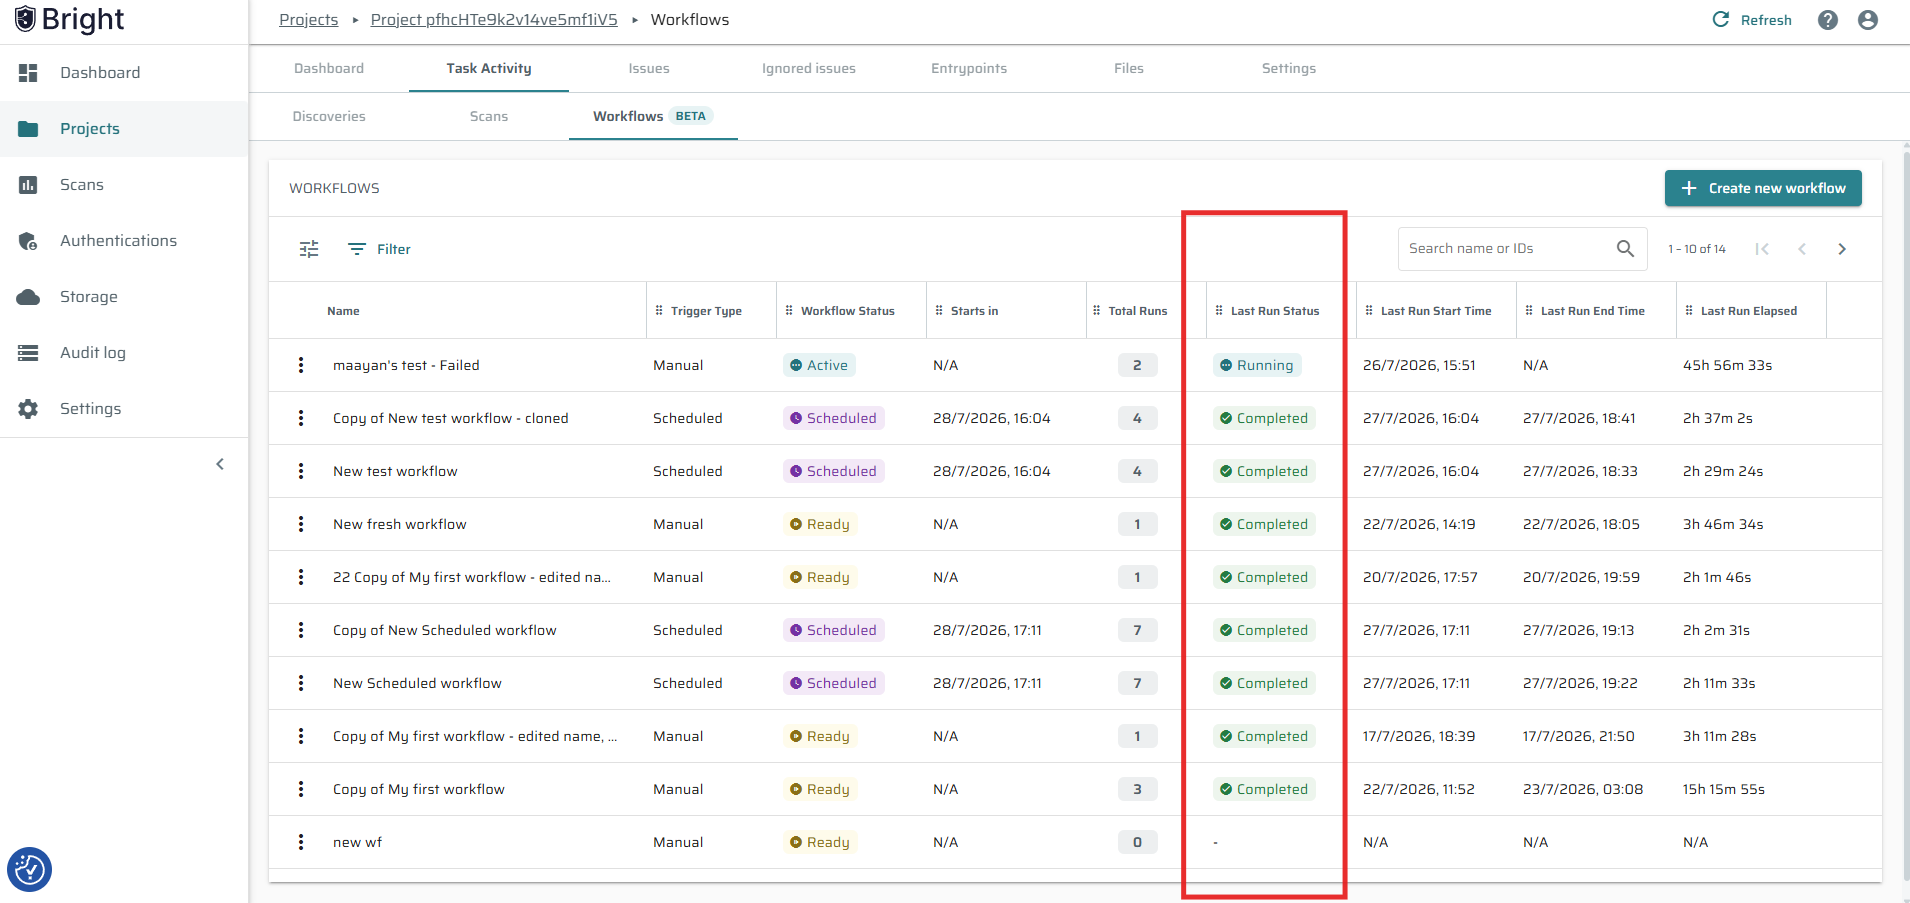
The execution status describes the state of a specific workflow run.
Possible statuses include:
| Status | Description |
|---|---|
| Running | The workflow is currently executing |
| Pausing | A pause request is being processed |
| Paused | The workflow run is paused |
| Resuming | A resume request is being processed |
| Stopping | A stop request is being processed |
| Stopped | The workflow run was stopped |
| Completed | All required steps completed successfully |
| Failed | The workflow run could not be completed |
View run details
To review a workflow execution, open its run history and select a run by simply clicking on the workflow entry.
The run details drawer displays:
- Status
- Start time
- End time
- Elapsed time
- Run ID
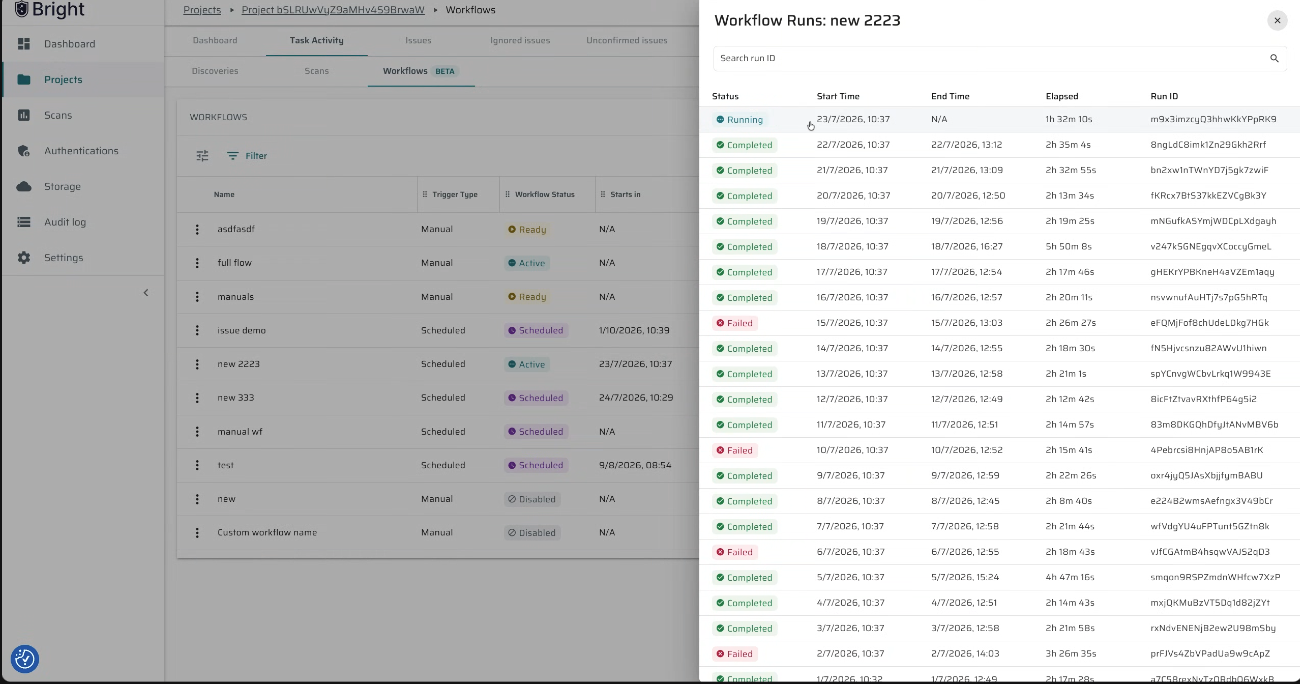
Click a run entry to open the workflow canvas for that specific execution.
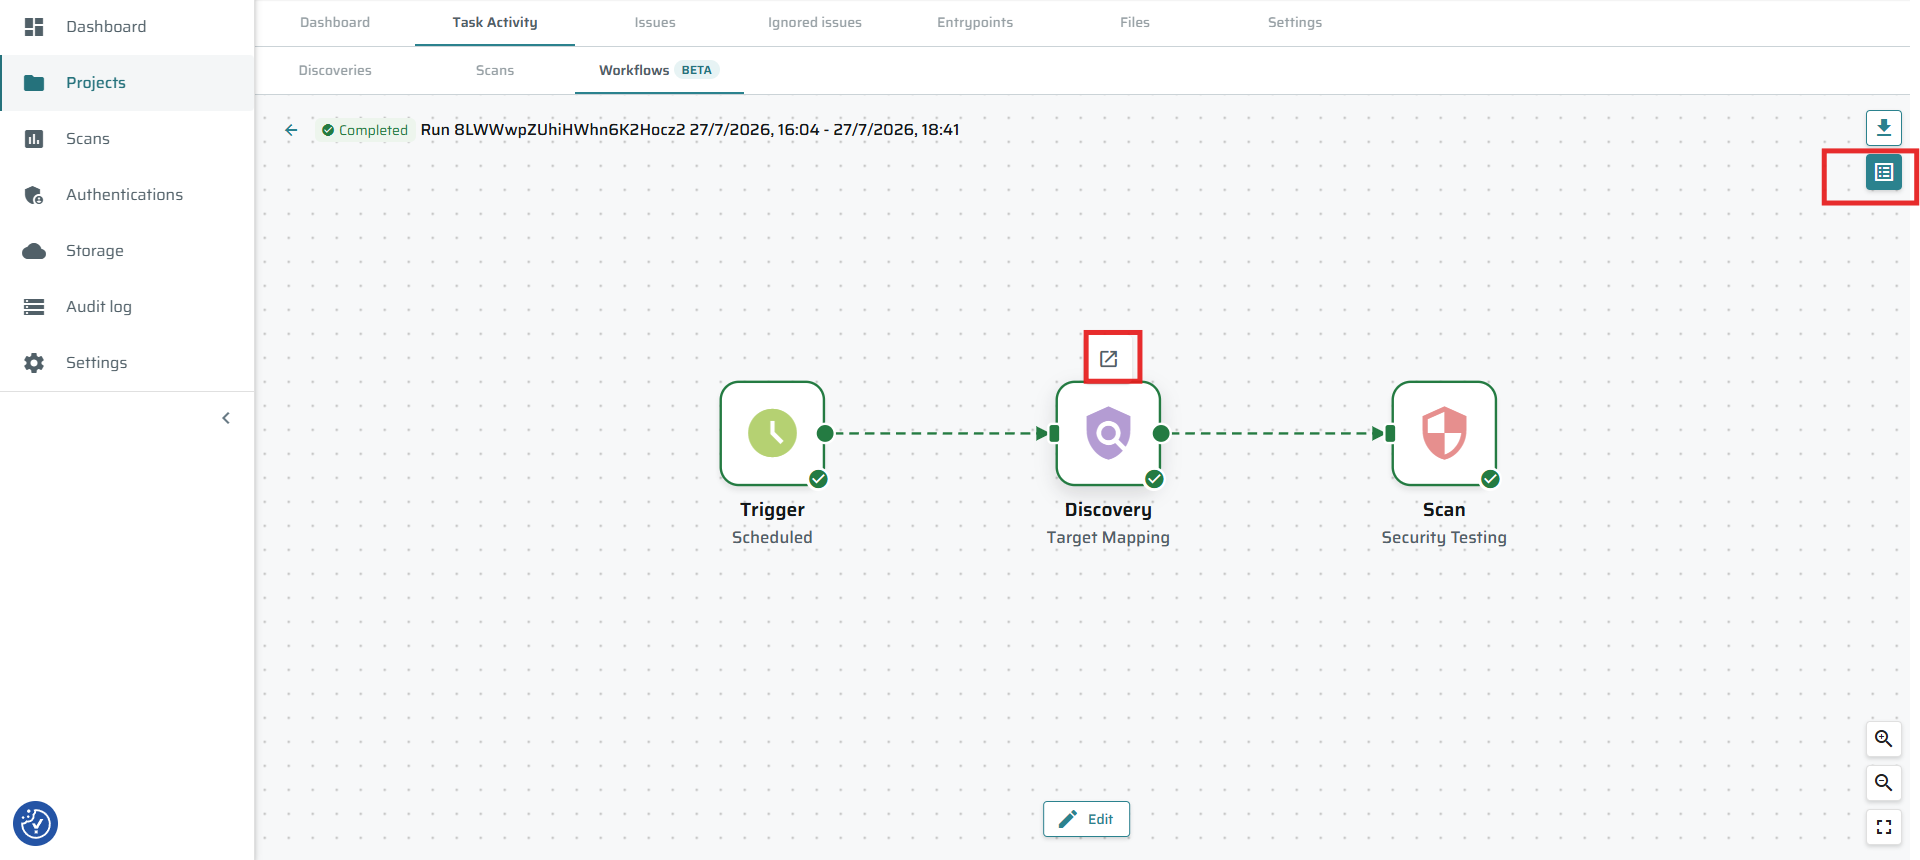
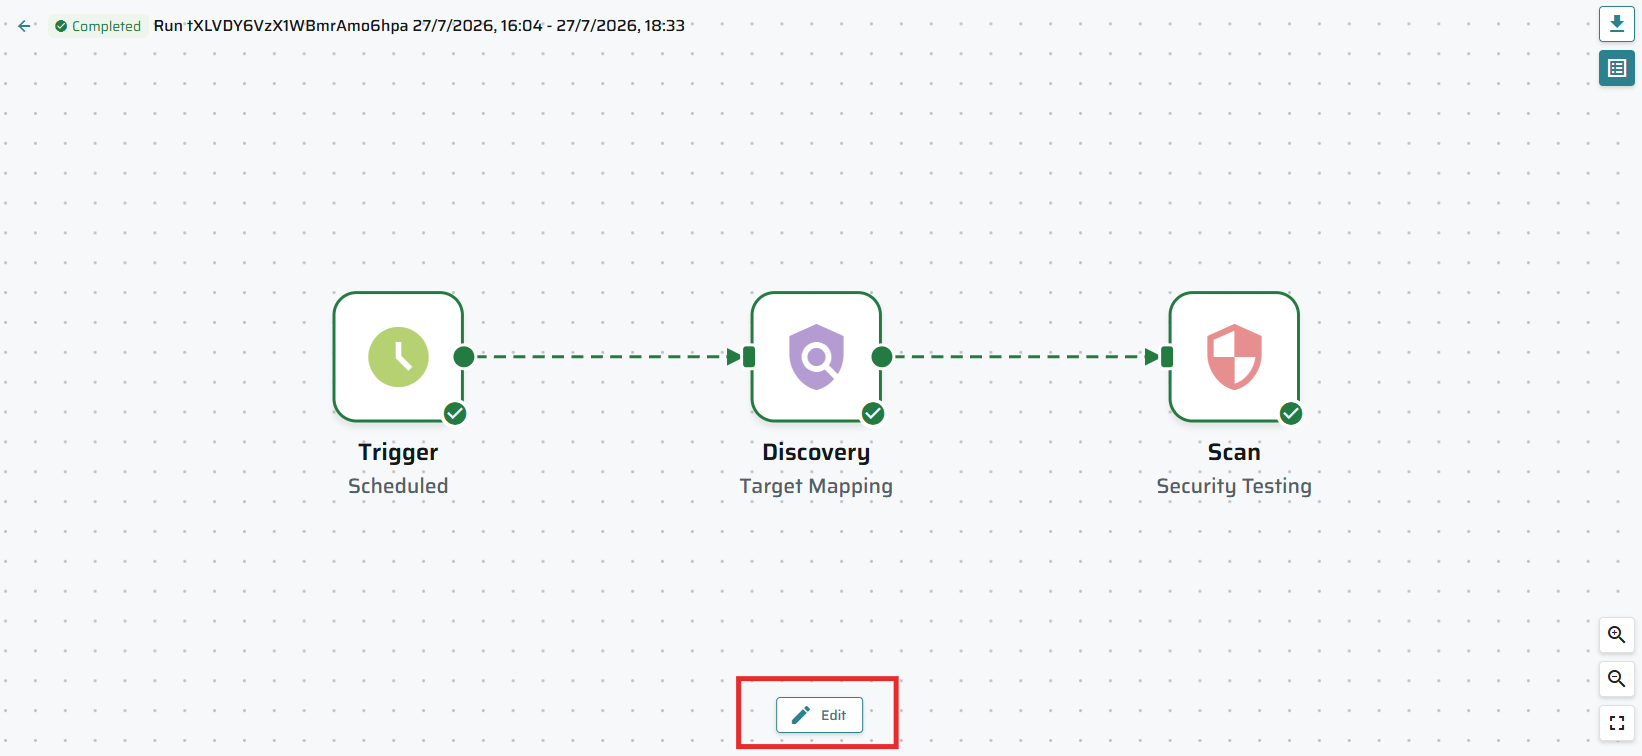
The canvas displays the status of the workflow and each of its nodes.
From the run canvas, you can:
- Click Logs to review the workflow execution logs.
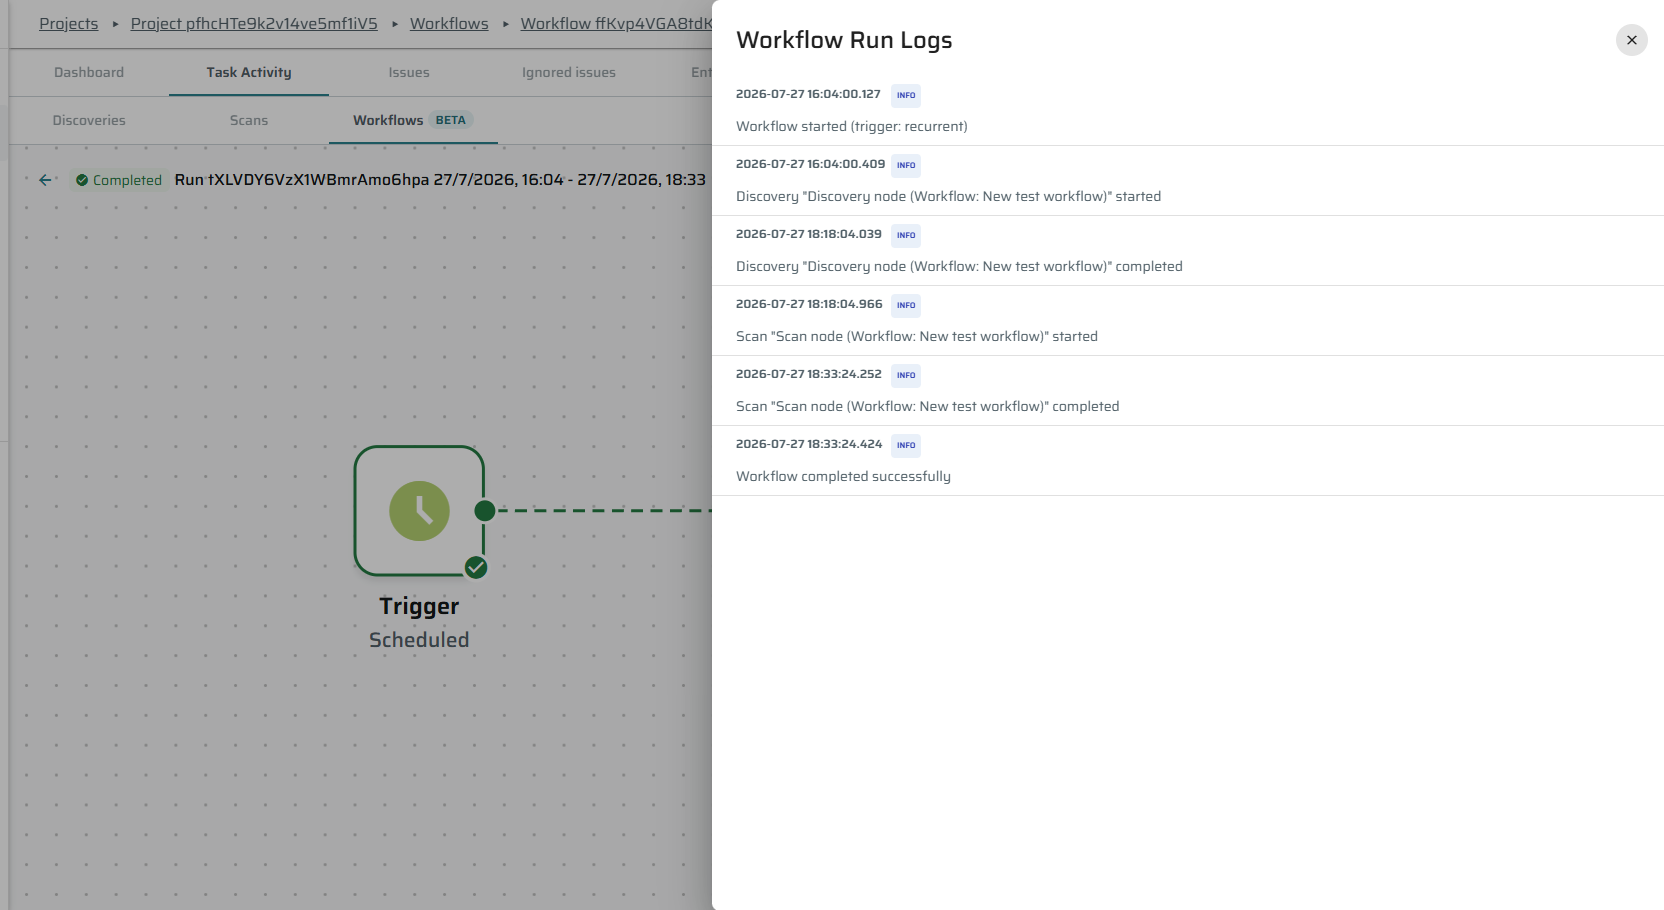
- Click a Discovery node to open its Discovery details page.
- Click a Scan node to open its Scan details page.
Stop a workflow run
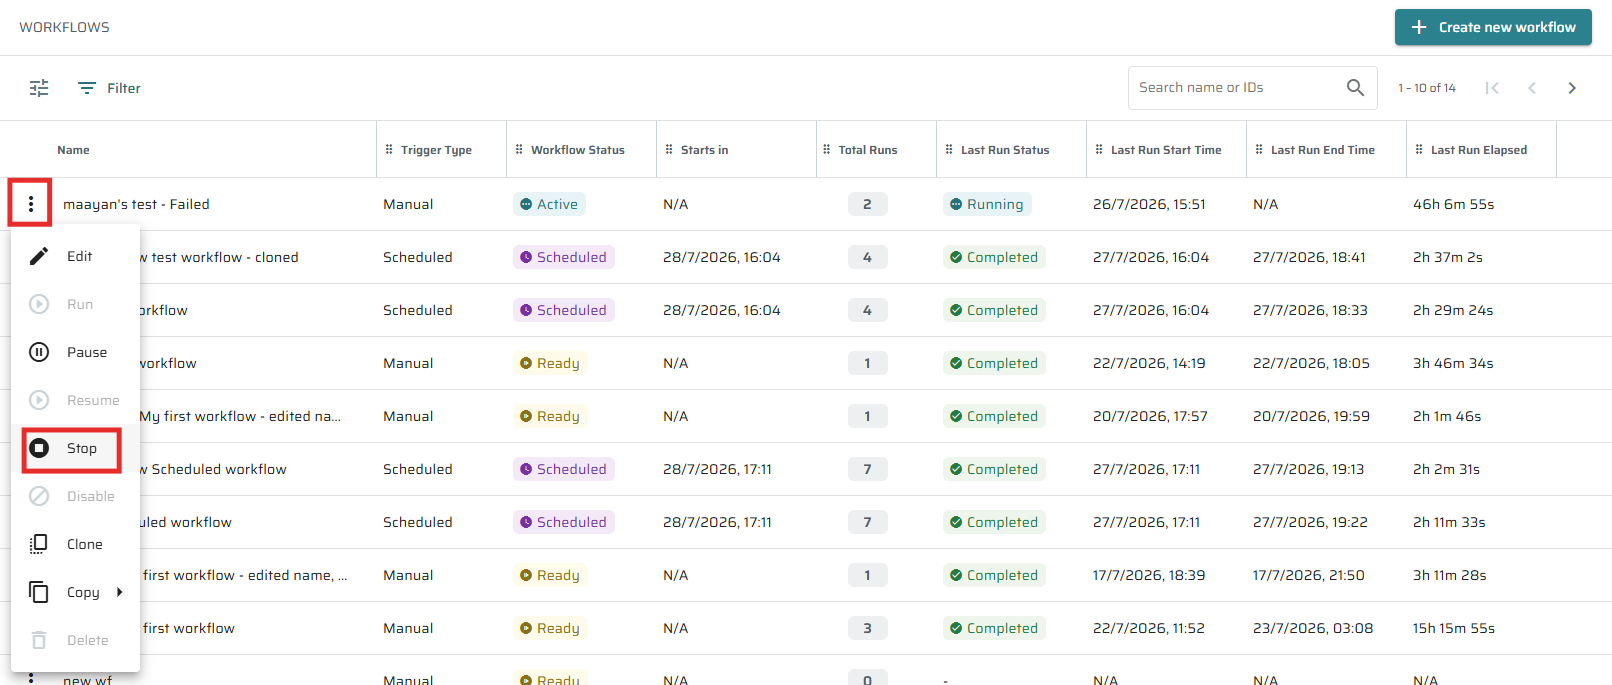
To stop an active workflow:
- You can either do it from the menu by clicking on the 3 dots icon -> Stop
- Or do it from the workflow canvas by clicking the stop button
The execution status changes to Stopping while Bright processes the request, and then to Stopped.
Stopping a workflow prevents steps that have not started from running. Results produced before the workflow was stopped remain available in the relevant Discovery or Scan pages.
Edit a workflow
To update a workflow:
- You can click on the 3 dots menu and click Edit
- From a run history view, click on Edit within the canvas
The updated configuration applies to future runs only. It does not change the configuration snapshot stored for earlier or active runs.
Export a workflow configuration
You can export a workflow configuration for review or reuse.
- Within the Canvas view -> Open the workflow actions menu.
- Select Export.
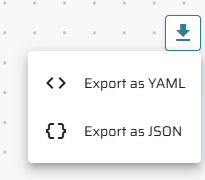
- Choose YAML or JSON.
Note: Workflow configuration can be exported as YAML or JSON. API-based workflow creation currently supports YAML.
Review results
Workflow steps use the existing Bright result pages:
- Discovery results are available on the relevant Discovery details page.
- Scan progress and results are available on the relevant Scan details page.
- Detected vulnerabilities are available on the Issues page.
The workflow run history keeps the relationship between the workflow execution and the Discovery or Scan entities created during that run.
Audit log
All workflow-related actions are recorded in the audit log, including:
-
Creat
-
Edit
-
Run
pause
-
Resum
Stop
-
Delete

Update 22/9/26 - Large-Scale Scan Execution
Workflows support scanning applications containing more than 2,000 Entry Points.
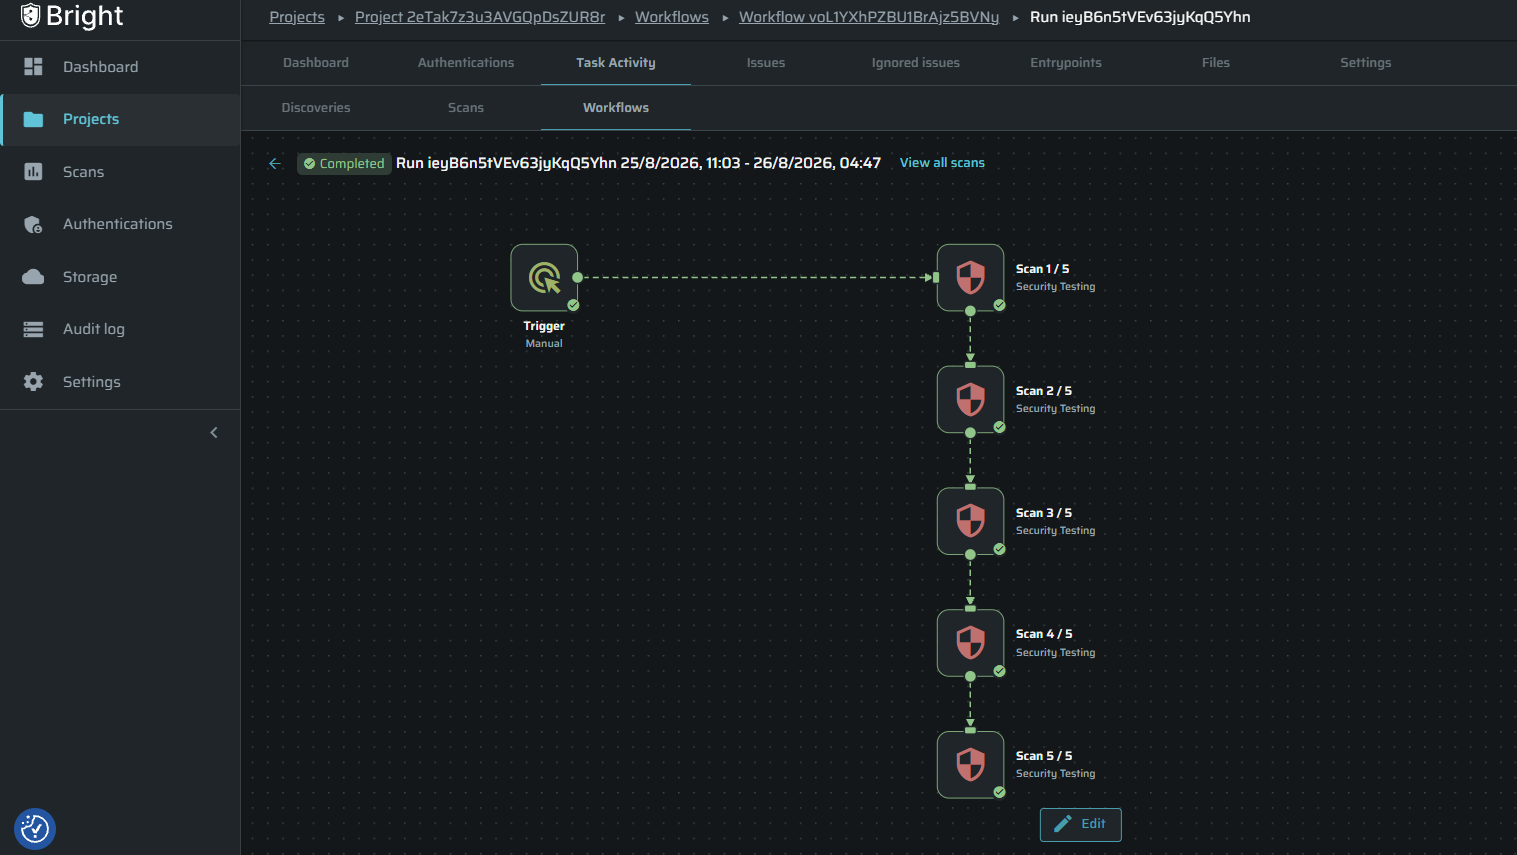
Bright automatically divides the discovered Entry Points into batches of up to 2,000 and runs them sequentially within a single Workflow Run. You do not need to divide large applications or create separate Scans manually.
Each batch is displayed as a separate Scan node, allowing you to monitor its progress and status. If one batch fails, the remaining batches can continue running.
You can also select View Scans to open the Scans page, automatically filtered by the relevant Workflow Run.
NoteThe 2,000 Entry Point limit still applies to standalone Scans. Use a Workflow when testing applications containing more than 2,000 Entry Points.
Monitor Workflow Run Progress
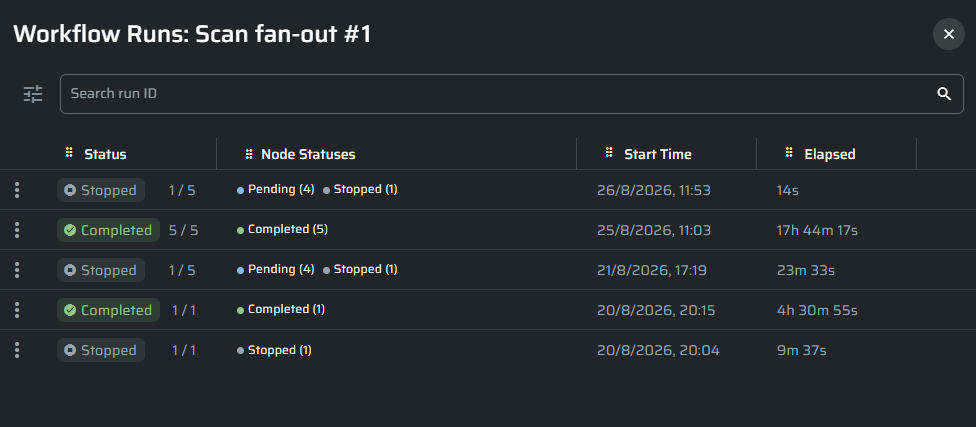
Workflow Run details provide an aggregated view of the run's progress and node statuses.
The updated view includes:
-
Execution progress displayed as executed nodes out of total nodes.
-
A breakdown of completed, running, paused, skipped, failed, and stopped nodes.
-
A warning indicator when one or more nodes require attention, even if the overall Workflow is still running or completed.
-
A View Scans action that opens the Scans page filtered by the selected Workflow Run.
-
Configurable table columns, with Run ID and End Time hidden by default.
The progress and status breakdown include both Scan and Discovery nodes. Use this information to understand how far the Workflow has progressed, identify problematic nodes, and open the relevant Scans for further investigation.
Troubleshooting
The workflow did not start
Check the following:
- The workflow is enabled.
- The workflow configuration is complete.
- The required Bright engines are available.
- The user who started the workflow has the required permissions.
A Scan step did not start
If the Scan depends on a Discovery, confirm that the Discovery completed successfully. A dependent Scan does not start when the preceding step fails.
The workflow failed
Open the run details and identify the failed step. Select the step to open its Discovery or Scan details page, where you can review the failure reason and available logs.
After correcting the configuration or target issue, start a new workflow run.
Changes are not reflected in an active run
This is expected. Each run stores a snapshot of the workflow configuration when it starts. Save your changes and start a new run to use the updated configuration.
Update: 20/10/2026
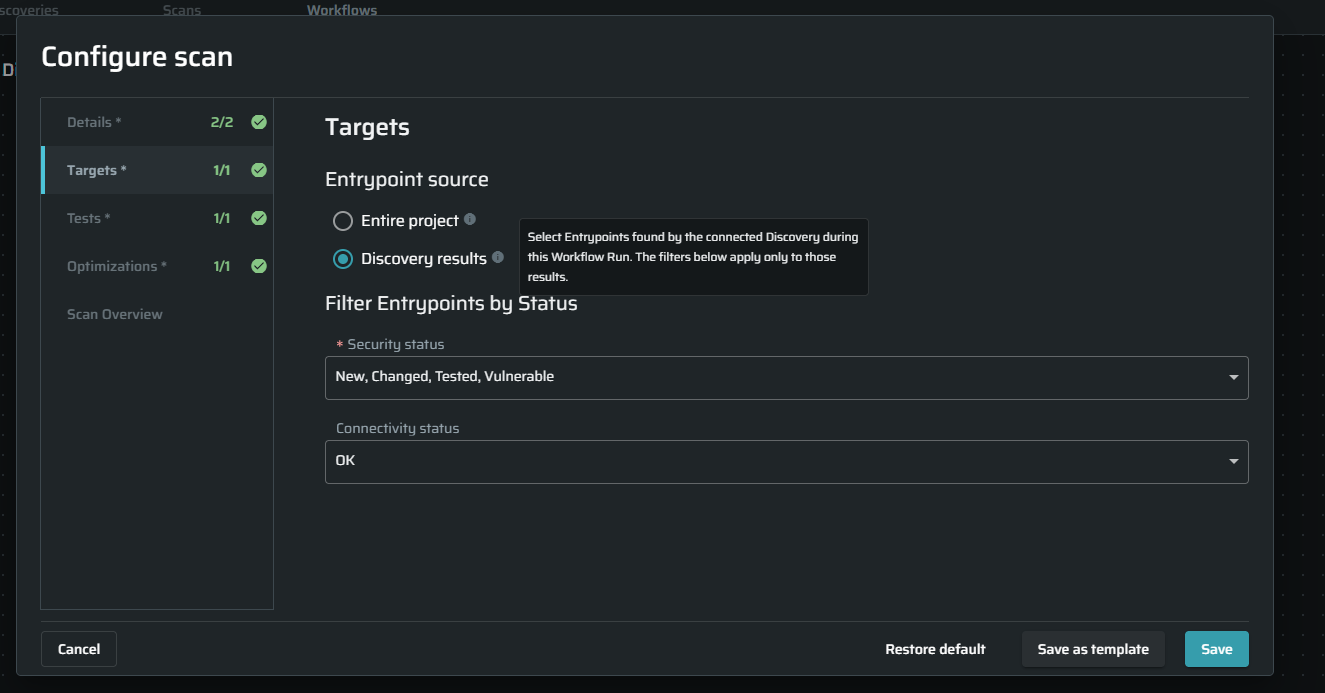
Scan Workflow Discovery Results
Previously, when running a workflow, a Scan following a Discovery selected entry points from the entire project, which could include targets outside the Discovery results.
You can now choose Scan Discovery results to scan only the entry points found during the connected discovery run. While applying security and connectivity filters to narrow the scope and avoid spending scan time on unrelated targets.
Updated 8 days ago