Azure AD: Service Provider initiated SSO and Provisioning
|
|
|
To simplify user access to Bright, you can configure Single Sign-On (SSO) integration with your Azure Active Directory. System for Cross-domain Identity Management (SCIM) is a protocol for user management across multiple applications. It allows you to easily provision (add), deprovision (delete) and update (map) user data across multiple applications at once. You can set up SCIM provisioning in Azure AD to automatically add the AD application users and groups to your organization in the Bright app. The added users will be able to access the Bright app using Active Directory Federation Services (AD FS) SSO. |
Bright supports the following provisioning attribute mappings:
userPrincipleNameSwitch([IsSoftDeleted], , "False", "True", "True", "False")givenNamesurnamemaildisplayName
Prerequisites
- You have a valid organization API key with the
scimscope.
Step-by-step guide
Step 1. Create an application for SSO integration in Azure
To enable Bright SSO with AD FS, you should first authenticate Azure in the Bright app.
- Create an application for Bright in Azure. For that, go to Enterprise Applications and click + New application.

- Click + Create your own application.

- In the Create your own application window, enter a name for a new application and click Create.
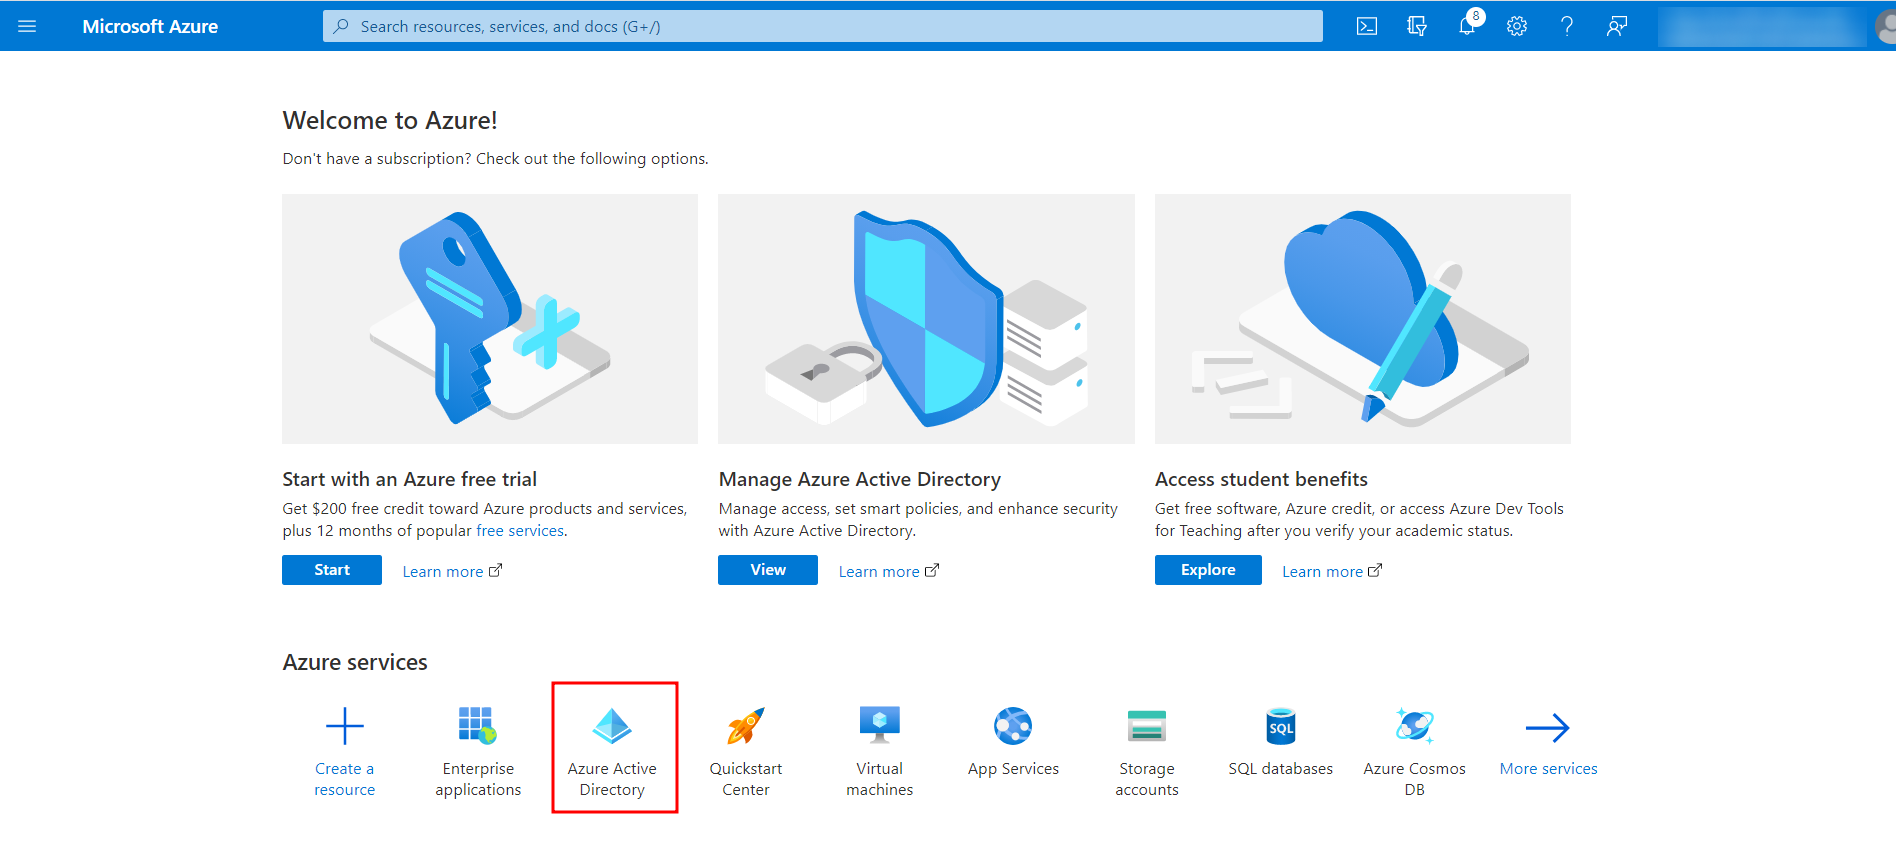
- Once the application is created, go back to the Home page and select Azure Active Directory.
-
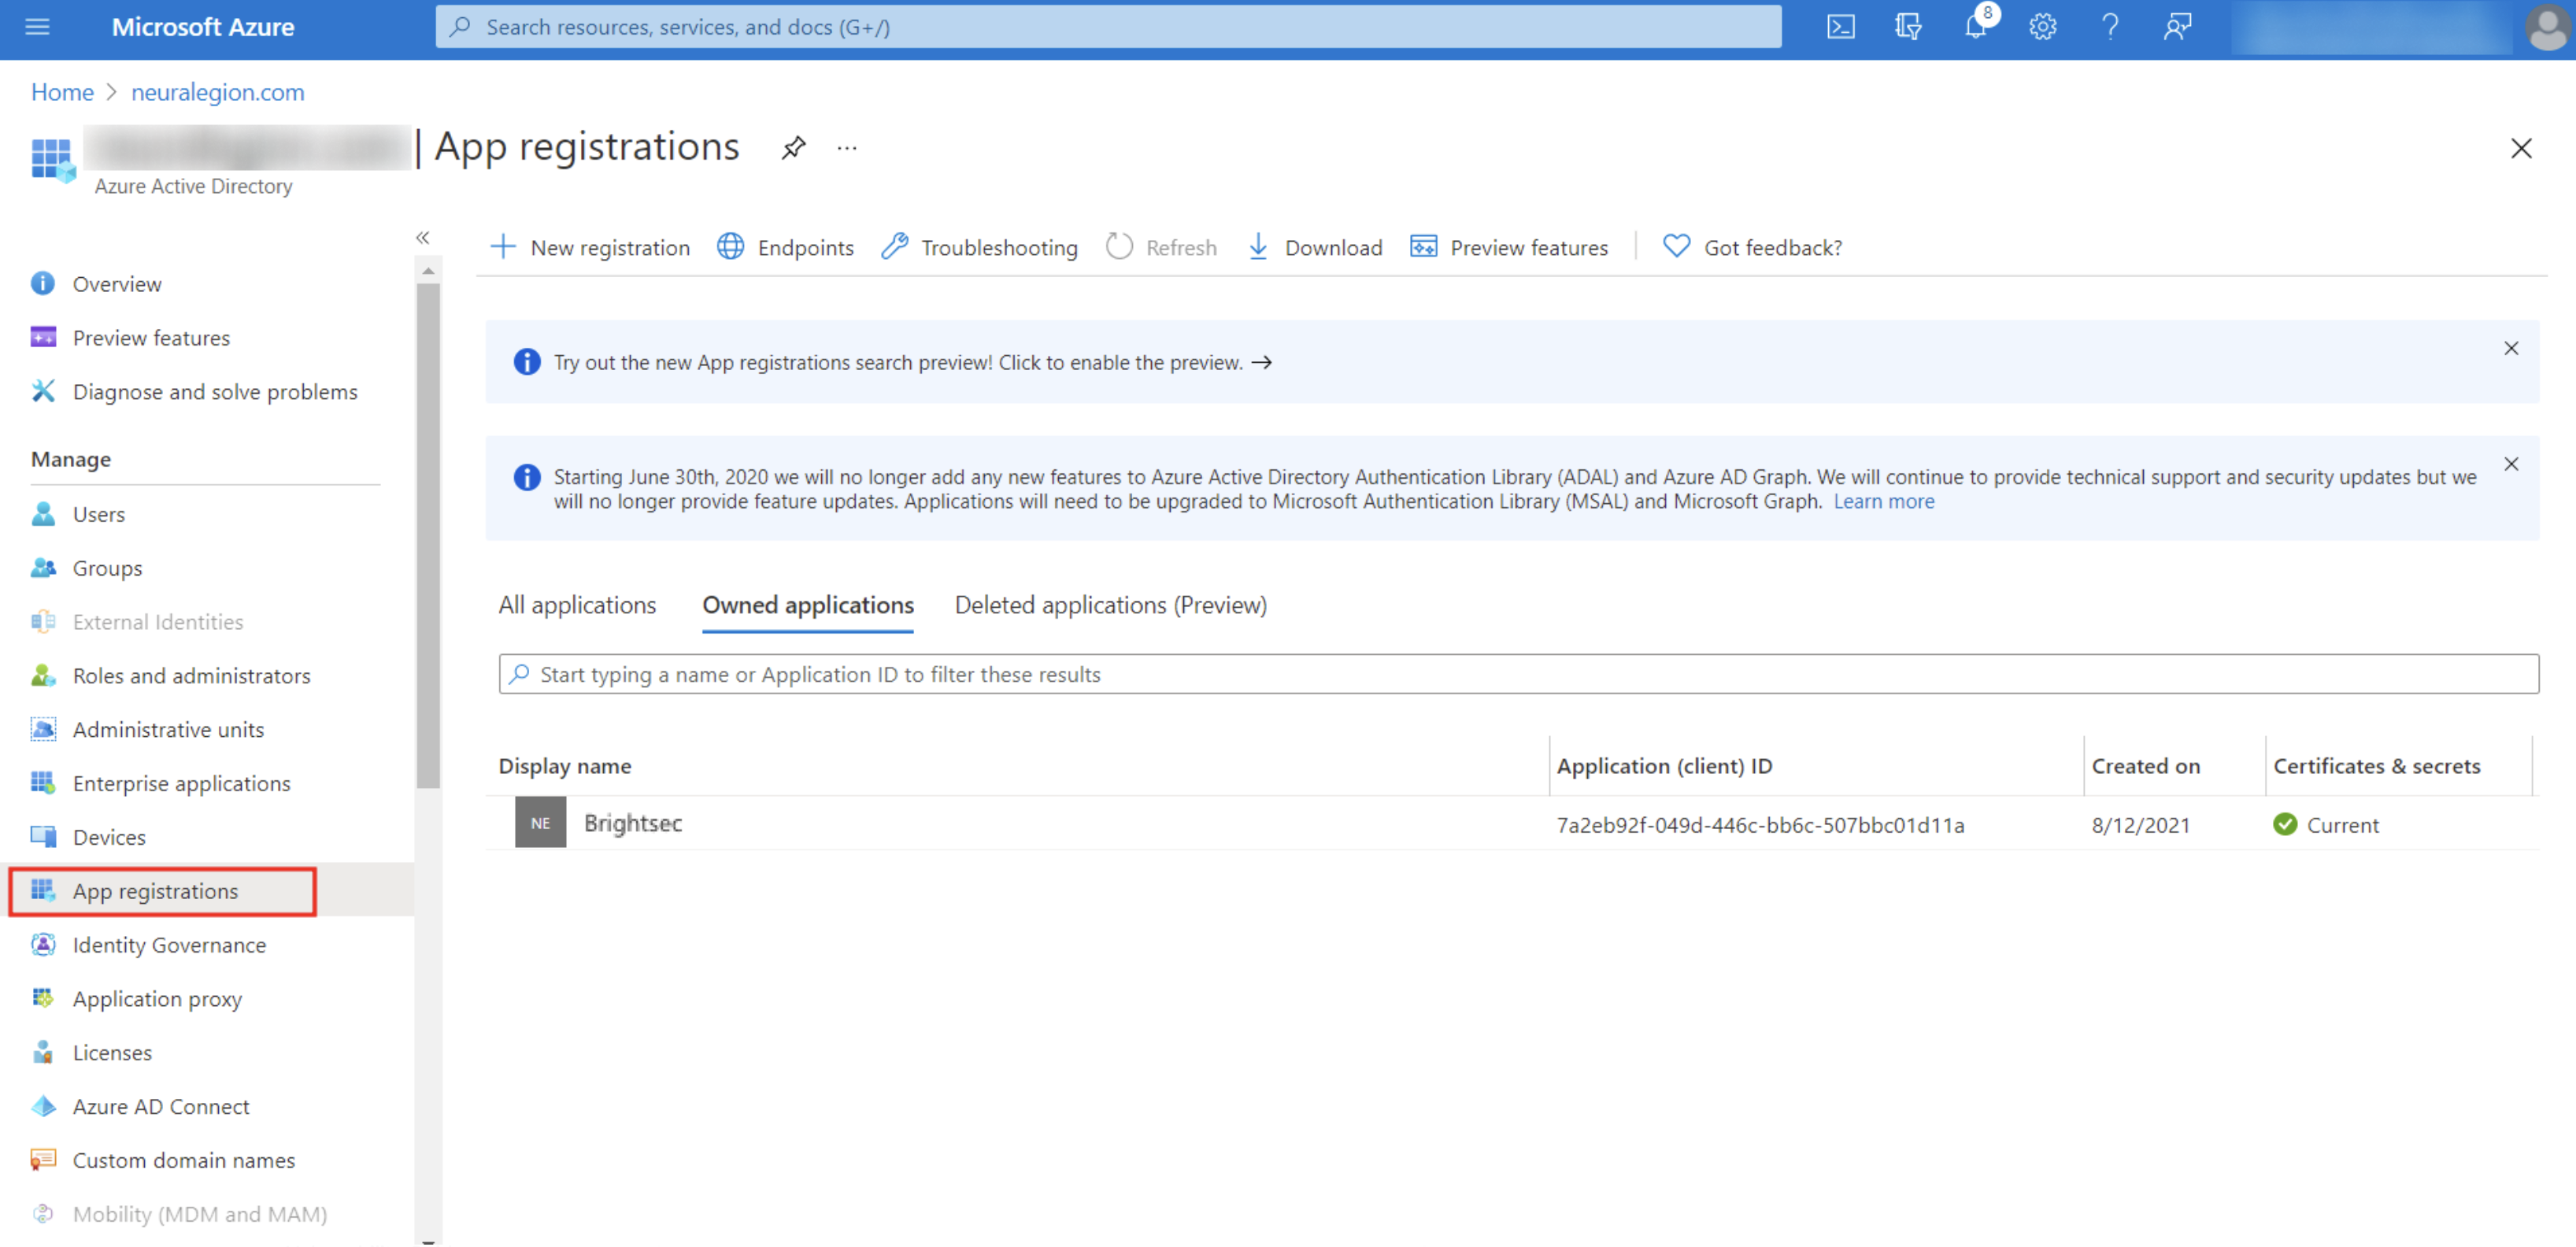
In the left pane, select App registrations, open the All applications tab, and select the created application from the list.
NoteIt may take some time until the predefined application is published in the Azure AD gallery.
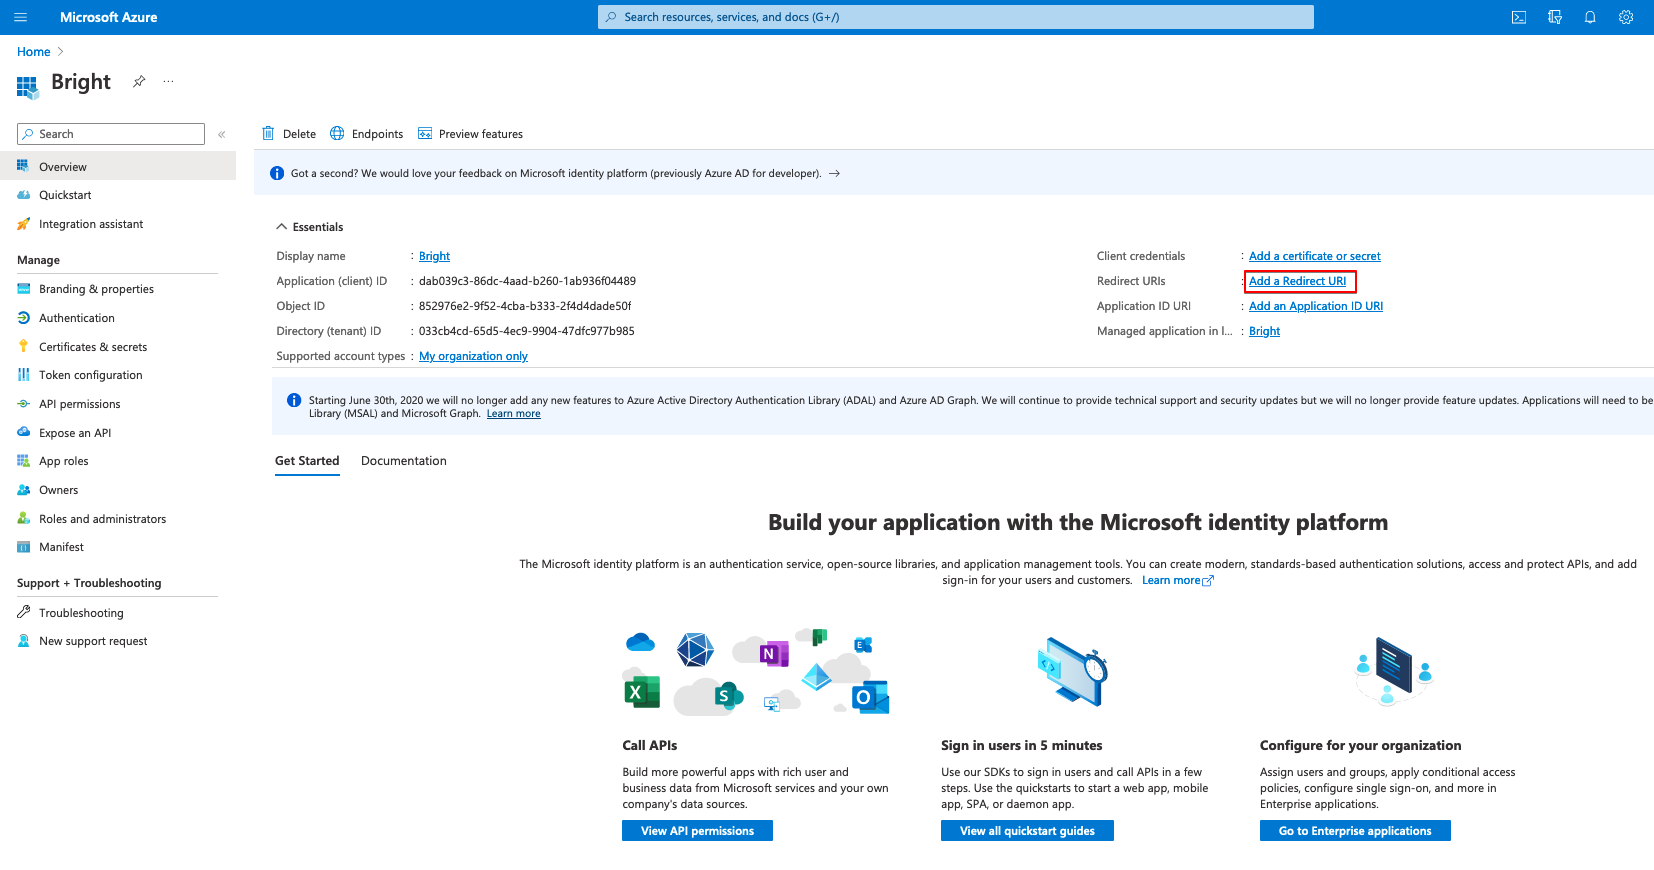
-
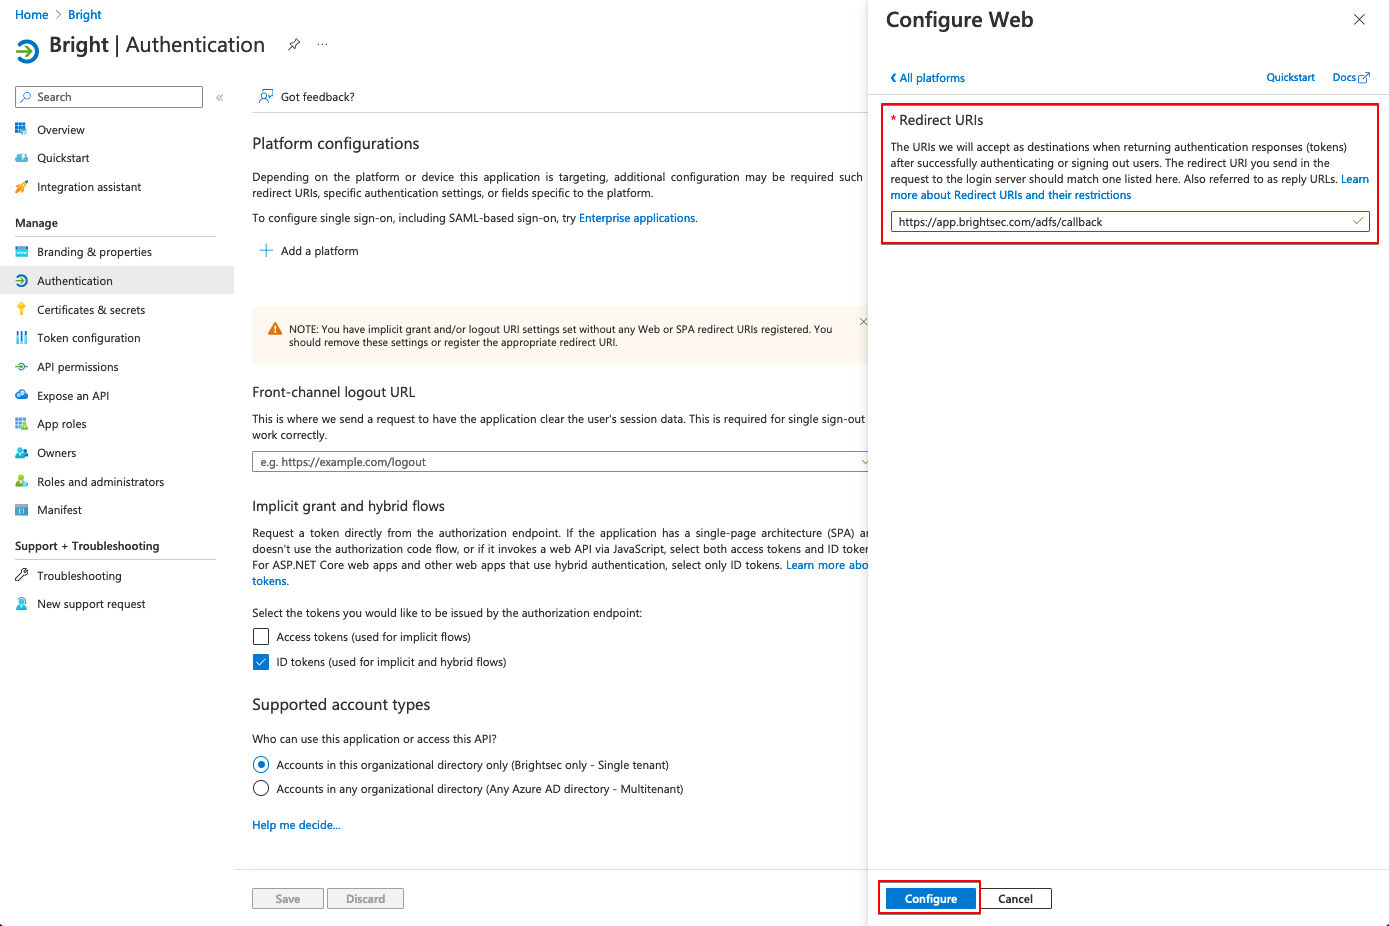
Add the redirect URL. For that, select the relevant setting and add a Web platform.
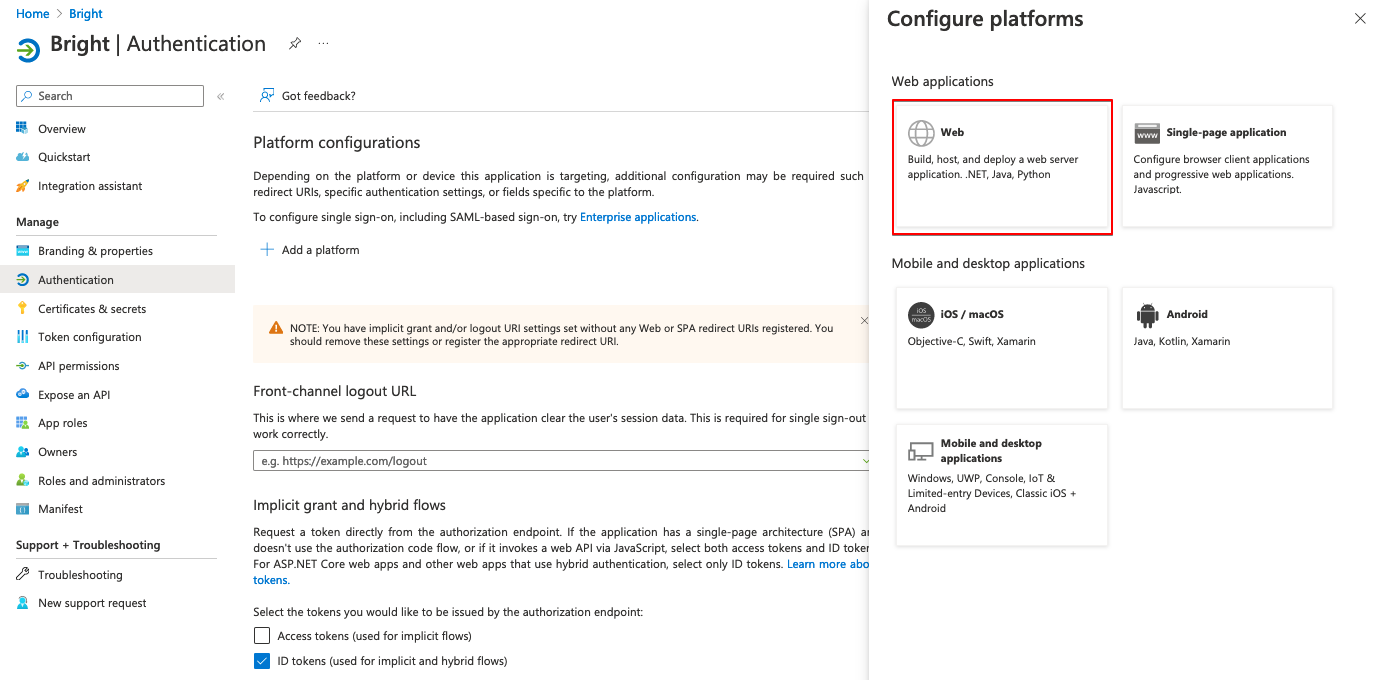
In the Redirect URIs field, enter https://app.brightsec.com/adfs/callback and click Configure.
-
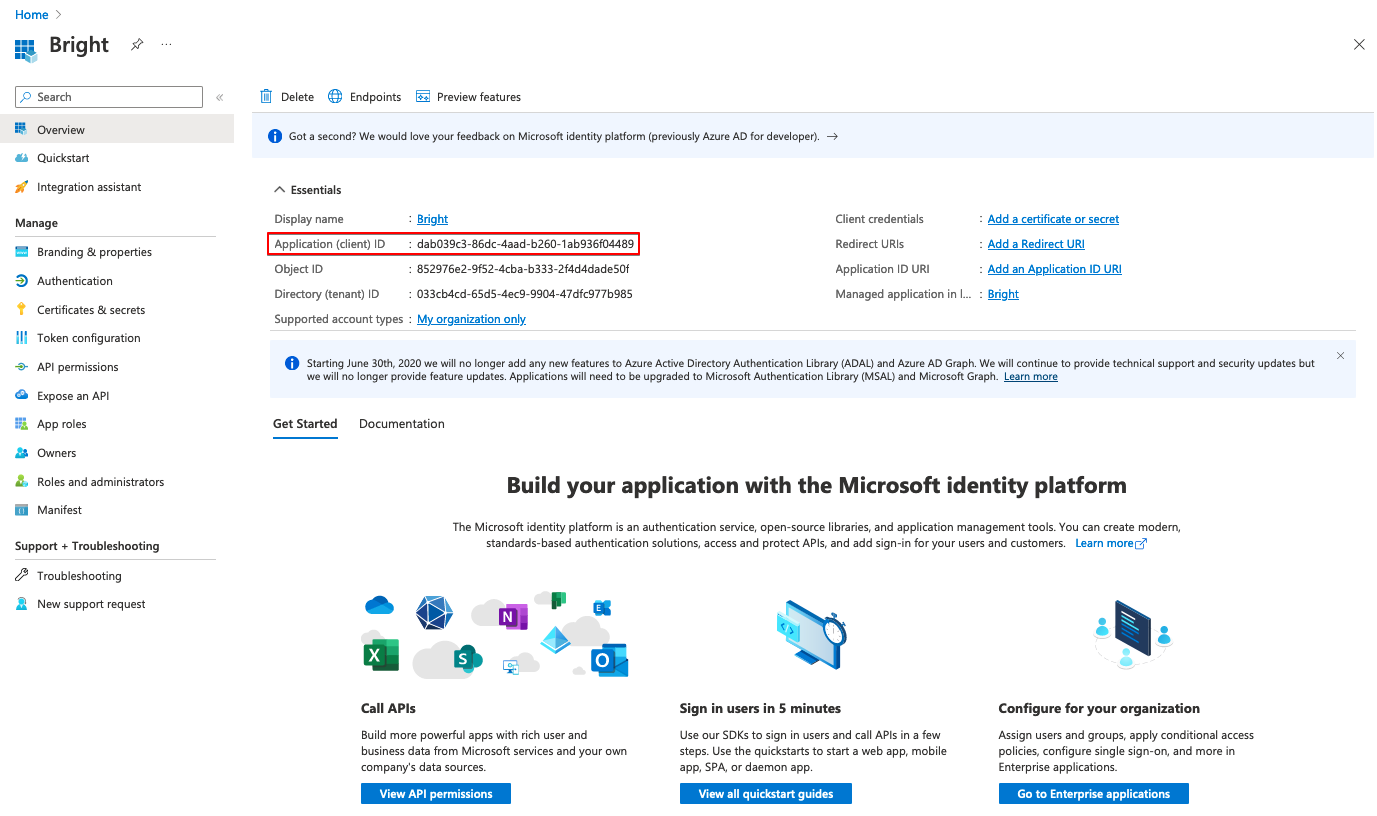
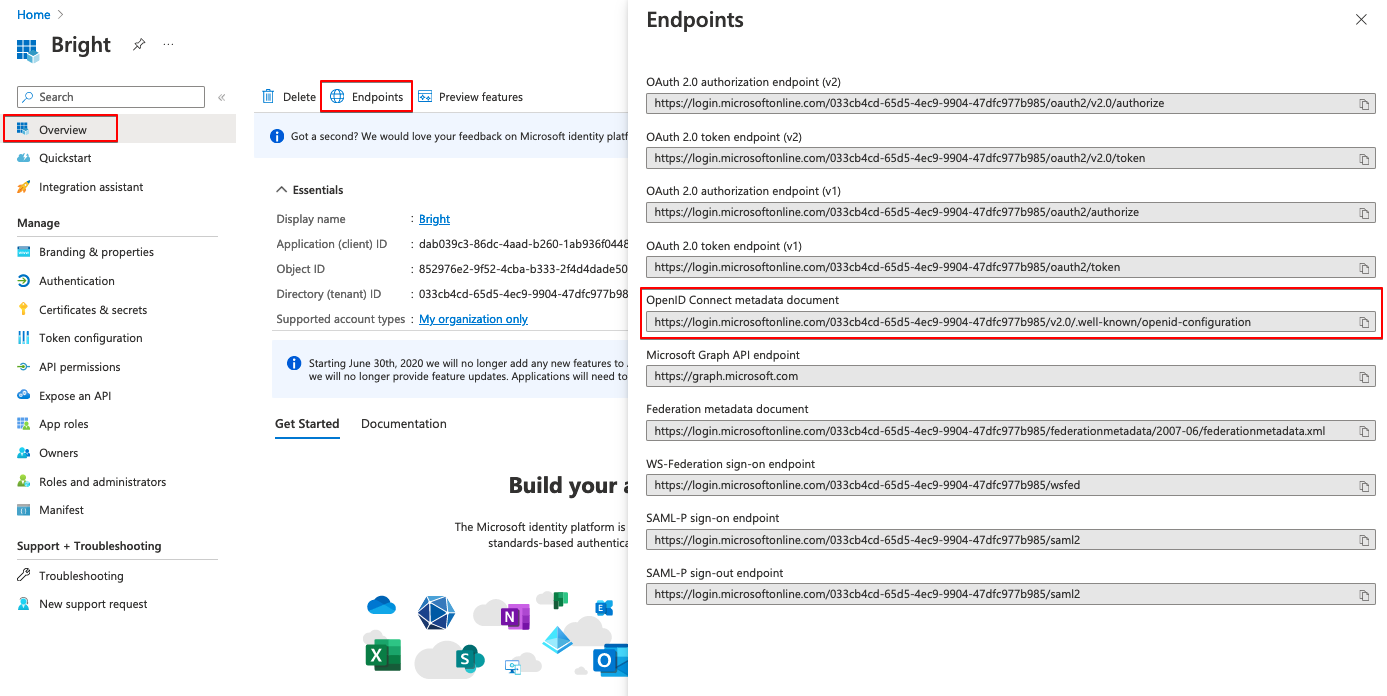
Go back to the created application and get the following credentials to use them further in the Bright app:
- On the application page, copy the Client ID.
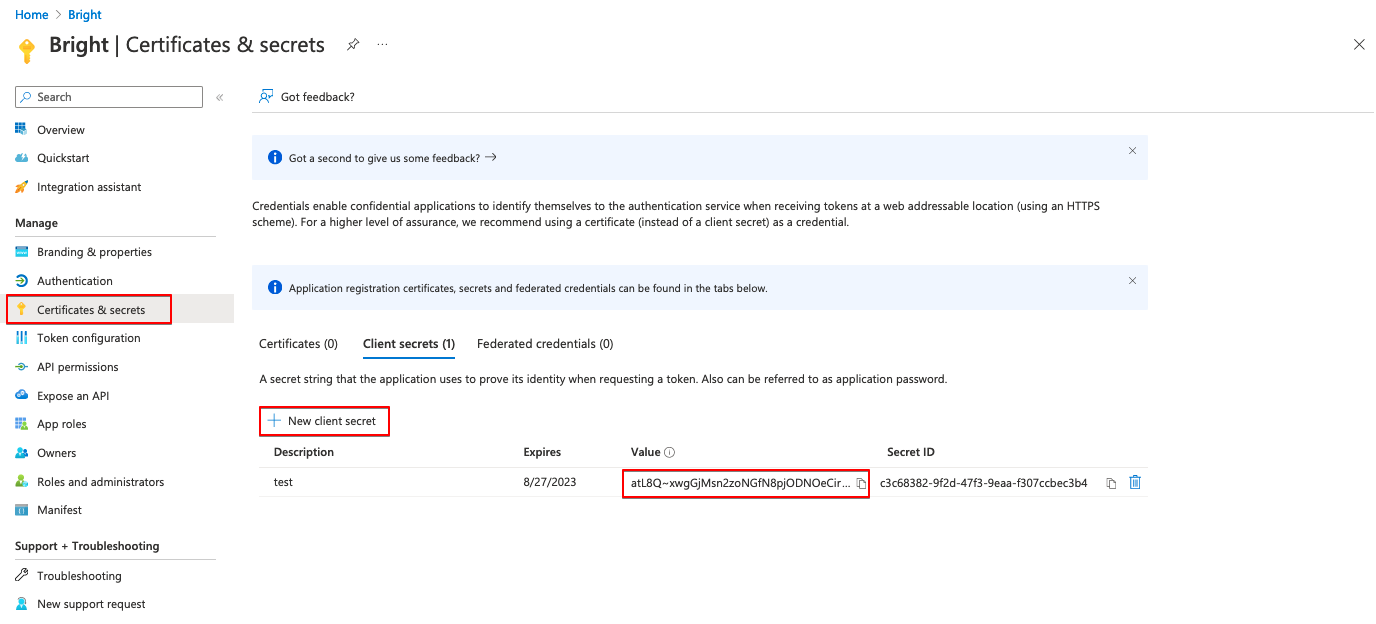
- In the Certificates & secrets tab, create a new secret key and copy its Value.
- In the Endpoints tab, copy the OpenID Connect metadata document URL.
-
Go back to App registrations, select the created application, and then assign users to this application in the Users section.
The assigned users will be able to log in to the Bright App using AD FS SSO.
Step 2. Enable SSO authentication in the Bright app
-
Log in to the Bright app.
-
In the left pane, select the Settings option.
-
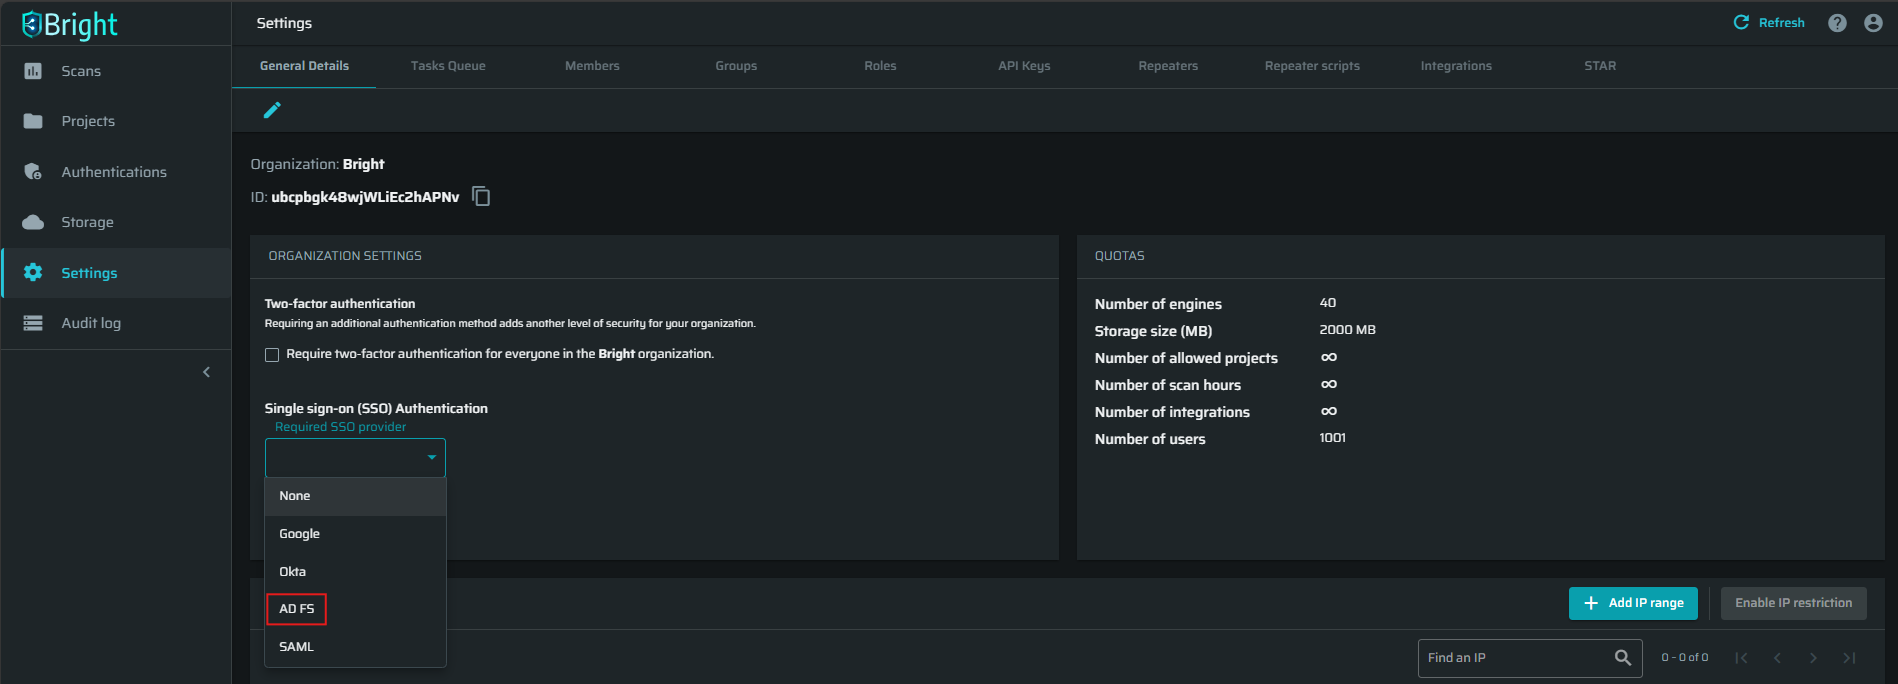
At the ORGANIZATION SETTINGS section, open the Single sign on (SSO) Authentication dropdown list, select AD FS, and then click Connect.
-
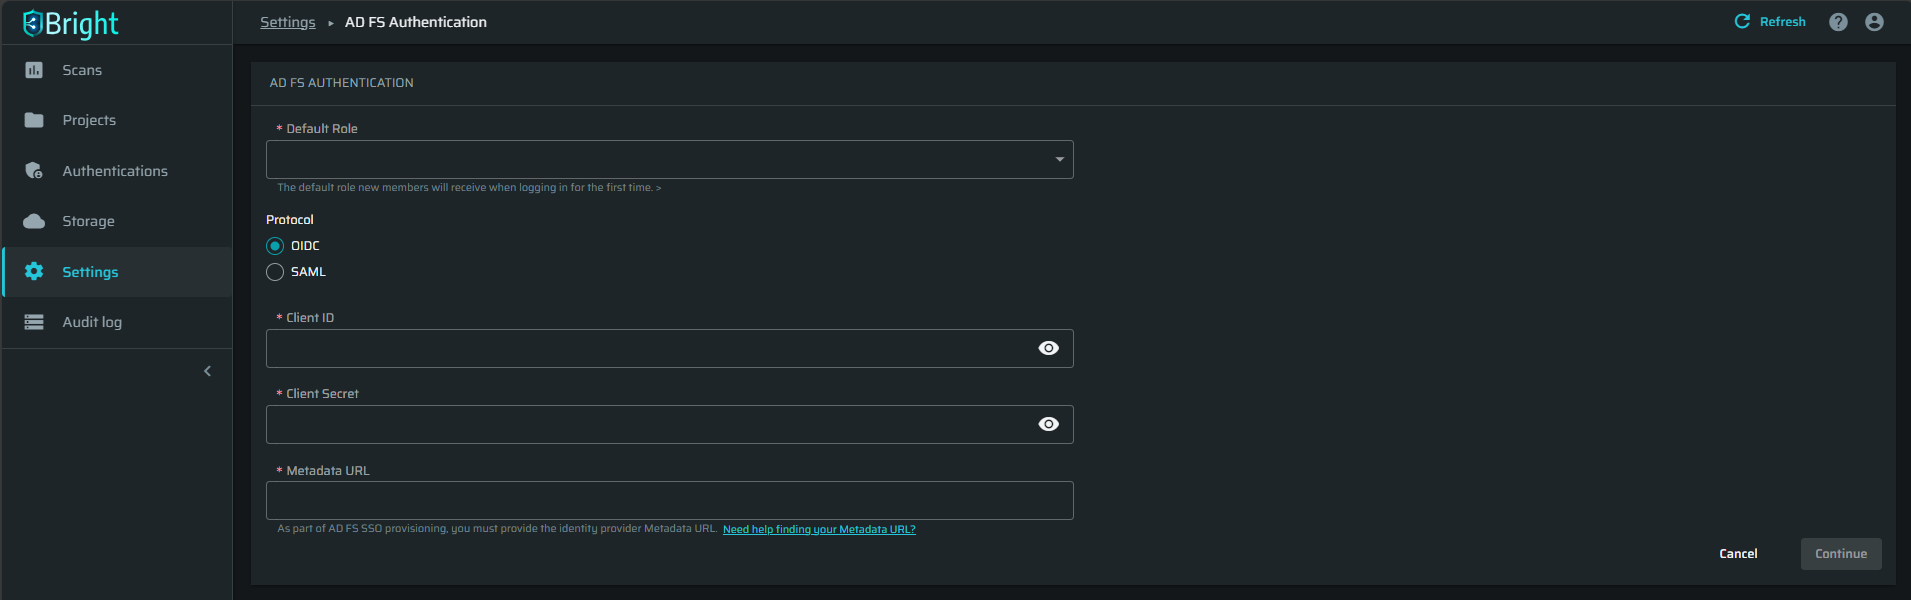
Fill in the AD FS Authentication fields with the credentials copied in Azure AD, and then click Continue.
-
On the Microsoft Permissions Requested page, click Accept.
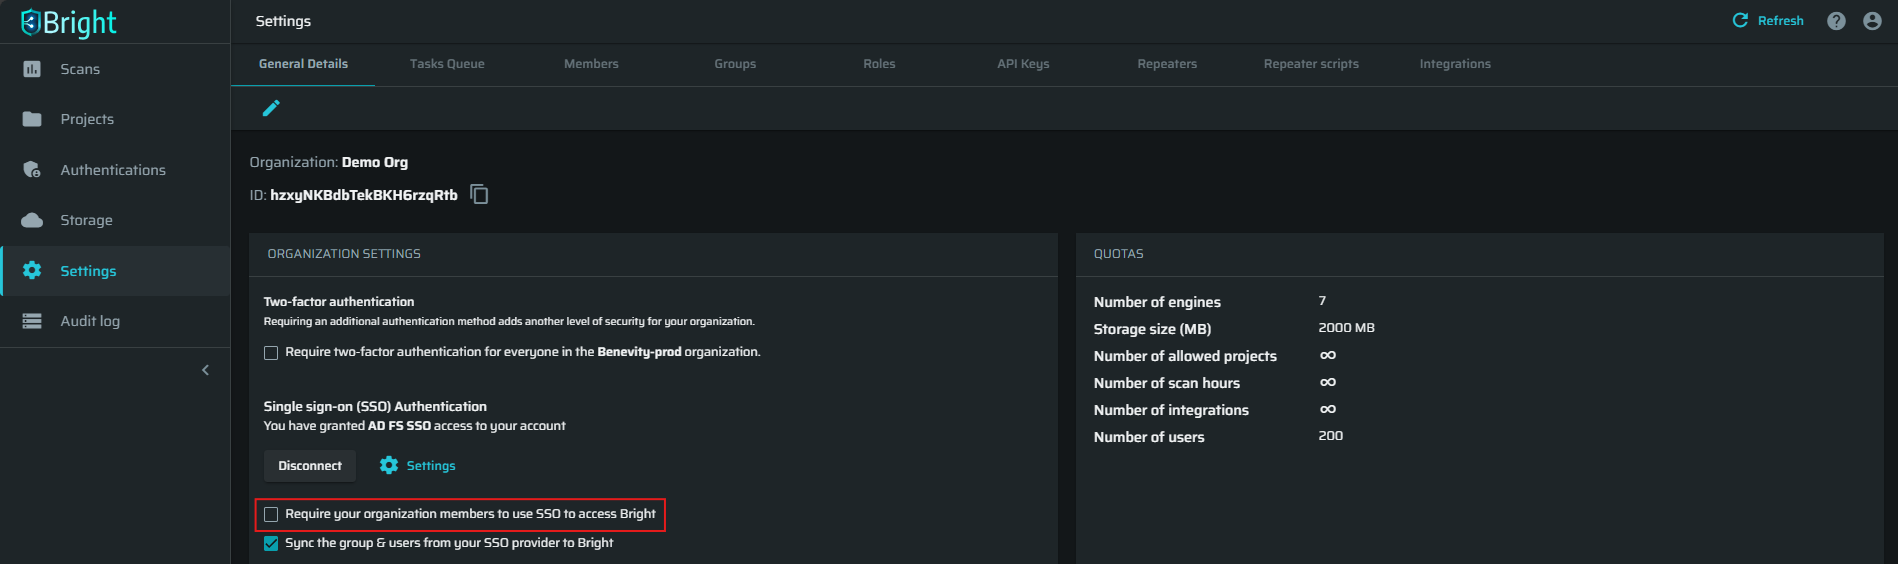
Now the AD FS SSO is enabled for all the users of the authenticated application with no limitations. -
(Optional) You can enforce AD FS SSO registration by selecting the Require your organization members to use SSO to access Bright checkbox. When this option is selected, only the registered users (current members of a Bright organization) with existing SSO accounts can access the Bright app.
ImportantStrict enforcement of SSO for all organization members will require resetting the connection in case of an SSO break. If that happens, please contact the Bright technical support for assistance.
Step 3. Enable provisioning
To configure the automatic provisioning of Azure AD users and groups to your Bright organization, follow these steps:
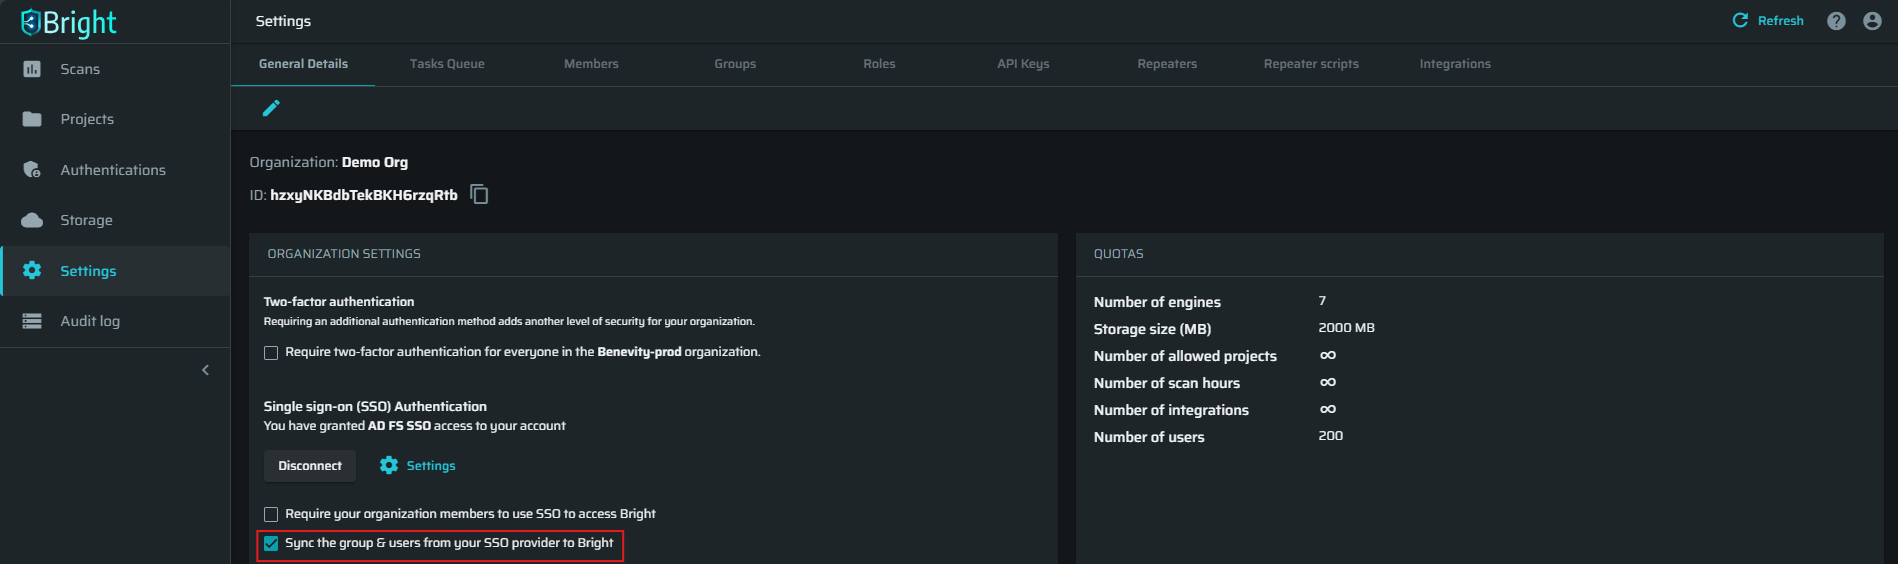
- In the left pane, select the Settings option.
- In the ORGANIZATION SETTINGS, select the option Sync the group & users from your SSO provider to Bright.
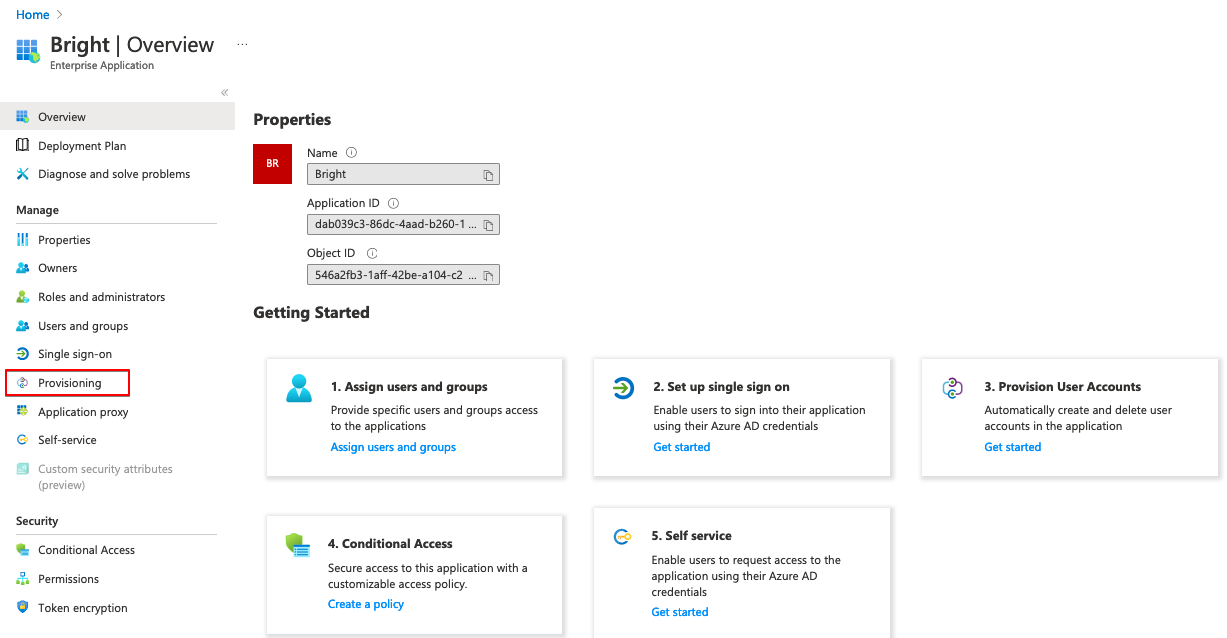
- In Azure AD, go to the provisioning section of your application and click Get Started.
- Select one of the following provisioning modes:
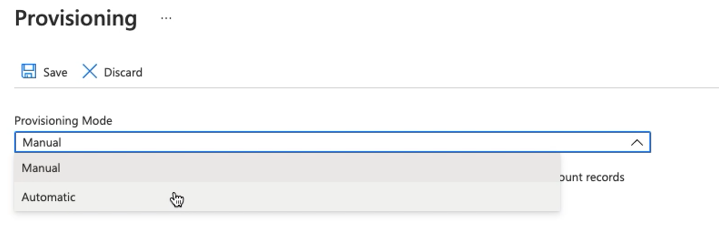
- Manual option allows you to add a new user or group to your Bright organization manually with immediate synchronization.
- Automatic mode enables adding every new user or group to your Bright organization automatically. The automatic provisioning interval is 40 minutes.
- In the Admin Credentials section, do the following:
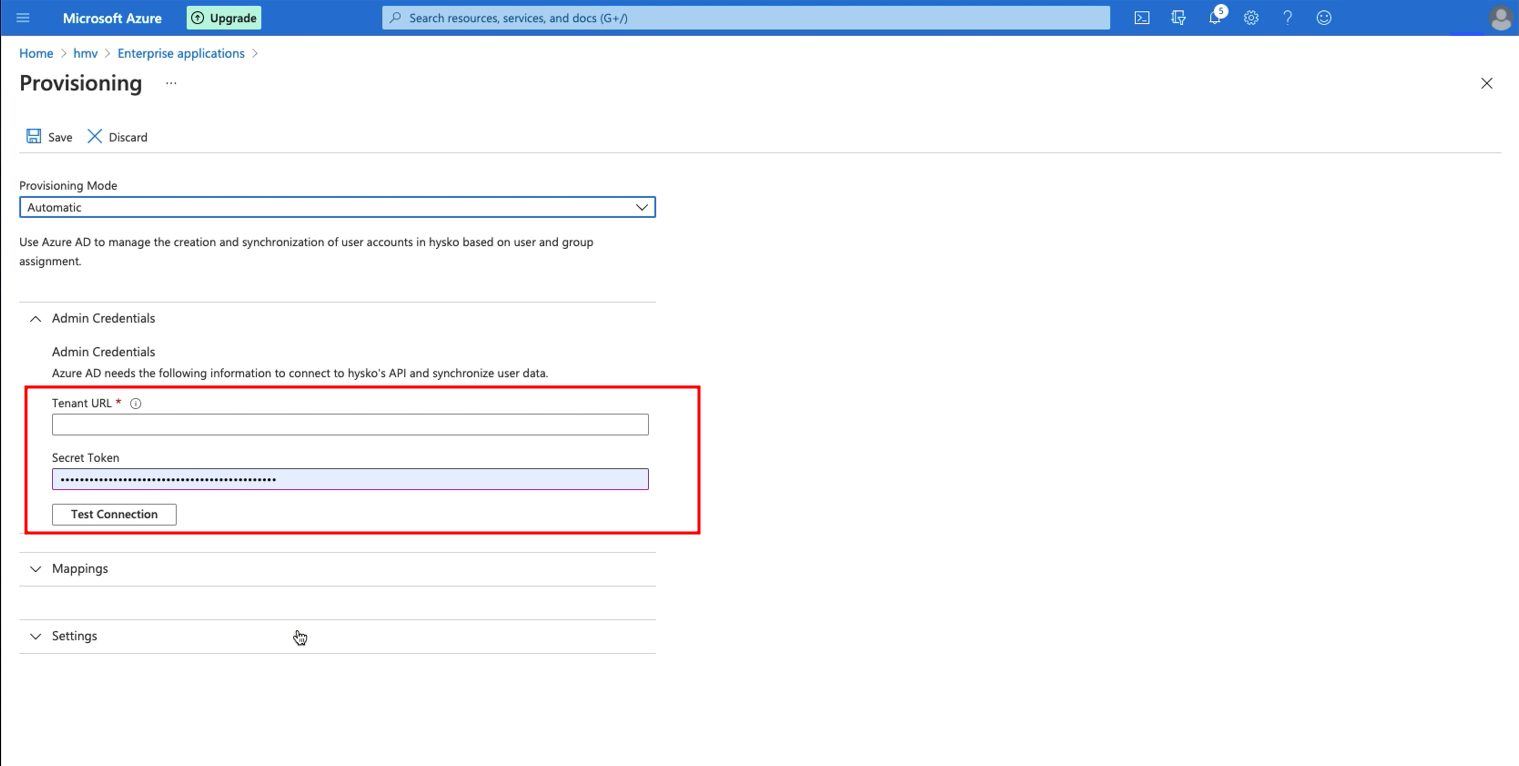
- In the Tenant URL field, enter
https://app.brightsec.com/api/v1/scim.
ImportantIf you delete a user that was provisioned to a connected Bright organization on the Azure side (either from the synced group or completely), the user will become inactive in the Bright organization and will not be activated back automatically after re-adding them to Azure (or the synced group). To enable automatic activation of users after re-adding them on the Azure side, add the
?aadOptscim062020flag to the Tenant URL, to make it look likehttps://app.brightsec.com/api/v1/scim?aadOptscim062020.
According to the Microsoft docs, this behavior is currently only available when using the flag but will become the default behavior over the next few months. Note this feature flag currently does not work with on-demand provisioning.
- In the Secret Token field, enter the API key created in the Bright app.
- Click Test Connection to verify the credentials that are authorized for provisioning.
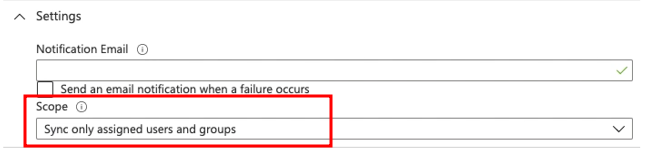
- (Optional) In the Settings section, make sure to set the scope to Sync only assigned users and groups. This will ensure that the provisioning will be limited to assigned users/groups only, and that no other Azure AD users will have access to the Bright app unintendedly.
- Above the Provisioning mode, click Save to save the configuration.
- In the Manage provisioning section, select Edit attribute mappings.
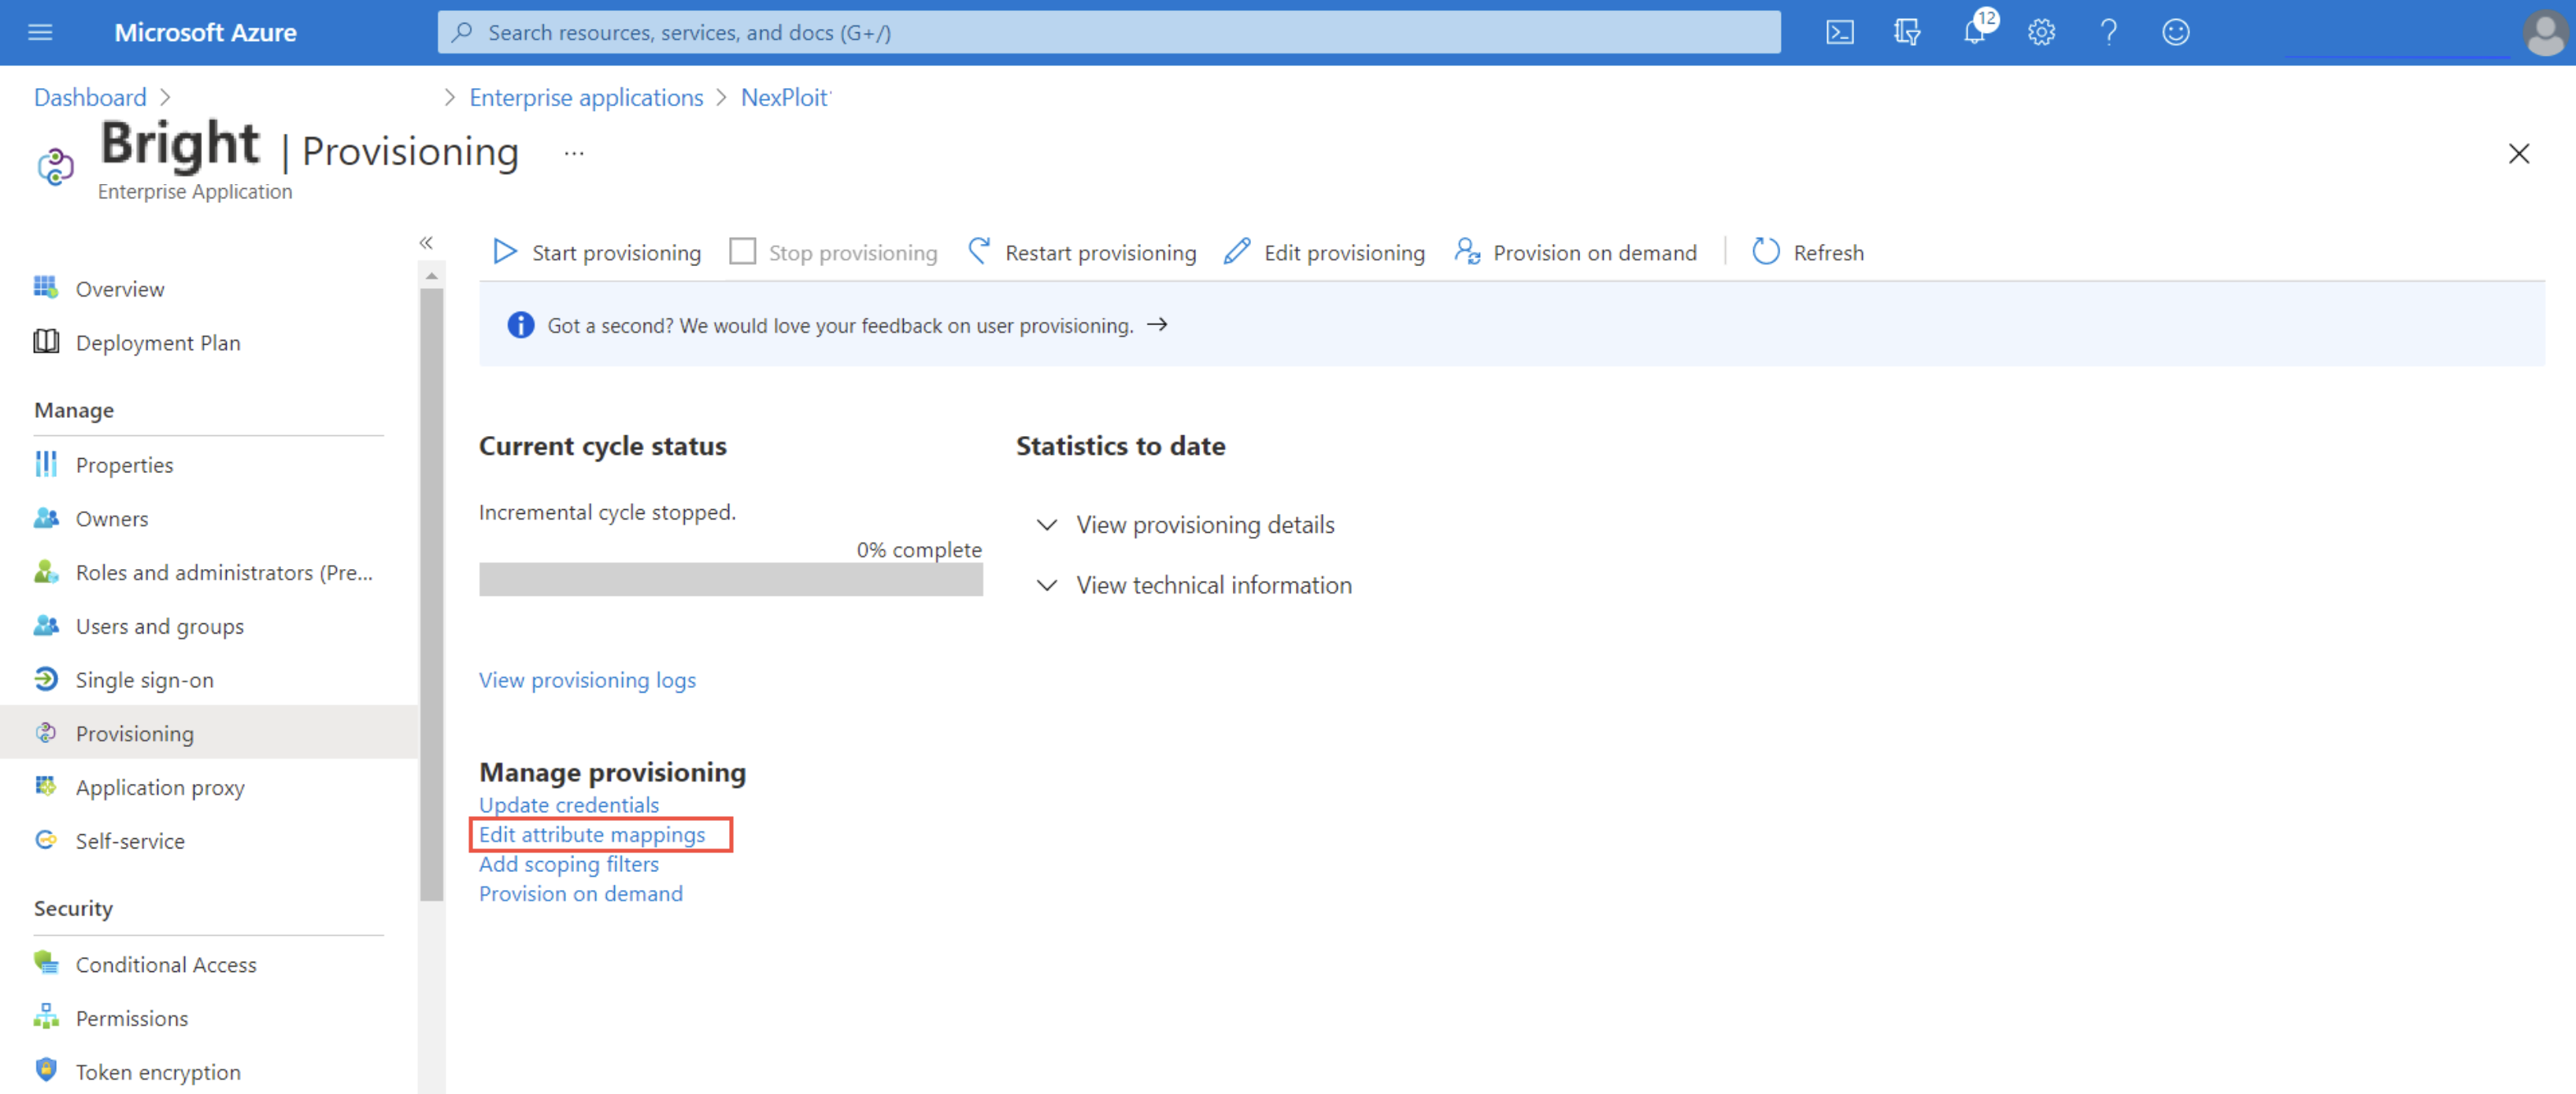
- In the Mappings section, select Provision Azure Directory Users.
Note: You can keep the group provisioning mappings to default, no changes are required.

- Set the attribute mappings to the following:
userPrincipleName\Switch([IsSoftDeleted], , "False", "True", "True", "False")givenNamesurnamemaildisplayName

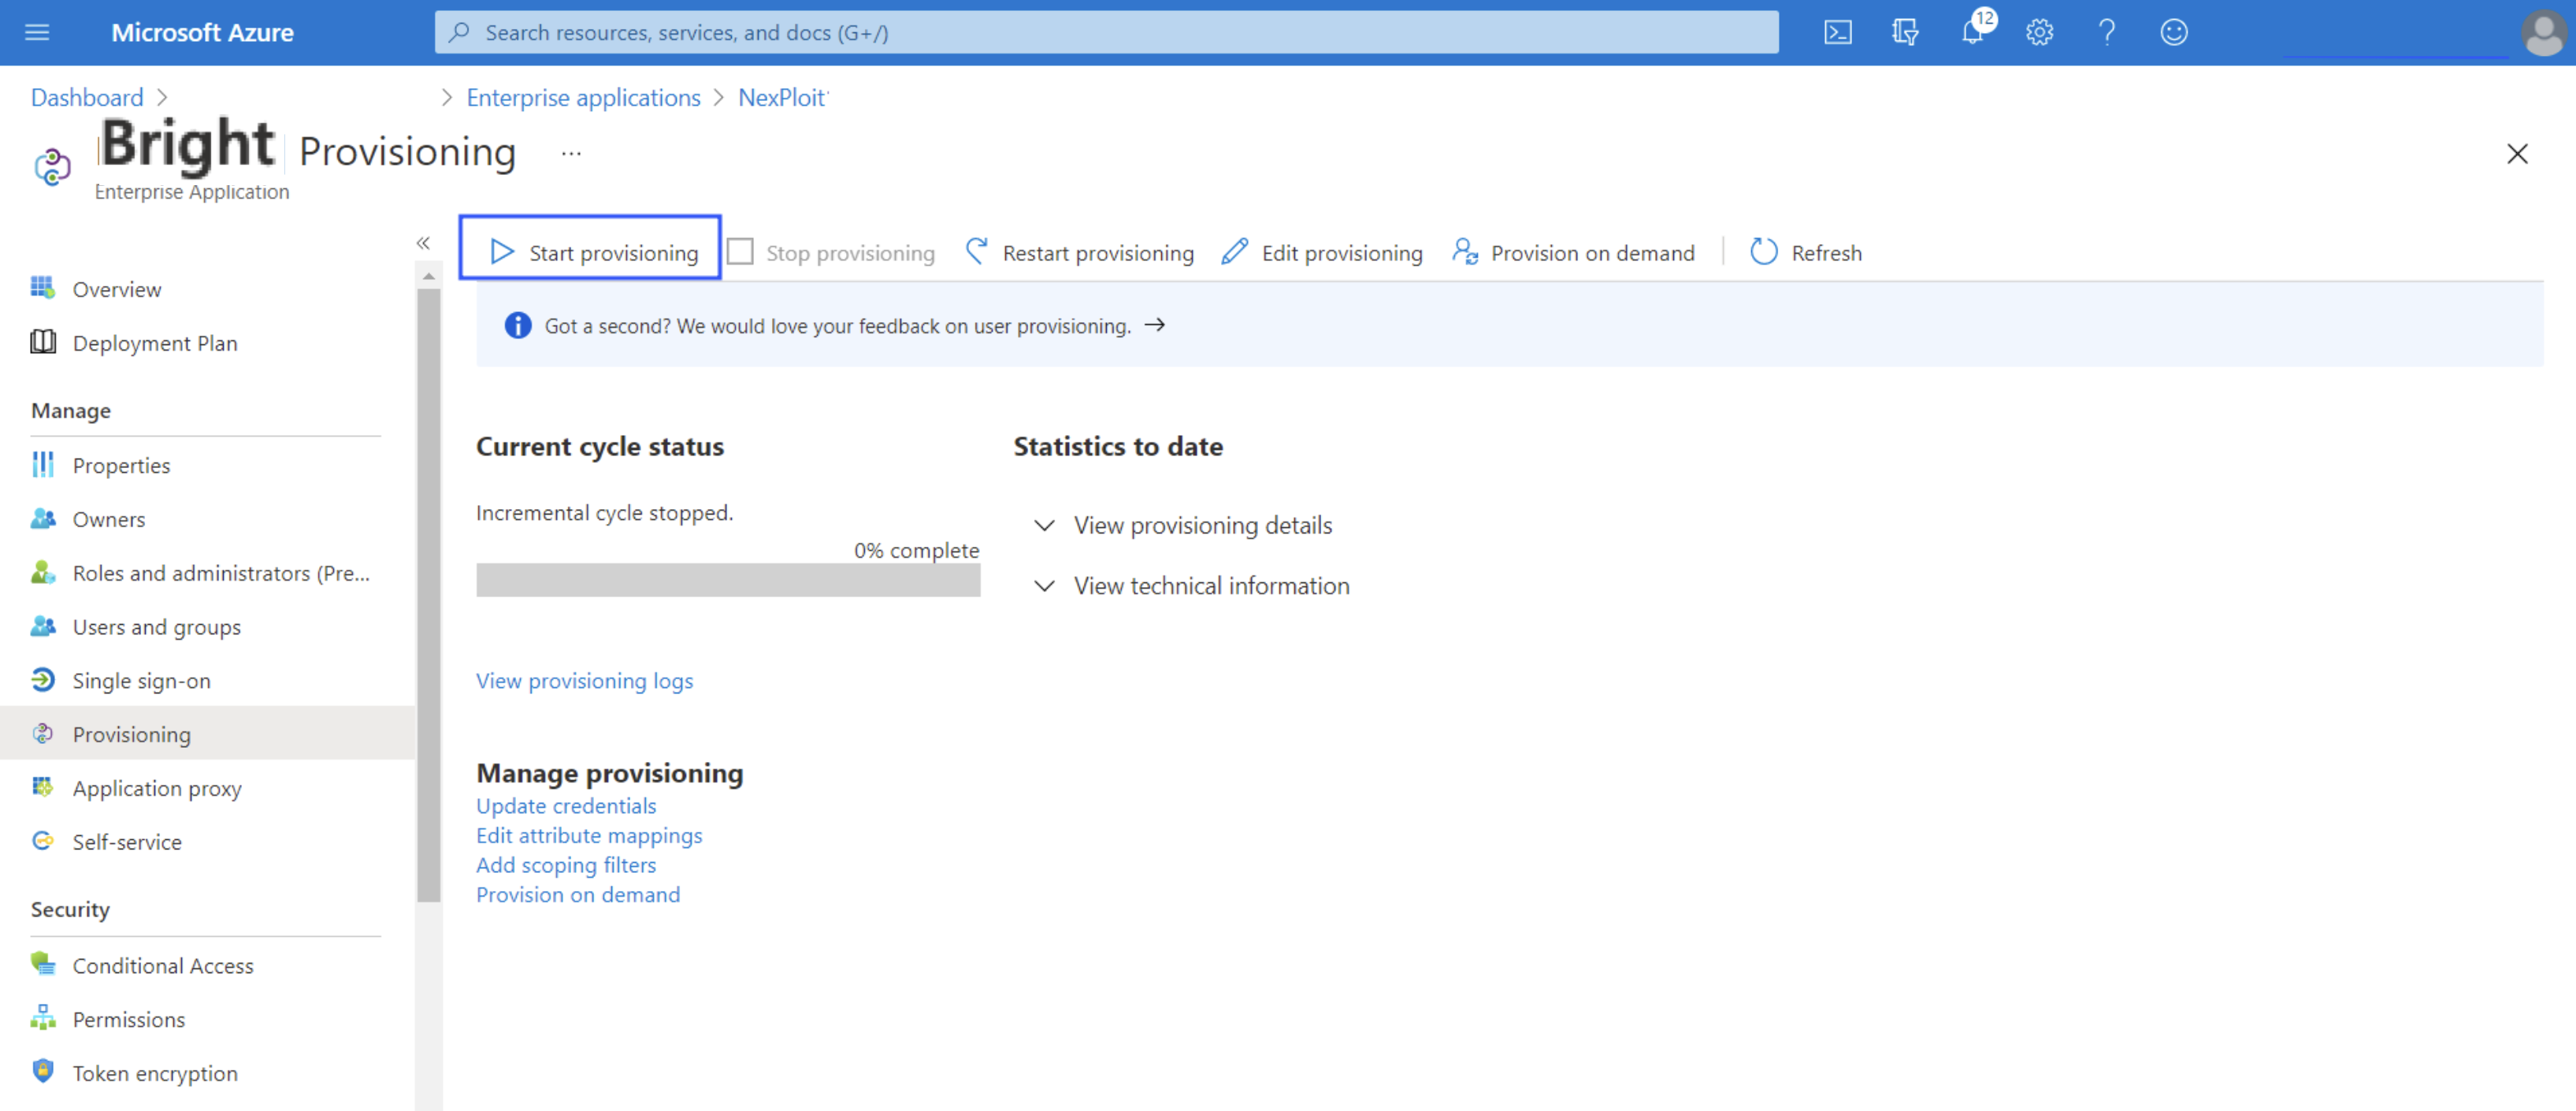
- To start provisioning, click Start provisioning.
Step 4. Assign Azure AD users and groups to your Bright organization
- In the left pane, select Users and groups.
- Click + Add user/group.
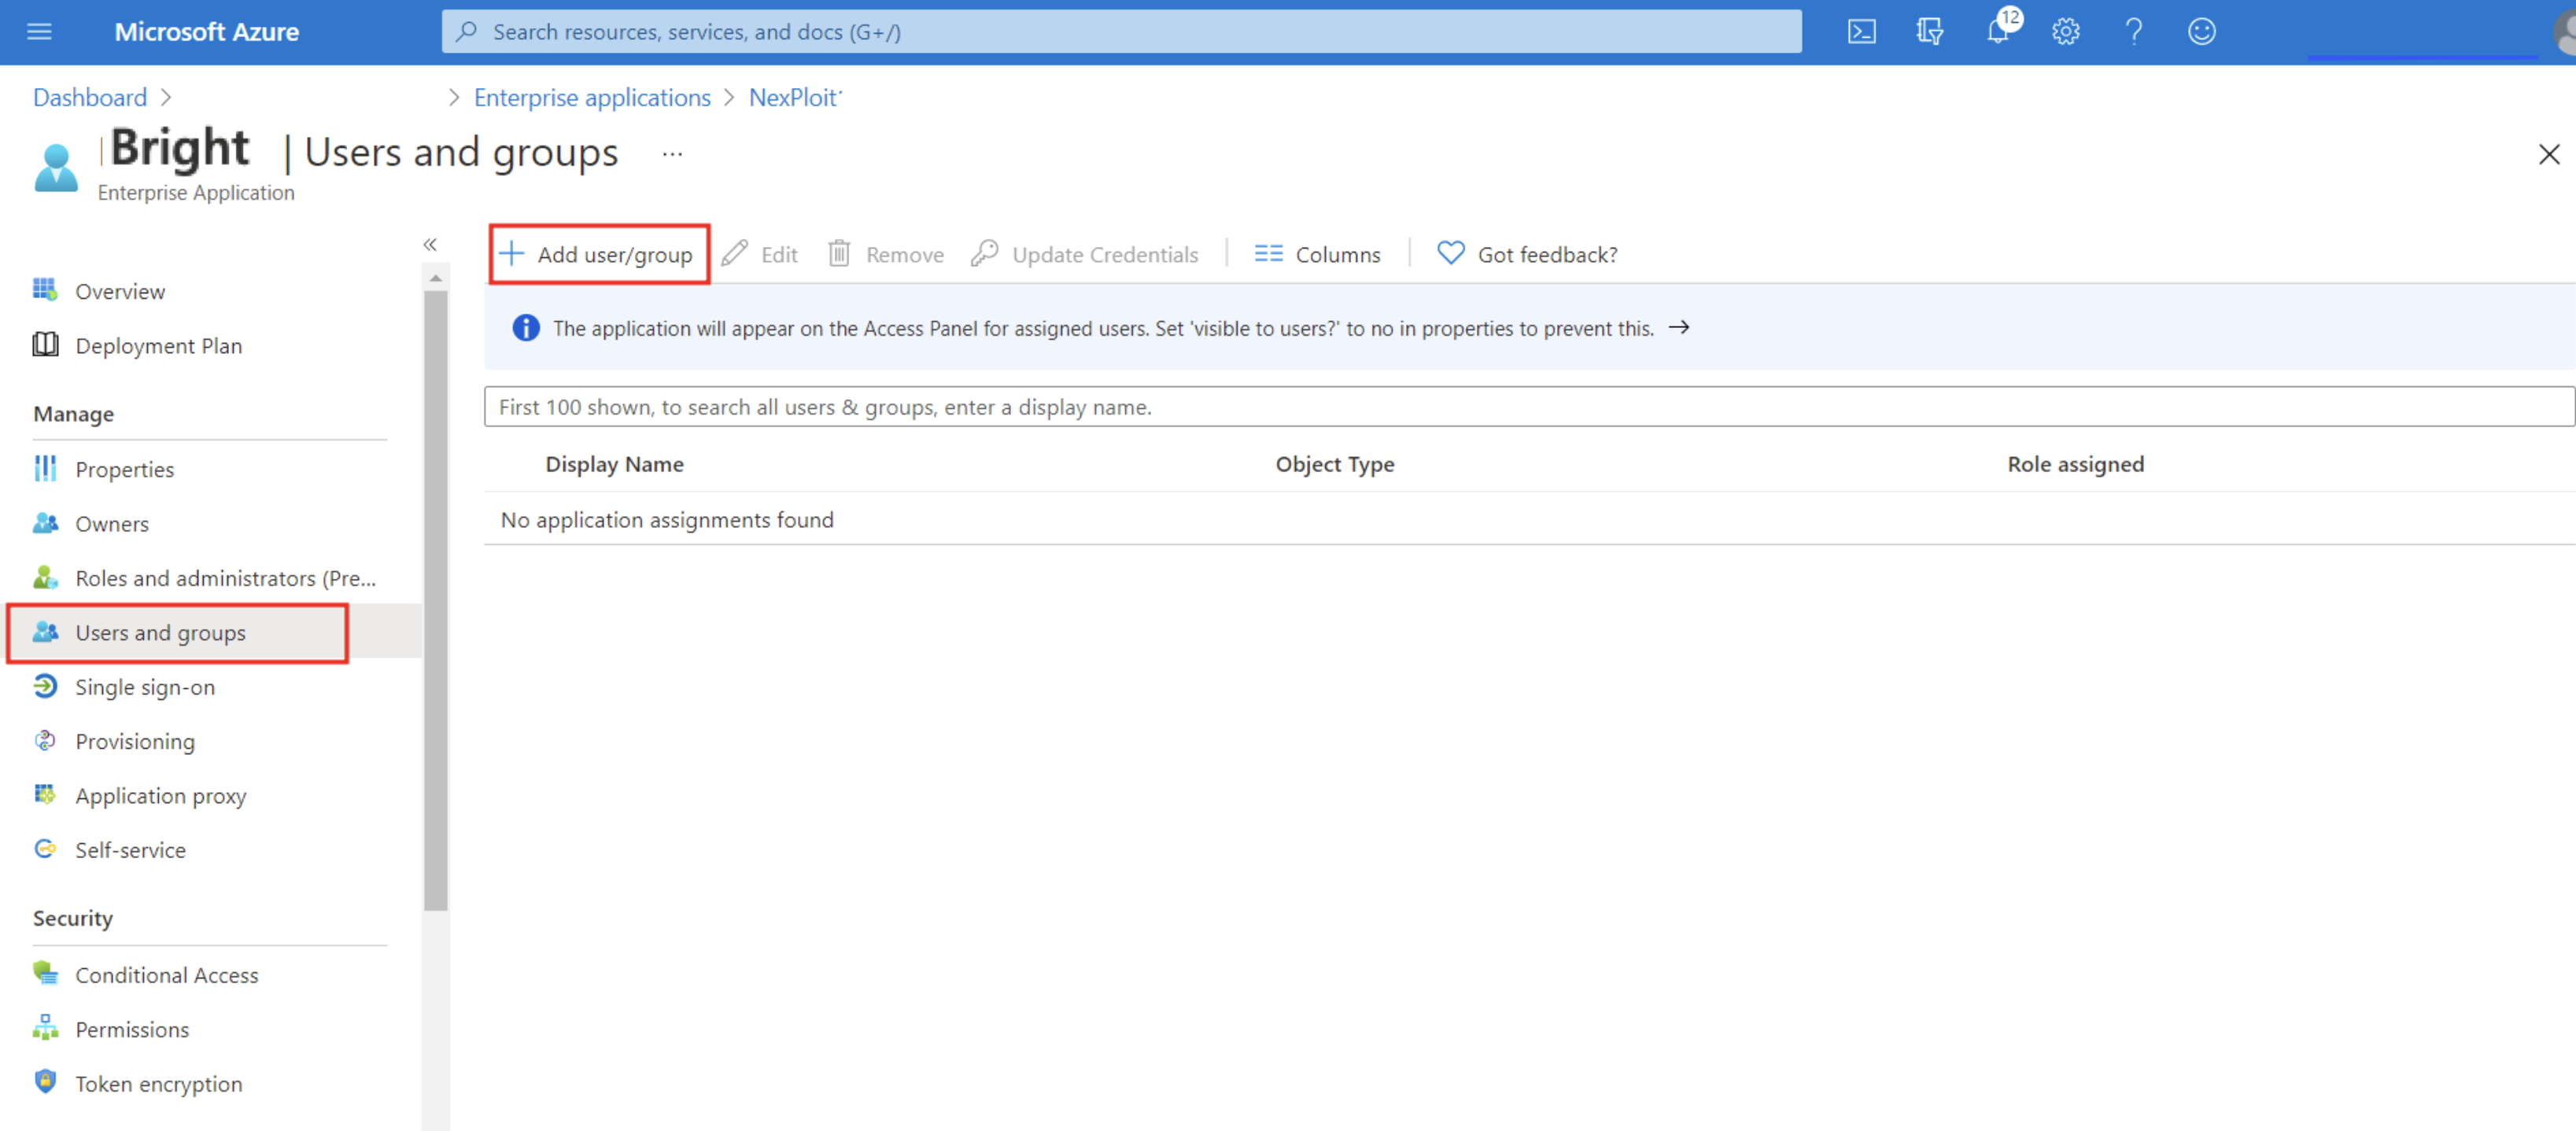
- In the Users and groups field, click None Selected. Select specific users or a group of users to sync them to your Bright organization, and then click Assign.
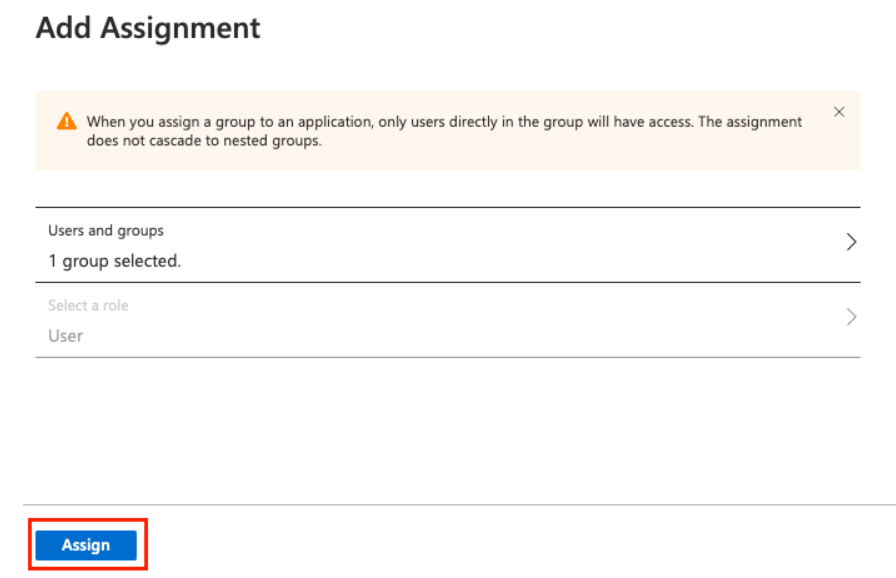
- The assigned users will be automatically added to the Members section of your Bright organization.
- The assigned groups will be automatically added to the Groups section of your Bright organization.
NoteIf you deprovision a user from the Bright integration application in Azure AD, the relative member turns inactive in your Bright organization and is no longer able to log in to the Bright app using AD FS SSO.
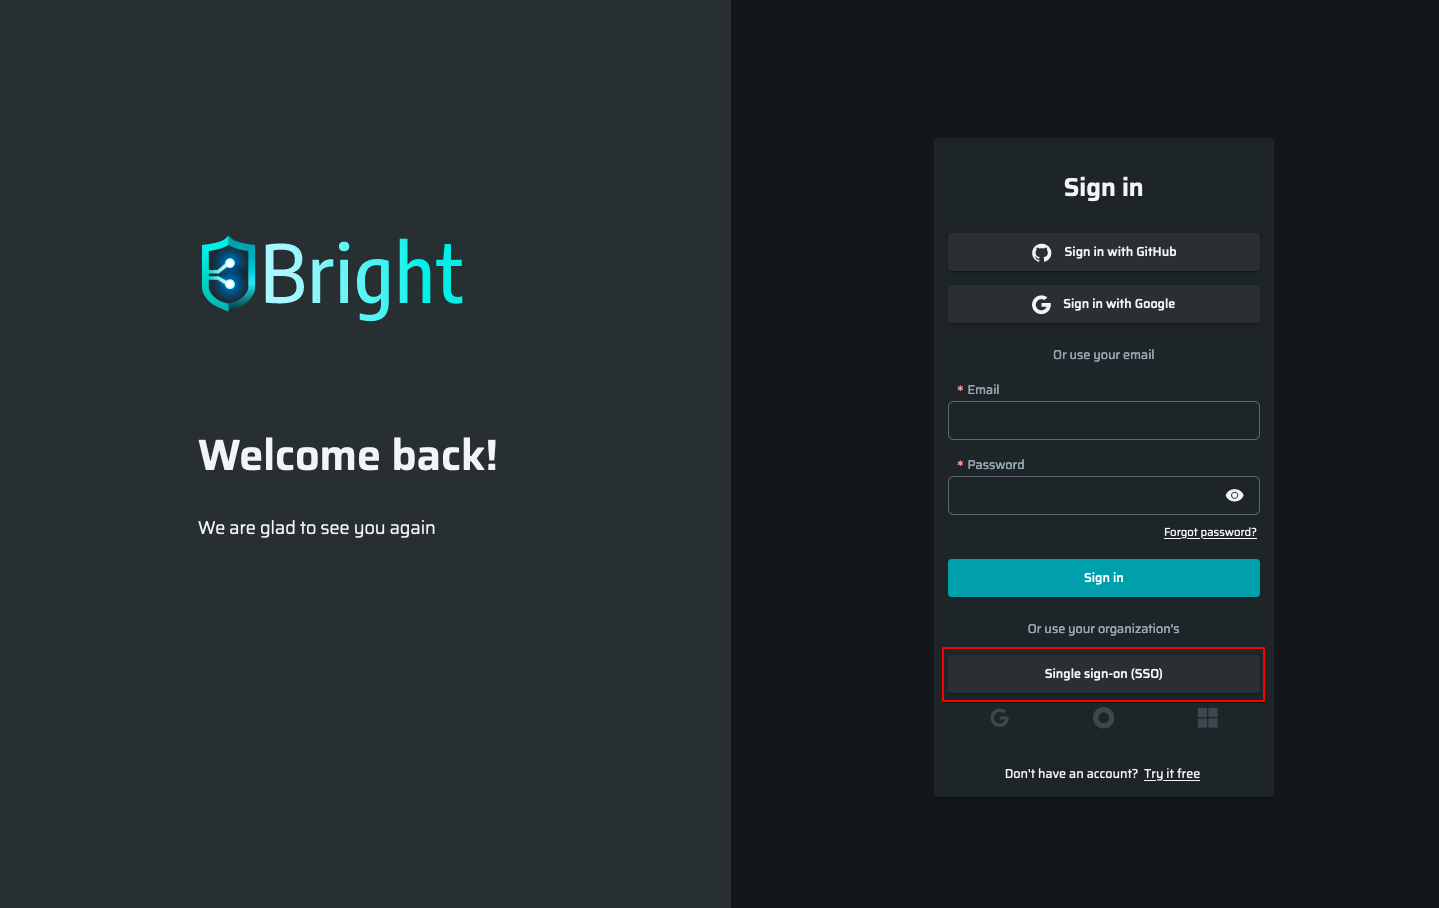
Step 5. Log in to the Bright app using AD FS SSO
- On the login page, click Single Sign On (SSO).
-
Enter the name of the Bright organization for which the AD FS SSO was enabled, and then click Continue.
-
Select Sign in with AD FS.
You are redirected to the Microsoft login page. -
Enter your Azure AD user's credentials.
Updated 12 months ago