Adding an Integration to a Project
You can integrate one or several ticketing systems with a specific Bright project.
Prerequisites
Integration flow is divided into organization and project levels. At the organization level, integration connectivity and authorization settings are performed. Fine grained details (repositories, boards, etc.) are set at the project level. This is made in order to simplify and speed up the configuration process in companies with a large number of projects.
Step-by-step guide
Configuring the integration on the Organization level
Follow any of the following guides to make the connection:
Configuring the integration on the Project level
-
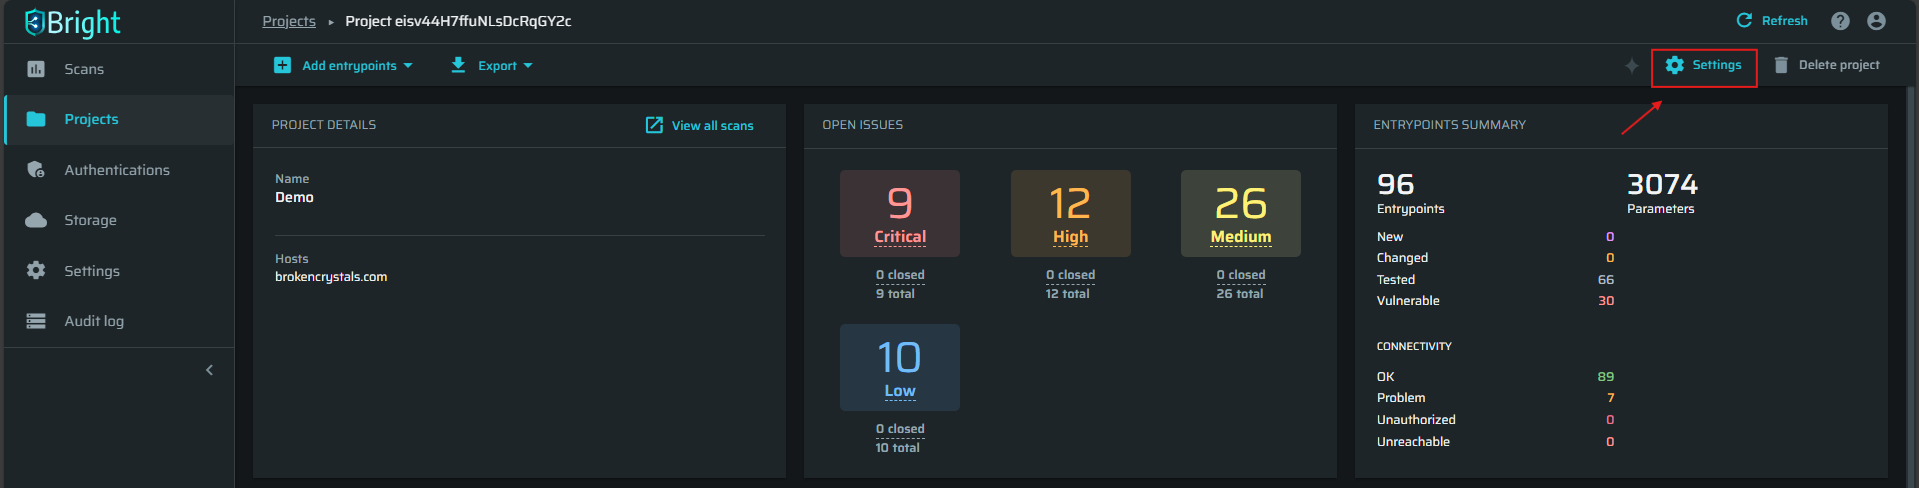
Open the Projects page and choose the project which you want to manage. Click on Settings.
-
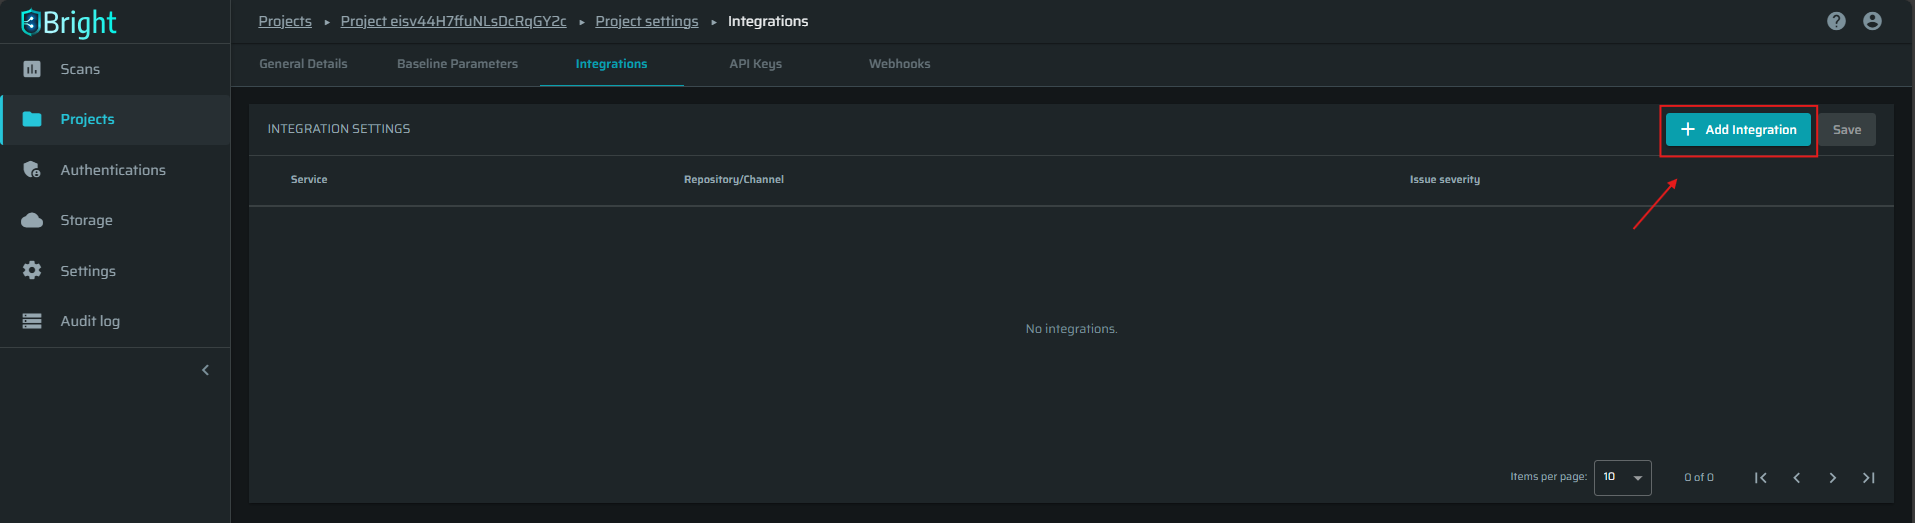
Navigate to the Integrations tab and click +Add Integration.
-
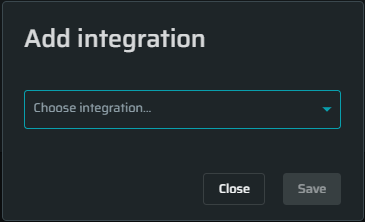
Choose the integration you want to set and the related settings (repositories, boards, etc.).
-
Click Save.
-
Now, this service is displayed in the Integration Settings list and successfully integrated.
Filtering the severity level of issues
You can select which severity level of issues will be sent to a repository/channel associated with your Bright project. For example, if you set only high severity level for the integration, then only high issues will be sent to your integration.
NoteThe option to filter issue severity is only available to the users whose roles include the
integrations.repos:manageaccess scope. For more information, see Manage Access Scopes.
To change the minimum severity:
-
Open the Projects page and choose the project which you want to manage. Click on Settings.
-
Navigate to the Integrations tab.
-
Open the Issue severity dropdown next to the integration you want to change and select the relevant severities.

How to turn off the integration
-
Open the Projects page and choose the project which you want to manage. Click on Settings.
-
Navigate to the Integrations tab.
-
Click
 and choose Disassociate.
-
Click Yes to continue.
Updated 12 months ago