Add an Authentication Object
This page describes adding a new Authentication Object to a scan in the Bright web app.
Creating authentication
-
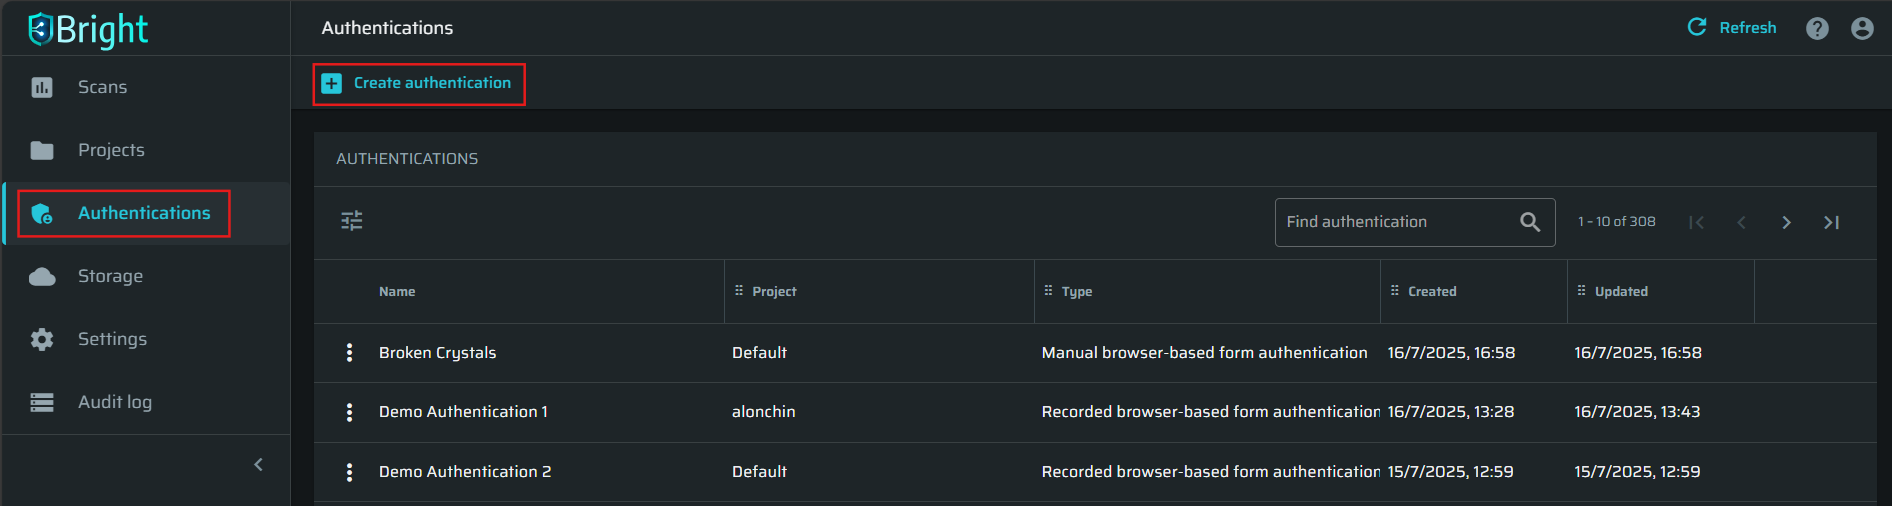
From the menu in the left pane of the Bright app, select Authentications.
-
In the Authentications pane, click + Create Authentication.
-
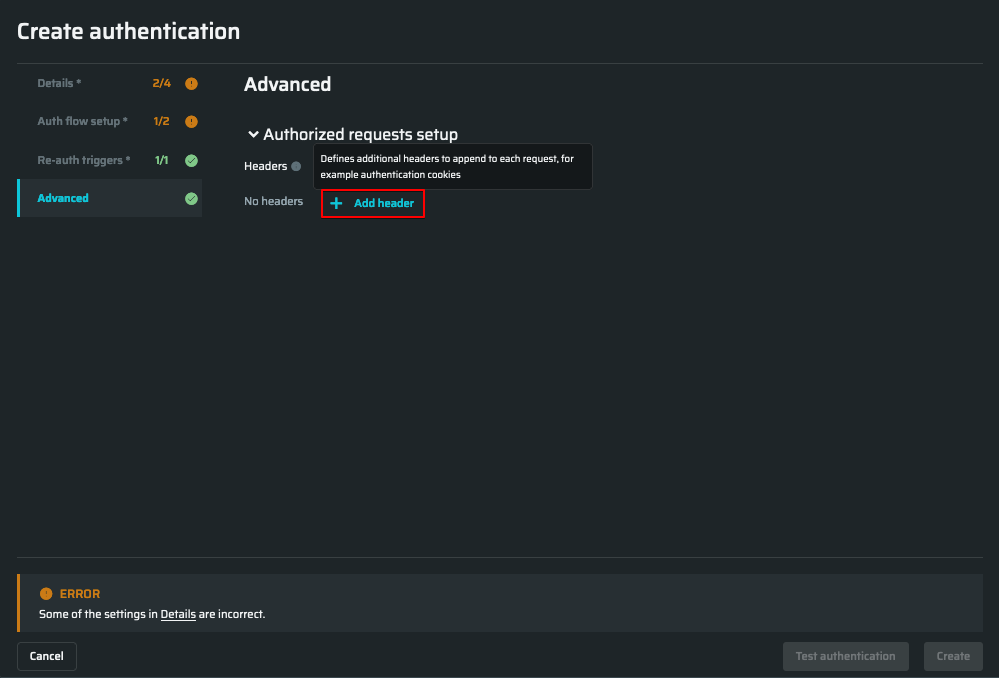
In the Create authentication dialog, fill in the fields as described below in the following chapters.
-
After filling in all the necessary fields, click "Create" in the bottom right corner of the Create Authentication dialog.
Note:
- All mandatory fields are marked with an asterisk (*).
- Bright allows testing a scan before saving it. For details, see the Testing Authentication section below.
The Details tab
This chapter contains the basic settings of the authentication object, which will help you quickly find the related project and distinguish it from other authentication objects.
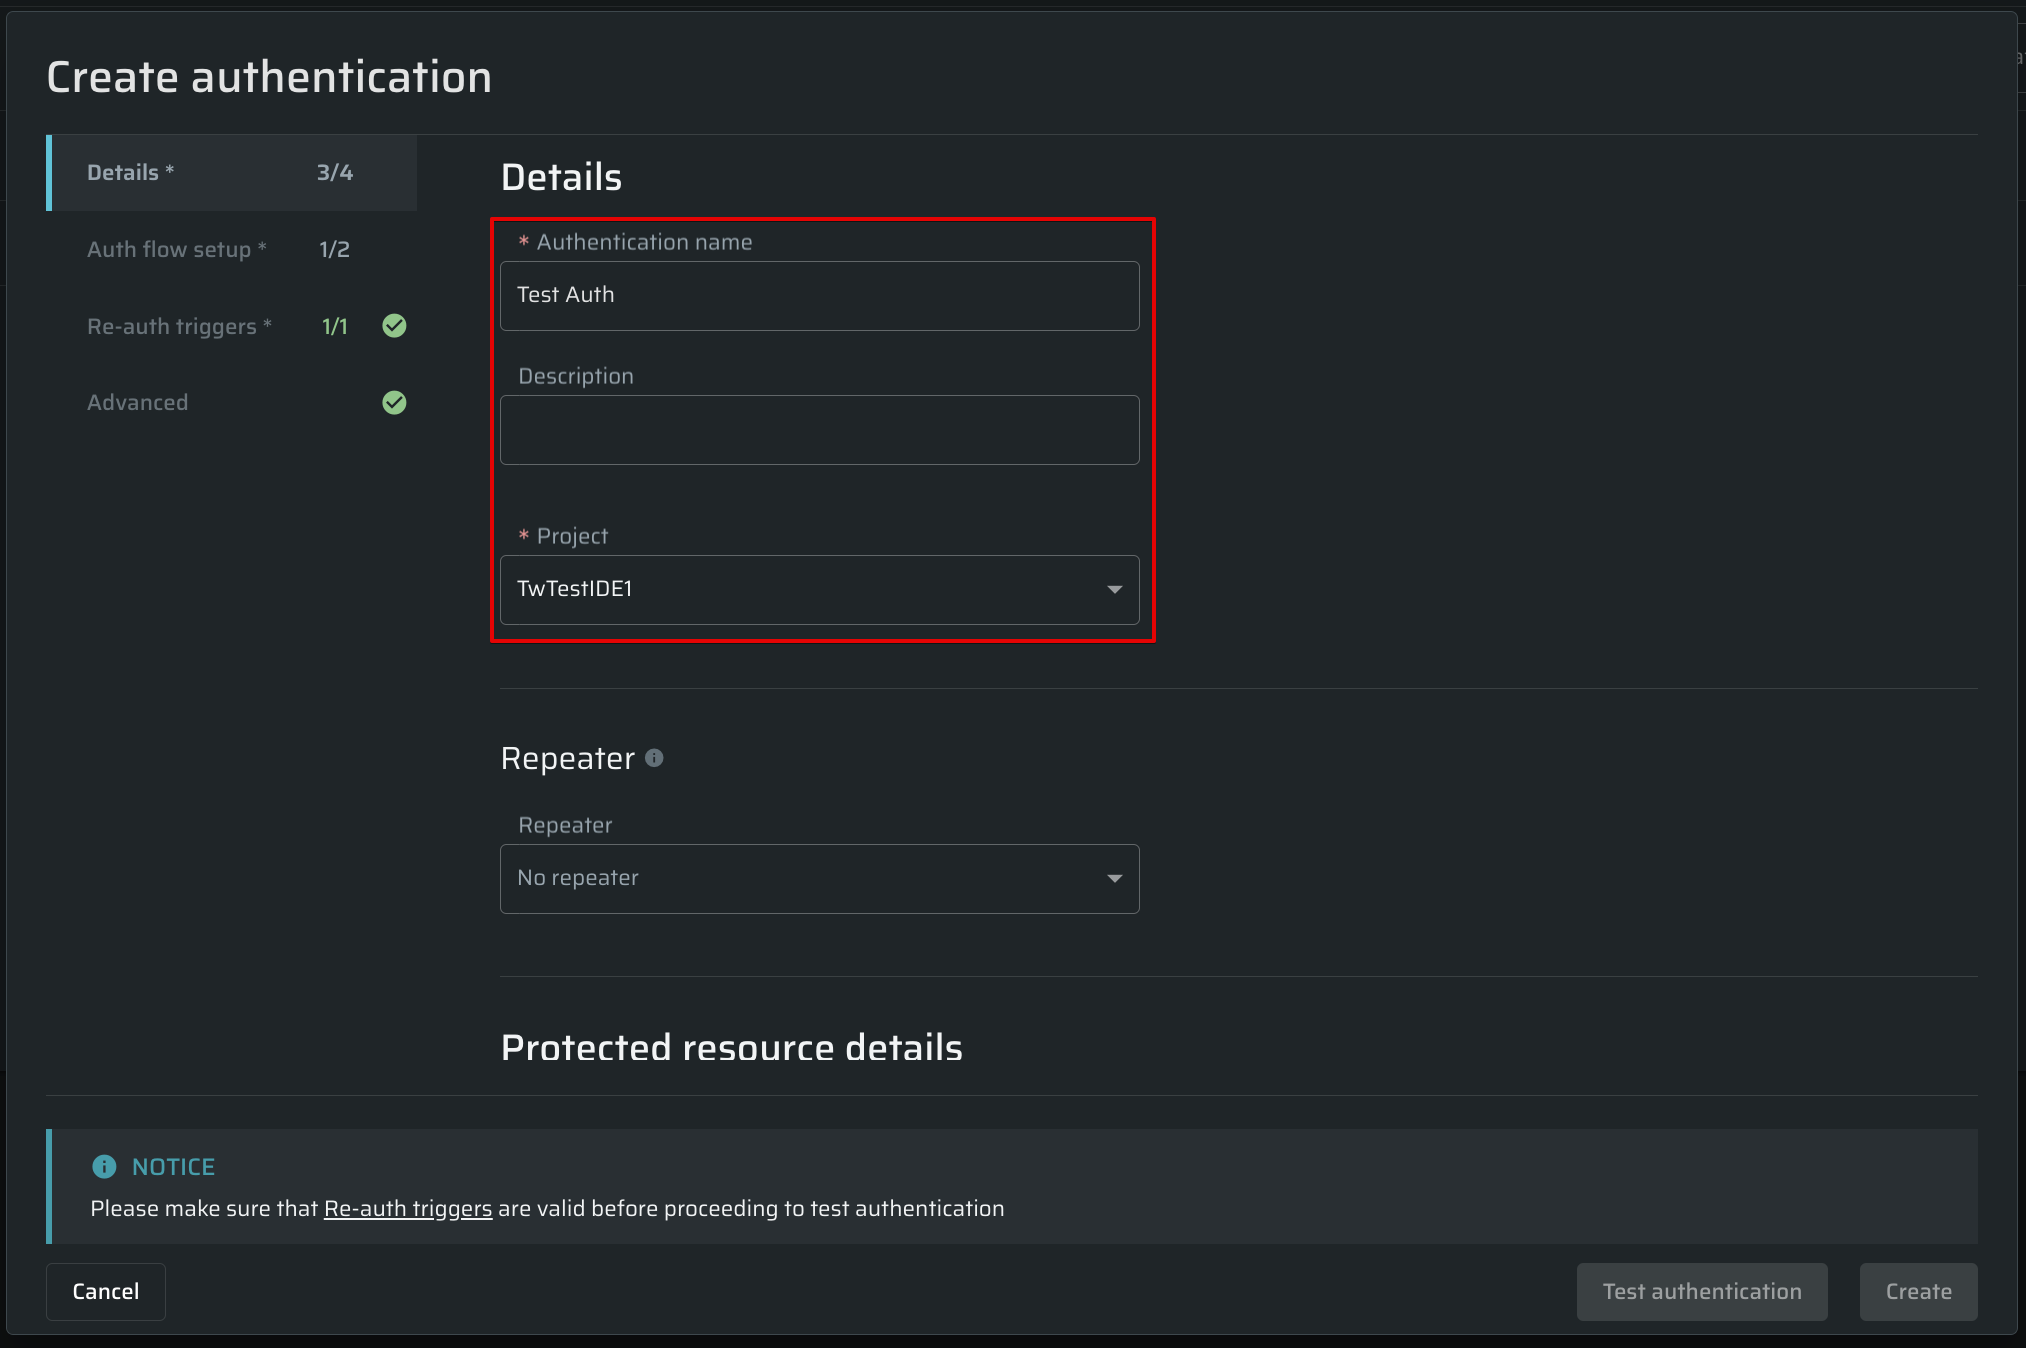
Specify the details of the authentication object you want to create.
| Field | Guidelines |
|---|---|
| Description | Enter the authentication object description. For example, you can specify the application type or other information that helps you distinguish your created object. |
| Project | Select the project to attach an Authentication Object |
Protected resource details
This chapter covers HTTP methods and validation URLs, explaining their role in verifying that regular calls work correctly and detecting re-authentication scenarios.
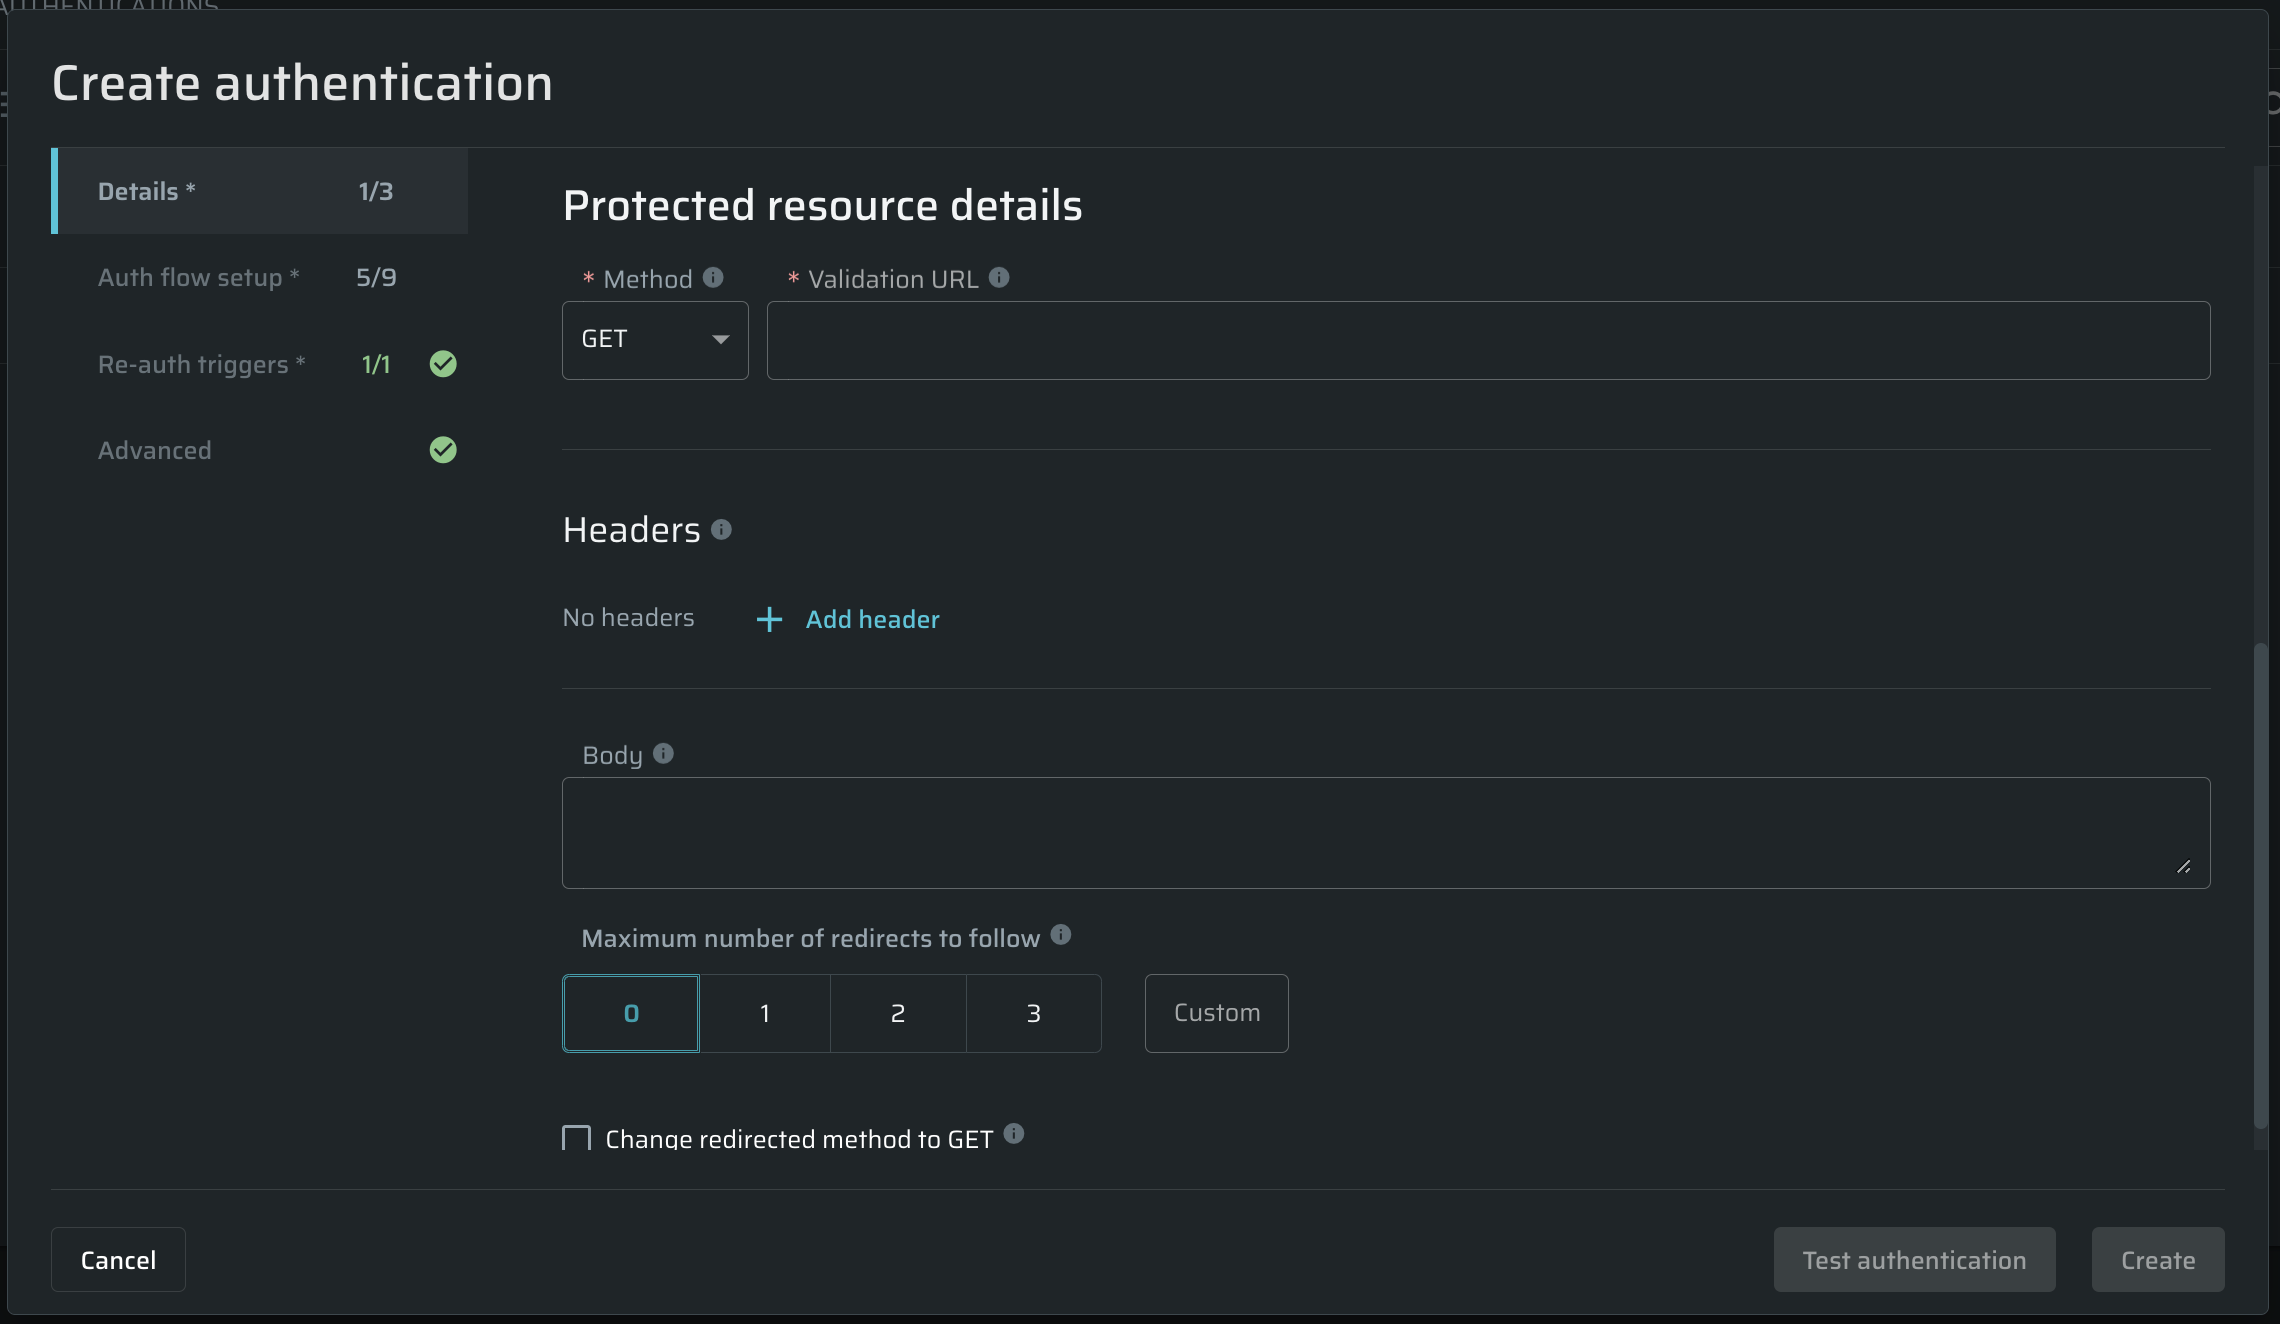
Provide the details of the authentication-protected resource.
| Field | Guidelines |
|---|---|
| Method | Select the HTTP method of an active tester end-point (authenticated resource) |
| Validation URL | Enter the URL of the authenticated (protected) resource to test if the authentication scenario is configured correctly. The validation URL should be different from the authentication URL. |
| Headers | Select an additional header to be replaced or appended before sending each request, for example, Authorization. The Clear text/Masked text dropdown defines if how the value of the header will be displayed as clear text. The ability to mask and unmask values is determined by the unmasking access scope. |
| Body | Enter the HTTP request body to be sent in the request sent, for example: {“user”: “foo”, “pass”: “bar”}The Clear text/Masked text dropdown defines if how the value of the body will be displayed as clear text. The ability to mask and unmask values is determined by the unmasking access scope. |
| Maximum number of redirects to follow | Enter the maximum number of redirections that Bright should follow during the authentication process
|
| Repeater | If you use a local Repeater to reach the target, select it from the dropdown list to connect it to the authentication object. |
The Auth flow setup tab
This tab allows setting authentication details.
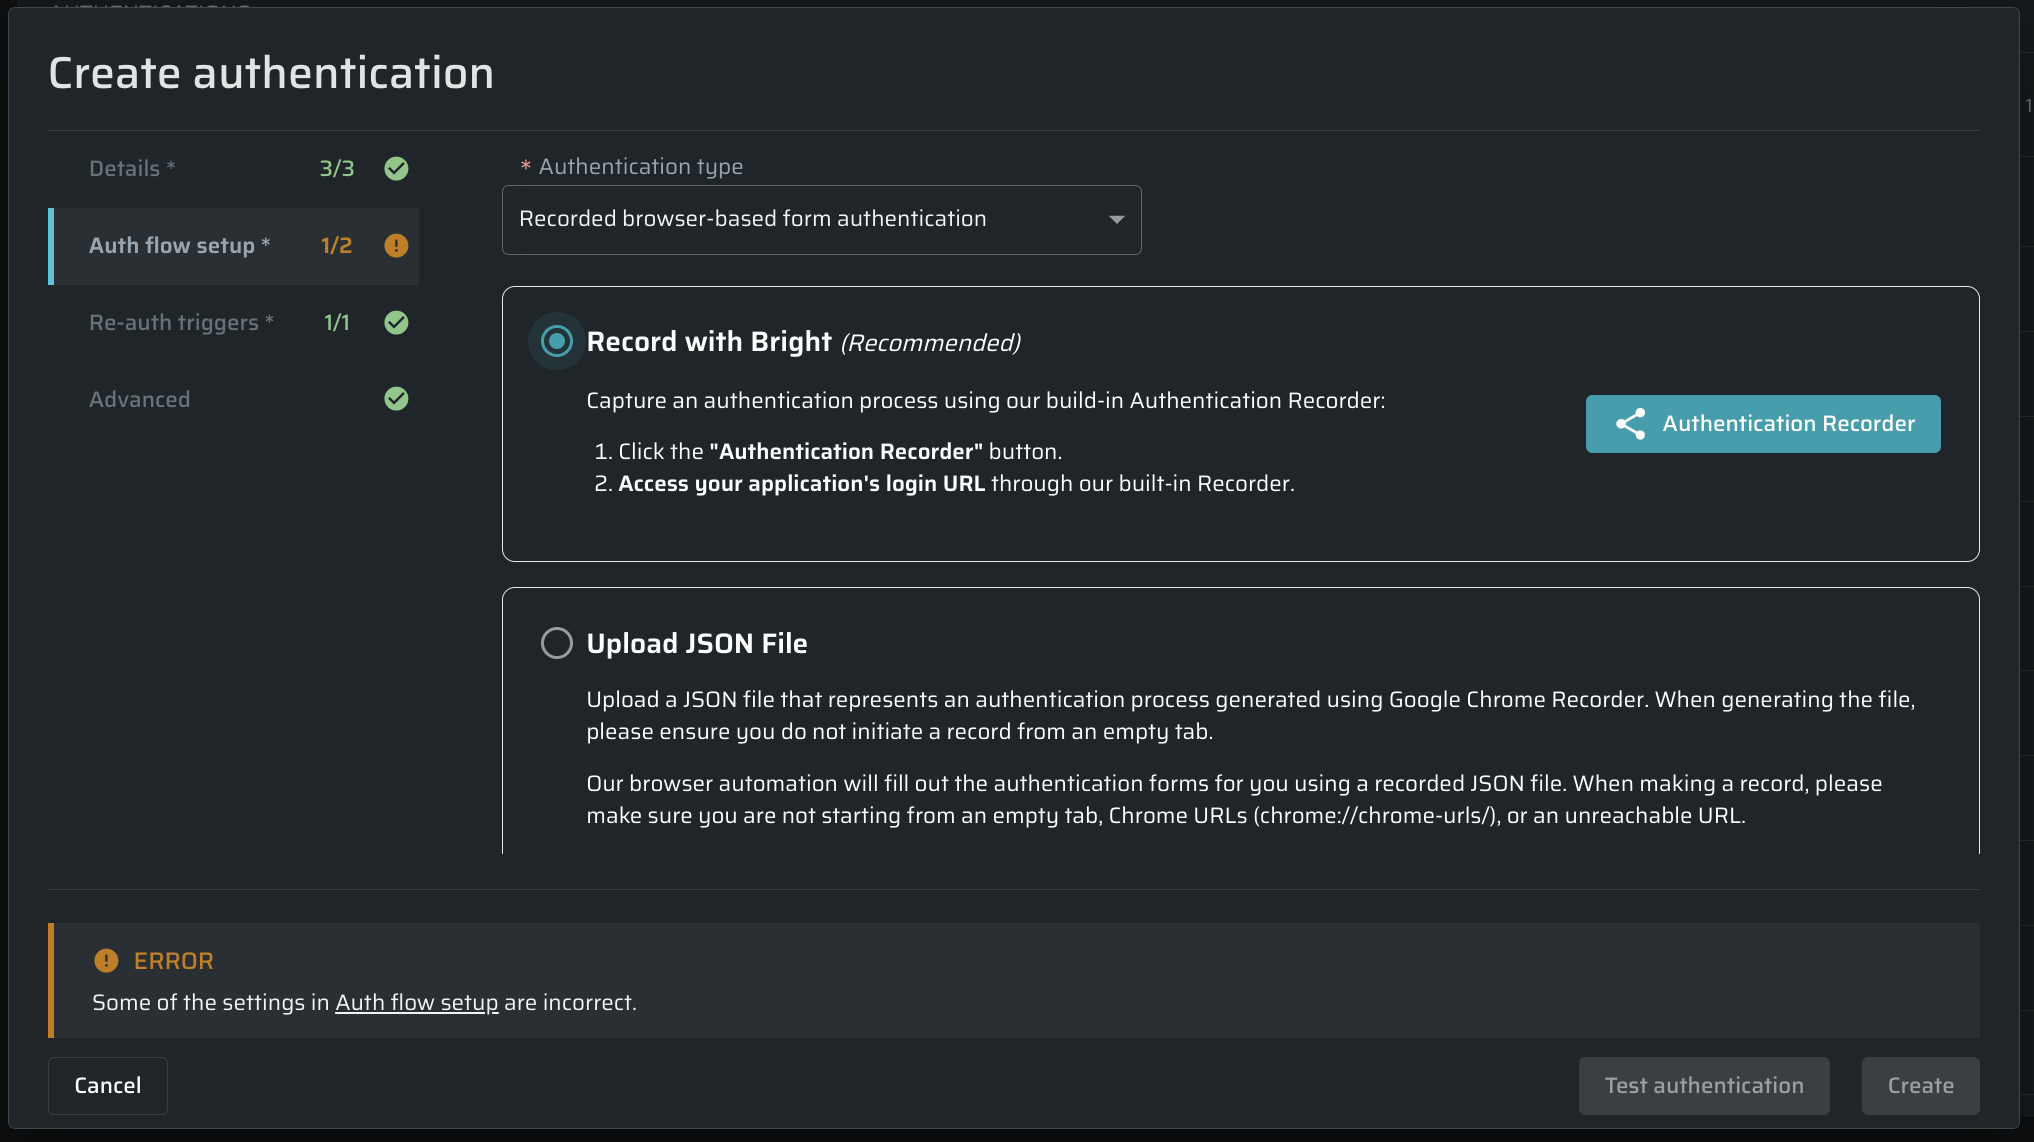
Select the required type from the Authentication type dropdown, and then configure the authentication details.
To learn how to configure a specific Authentication Object, follow the relevant links below.
Valid authentication types
- Recorded browser-based form authentication
- Manual Browser-based form authentication
- Header authentication
- OpenID Connect (OAuth)
- Custom API authentication call
- NTLM authentication
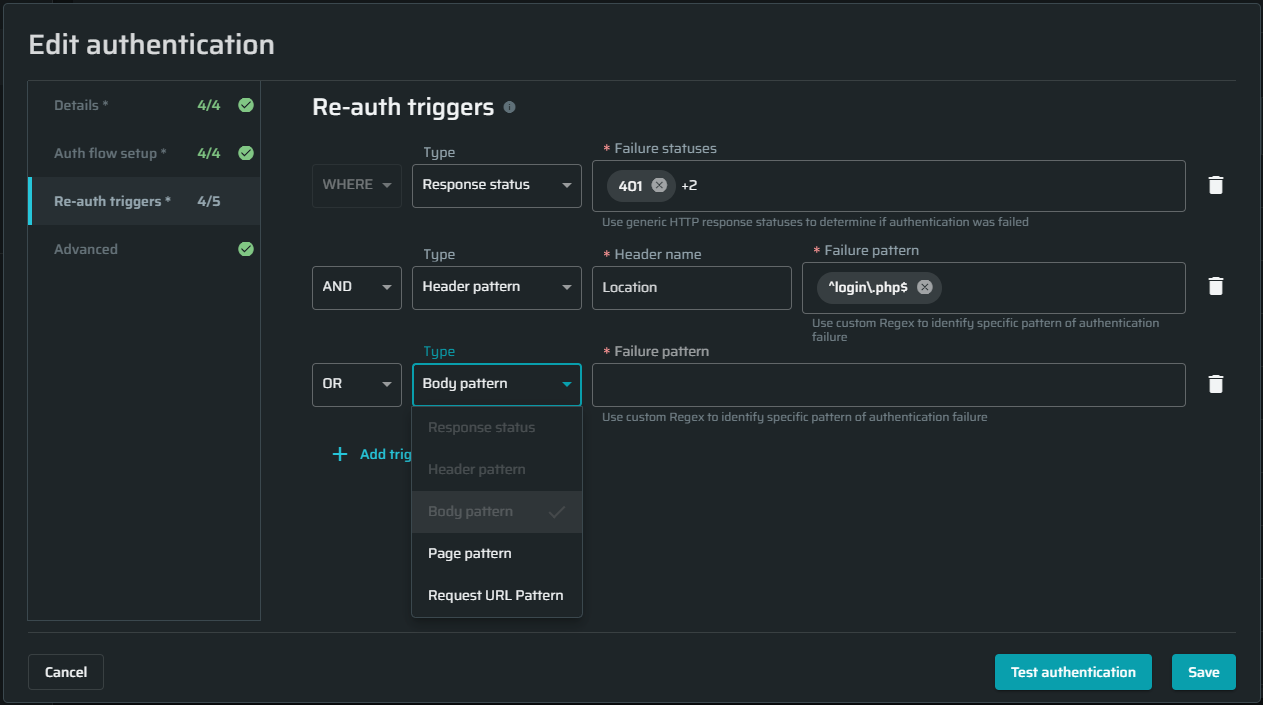
The Re-auth triggers tab
This section provides options for the Bright's engine to detect when the authentication flow is no longer valid, preventing access to authenticated resources. It defines how the application should respond if the authentication fails.
| Field | Guidelines |
|---|---|
| Response status | Response trigger. Select the checkbox and then enter the HTTP response status to tell you about the authentication failure. |
| Header pattern | Response trigger. Select the checkbox and then enter the header name and Regex pattern, which will help you identify the authentication failure. For example, you can use a simple Regex pattern, such as index. |
| Body pattern | Response trigger. Select the checkbox and then enter the body pattern that will help you identify the authentication failure. For example, this Regex pattern detects a body looking for a UUID in a sessionId parameter: sessionId: \"\\b(uuid:){0,1}\\s_([a-f0-9\\-]_){1}\\s\*\". |
| Page pattern | Browser-based trigger. Select the checkbox and then specify CSS selector(s) or inner text selector(s) that match page element(s) to be used as logout indicator(s). |
| Request URL pattern | Mixed trigger. Select the checkbox and then enter the URL pattern that will help you identify the authentication failure. |
How it works
- A group contains one or more triggers (e.g., Response status, Header pattern).
- The group has a single operator:
- AND – all triggers in the group must match.
- OR – any trigger in the group may match.
- Multiple groups can be added. The final result is evaluated left to right across groups.
📘The engine applies this logic in Test authentication and in Discovery.
Set up a configuration
- Start with the default group. It contains Response status = 401.
- Add triggers to the group. Each trigger type can be added once per group.
- Choose the group operator (AND/OR).
- (Optional) Add up to two more groups and choose the operator between groups.
- Save.
Limits and behavior
- Max groups: 3. After three groups are created, Add group is unavailable.
- Nesting: Single-level only (groups cannot contain groups).
- Deleting groups: When the last trigger in a group is removed, the group is deleted.
- Defaults when adding: A new trigger defaults to Response status with an empty value; the default operator is OR.
The Advanced tab
According to the authentication type, the following configuration options are available: One-Time Passwords (OTP), set up authorized requests by adding custom headers, and define additional custom headers.
OTP-generation settings
OTP is a reliable way to increase an application's security by adding one-time passwords. It is often used in combination with a regular password as an additional tool for user authorization. Bright provides the following possibilities for use: Time-Based One-Time Password (TOTP), Hash-Based One-Time Password (HOTP), Google Authenticator (TOTP), and Email OTP.
Note:This tab is only available for Recorded Browser-Based Form Authentication, Manual Browser-Based Form Authentication and Custom API authentication flow.
- Users are allowed to create up to 5 OTPs
- There are no restrictions on types: for example, they can all be only one type
- Users can rename each OTP if needed
To configure an OTP correctly, follow the steps below:
-
Create an Authentication Object using Recorded Browser-Based Form Authentication, Manual Browser-Based Form Authentication or Custom API authentication flow.
-
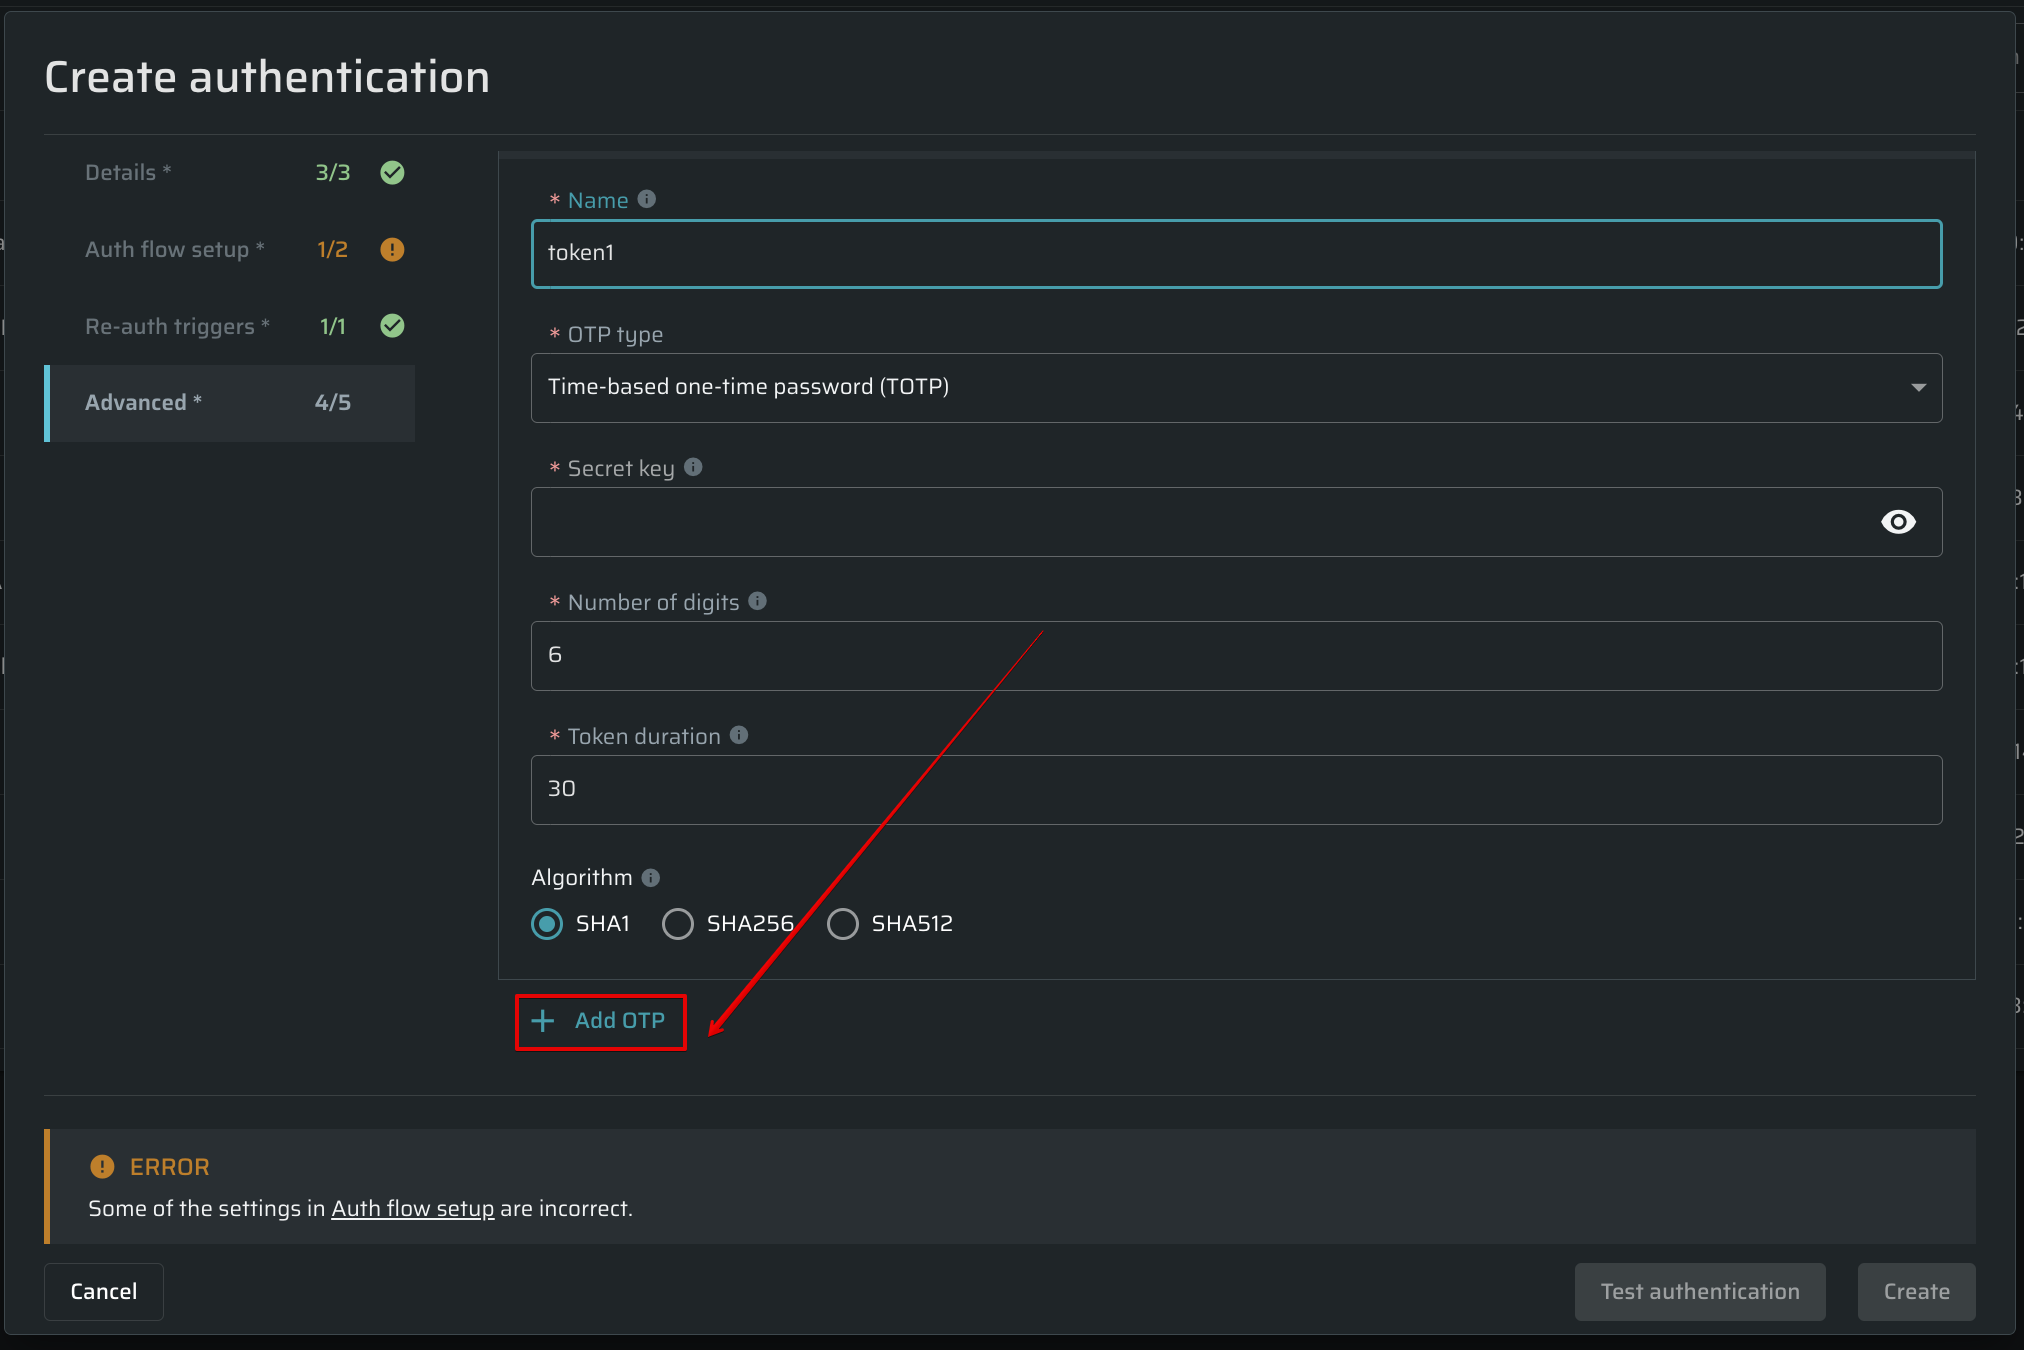
Go to the Advanced tab and click Add OTP.

-
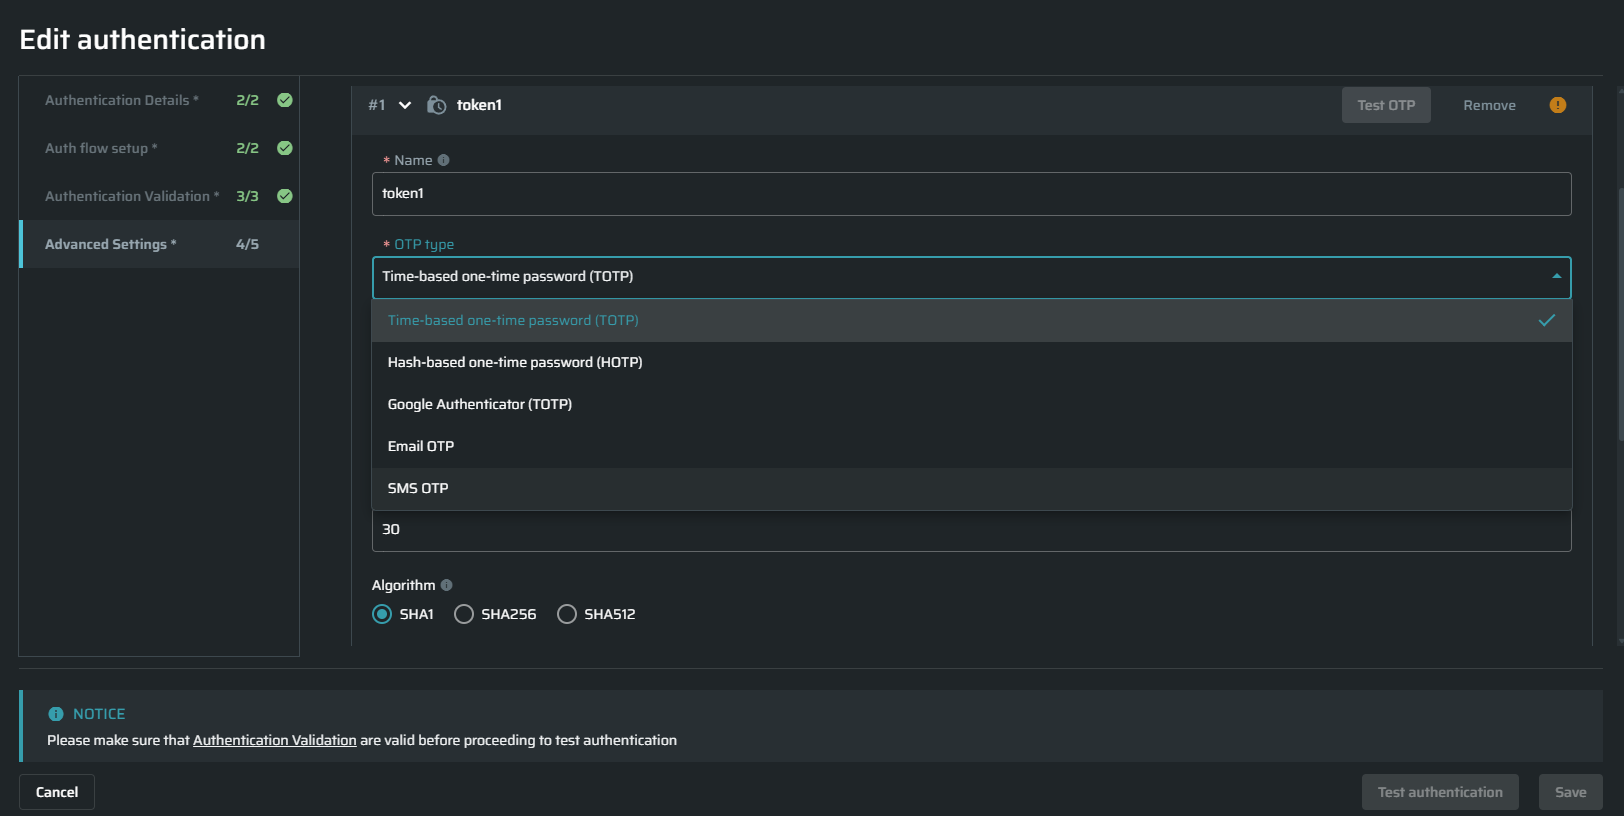
Fill in the following parameters:
- Name - can be modified to any name consisting of alphanumeric characters and underscore (_) only
- OTP type:
- Time-based one-time password (TOTP) - a temporary passcode generated by an algorithm that uses the current time of day as one of its authentication factors
- Hash-based one-time password (HOTP) - Hash-based message authentication code, based on a counter.
- Google Authenticator (TOTP) - a time-based one-time password is a time-based OTP, the most popular algorithm used by Google Authenticator.
- Email OTP - a temporary passcode sent to a generated email and read by Bright web app to authorize test users. See the Email OTP article for more details.
- Secret key - a key that is provided by the target website and used to generate the OTP
- Number of digits - a number of digits (from 1 to 8) used to generate the OTP's length
- Token duration - a time (in seconds) after which an OTP is regenerated (only available when TOTP is selected)
- Algorithm - an encryption algorithm, that contains three types of the cryptographic hash function, which produces a 160-bit, 256-bit, and 512-bit hash value accordingly.
-
Once everything is done, click on Test OTP generation to check everything is set up correctly. Generated code can be used for OTP adjustment on a target site/service.
-
To add an additional OTP, click Add OTP.
-
Open the Auth flow setup tab and insert the
{{ auth_object.otps.<OTP_NAME> }}to all places needed. The Bright engine will interpret this placeholder into an existing token.-
Bright allows users to add this token to the following fields:
- URL
- Body
- Header Value
-
For Manual Browser-Based form Authentication it is allowed to put the
{{ auth_object.otps.<OTP_NAME }}into the Value field. The Name field should match the field's selector name.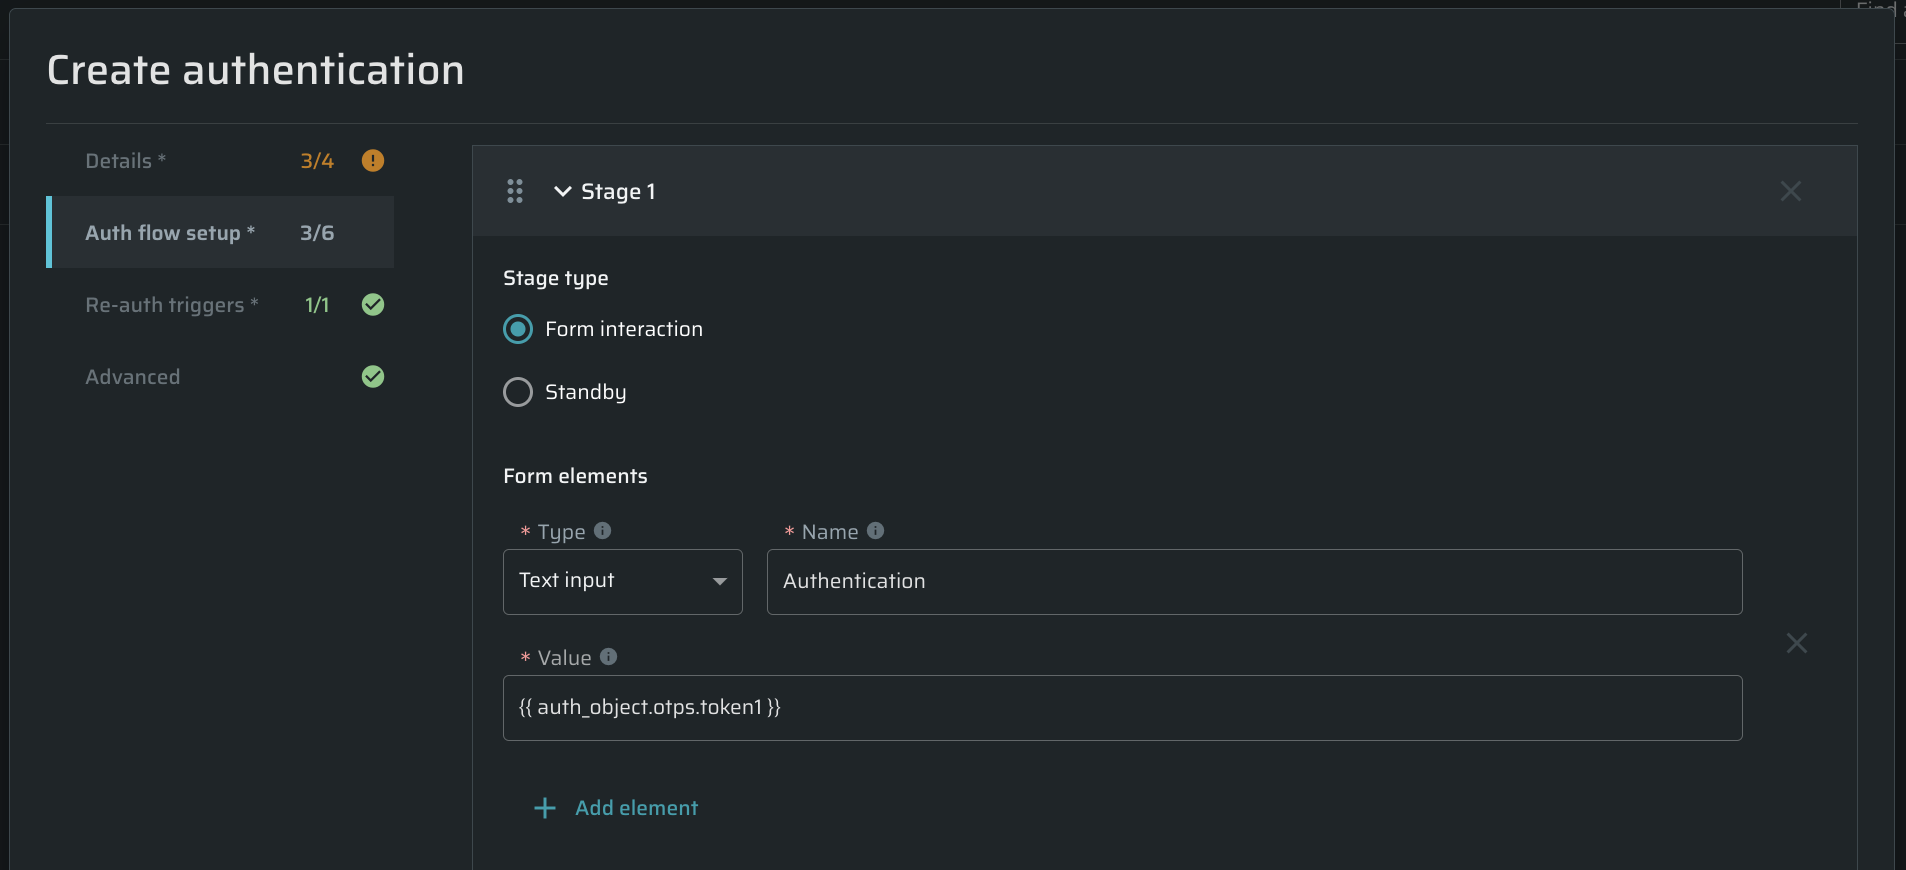
-
For Recorded Browser-Based form Authentication, open the recorded JSON file in a text editor, and change the data in the value line to this:
{{ auth_object.otps.<OTP_NAME> }}or use the built-in recording editor.
-
Additional Headers
Additional Headers are used to handle complex login scenarios. This feature enables you to inject custom HTTP headers or internal feature flags into every request throughout the entire authentication process. This could be essential for successfully bypassing conditional access controls like WAFs, captchas, or other security measures that could otherwise block the login flow.
- These headers will replace existing headers with the same name
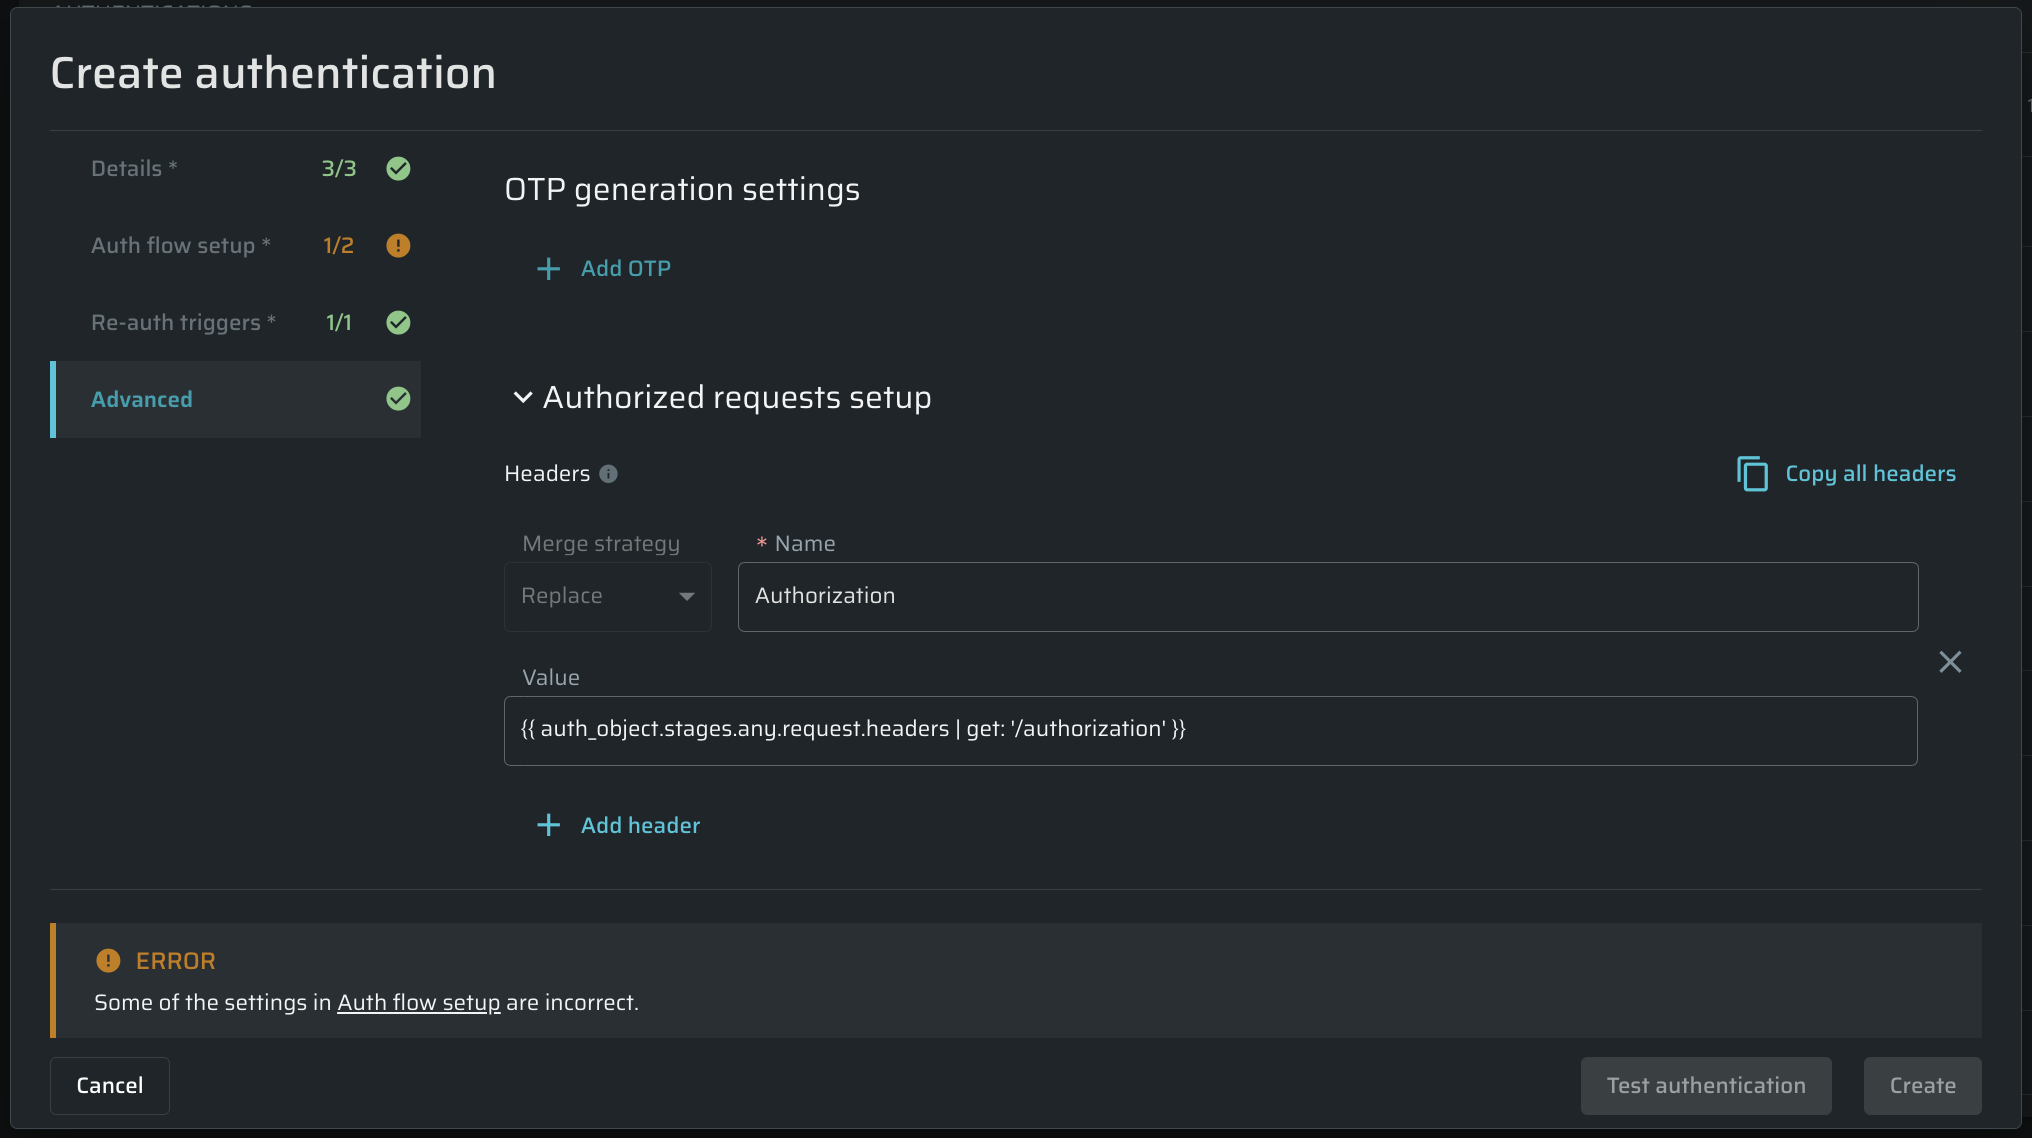
Authorized requests setup (Custom Headers)
The Bright app allows users to manually add a custom header to browser-based form authentication (manual or recorded). Users can cover complex non-standard headers to make protected resource tests possible.
Note:All existing templates, except those containing
$faker, must have theauth_objectcontext, if they do not already. To learn more about Faker.js data generator, see Generating mock data.
To use a custom header in the authorized requests, follow these steps:
-
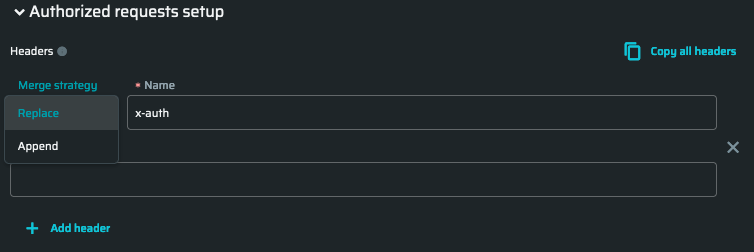
Go to the Advanced tab, the Authorized requests setup, and click Add header.
-
Fill in the header name (as an example,
x-auth).
There are two merge strategies:- Replace - replaces the value without duplication
- Append - adds the value to the end of the page
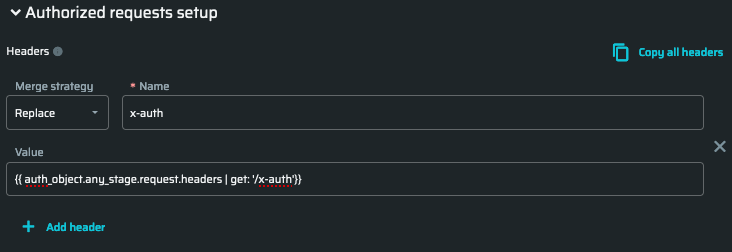
- Fill in header value:
{{ auth_object.any_stage.request.headers | get: '/x-auth'}}.
SMS-Based One-Time Passwords
Bright supports authentication flows that receive one-time passwords through SMS. When configuring SMS OTP, Bright assigns a phone number that the target application can use to send verification codes.
Before You Begin
Make sure you have permission to manage authentication objects.
SMS OTP phone numbers are limited and assigned based on availability.
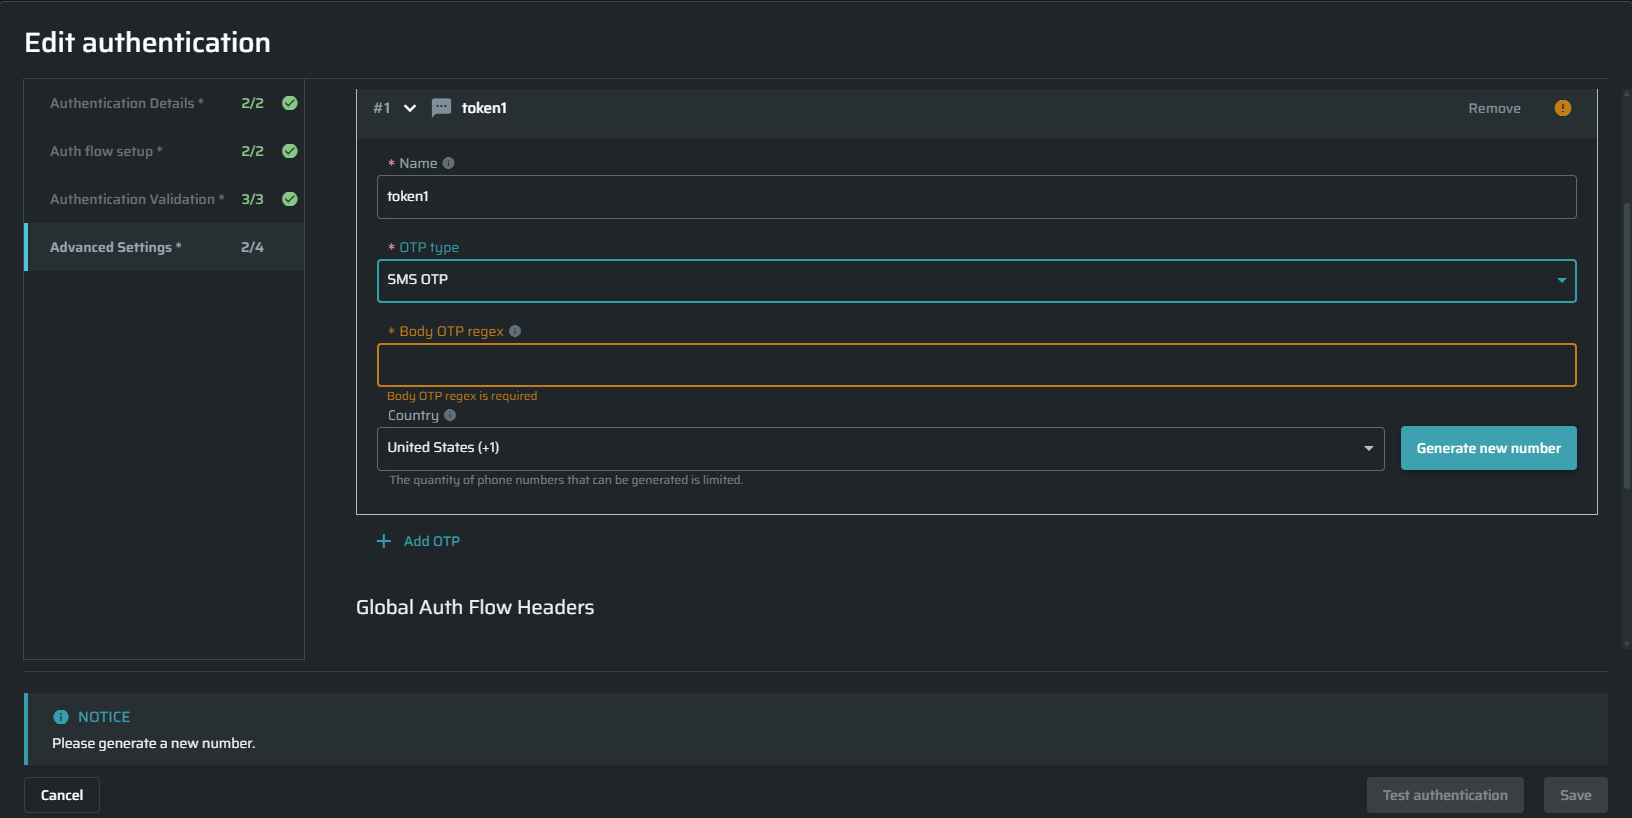
Configure SMS OTP
- Create or edit an authentication object.
- Go to Advanced Settings and add an OTP step.
- In OTP type, select SMS OTP.
- In Body OTP regex, enter the regular expression Bright should use to extract the verification code from the SMS message.
- Under Country, select the required country code.
- Click Generate new number.
- Add the assigned number to the target application as the user's verification number.
- Complete the remaining authentication settings.
- Test the authentication and click Save.
The assigned phone number remains visible in the authentication object.
Note: If Bright cannot assign a number, try again later or select another supported country.
Usage Limitations
The same SMS verification cannot be used by multiple scans or discoveries at the same time. If the authentication object is already in use, wait for the active operation to finish before starting another one.
Delete an SMS OTP Authentication Object
When you delete an unused SMS-based authentication object, its assigned phone number is released. The confirmation message displays the number being released.
The number may be returned to the provider and reassigned later. Make sure it is no longer connected to an active account before deleting the authentication object.
Updated 1 day ago