Configuring Recorded Browser-Based Form Authentication
Before following the instructions below, ensure that your application and authenticated resources are accessible to the Bright engine, either directly from the Internet or via the Repeater.
The recorded browser-based form authentication method allows you to create/use a recorded session. The recording contains browser interactions (e.g.: clicks, form values population, navigation) which are replayed by our engine.
Recording/uploading a new login session
To record your login session, follow these steps:
-
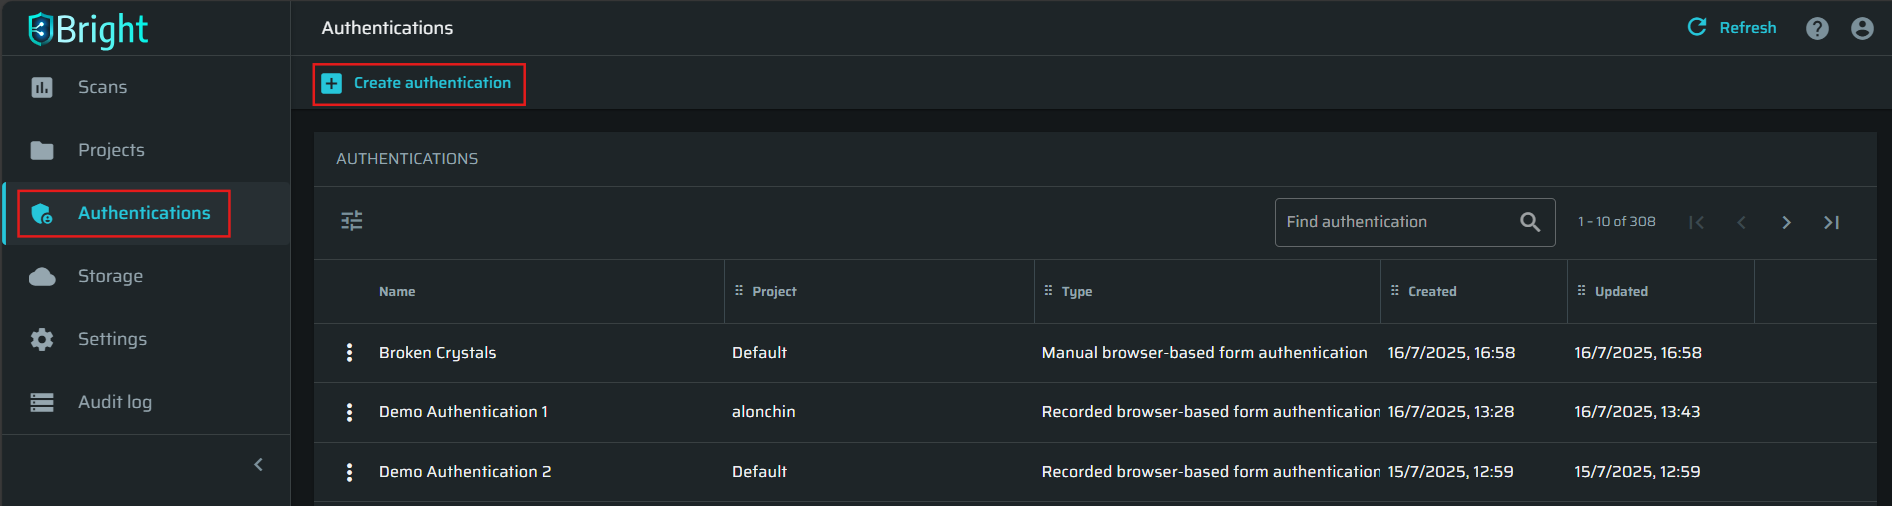
Open the Authentications tab on the left menu and click +Create authentication:
-
Specify the required details: enter your Authentication name (this name aims to provide context when selected later while defining a discovery or a scan). Select a Project from the available projects and a Reapeater, if needed:

-
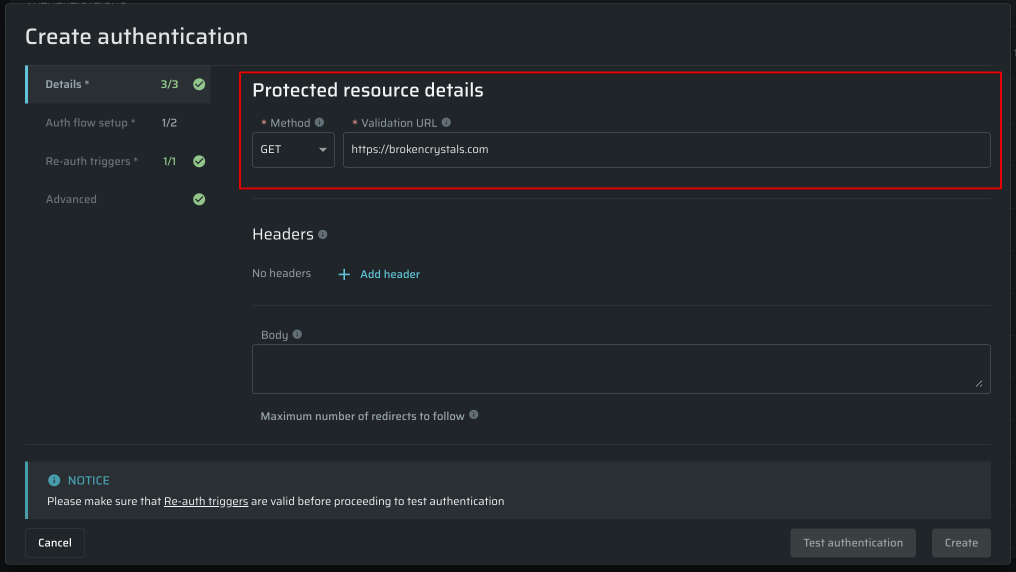
Enter the target's address in the Protected resource details section to proceed:
-
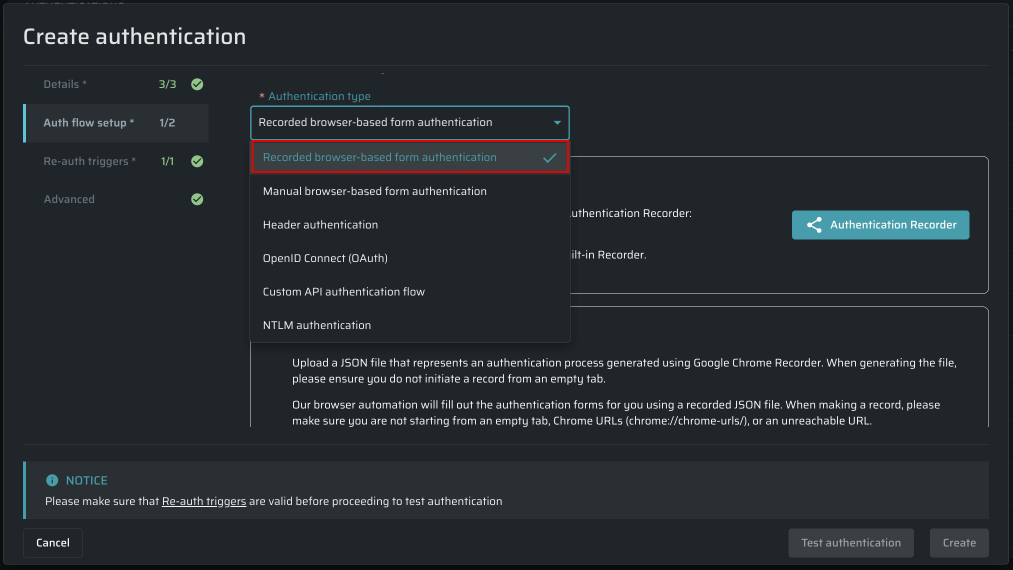
Select the next tab in the flow called Auth flow setup. In the Authentication type field, select the Recorded browser-based form authentication:
-
Select either Record with Bright to use our built-in recorder, or Upload JSON File to upload your own recording.
To learn more, see Bright Authentication Recorder, or Google Chrome DevTools.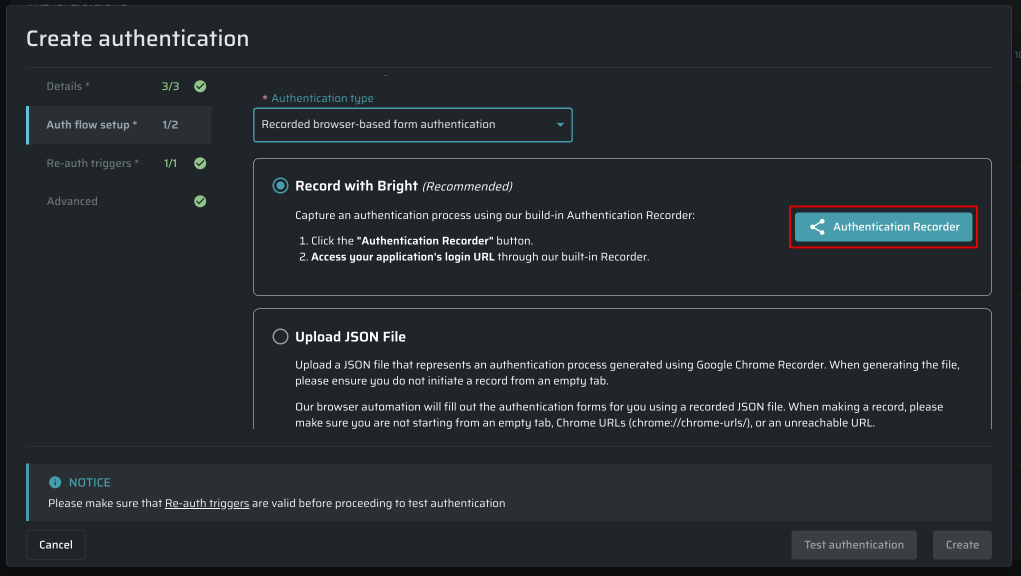
Editing a recorded login session
Bright app allows you to edit the values captured as part of a recording without having to create a new recording.
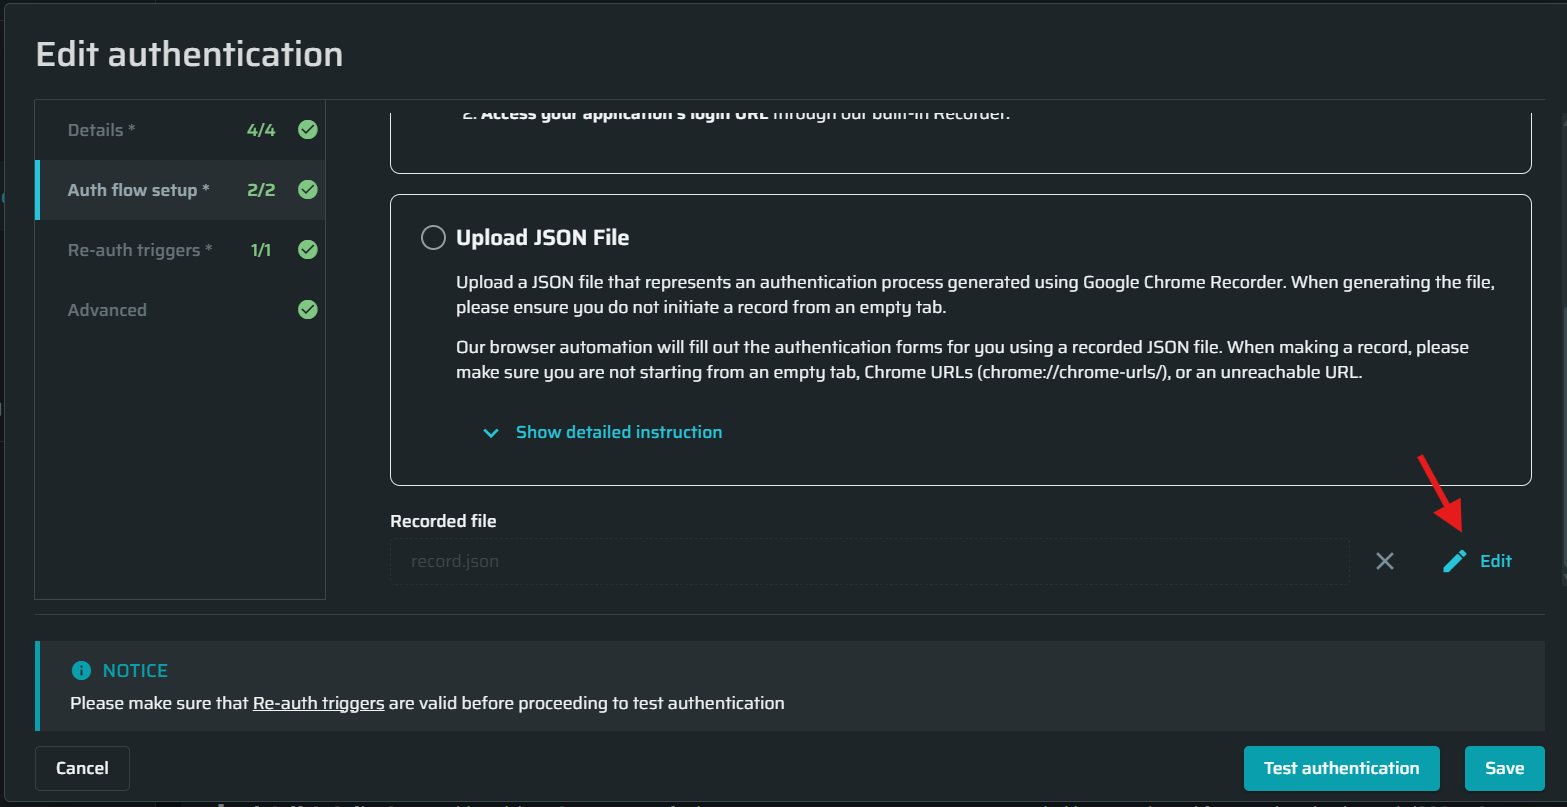
To do so, click the Edit button in the Auth flow setup step:
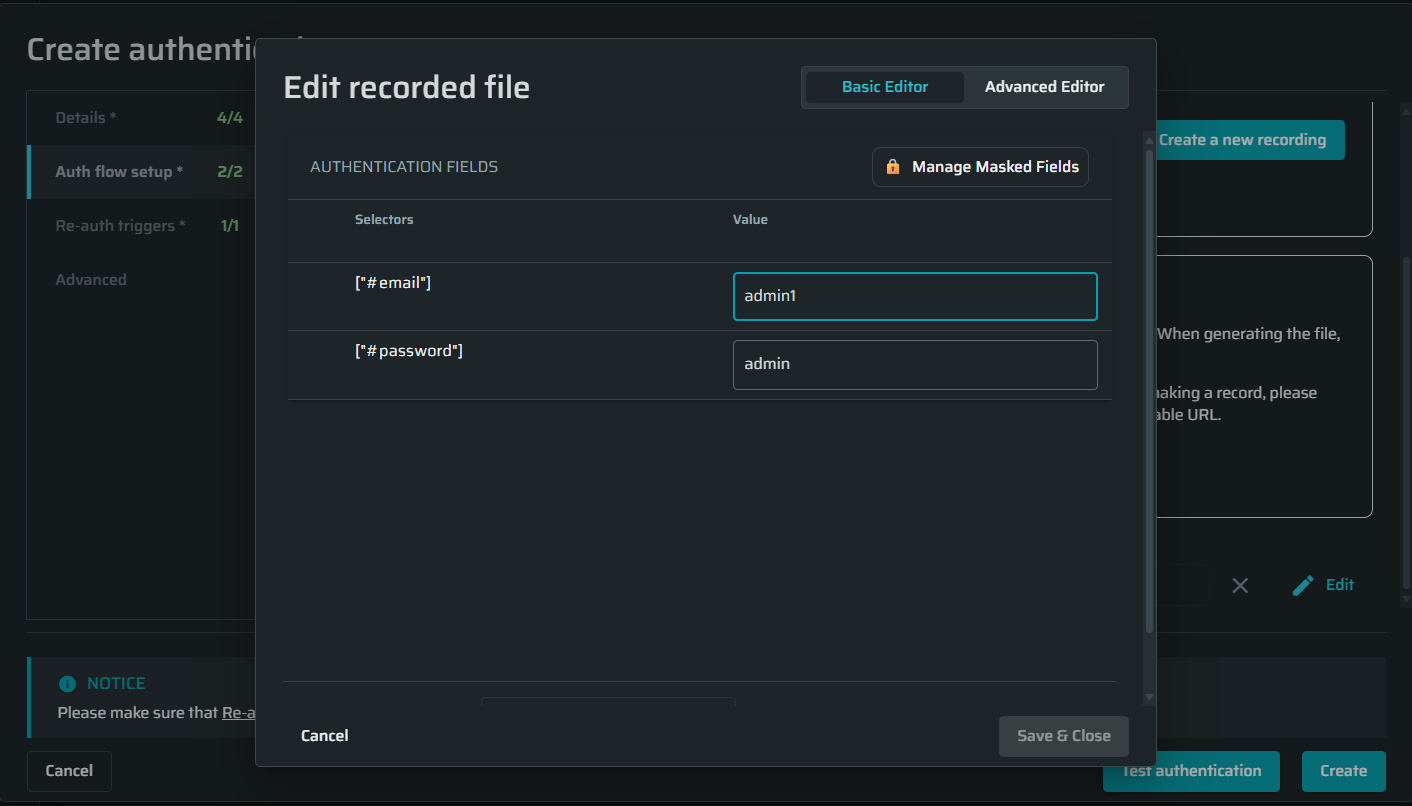
- Field value: You can edit the authentication field value, such as username or password.
- Page Timeouts: Adjust how long each page waits before timing out (from 1 to 120 seconds) to address slow page loading speed.
- One-Time Passwords: Append one-time passwords (OTP) generated by the OTP Generation settings under the Advanced tab by entering the marker
{{auth_object.otpToken}},replacing the static OTP saved by the page recording (e.g.763041).
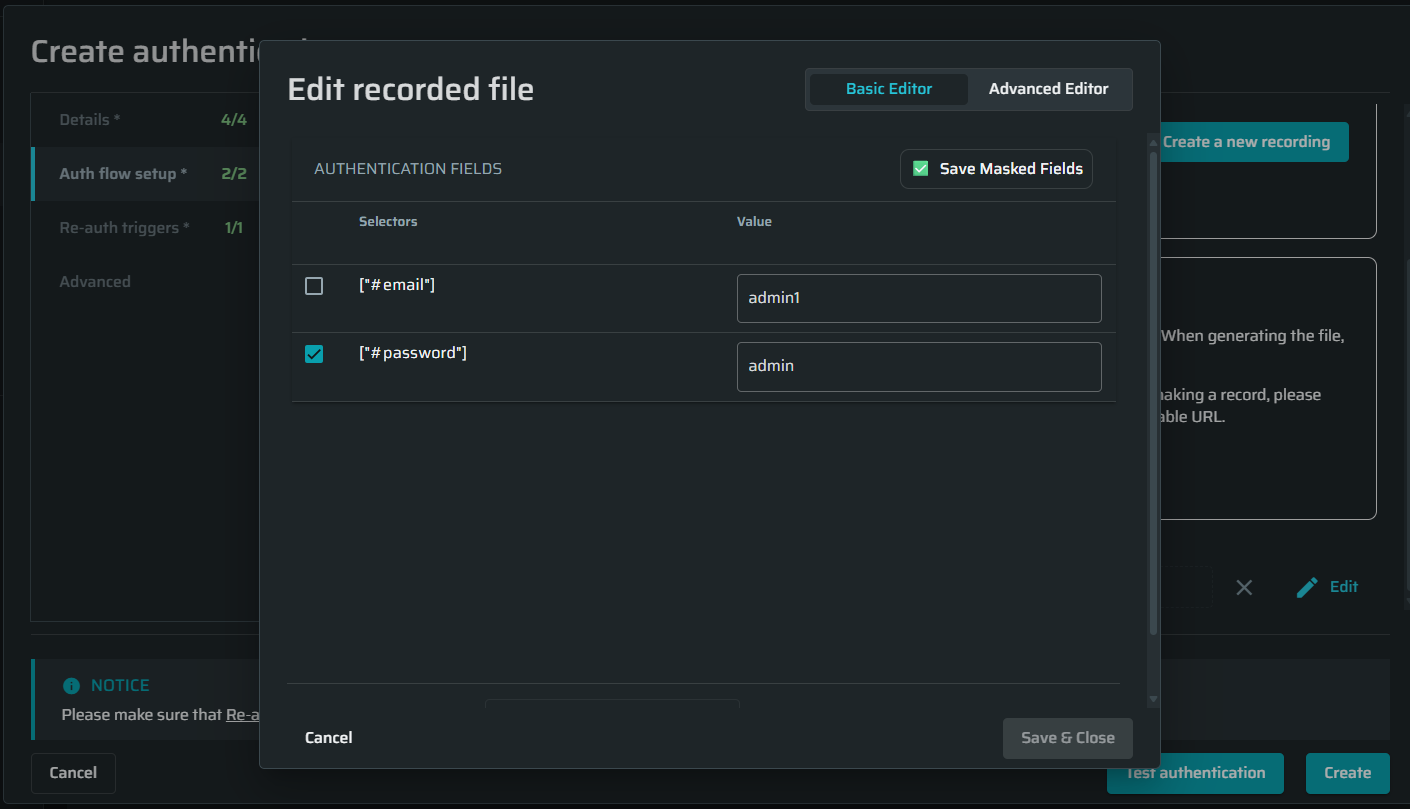
Protecting fields as secrets
To protect input fields as secrets, click Manage Masked Fields, select the fields you want to protect and confirm by clicking on Save Masked Fields.
Marked fields will require the unmask-password scope to be able to present the value.
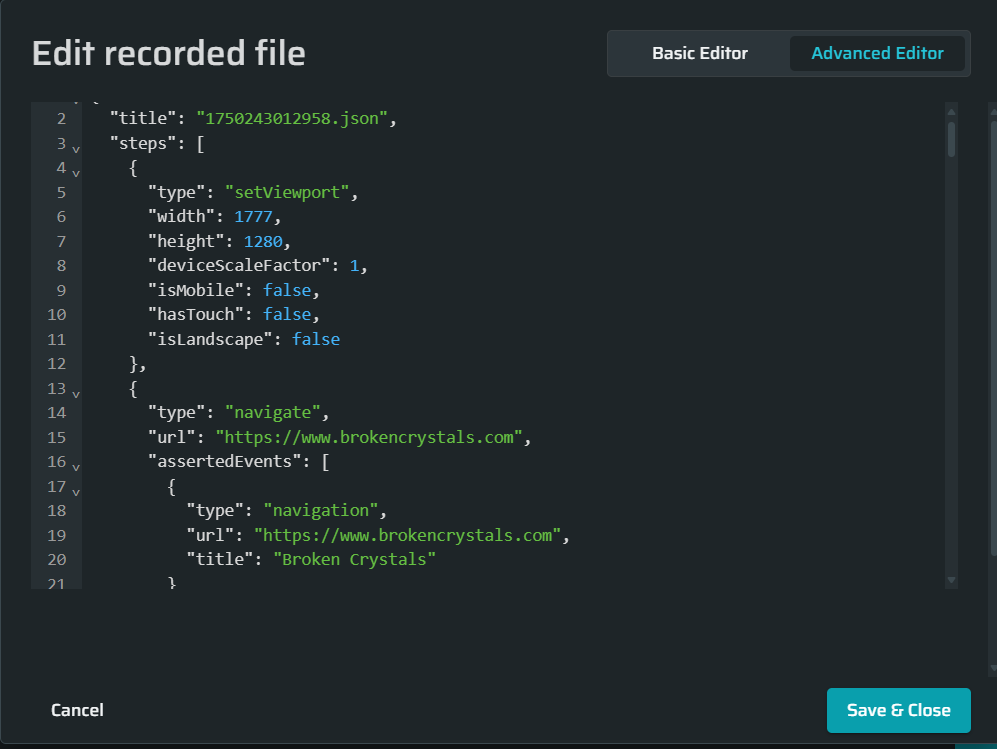
Full JSON edit of the recording file
To edit the recording file, click on Advanced Editor. Modify the recording file and click Save & Close to save the updated file.
Notes:
- If the file is not a valid JSON, you will not be able to save the change. The save button will be grayed out until corrected.
- Beyond JSON structure validation, there are no other validations performed for the time being. It is suggested to keep a copy of the file prior to making changes in case a revert is needed.
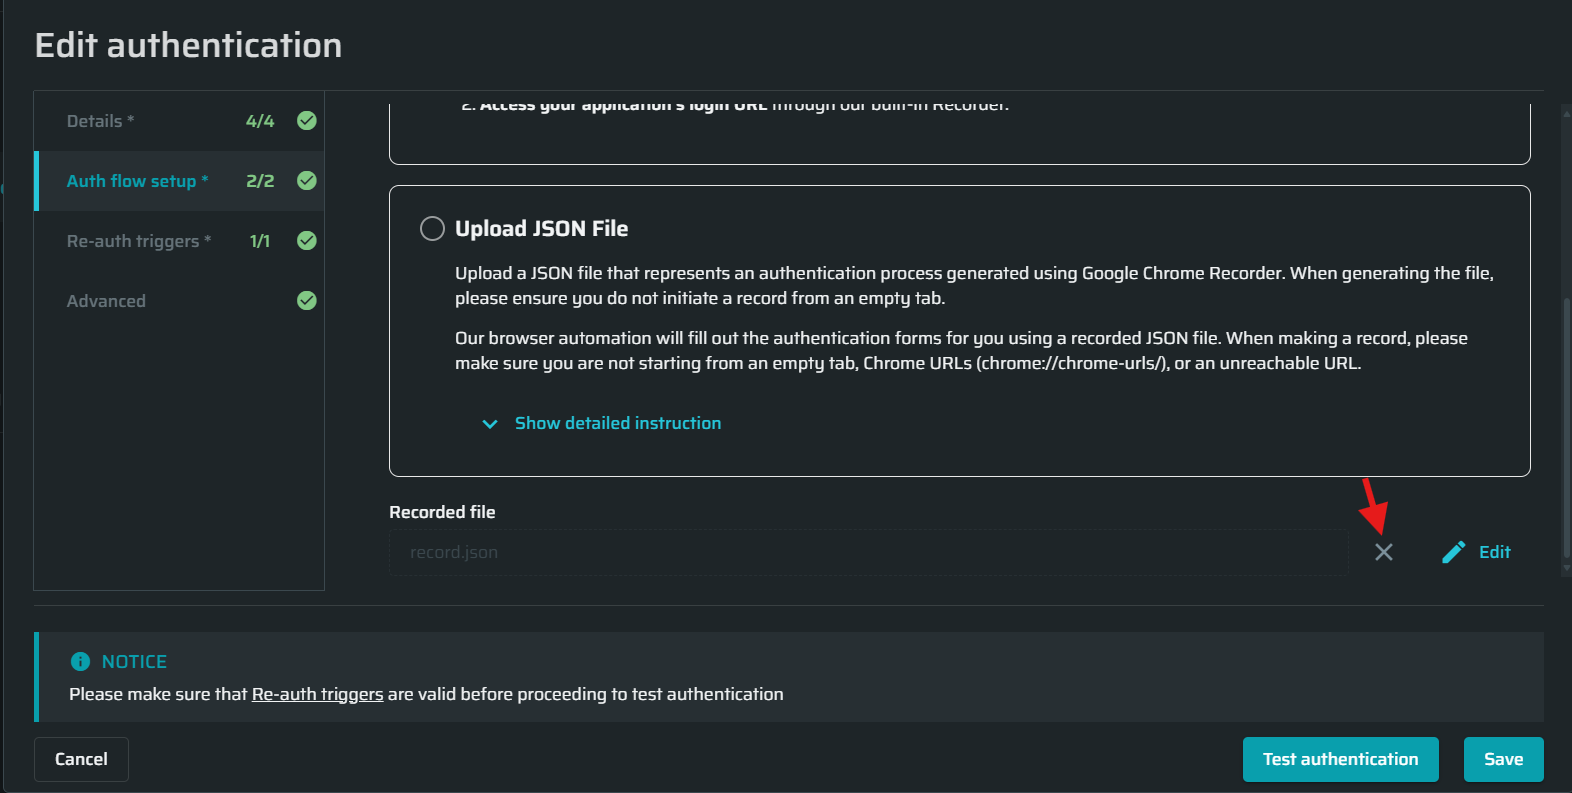
Deleting a login session
If you decide to record a new file, click the X button to delete the uploaded recording.
Updated 12 months ago