Troubleshooting
The purpose of this section is to help you solve common problems that you may encounter while using the Repeater.
Diagnosing network connection
You can check if a created (registered) Repeater can successfully connect to all target hosts on your local network. The Repeater diagnostics allows you to reveal and fix the network connection problems before you run a scan.
Prerequisites
- You have created the Repeater in the Bright app.
- You have registered the Repeater in your local network using the Bright CLI.
To run the connection diagnostics, follow these steps:
- Click
 next to the Repeater connected to your network, and then select Diagnose.
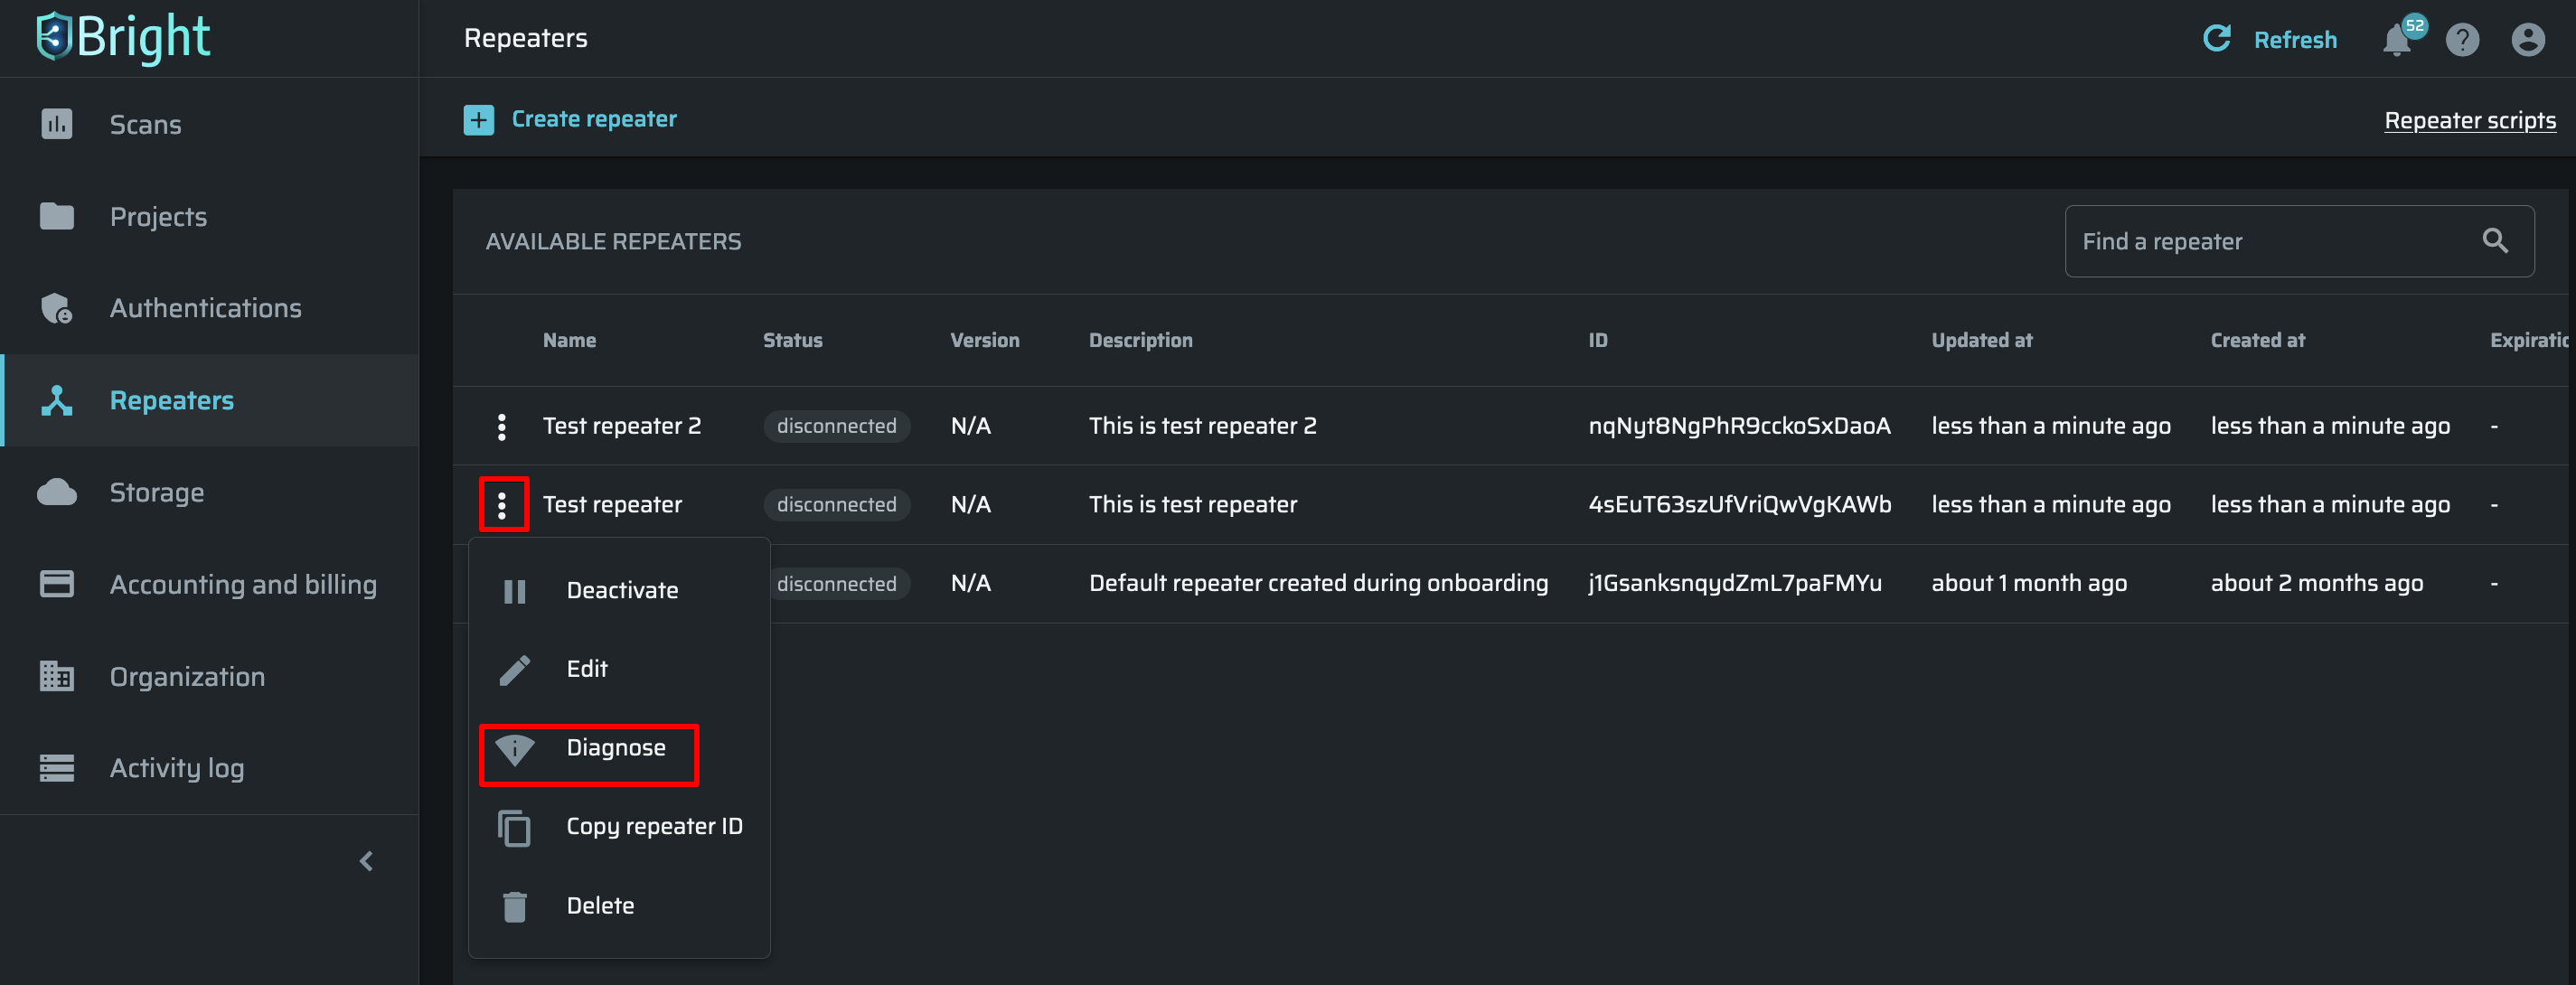
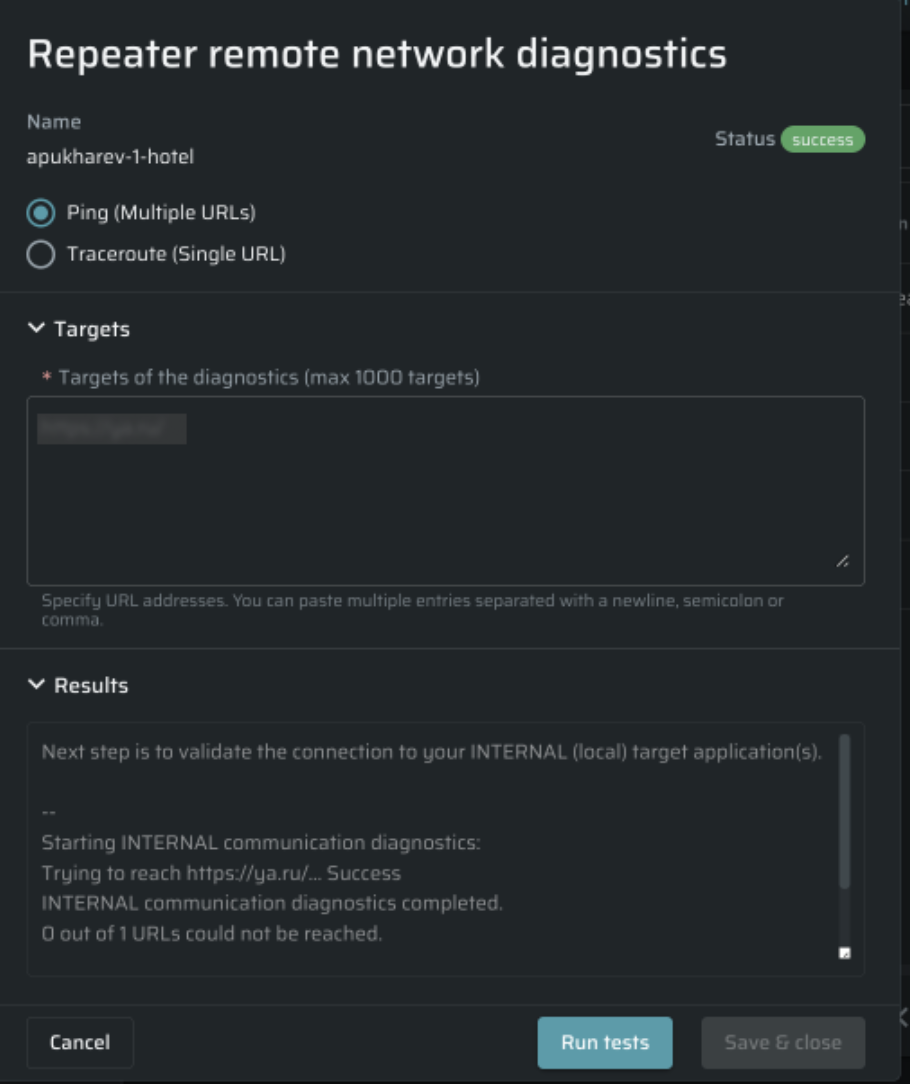
- Under the Repeater name, select one of the following options:
- Ping (Multiple URLs) - Enables testing of the network connectivity on a single or multiple targets. You are only required to enter the URL(s) of your internal (local) target application(s) to initialize the diagnostics. You can add up to 1000 target hosts separated with a newline, semicolon or comma.
- Traceroute (Single URL) - Provides a full IP trace on a specific target. It means that this option returns a list of all the IPs along the route of the request, thus allowing you to detect the connectivity bottlenecks. You simply need to specify the target hostname or IP address to initialize the diagnostics.
-
In the Targets field, specify the URL(s) of the diagnostics target(s).
-
Click Run tests. The full results of the diagnostics will be provided in the Results section. You can also quickly check if the diagnostics passed successfully or not by the status displayed in the upper-right corner of the Repeater remote network diagnostics dialog box.
Connectivity test
In order to scan a target on a local network in the Repeater mode, you first need to make sure that a registered (created) Repeater has a proper access to the target.
You can use the bright-cli configure command to run a simple connectivity testing process.
Prerequisites
- The machine on which the Repeater will be run must have the latest version of the Bright CLI.
- A valid API key (
Repeater API Token) with the following scopes:bot,scans:run,scans:read,scans:stop. You can create an organization API key or a personal API key. - A valid
Repeater ID. To register (create) the Repeater, see Managing Repeaters.
Step-by-step guide
-
Run the command
bright-cli configurein your console. The Bright Network Testing wizard is launched. -
Enter your
Repeater IDandRepeater API Tokenin the relevant fields.

-
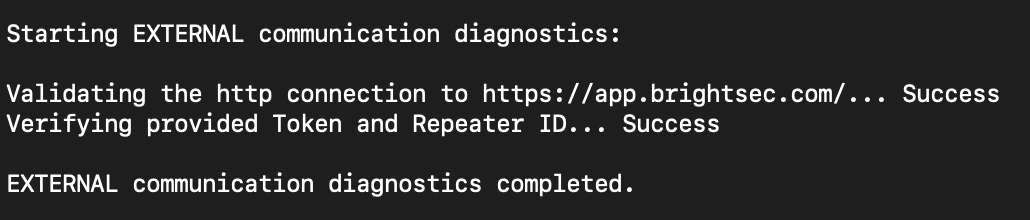
The CLI runs the first stage of the external communication diagnostics:
- Validating that the connection to app.brightsec.com at port is open is required to reach the Bright API endpoints.
- Verifying provided Token and Repeater ID is required to validate the credentials.
The diagnostics results are provided next to the validation parameters.
Once the external communication diagnostics is completed, the CLI switches to the validation of the Repeater communication with local target application(s).
- Enter the target URL(s) to test if the Repeater can reach them.

The internal communication diagnostics starts, and the Repeater tries to reach the specified applications.

- Once the diagnostics is completed, you can see how many targets cannot be reached by the Repeater. To exit the wizard, close the console.
Updated about 2 months ago