Managing Custom Roles
Creating a custom role
You can create a custom role with specific access scopes and assign it to a new or an existing member of your organization. Therefore, all the created members can be granted different scanning and management permissions.
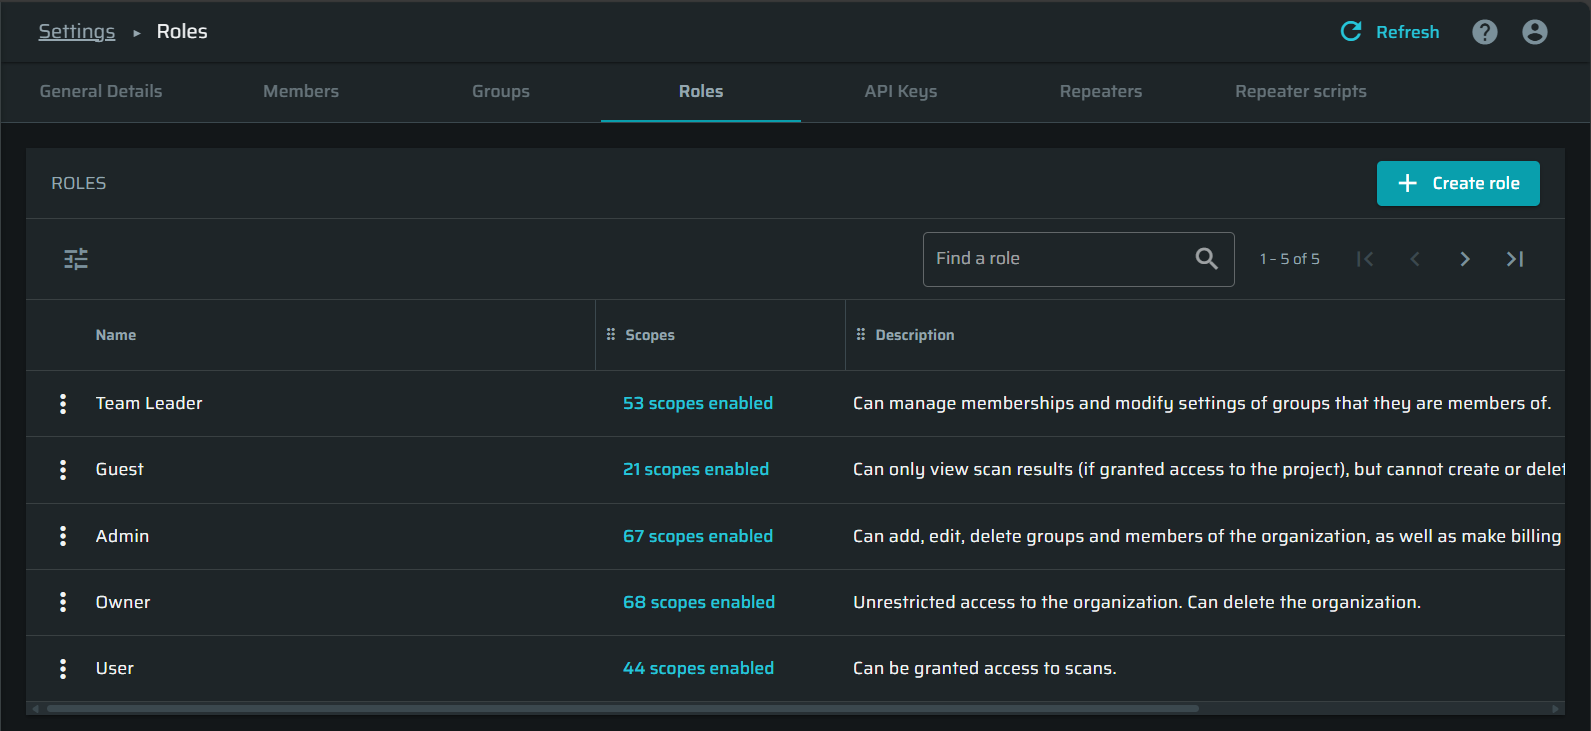
Initially, the list of roles includes only the default options. View the Description column to check the access permissions provided by each role.
NoteOnly the Admin and Owner default roles allow creating and managing custom roles. A Team Lead can only view the custom roles created by an Admin or an Owner
To create a custom role with specific permissions, follow these steps:
-
Navigate to the Roles tab, click + Create Role.
-
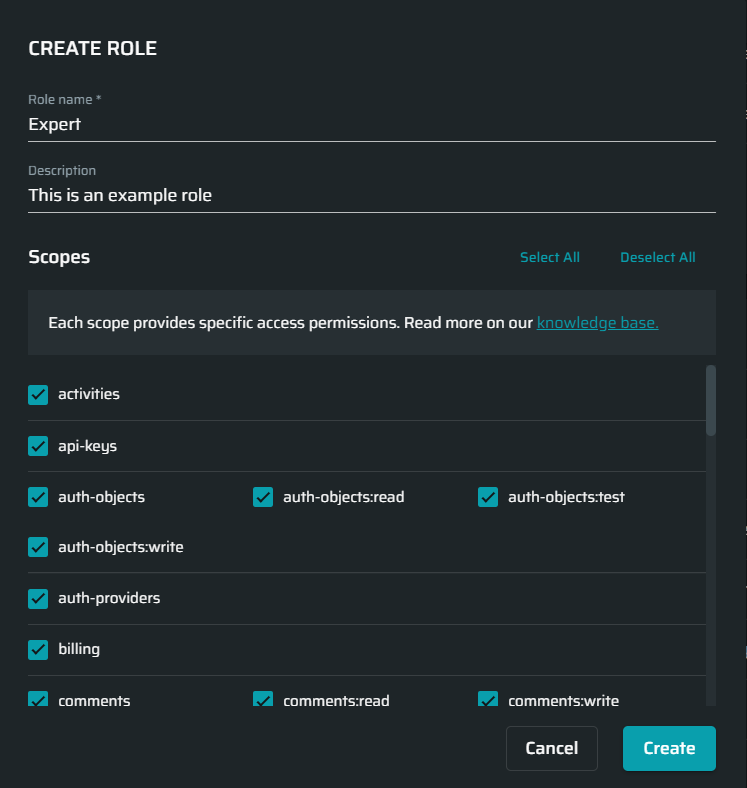
In the Create Role dialog box, do the following:
- In the Name field, enter a role name.
- (Optional). In the Description field, enter a short description of the permissions that a user assigned to this role will be granted.
- Select the access scopes for the role. You can find more information about the available scopes in here.
The list of scopes available for selection depends on your role. You cannot select the roles you do not have access to (such scopes are grayed out). - Click Create.
The created role is added to the end of the list. Please switch to another list page or set an extended number of items to be shown on a page to view the recent custom roles.
Selecting a custom user scopes
The Bright app allows you to create custom roles with specific access permissions. When creating a custom role to be assigned to a new or an existing user, you can predefine access permissions for this role by selecting the relative scopes. See the table in Role Management Scopes for the description of each scope.
Editing a custom role
You can edit a custom role, for example, change the description and access scopes.
NoteThe default roles are read-only, you cannot edit or delete them.
To edit a custom role, do the following:
-
Click
 next to the role you want to edit, and then select Edit.
-
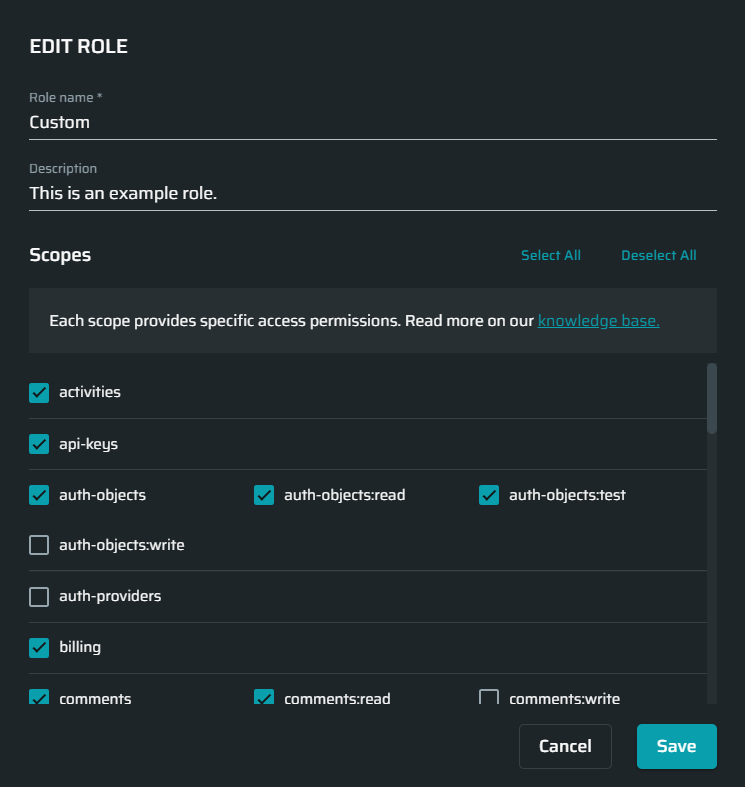
In the Edit Role dialog box, make changes to the role and click Save.
Deleting a custom role
To delete a custom role, do the following:
-
In the ROLES list, click
next to the role you want to delete. -
From the dropdown list, select Delete.
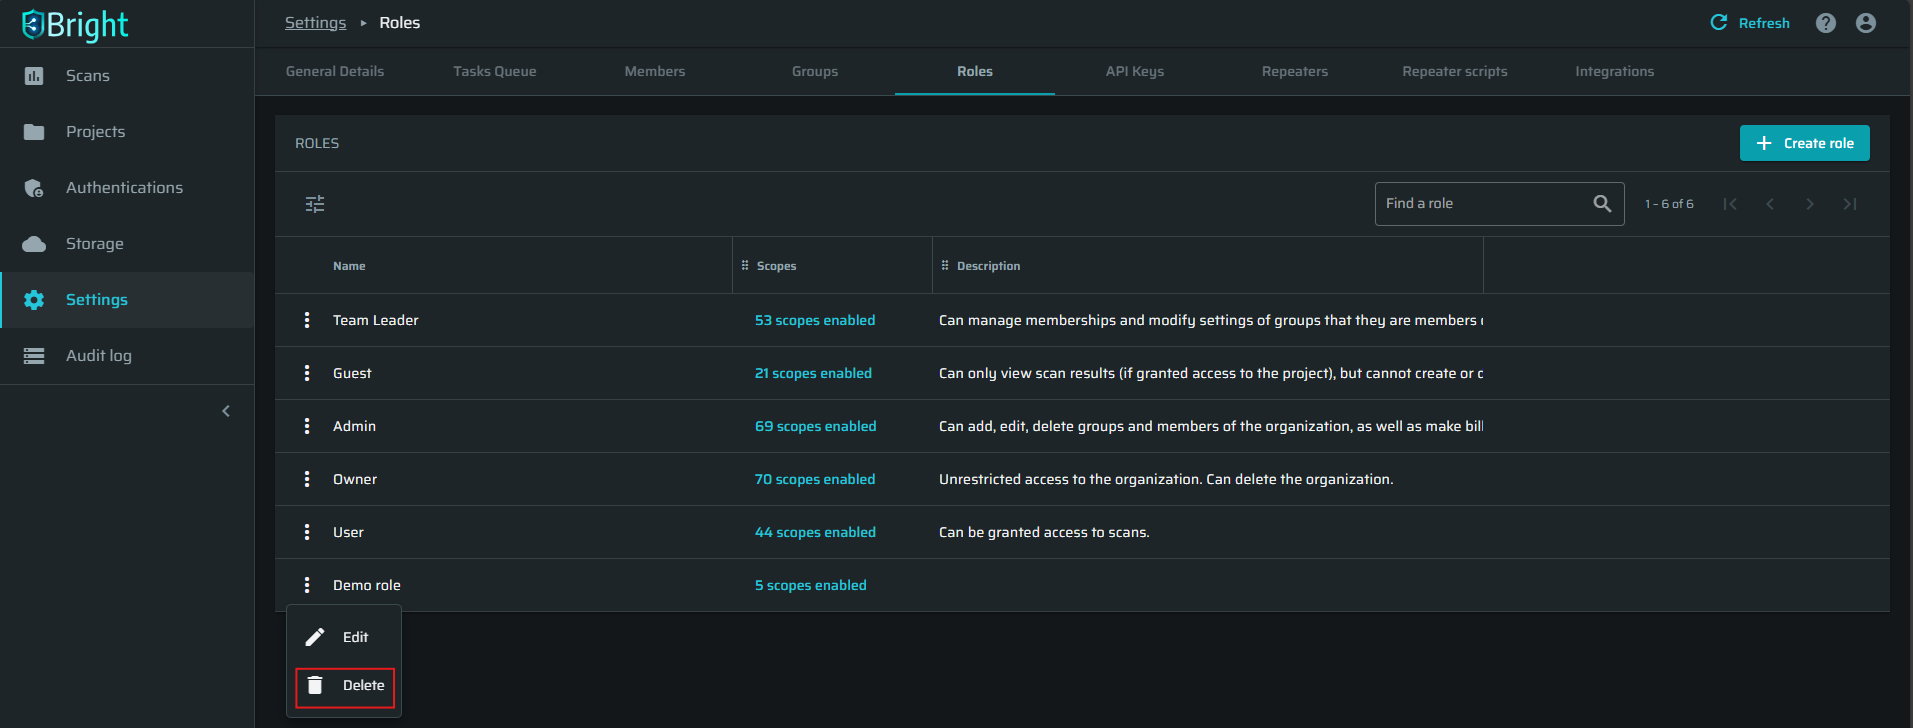
The users assigned to the role that you have deleted automatically lose their permissions and become Guests.
Updated 12 months ago