Repeaters Overview
Important:The latest Repeater version can be downloaded from our Github repository.
We support the latest and one generation back. Older generations will fail to connect to our service.
The Bright Repeater is a scan proxy which provides a secure connection between the Bright cloud engine and a target on a local network. The Repeater mode enables you to securely discovery and scan targets on a local network without having to allowlist the Bright IP address in your firewall for incoming traffic.
The Repeater mode is designed for:
- Organizations that cannot open a port in the firewall for inbound traffic. A Repeater enables you to discovery and scan either from the Bright SaaS or a private cloud.
- Users who must run a local scan on their machine without deploying the target application.
Important:
- The Repeater is using WebSocket and HTTPS (443) for communication between the Repeater and Bright cloud.
- If your environment uses a proxy server, please make sure that the SOCKS protocol support is enabled.
- The Repeater mode is not compatible with TLS tests.
- To get access to a scan target using the HMAC authorization, see Using Repeater Scripts.
How the Repeater deployment works
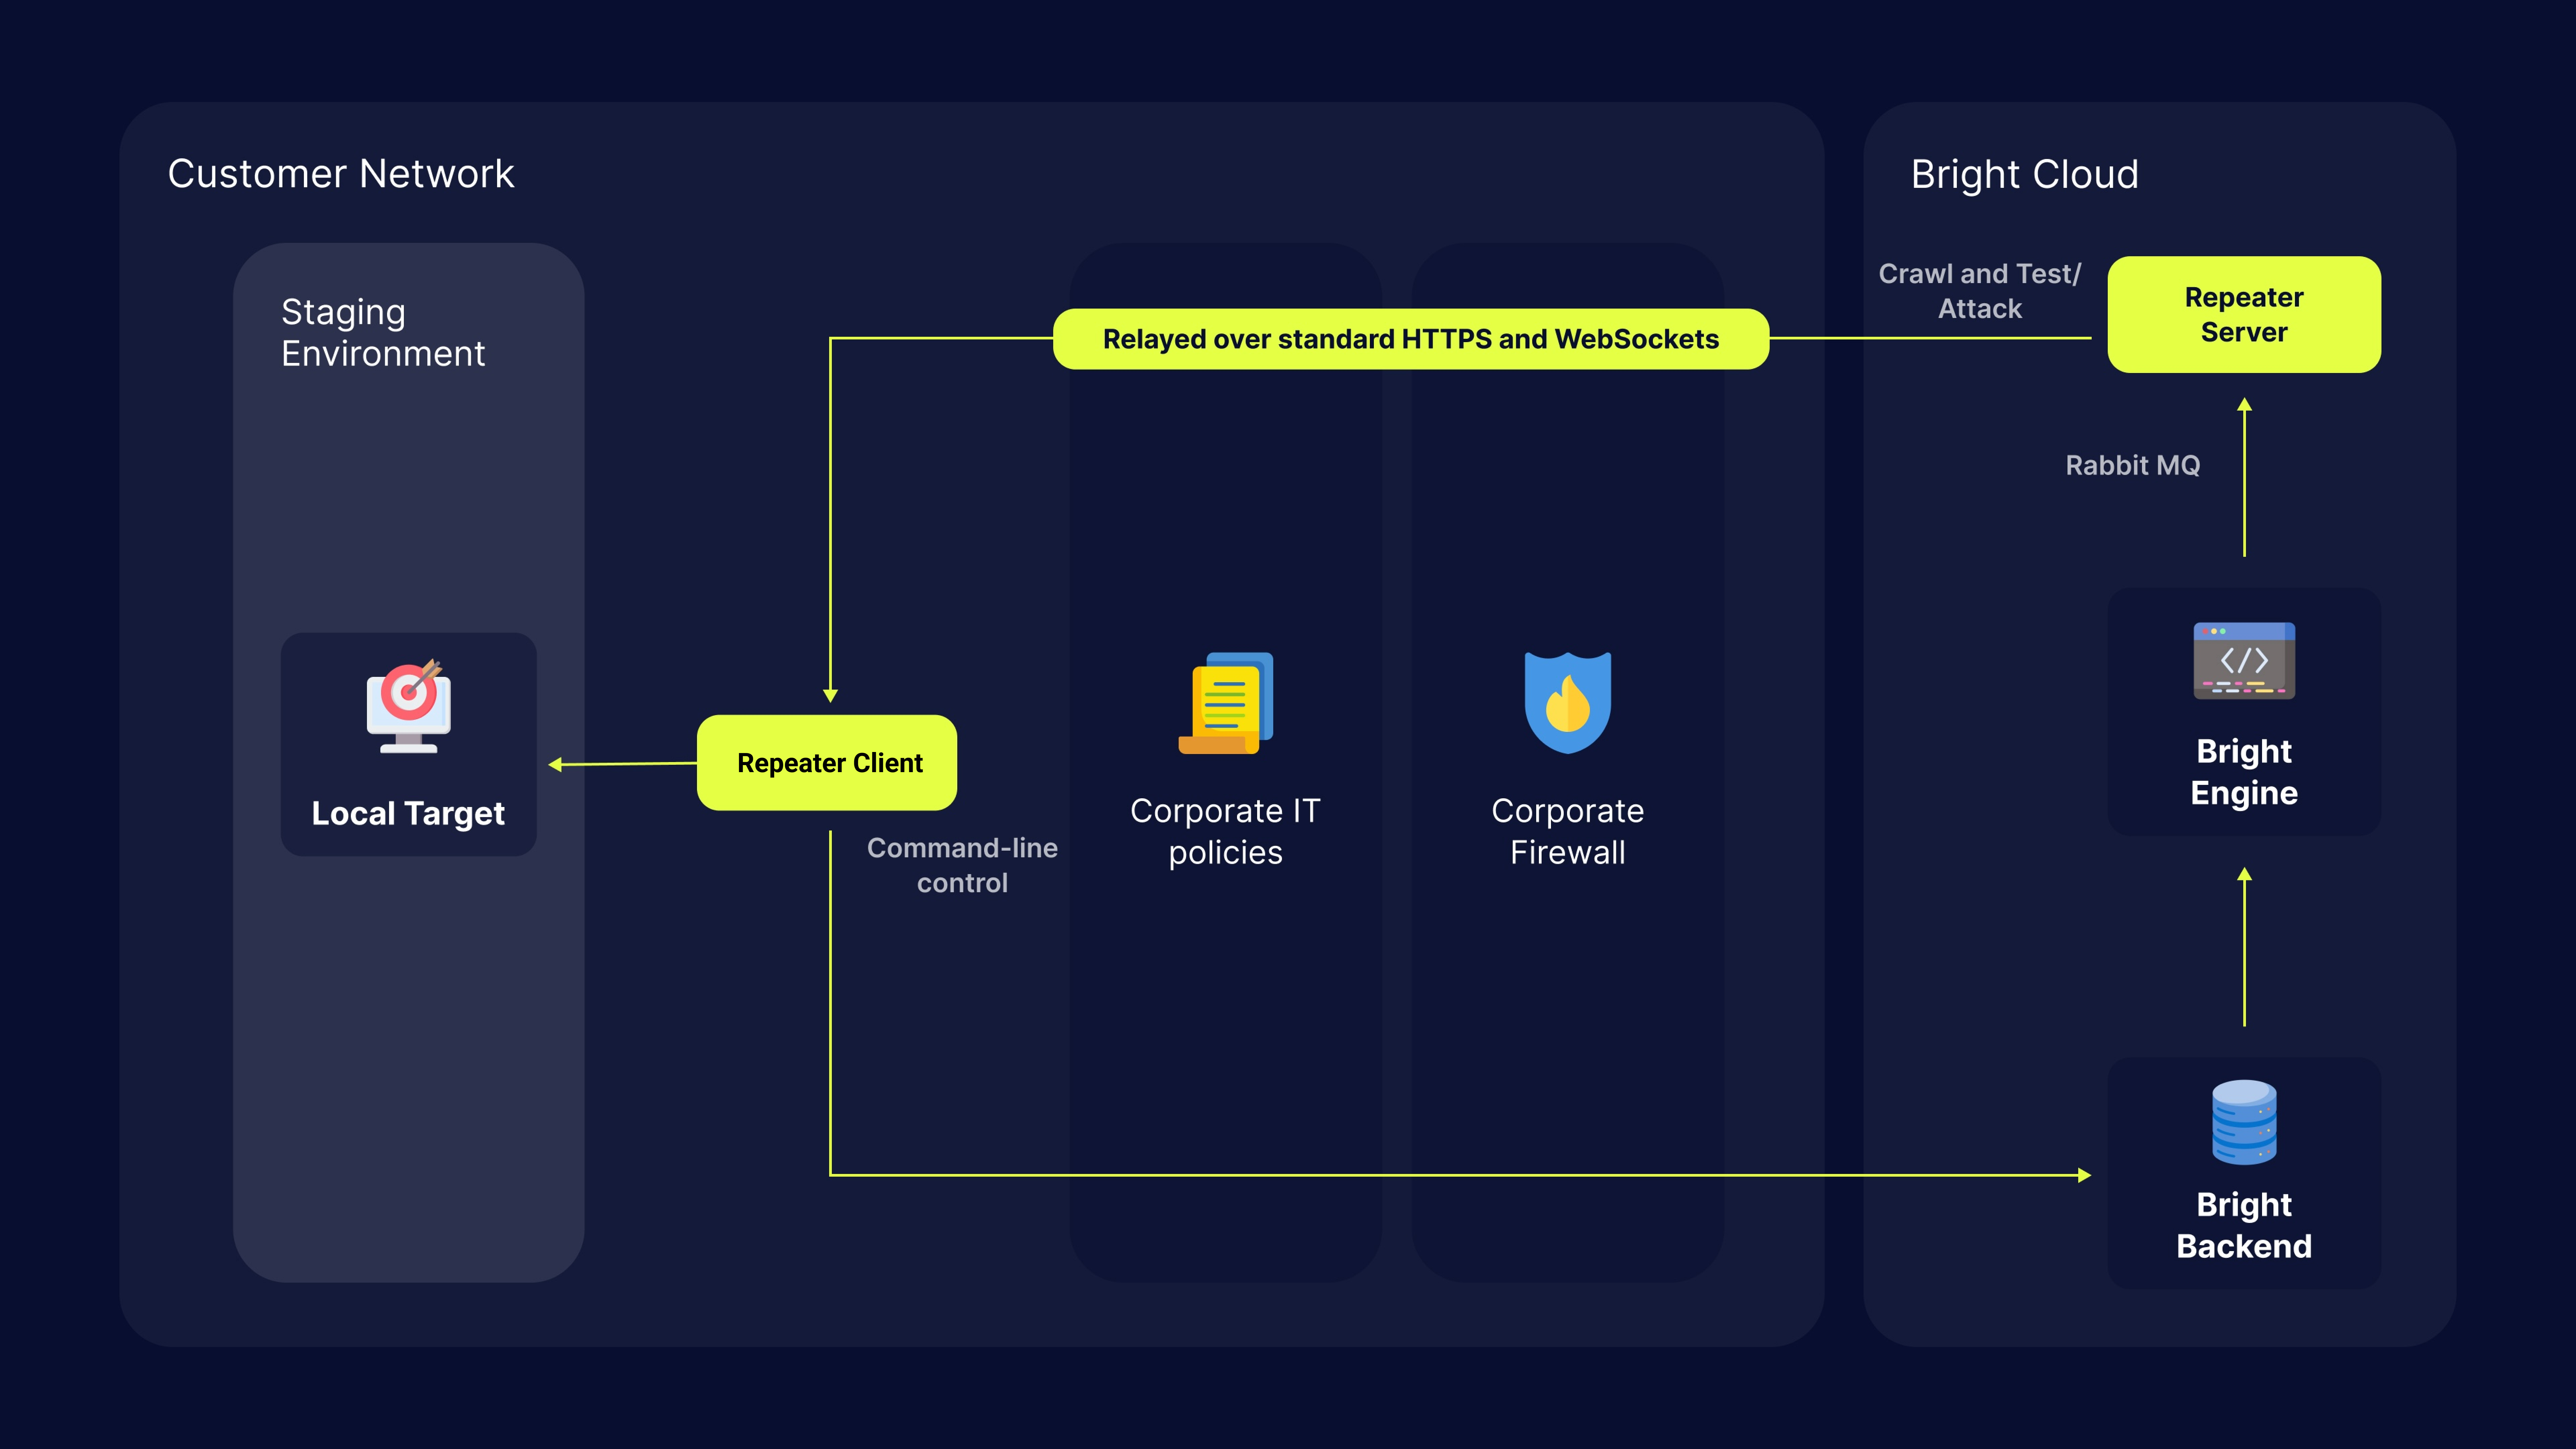
The Bright Repeater is an open source scan proxy which securely connects to the Bright cloud engines and mediates all traffic from the cloud to any local target.
Deployment
To run a discovery or a scan in the Repeater mode so that all requests are sent from the Bright cloud through a Repeater to the local target, you first need to install the Bright CLI on your machine. Using a special Bright CLI command, you will be able to connect a Repeater to your local network.

Follow these instructions to deploy Bright CLI:
- Minimal requirements
- Install as a standalone app
- Install as Docker
- Install as NPM / Yarn
- Install as Windows app (MSI)
You will also need to follow the Repeater Prerequisites.
Updated about 2 months ago