Creating a Legacy Scan
Note:Bright provides a new way of scanning using a separate Discovery process, which is much faster and reliable. To learn more about it, visit the Modern scans article.
To run a security scan against a target, follow these steps:
-
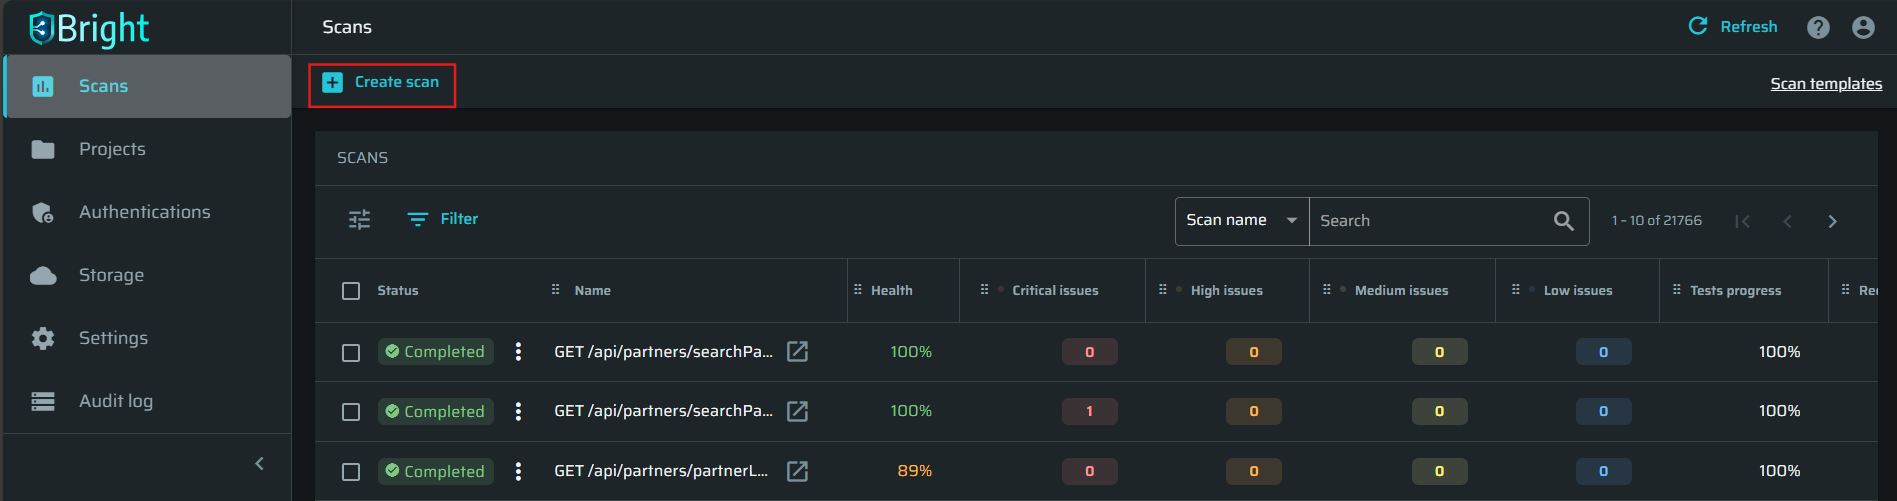
In the left pane, select the Scans option to see the list of available scans.
-
In the Scans pane, click Create scan to create a new scan.
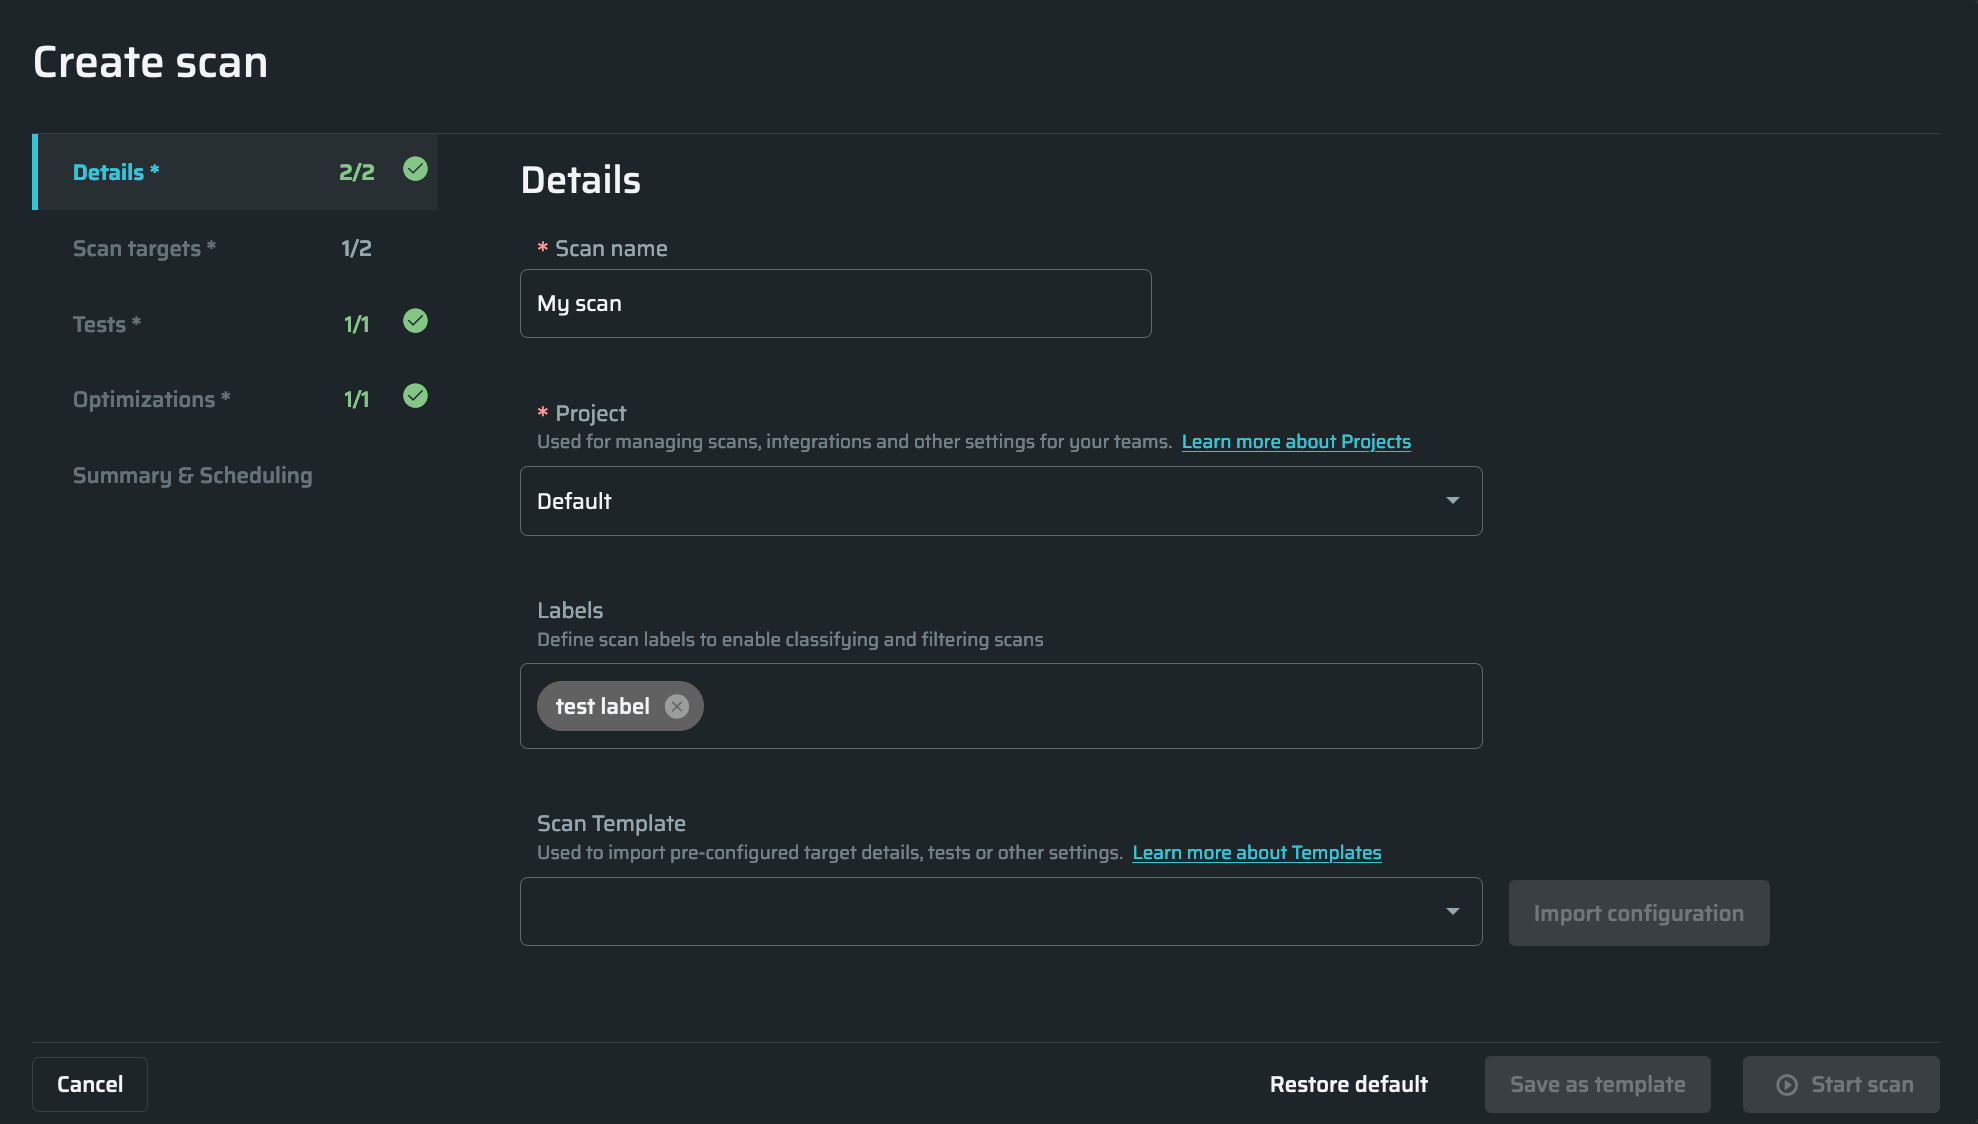
Specifying scan details
In the Details tab, do the following:
-
In the Scan name field, enter any free-text name for the scan.
-
From the Project dropdown list, select the Bright project you want to use for the scan.
Note:You can start a scan only with a project selected. If you do not have any projects in Bright, select the Default one.
-
Bright allows users to mark any scans to simplify work with them. Labels can be added in this field, separated by commas. All the added labels will be displayed on the Scans page and on the Configuration tab in the Scan info page. If there is an existing label from previous scans, start to type it, and then choose from the autocompleted form below.
Semicolons and commas are used to separate labels, so It is not allowed to use them in label names. For one scan it is possible to add up to 15 labels, each of them can be up to 255 symbols in length. The ability to add or/and remove labels is limited toscans,scan:run, andscan:managescopes.Note:It is allowed to change the scan labels after the scan creation on a Scan editing page
-
(Optional). Bright provides a list of preconfigured scan templates to help users assess their vulnerabilities quicker and more efficiently. The list is available in the Scan Template. Click Import configuration to apply changes. You also can create a template to apply frequently used scan configurations. For further details, see Managing Scan Templates.
Note:Please note that templates may have locked settings which are unavailable for editing when the scan is being created. To update such settings, you should have access to the template. To learn more about templates, see this article.
Defining scan targets
- In the Scan targets tab, do the following:
- Choose the scan targets type. Scan targets may be the following types:
Publicly accessible from Bright's cloud - Scanning directly from the cloud is allowed for authorized targets only. Learn more about Target Authorization.
On a private network or not authorized - Scanning via CLI in Repeater Mode, provides secure access to local networks or unauthorized targets.
Choose repeater (this option is available only if the "On a private network or not authorized" type is selected) - From the dropdown menu if there are existing ones. To know how to create a new repeater, Learn more about Repeater Mode
(Optional) Authentication - Select authentication type. Leran more about Authentications.
Discover Entrypoints
Select a method to discover Entrypoints while scanning. To learn more, refer to the relevant section in the discovery guide.
Entrypoint discovery options
Skip Entrypoints, if a response is longer than - Bright allows configuring the limit to Entrypoint response duration, which is 1000 ms by default. If the response takes longer than the predefined time (for example, due to some target configuration changes), Bright will skip that entrypoint. You can change the limit, but this will affect the scan speed. Learn more about Entrypoints.
(Optional).The Skip Entrypoints by patterns section contains an expression that excludes the most common static files like images, audio, video, and other files that don't contain any vulnerabilities (including fonts). If you don't want these files to be excluded, you can clear the URL regex pattern field.
In this pane, you may set additional parameters to be ignored during scanning.
- Below the Method field, click + Add exclusion . Empty fields will appear.
- From the Method dropdown menu, select the method you want to be excluded from scanning.
- In the URL regex pattern field, enter the parameters for the selected method.
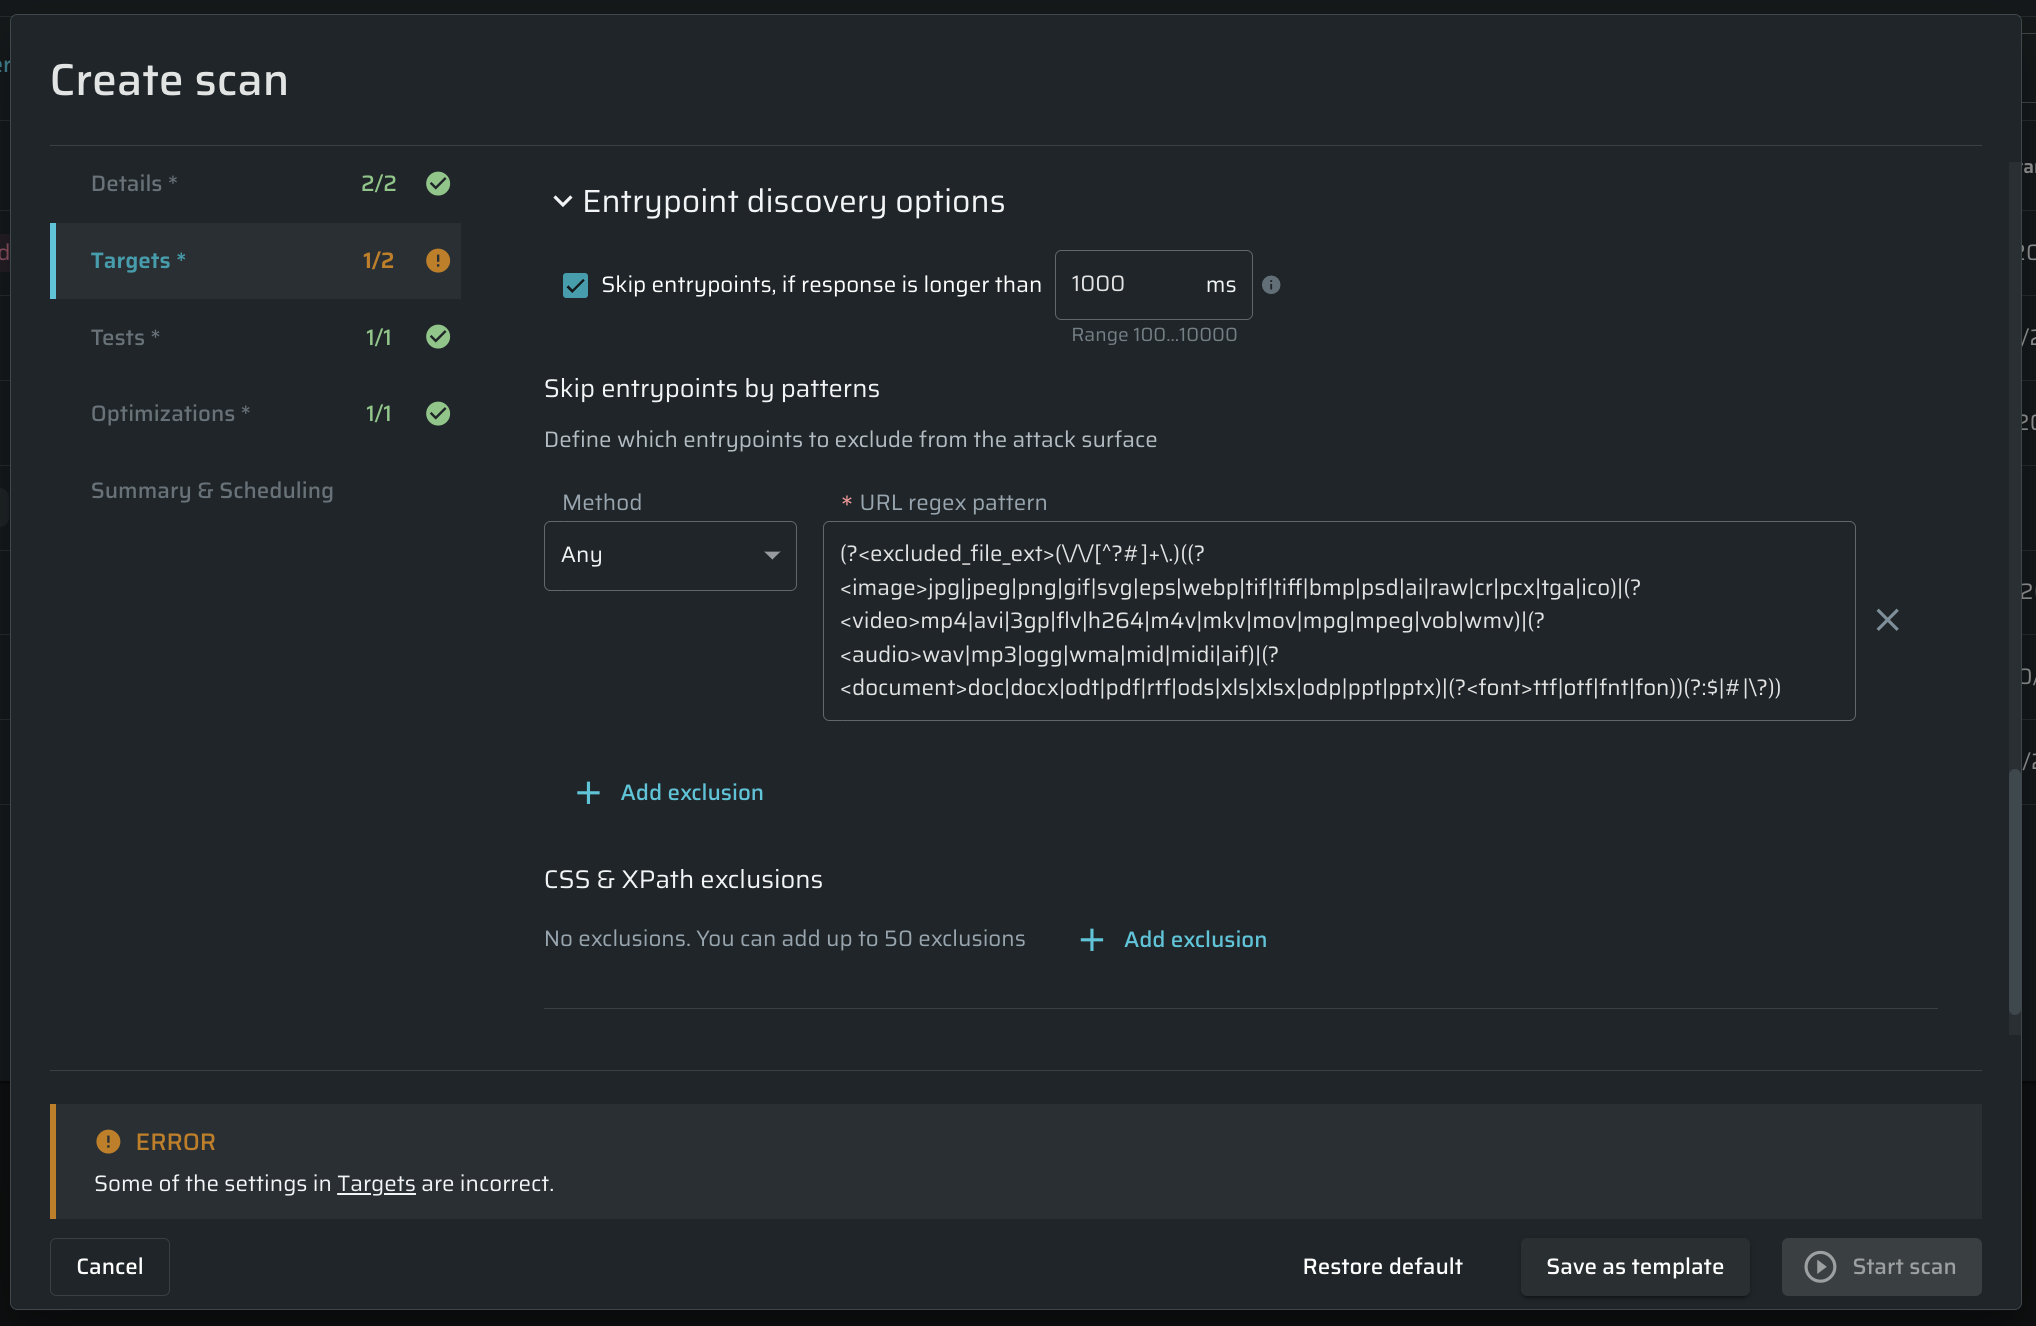
For example, if you don't want the POST method to go over entry points that contain vendor in the URL, from the Method dropdown menu, select POST and then in the URL regex pattern field, enter vendor. Any URL which contains vendor will be excluded from scanning.
CSS & XPath exclusions - CSS selectors & XPath for links to exclude.
Target specific settings
In the Additional Headers section, define any custom headers to be appended to or replaced in each request. If you need to add authentication headers, consider using Header Authentication.
TipIf you need to add several Additional headers, you can copy-paste them in a single Name field. The headers will be distributed among the fields automatically.
Custom DNS records
Custom DNS Records are used to access local, non-public targets. Use it when you want to replace localhost with a specific IP address.
Also, it can be helpful to bypass CDN and proxy layers when requesting content from the site by sending those web requests directly to a specific IP address without using the site's public DNS records.
Click Add DNS record button to add a Host/IP pair. You can add multiple records if needed.
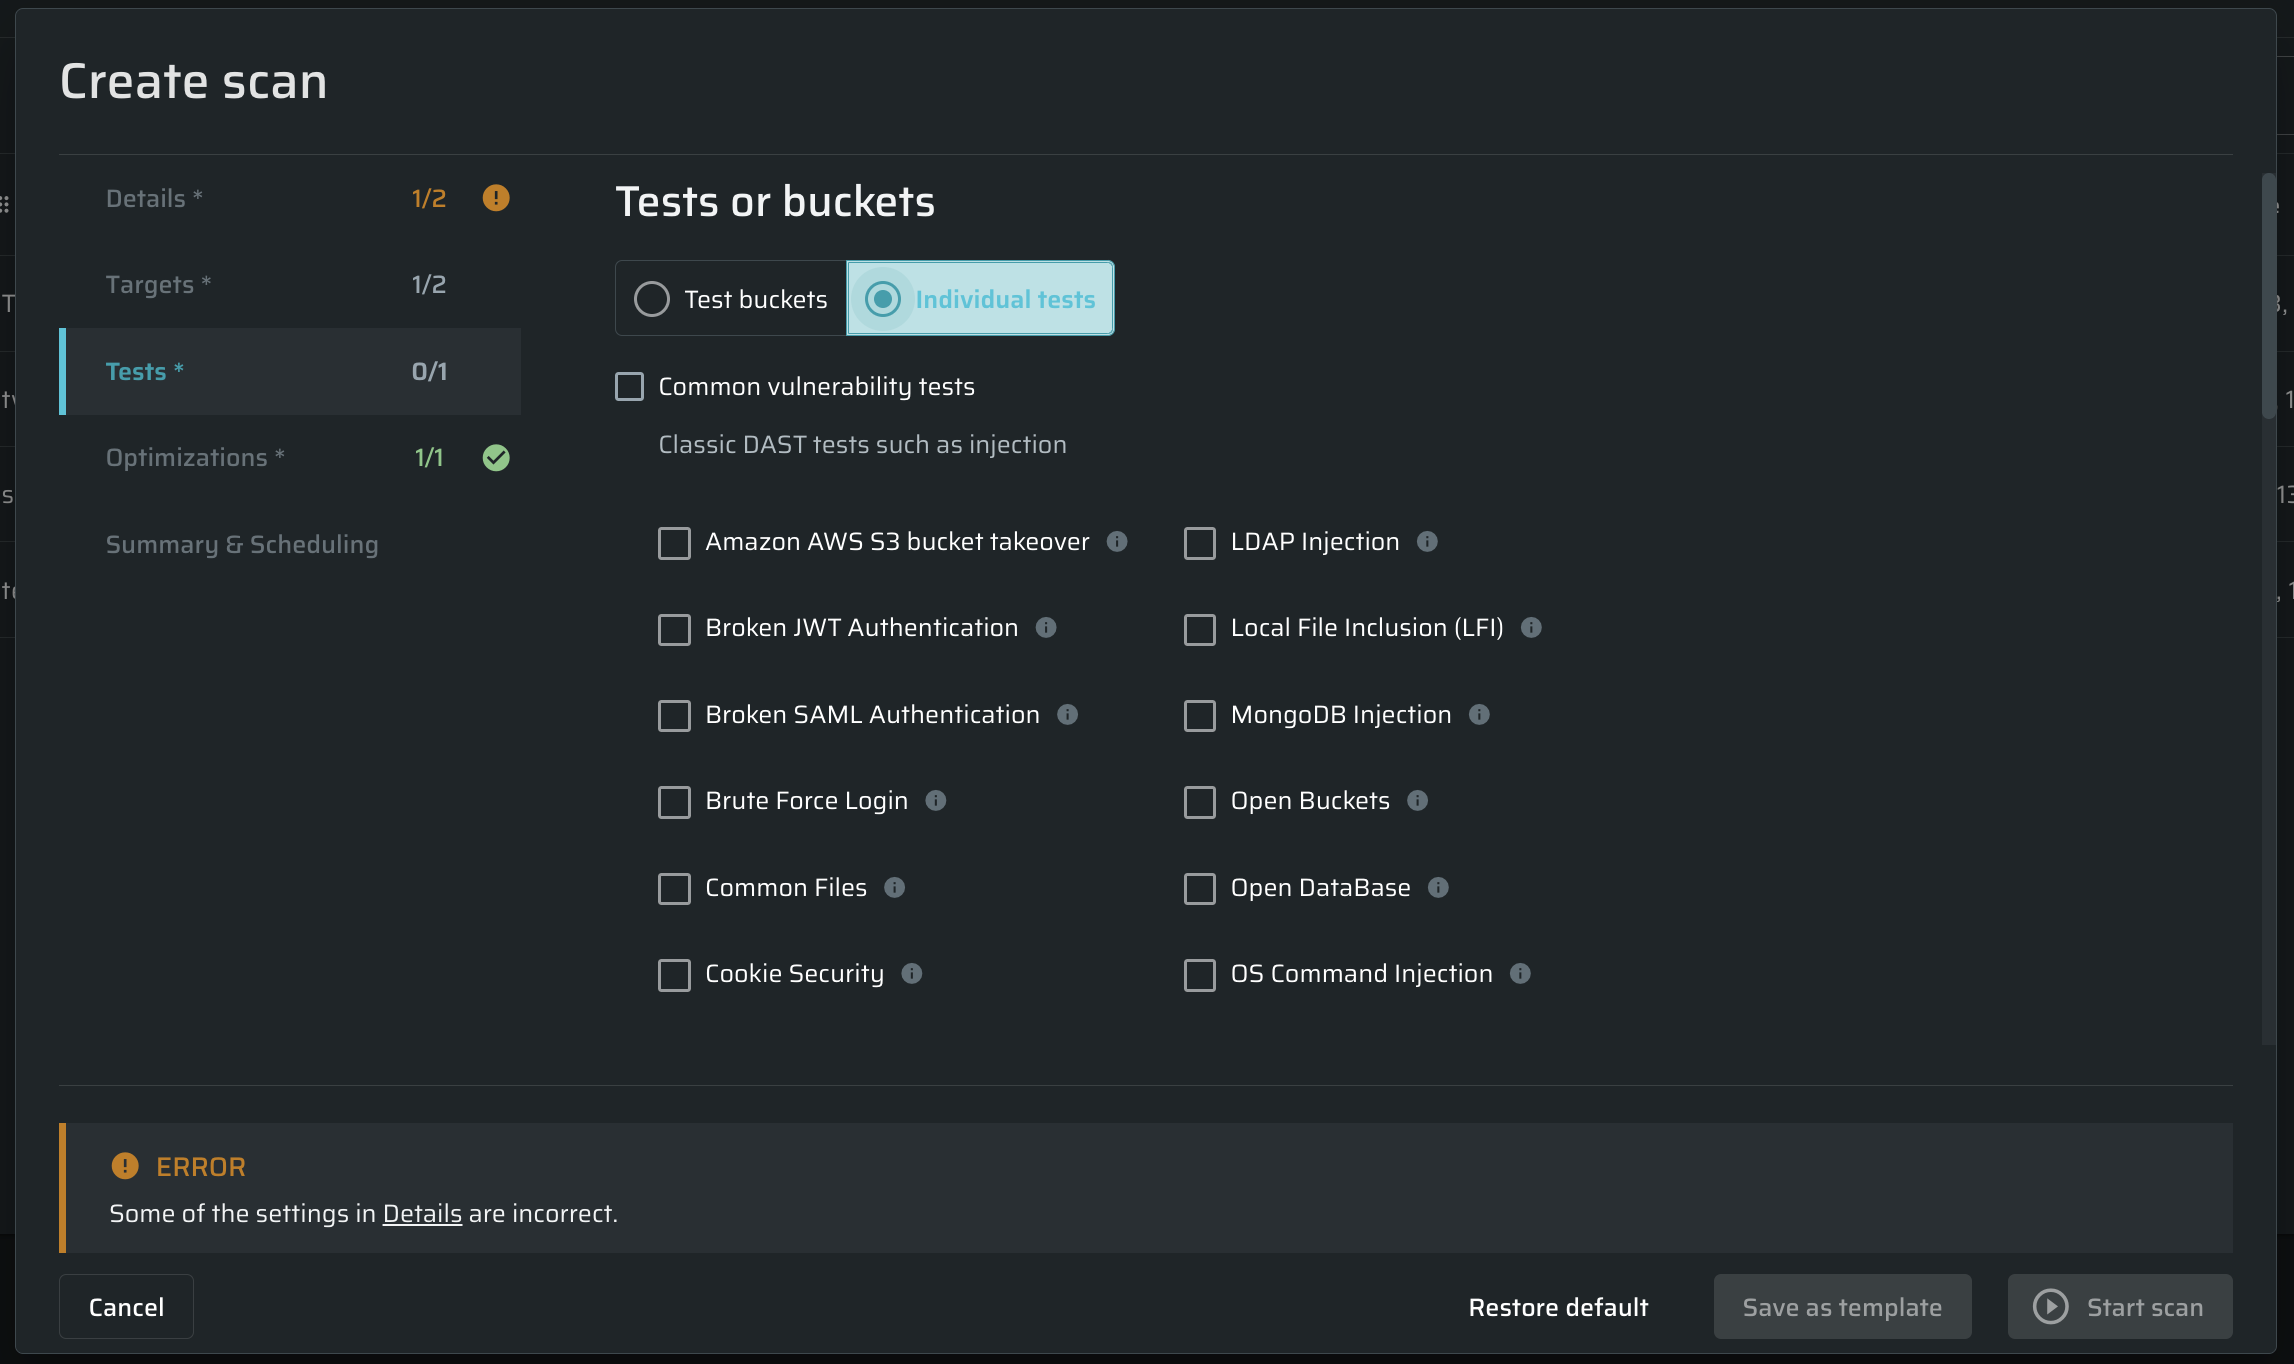
Selecting test for a scan
In the Tests tab, do the following:
-
Use the Test buckets section, to select the appropriate tests from the pre-configured buckets.
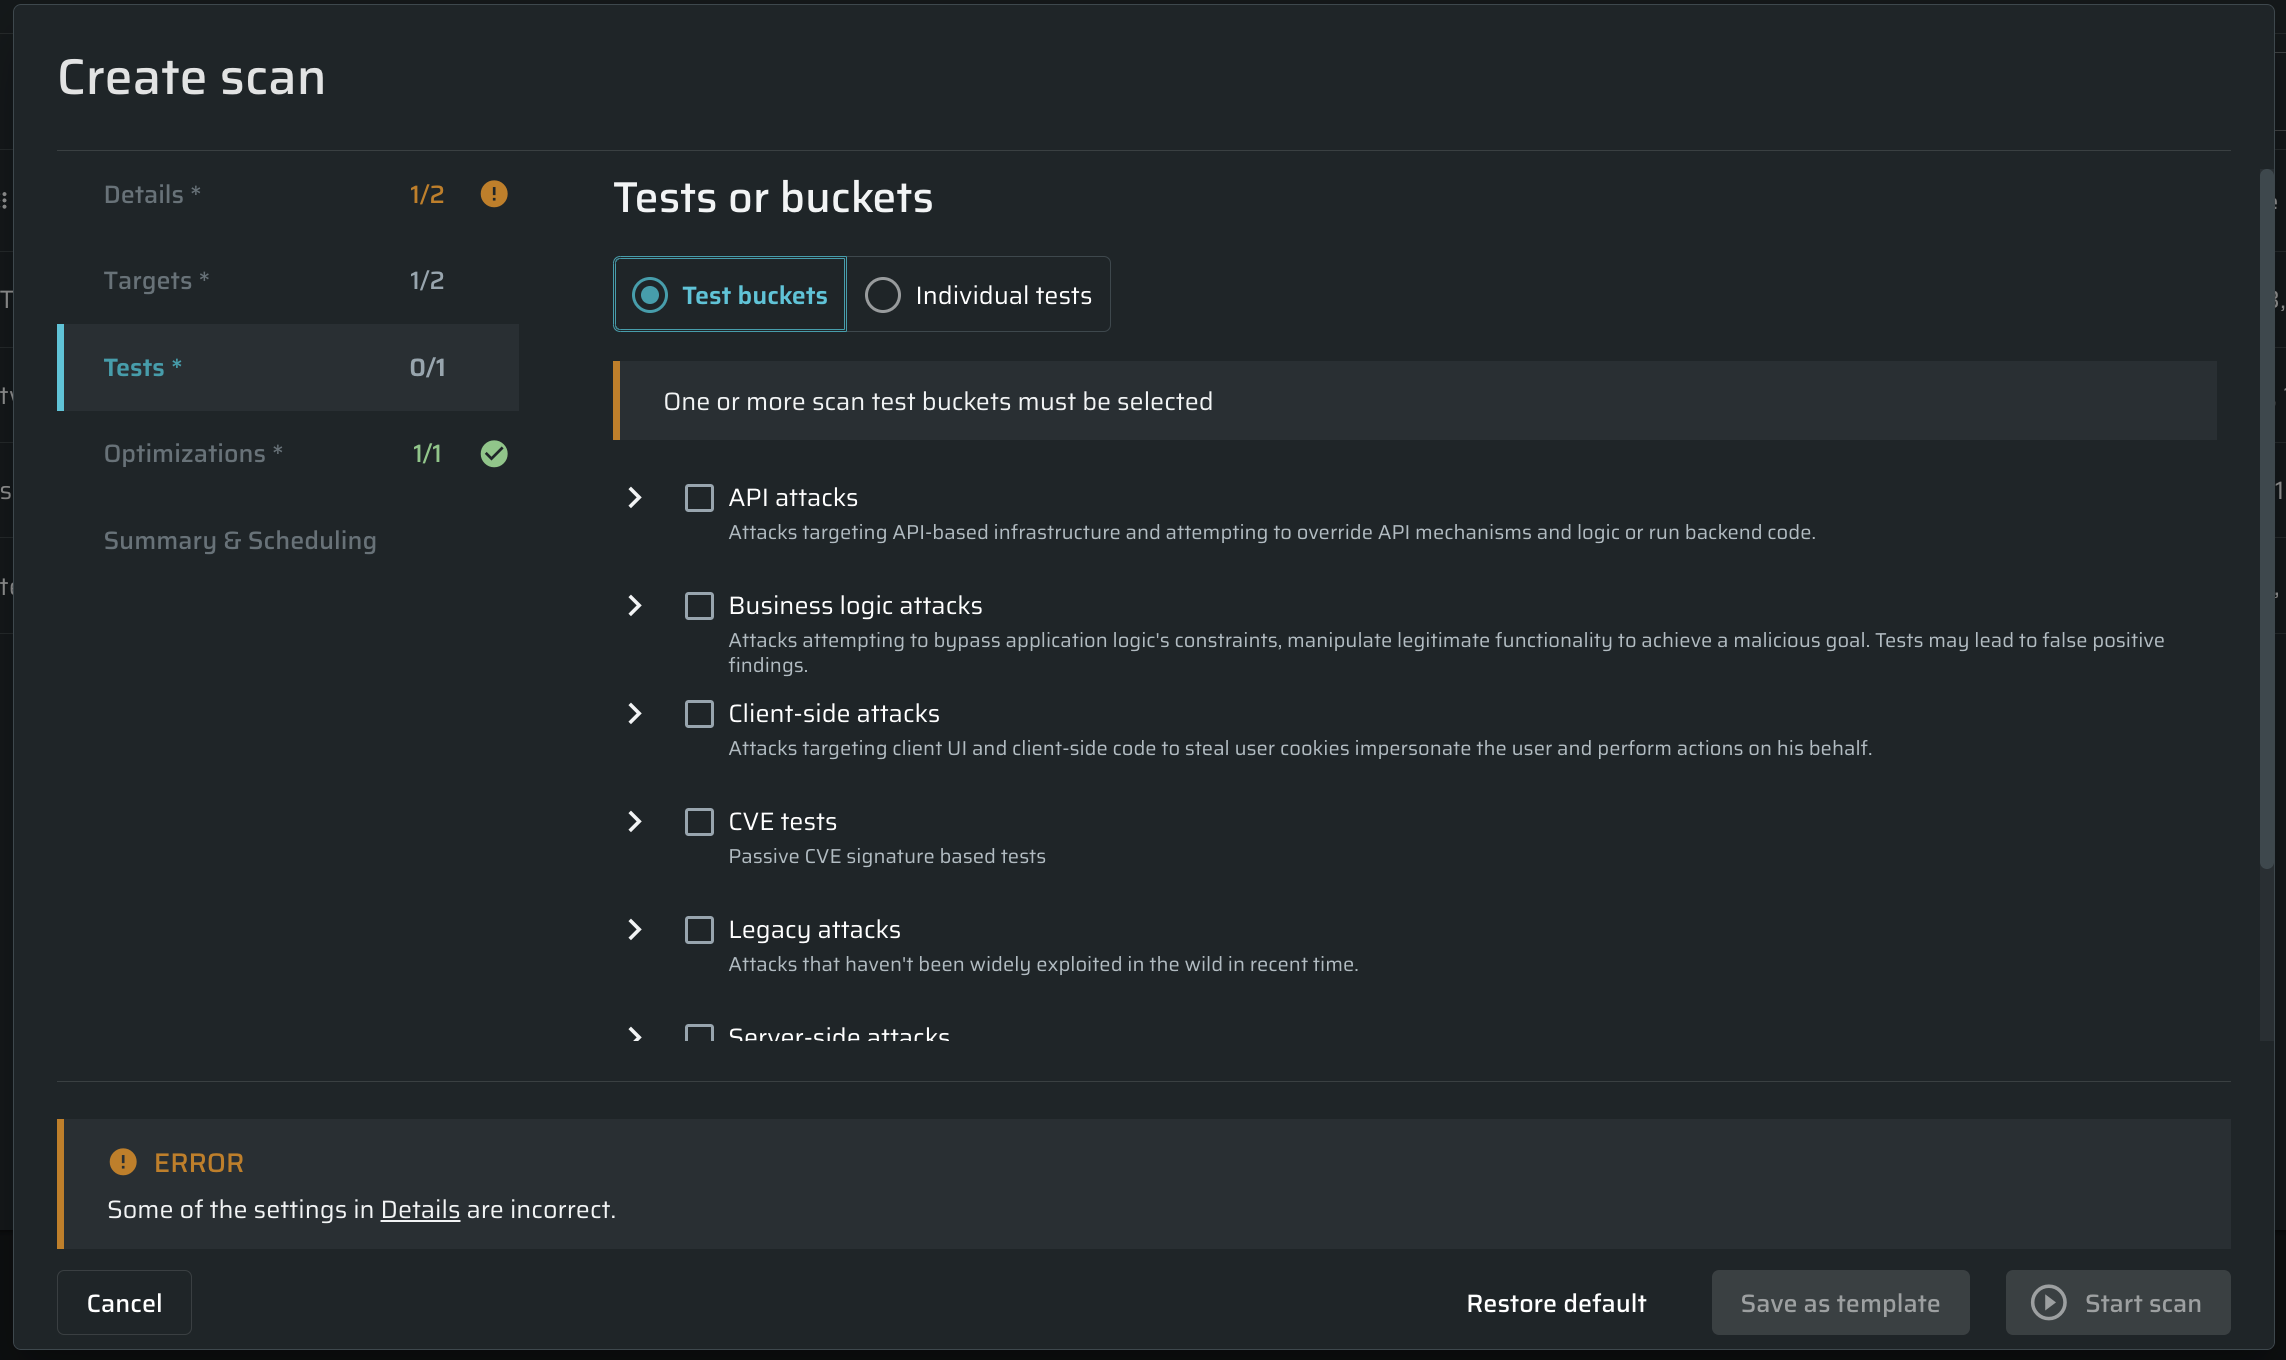
Learn more about the test buckets. -
If you want to select tests manually, open the Individual tests section, and choose the tests to be performed during the scan by checking their checkboxes.
 Note
NoteFor details on vulnerabilities that can be detected by Bright, see Vulnerabilities Index.
Configuring optimizations settings
NoteCurrently our scans are capped at 2000 Entrypoints.
Scan performance and speed
Concurrent requests - Specify the maximum concurrent requests allowed to be sent by the scan in order to control the load on your server. The default value is 10 requests.
Request rate limit - Specify how many requests per seconds will be sent or let us automatically calculate it based on the target's responses.

Test optimizations
Smart scanning
Use smart scanning for speed optimizations - Specify whether to use automatic smart decisions (such as parameter skipping, detection phases, and so on) in order to minimize scan time. When this option is turned off, all tests are run on all the parameters, which increases coverage at the expense of scan time.
- For specific tests, the Bright app scan only relevant type parameters, for example for a test that needs to manipulate "URL", don't test it as an "Integer".
- Only the relevant headers that have a high chance of having vulnerabilities (User-Agent, Referer) will be tested, if "Headers scan location" is chosen, other headers will be skipped.
- For Operating System Command Injection vulnerability we will choose only the payloads that are relevant to the detected operating system, without it all the payloads will be tested.
- For the SSRF vulnerability, only the payloads that are relevant to the detected operating system will be chosen, without it, all the payloads will be tested.
Static parameters
Skip static parameters - Specify whether to skip static parameters to minimize scan time.
Static parameters are the parts of the request that does not effect on the target system's behavior when changed. Skipping static parameters greatly increases the scan speed, without compromising the scan coverage. Static parameters can include: style parameters like 'javascript.version=', analytics-related data, and other kinds of metadata.
The Bright app can define which part of a request is static and then skip it while scanning. To make this happen there is an advanced algorithm that is able to check all the requests parameters before the scan starts.
Skip parameters
Skip parameters by patterns - You can define which parameters you want to skip in order to improve scan time. You can skip parameters that will cause performance issues.
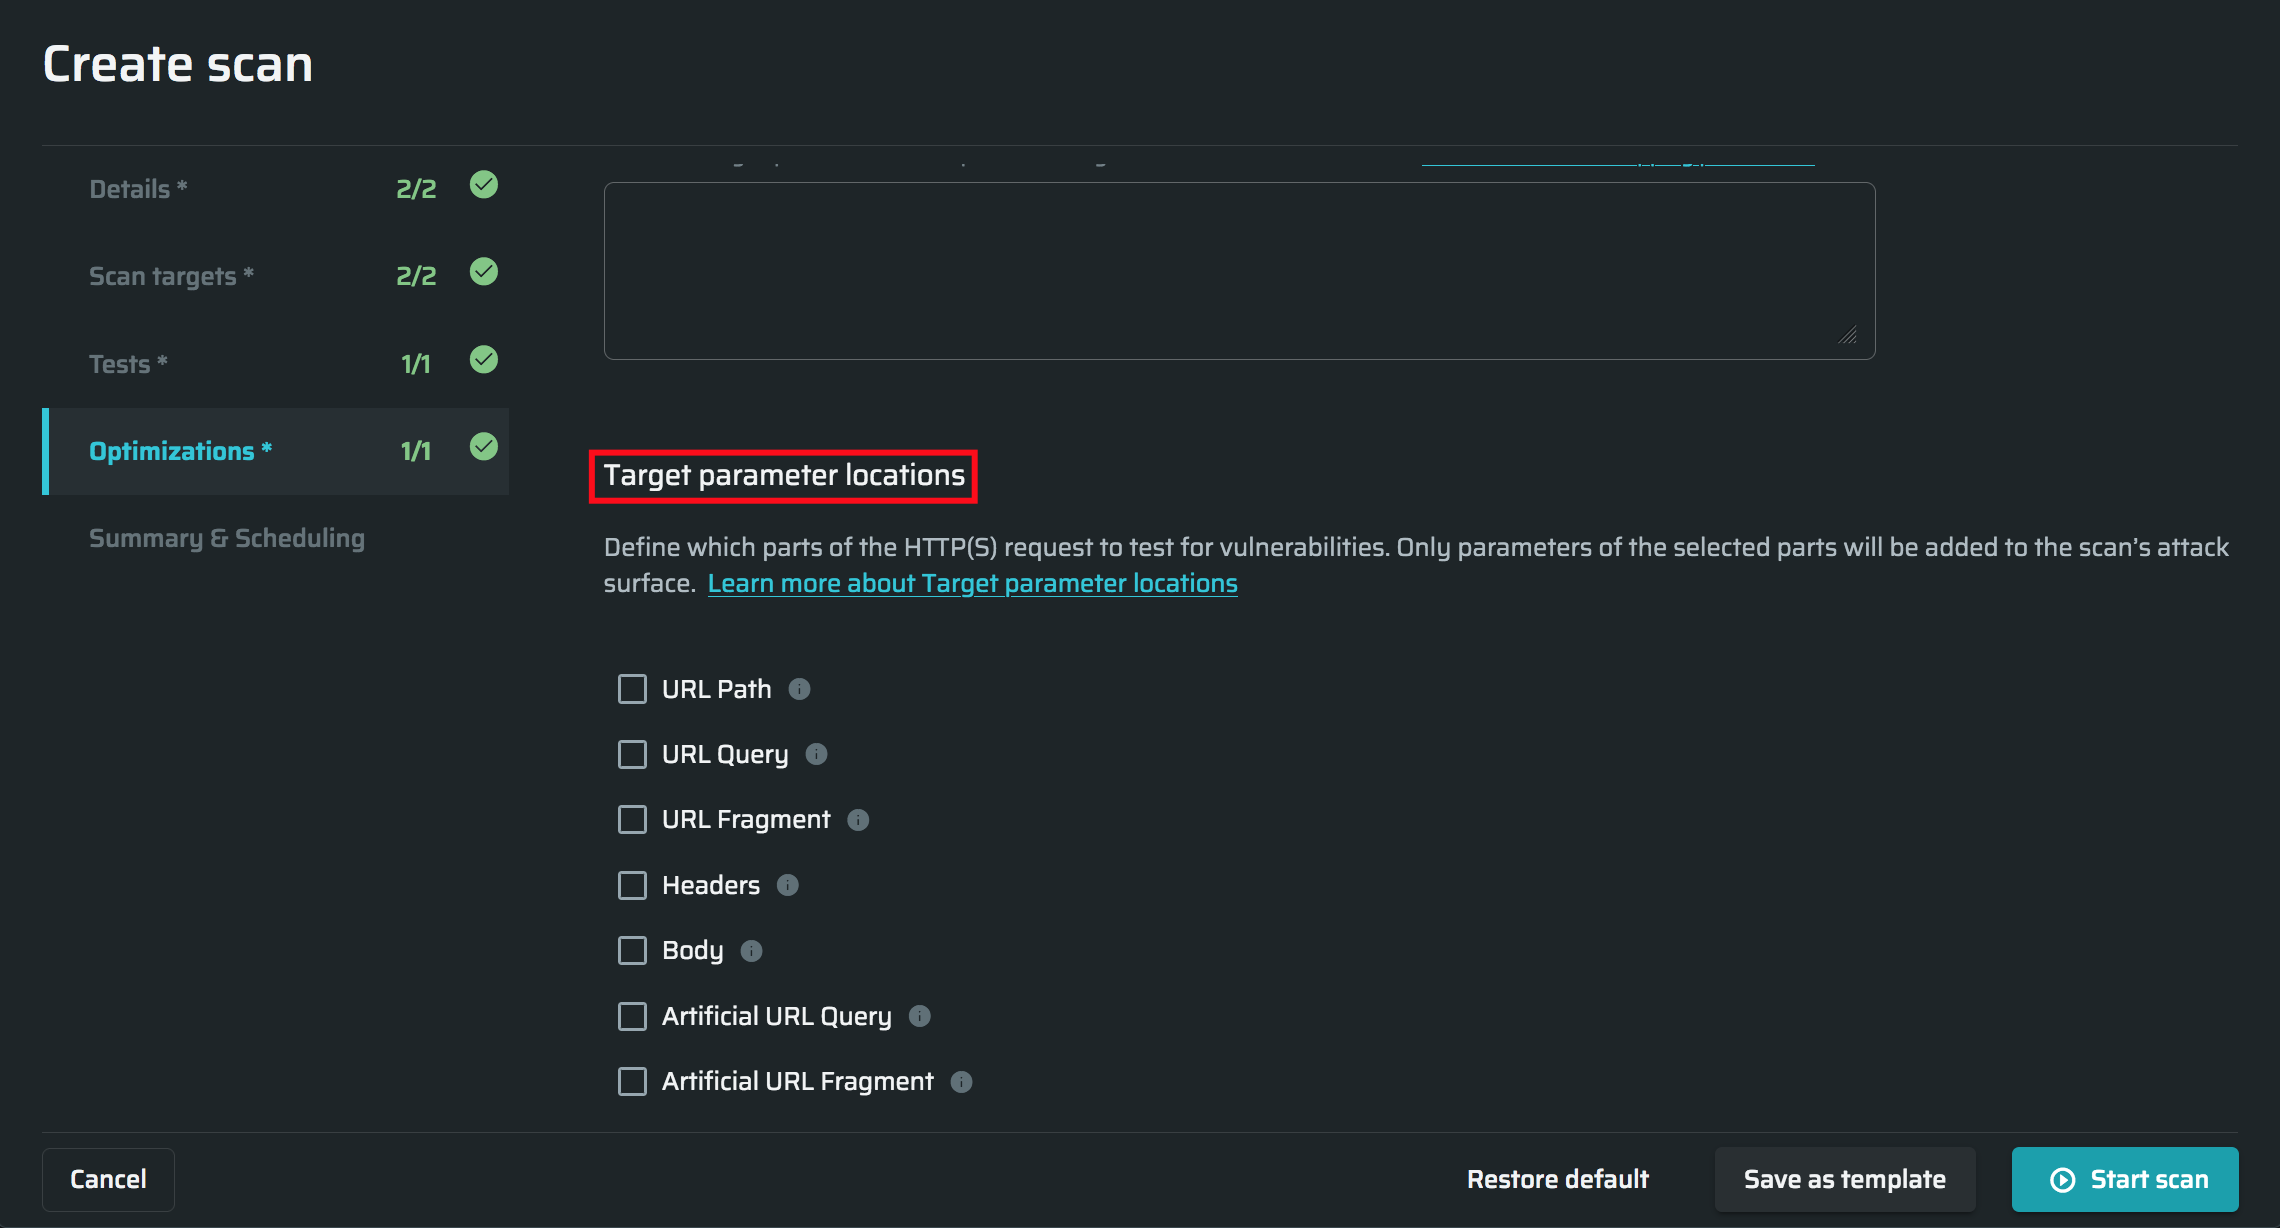
Parameter locations
Target parameter locations - Settings are used to manually point the scanner which parts of the request (address) to attack.
By default settings are set for optimal results: URL Query, URL Fragment, and Body are turned on.
In most cases, this is enough to provide a high-quality scan. Select all available options if you want the deepest scan and don't care about the long scan time. In this case, the scanner will check all parts of the request (address), which will significantly increase the scanning time. In some cases, this can improve scan results. The available locations are:
- URL Path – The main part of the URL, after the hostname and before the query parameters is used to identify the specific resource in the host that the client wants to access. In some cases (such as API endpoints), it may contain dynamic parameters (for example, object id). Enabling parsing and testing of URL path will significantly increase the attack surface, as well as the overall scan time.
- URL Query – The query parameters string (after the question mark (?) and, if relevant, before the hash sign (#)) is used to provide additional information from the client to the request, such as data to search for in the target resource.
- URL Fragment – The last part of a URL, after the hash sign (#), is used as an internal page reference or by DOM elements such as JavaScript, only used on the client side.
- Headers – Request Headers are used to provide additional information from the client to the server in each HTTP request, such as cookies, information formats, security settings, and so on. Enabling parsing and testing of all possible headers will significantly increase the attack surface, as well as the overall scan time.
Optimization is possible by specifying the custom headers manually. To enable the selection of custom headers, you need to select both the Headers and Smart scan checkboxes. This will open an additional field where you can enter a comma-separated list of custom headers that should be parsed and tested for injections within the scan scope. - Body – A Request Body can contain anything. In many cases, it contains data bytes transmitted from the client to the server, such as files.
- Artificial URL Query - A URL Query added artificially to check if it can be manipulated for attacks.
- Artificial URL Fragment - A URL Fragment added artificially to check if it can be manipulated for attacks.
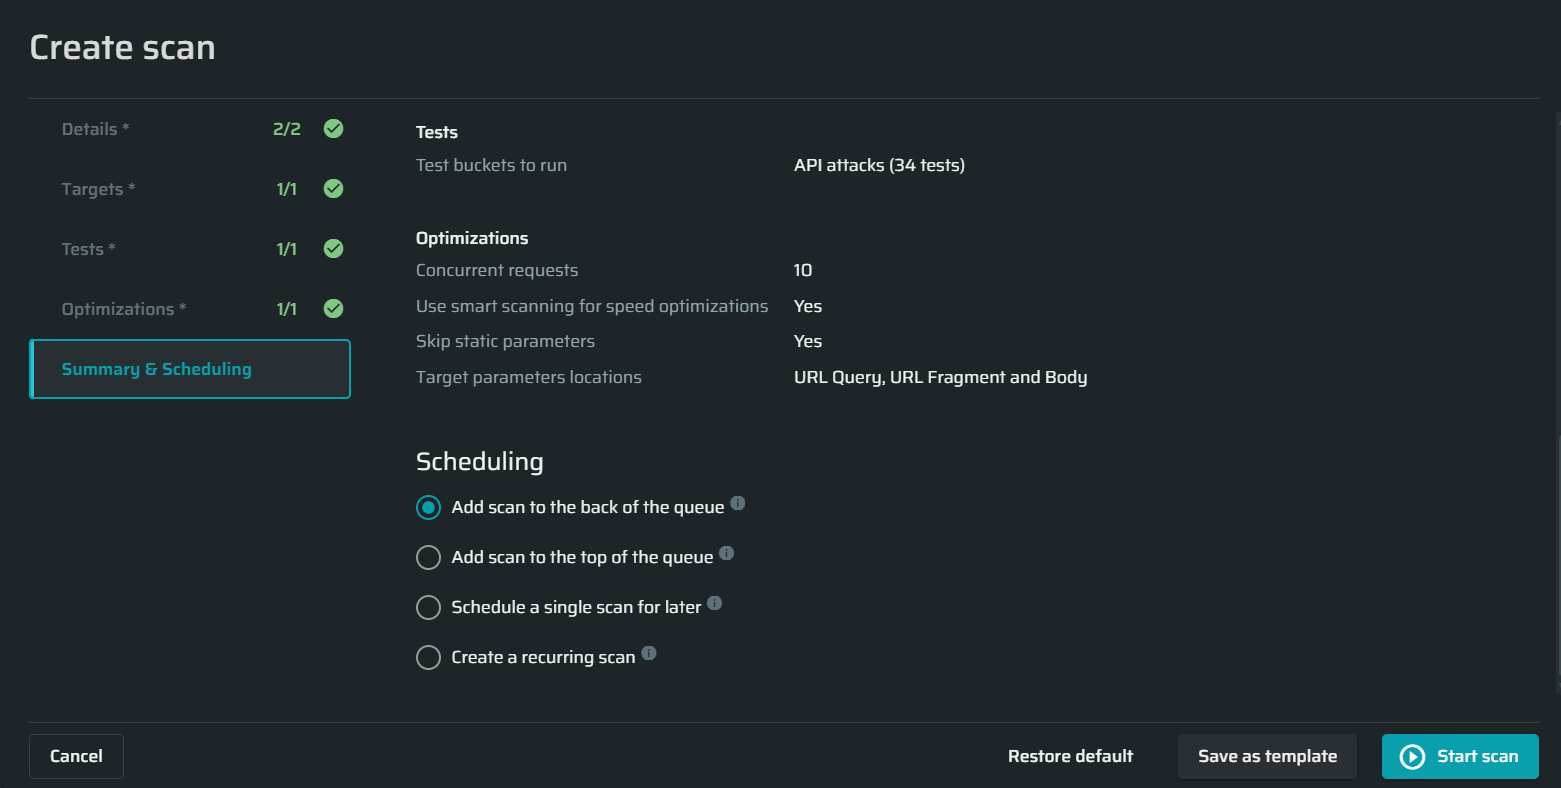
Summary and scheduling
Add scan to the back of the queue - Choose this option to add the scan to the back of the queue.
Add scan to the top of the queue - Choose this option to add the scan to the top of the queue.
Schedule a single scan for later - Select a date and time to schedule the scan to run once automatically.
Create a recurrent scan – Define the frequency and schedule of the scan to run repeatedly and automatically.
Starting a scan
Once you complete the setup, you can run the scan immediately or save it as a template. The template will be saved to the templates list in the Templates tab. You can select any template when creating a new scan.
- Click Save as Template to save the scan template.
- Click Start Scan to run the preconfigured scan immediately.
NoteIf the maximum number of scans that can be run simultaneously is exceeded, the scan is placed in the queue. The concurrent scans limitation can be set either for the entire organization or for this particular project in the project settings. The new scan will start as soon as you manually stop another running scan or when the current scan is completed.
You can also use the Restore Default button to reset the custom settings.
Updated 12 months ago