GitHub Actions
In this section, you will learn how to integrate the GitHub actions into your CI pipeline to trigger a Bright scan on every new commit automatically.
A full working example of a GitHub Actions pipeline with Bright can be found here.
Bright provides several actions on the GitHub marketplace. You can configure a .yaml file with the available actions and add the file to your pipeline.
More information about the Bright GitHub Actions can be found here:
You can also integrate the scan results into the “Code Scanning Alerts”. This will significantly facilitate the management of detected issues.
Although it is possible to configure a CI pipeline with our REST API, it is recommended to use our Bright CLI for an easier, more robust configuration of your pipeline.
Integration configuration guide
Creating a Bright API Token
Create either a User Key, a Project Key or an Organization Key.
Remember to copy the key and securely save it as it will only be displayed once.
Creating a GitHub API Token
-
Sign in to your GitHub account.
-
On the top right, click on your account's logo → click Settings → Developer settings
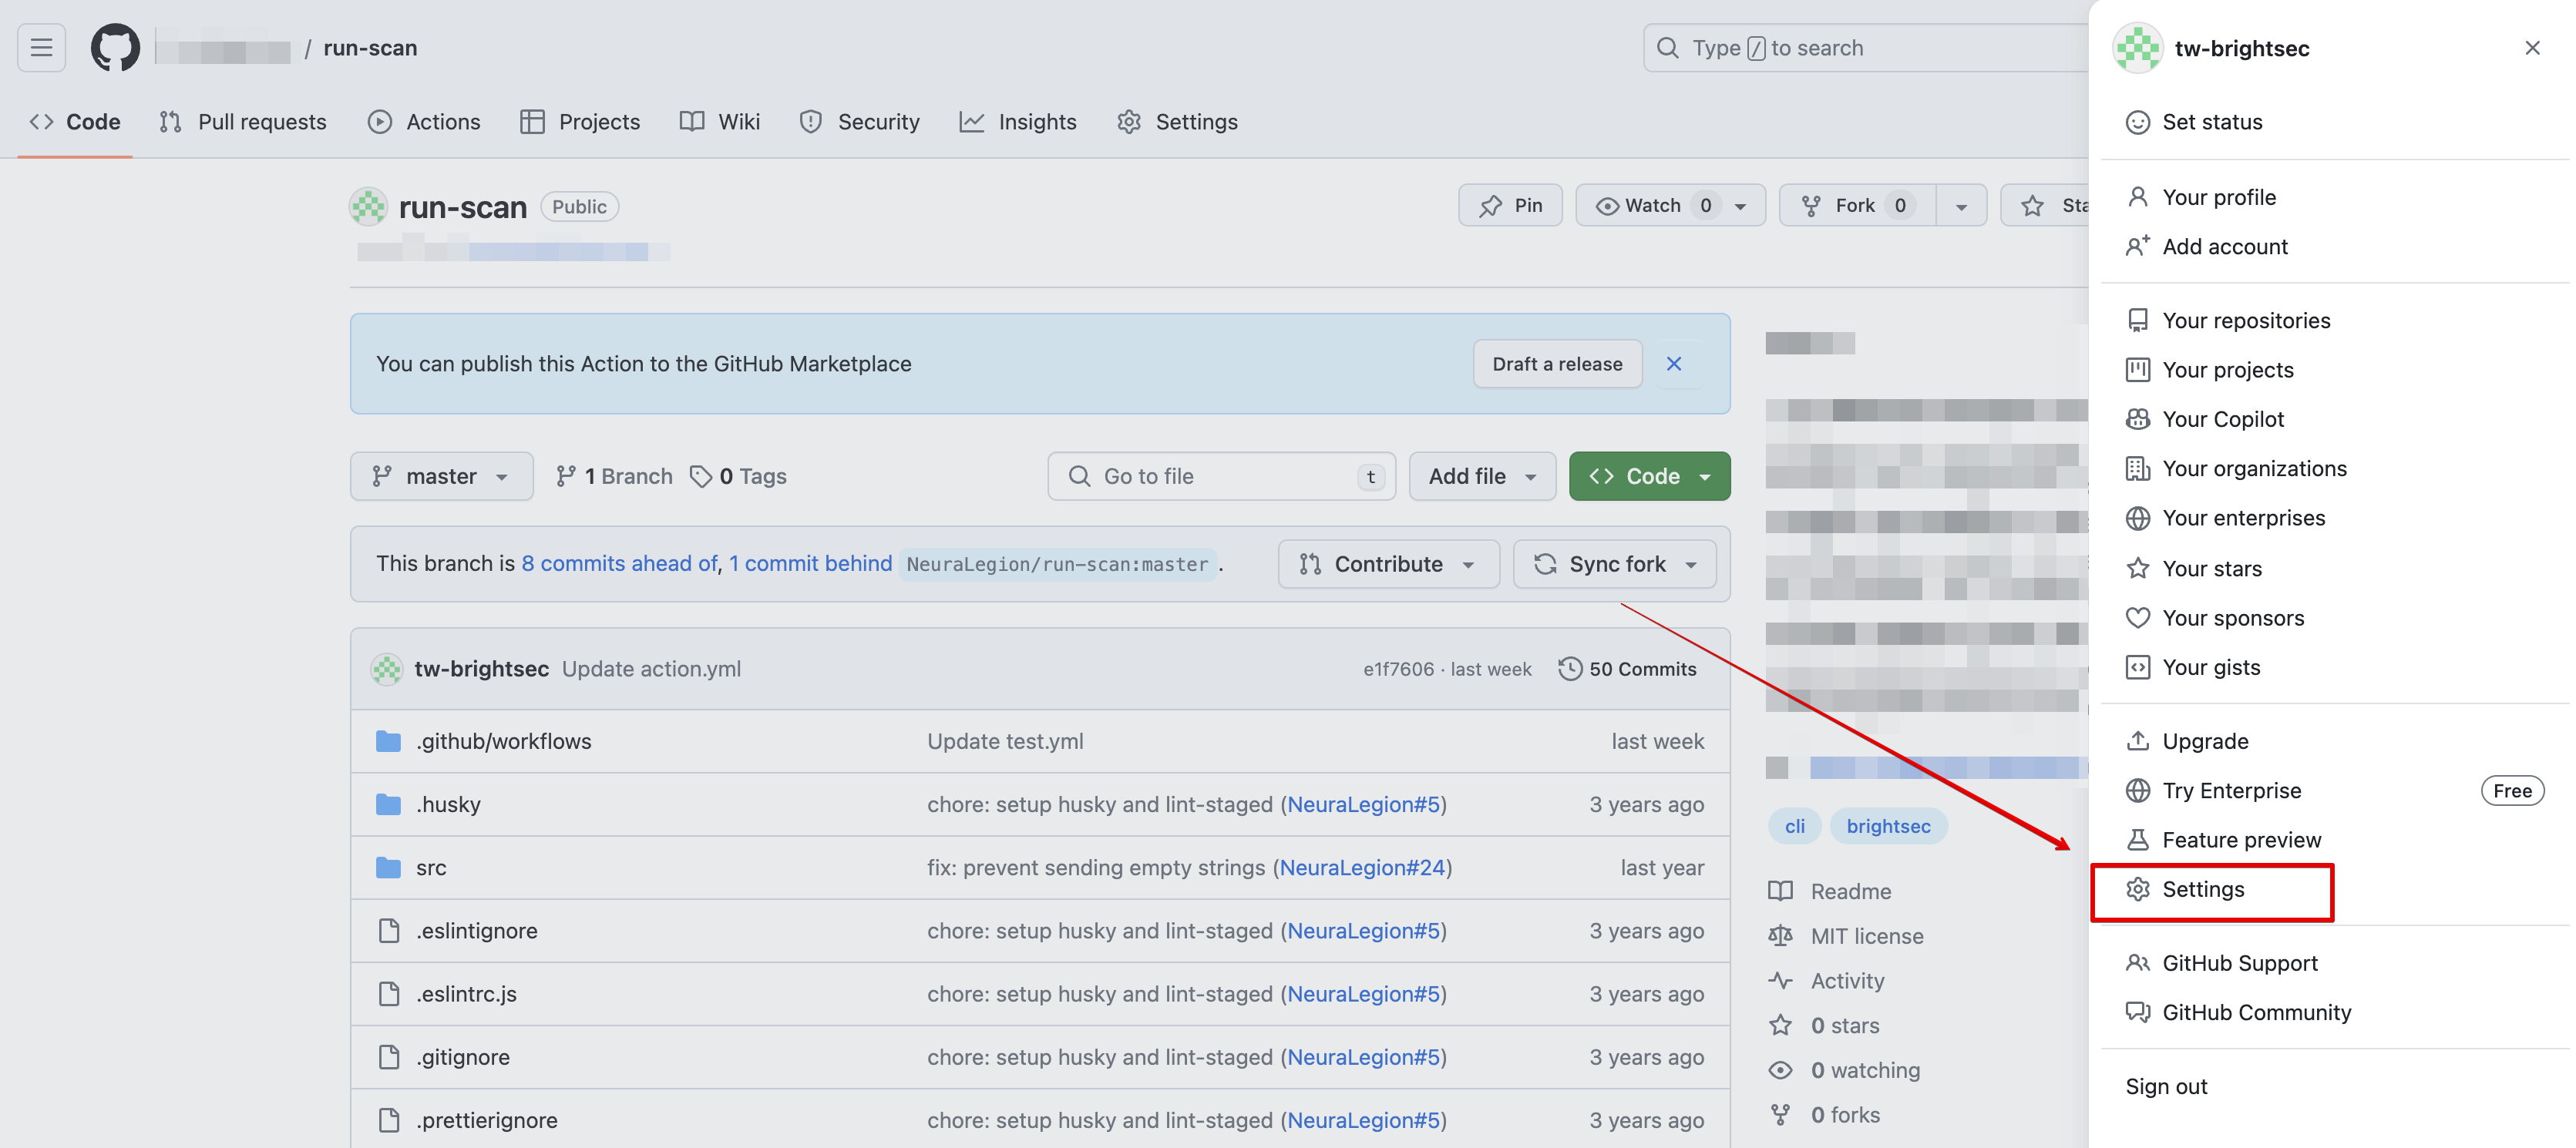
-
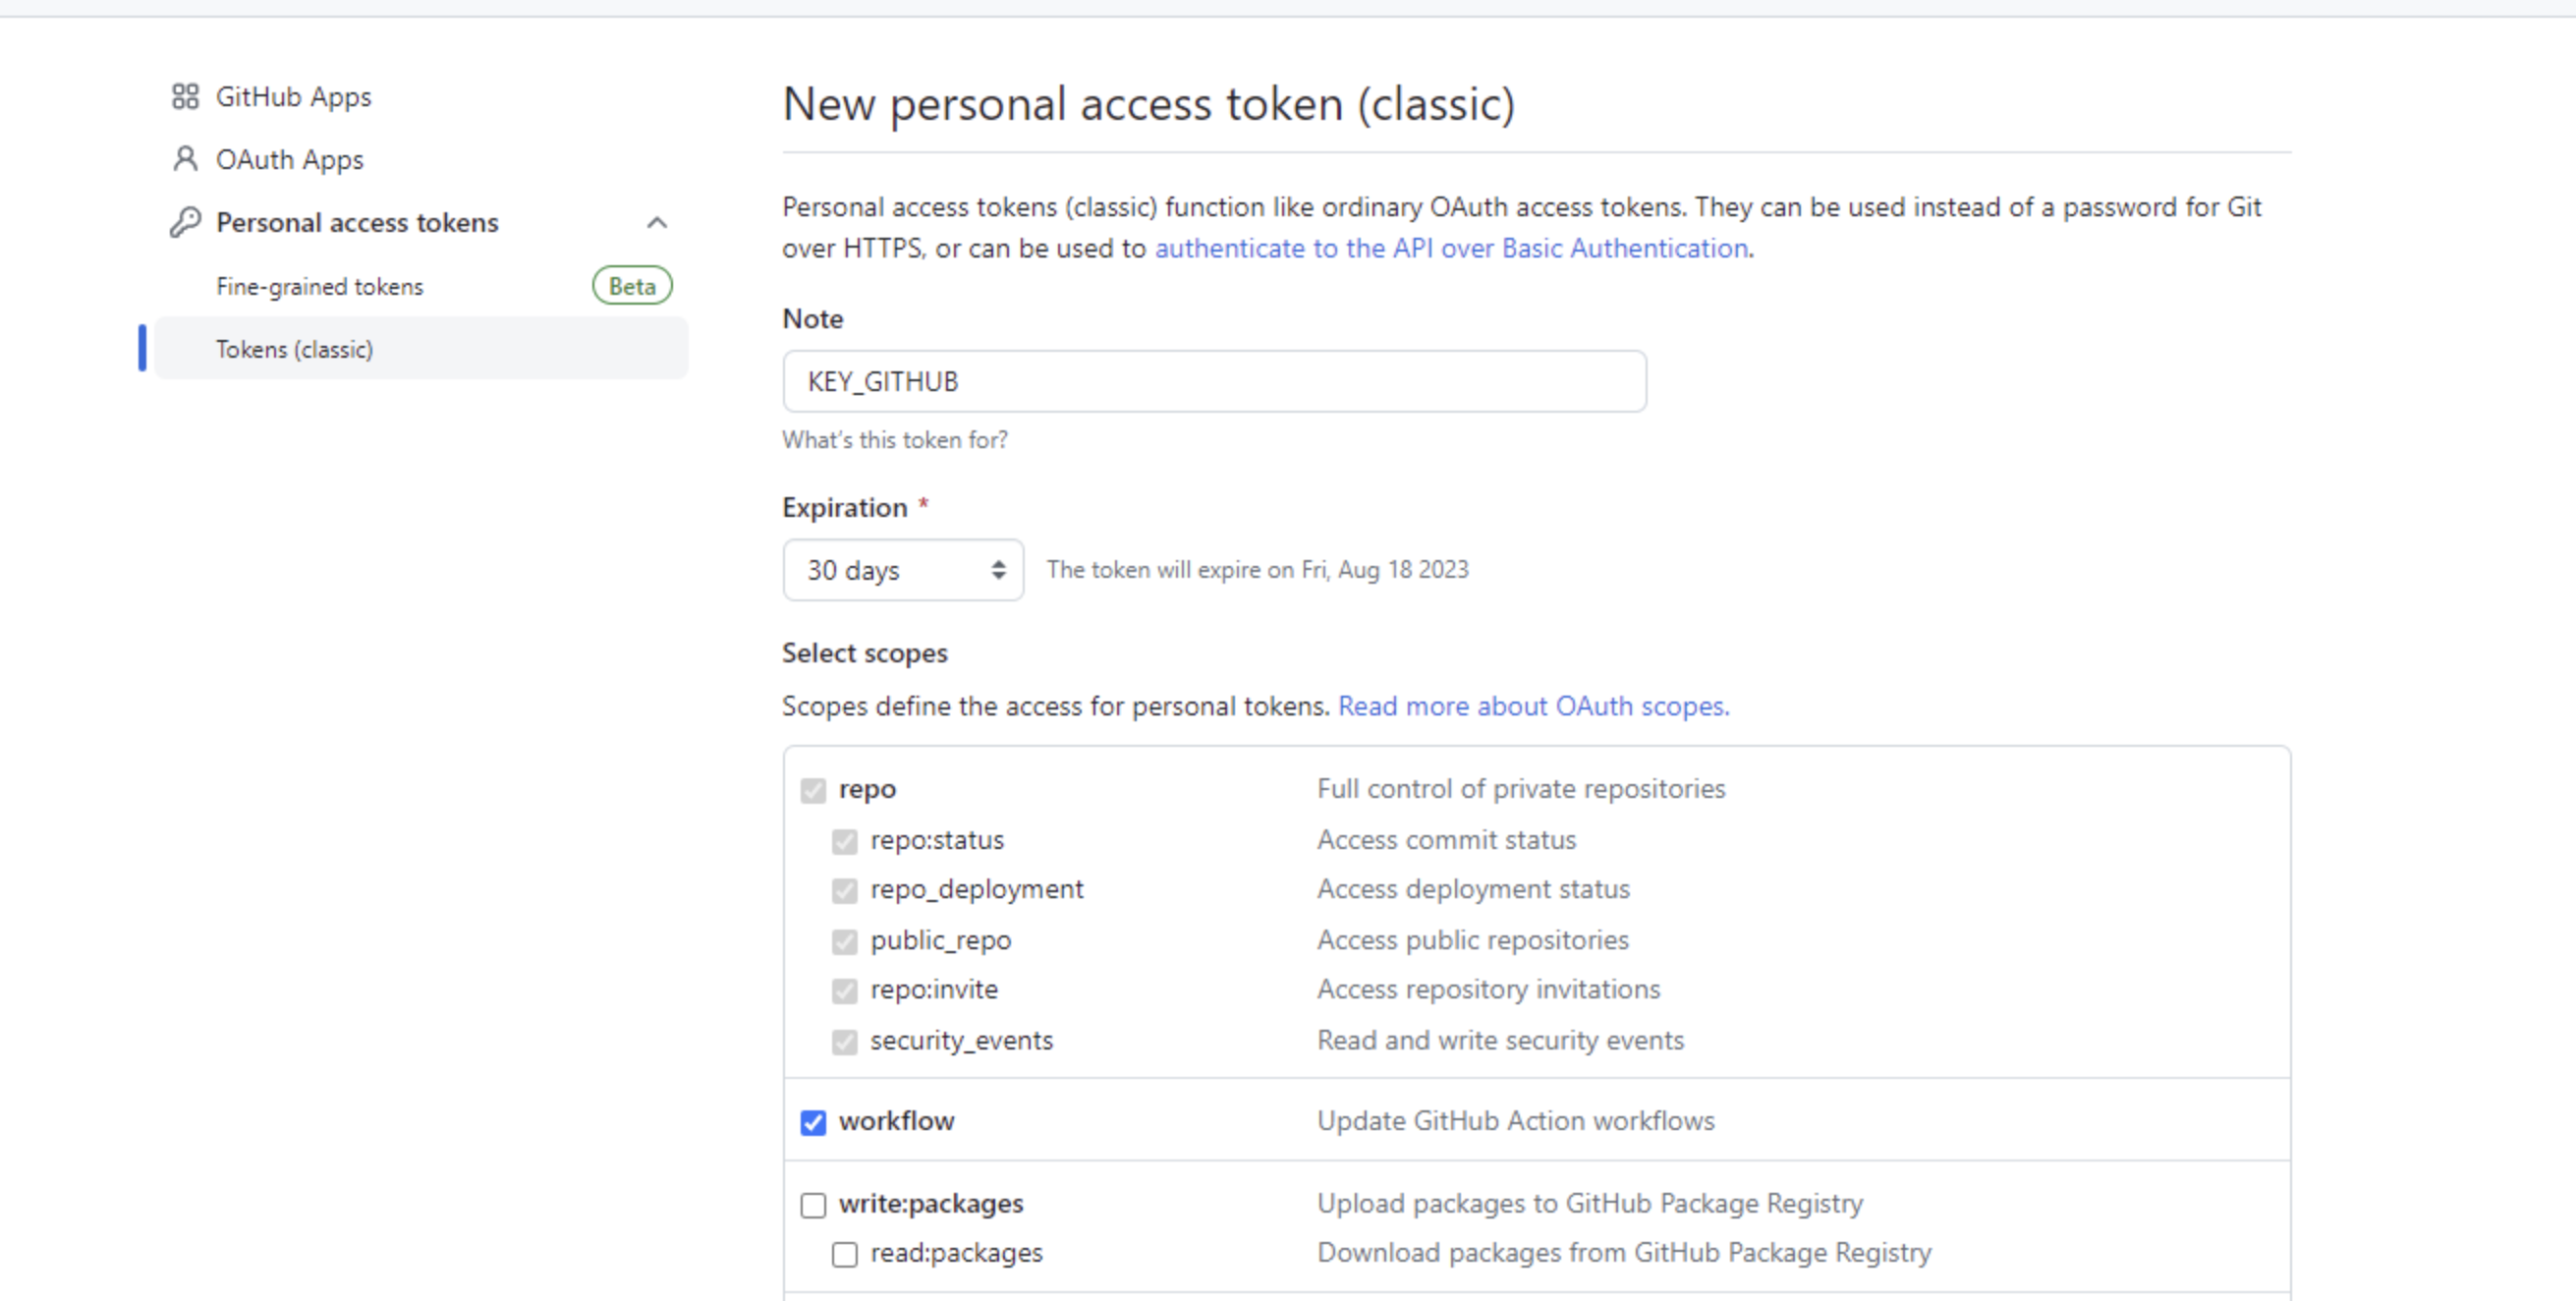
Click on Personal access token → Tokens (classic)

-
On the top right of the page, click Generate new token → Generate new token (classic).
-
Additional authorization steps might be required. Paste password / TOTP authorization code.
-
Name your GitHub key, ensuring it doesn't start with github, as GitHub prohibits this.
-
Copy and securely save the newly generated key.
Setting up a Github repository
- Open this repository.
- On the top right of the page, click Fork → Create fork.
- Click Settings at the top of the screen.
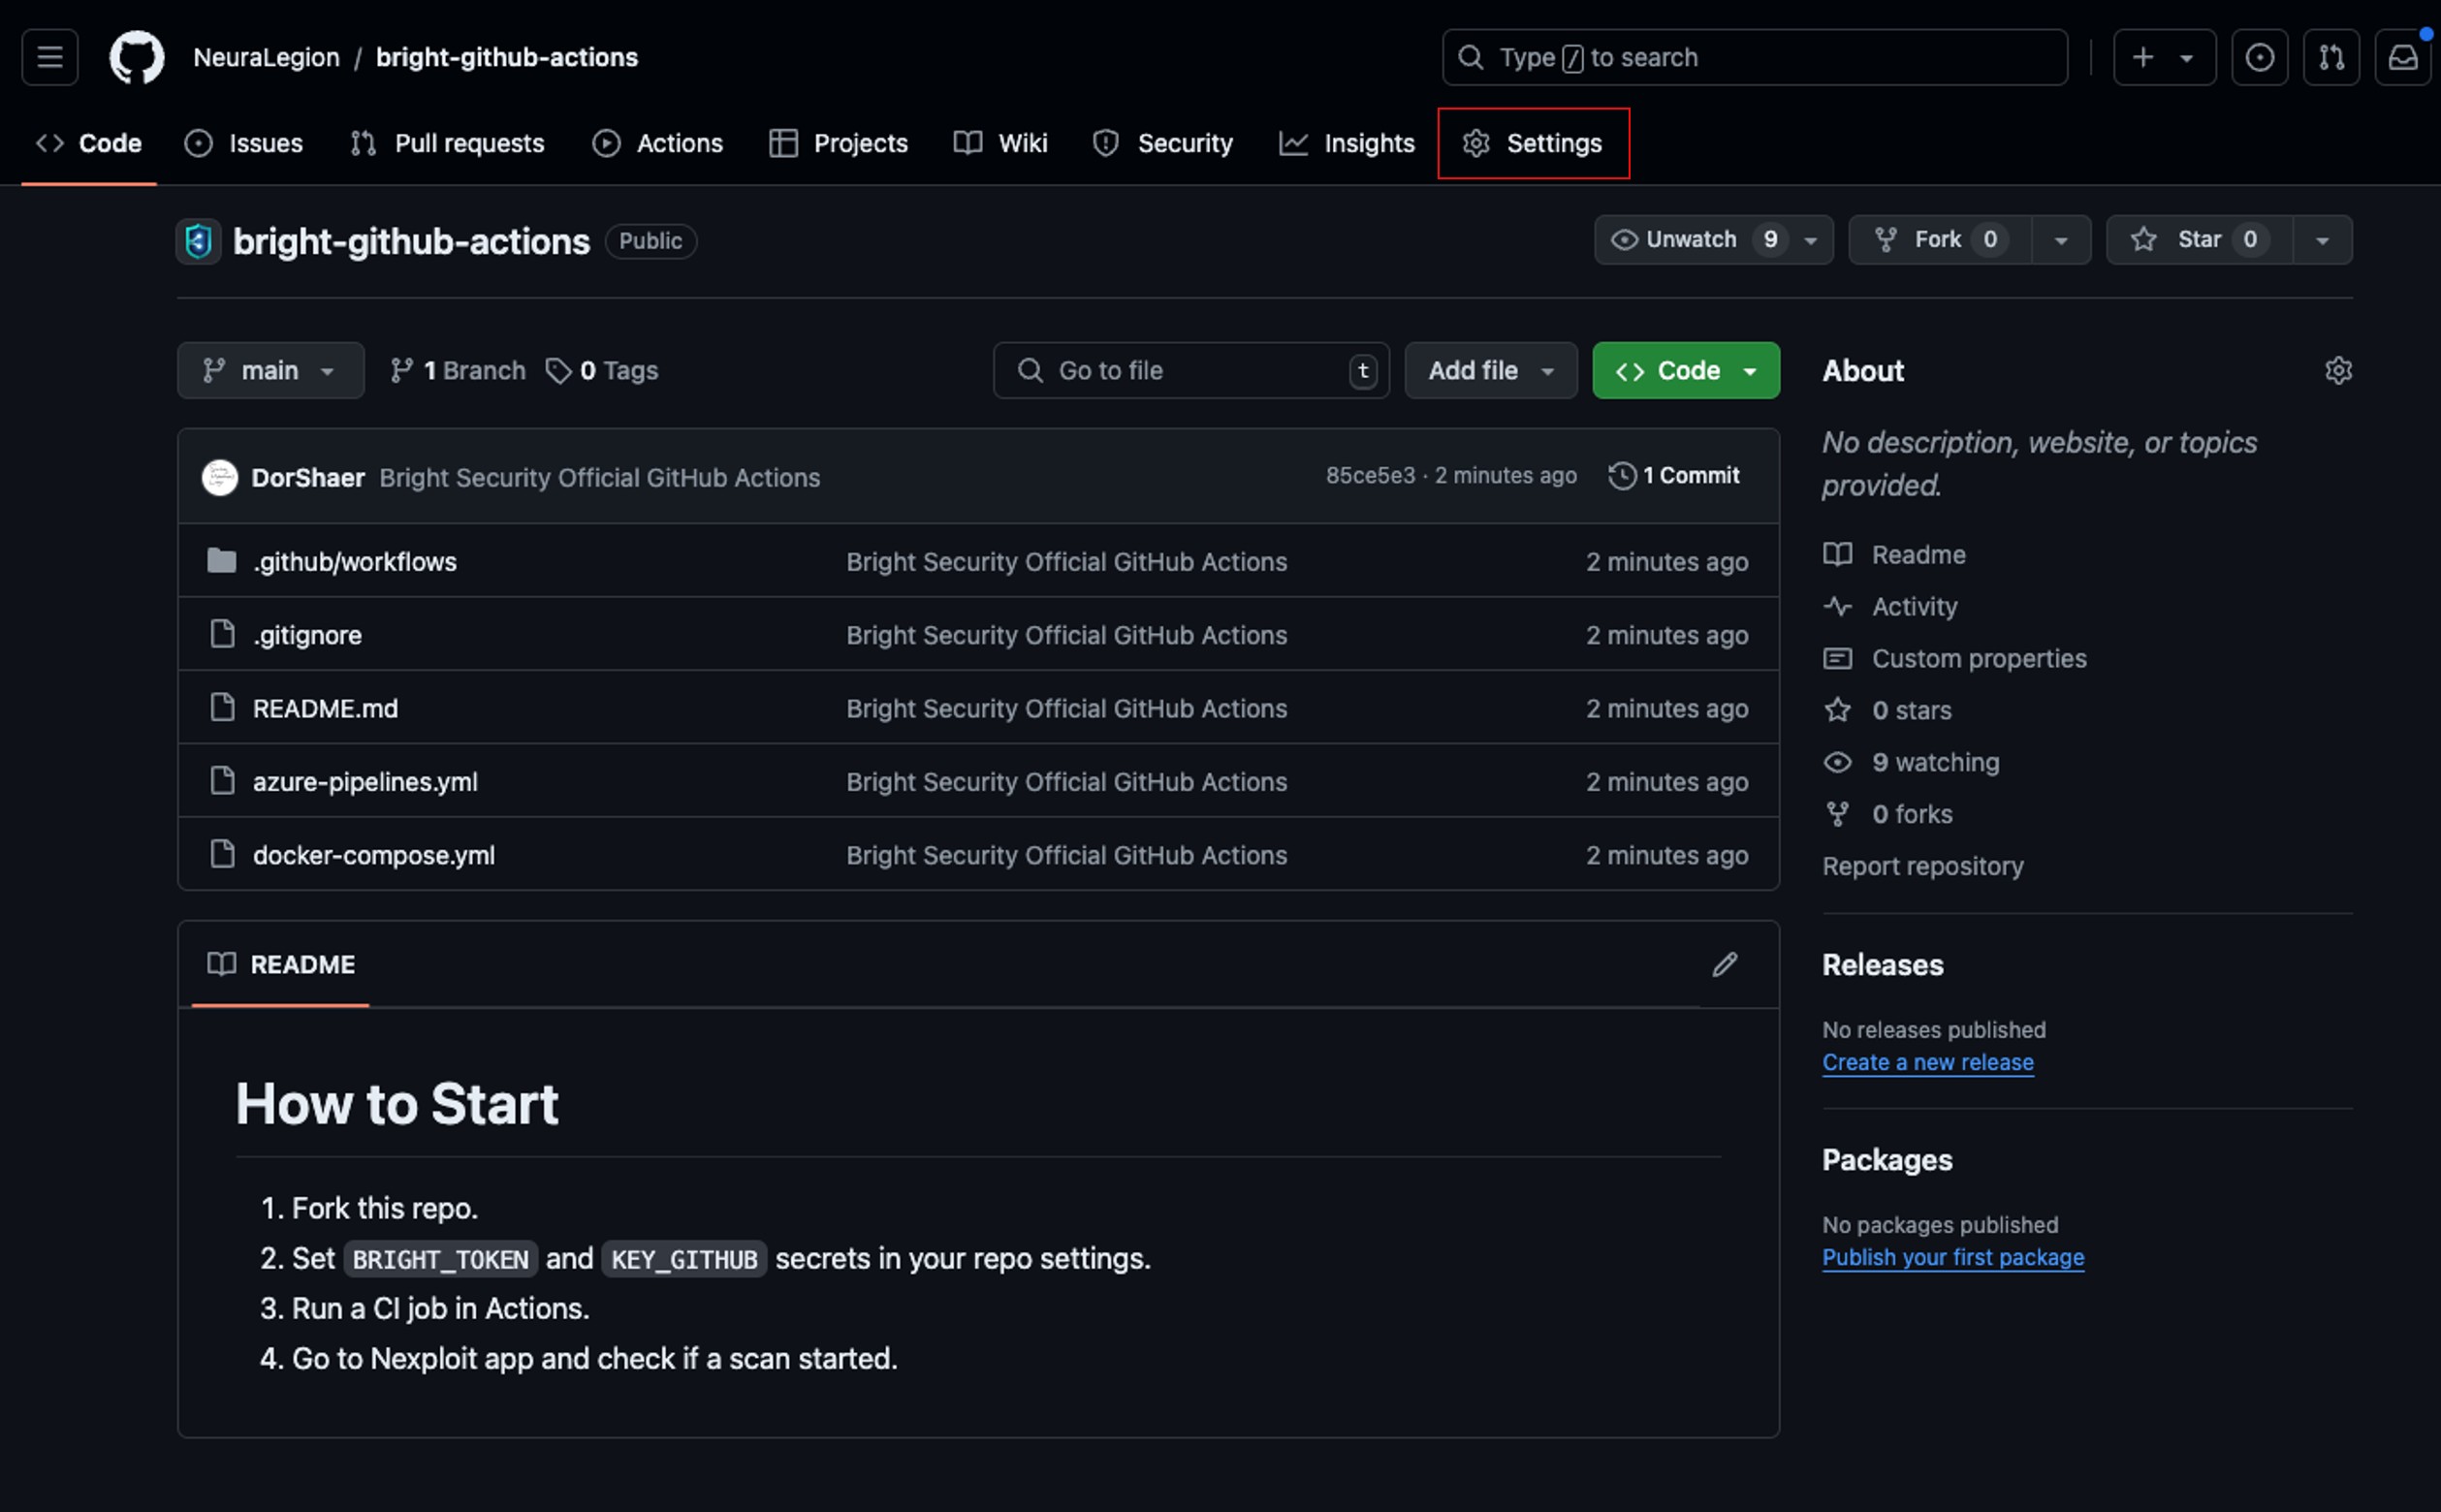
- On the bottom left pane, click Secrets and variables → Actions → New repository secret.
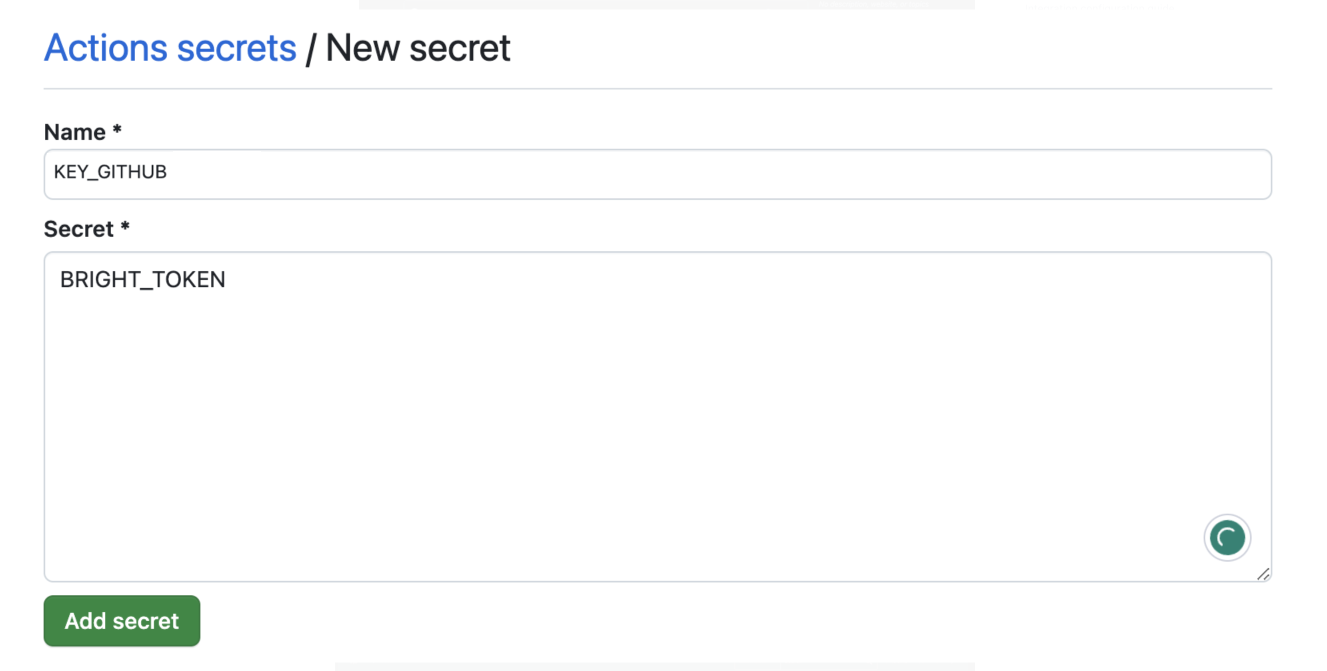
- Type a name and paste the previously generated API token, then click Add secret.
-
Create a second secret for GitHub Actions token taken from the Bright app. In our example, we'll call it KEY_GITHUB.
-
Click Add secret after entering the token.
Configuring Github Actions
To emulate a real-world scenario and trigger the GitHub Action, modify the README.md file. Upon a developer committing code, it will set off the GitHub Action and initiate a scan against the target.
To view the running workflow, click Actions → select the running task → click on the active workflow. If a scan was successfully initiated, the GitHub Action task will start either.
The scan will now begin. You can monitor it from Bright's dashboard, the scan name will be Bright Scan followed by the commit number.

Example
Here is a sample .yaml file where we have already set the actions in a workflow.
on:
  push:
    branches:
      - main

jobs:
  wait_for:
    name: Wait for any issues, gh-int + code_scanning_alerts on
    runs-on: ubuntu-latest
    container: node:16
    steps:
      - name: Scan Start
        id: start
        uses: NeuraLegion/bright-github-actions/run-scan@release
        with:
          api_token: ${{ secrets.BRIGHT_TOKEN }}
          hostname: app.brightsec.com
          name: Bright Scan - ${{ github.sha }}
          restart_scan: $SCAN_ID
      - name: Wait for breakpoint
        id: wait
        uses: NeuraLegion/bright-github-actions/wait-for@release
        with:
          api_token:  ${{ secrets.BRIGHT_TOKEN }}
          hostname: app.brightsec.com
          scan: ${{ steps.start.outputs.id }}
          wait_for: any
          code_scanning_alerts: true
          github_token: ${{ secrets.GITHUB_TOKEN }}
          timeout: 600
We are using two actions, which are configured as steps.
Step 1. Run a scan
The first step runs a scan with a name, an API token, and a target hostname. In this example, we are re-running a previous scan using its ID.
- name: Scan Start
        id: start
        uses: NeuraLegion/bright-github-actions/run-scan@release
        with:
          api_token: ${{ secrets.BRIGHT_TOKEN }}
          hostname: app.brightsec.com
          name: Bright Scan - ${{ github.sha }}
          restart_scan: $SCAN_ID
The scan ID (SCAN_ID), as well as the API token (BRIGHT_TOKEN), is taken from the Bright app. These are the basic inputs needed for scan configuration. For a full list of available inputs and expected outputs, check out a specific action on the GitHub marketplace.
Step 2. Poll the scan status and open the detected vulnerabilities as code scanning alerts
Then, we proceed to poll the scan status until it returns a detected issue.
- name: Wait for breakpoint
        id: wait
        uses: NeuraLegion/bright-github-actions/wait-for@release
        with:
          api_token: ${{ secrets.BRIGHT_TOKEN }}
          hostname: app.brightsec.com
          scan: ${{ steps.start.outputs.id }}
          wait_for: any
          code_scanning_alerts: true
          github_token: ${{ secrets.GITHUB_TOKEN }}
          timeout: 600
The wait_for action allows you to follow the “fail-fast” approach by interrupting the build with the first issue found. Moreover, you can set the severity of the first issue to wait for. In our example, it is set to any, meaning the build will stop automatically once a low, medium, or high severity issue is found. You can also manage the polling duration by specifying the timeout in seconds. The scan will stop upon the timeout expiration if no issue is detected. The GitHub token is a required input for the polling action.
We set the code_scanning_alerts to trueto open the detected issue as a “Code Scanning Alert” that can be viewed and managed in the Security tab for the target of the scan.
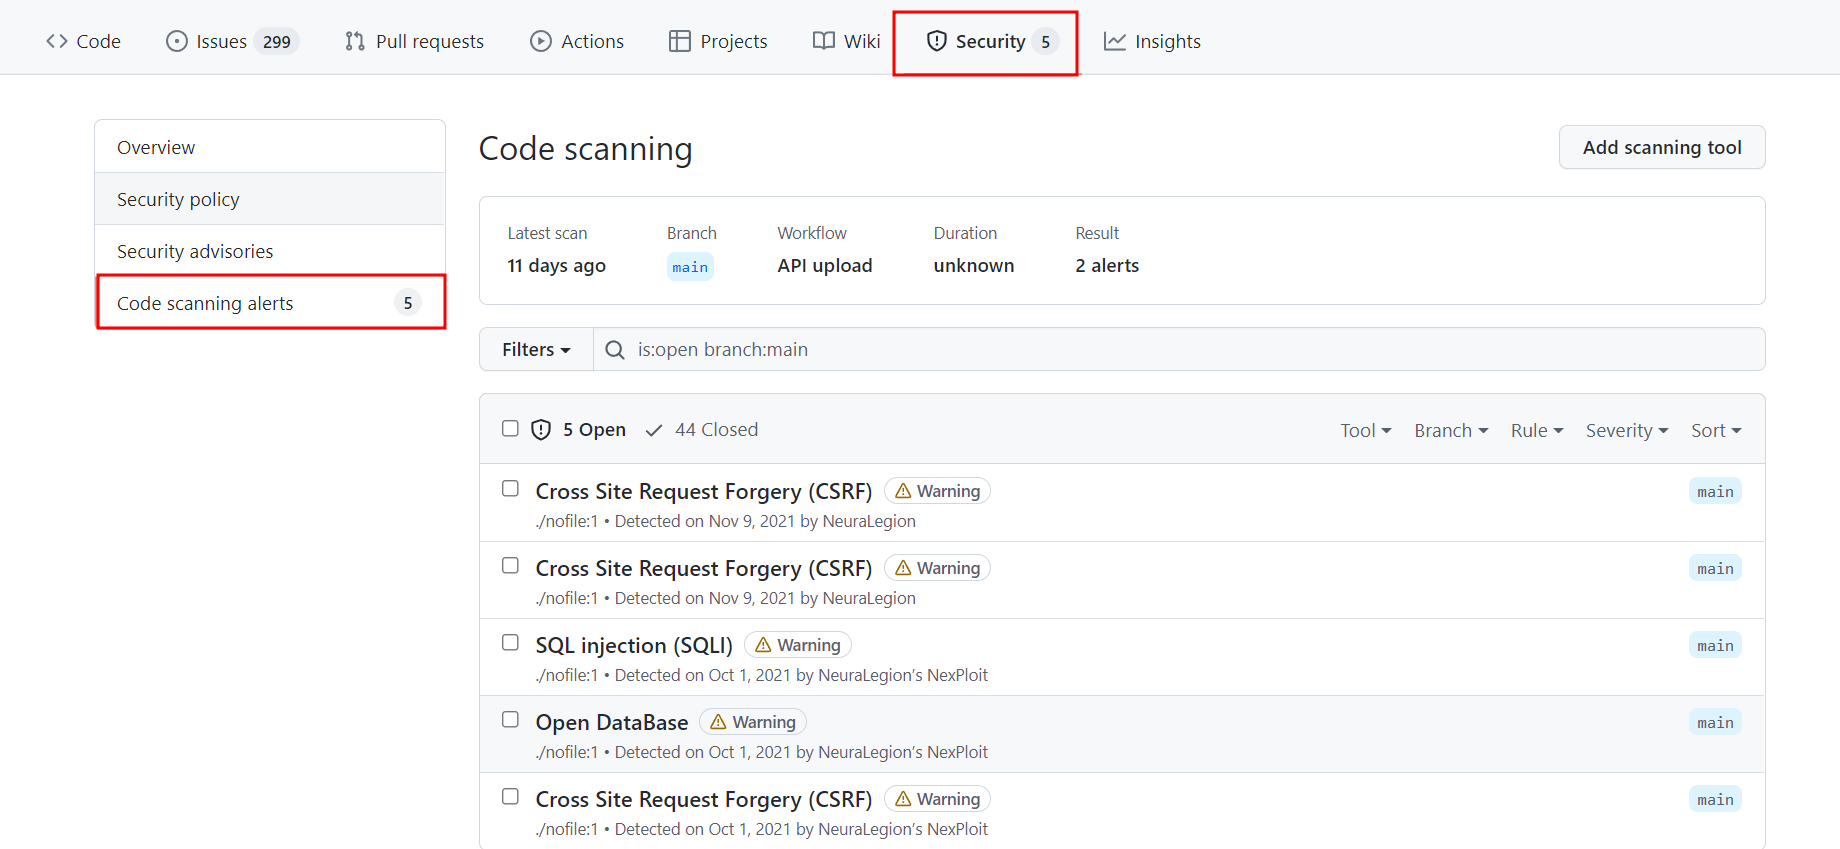
After you configure a similar file and add it to your pipeline, it will trigger a scan on every commit made to that pipeline.
Updated 7 months ago