JFrog

|
|
| If you are using JFrog Pipelines for development automation, you can integrate it with Bright to run security scans on every new build as part of your SDLC. | |
| For this example, we use a sample vulnerable application in a public GitHub repository. The repository also contains the corresponding JFrog Pipeline YAML file. You can use this application for a test project. | |
Prerequisites |
- You have a valid User Key, Project Key or Organization Key with the following scopes:
scans:readscans:runscans:stop
YAML File Breakdown
Resources and Pipelines Configuration
The YAML file contains configuration for security scanning and the pipeline itself, with details of the repository and execution steps.
resources:
  - name: jfrognexploit
    type: GitRepo
    configuration:
      gitProvider: GH
      path: NeuraLegion/jfrog-example

pipelines:
  - name: nexploit
    steps:
      - name: nexploit
        type: Bash
        configuration:
          integrations:
            - name: Nexploit
          inputResources:
            - name: jfrognexploit
A Git repository is given as a JFrog resource, so you can use this repository for any events, such as pushing a new commit or as a trigger to run a security scan.
Execution Steps
The execution steps are the following:
- Setting up the environment (NodeJS).
- Installing the Bright CLI utility. Using the Bright CLI commands, you can run, poll status and stop scans directly from your pipeline.
execution:
          onExecute:
            - sudo apt update
            - sudo chmod 1777 /tmp
            - sudo apt update
            - sudo apt install nodejs npm
            - sudo apt install --fix-broken
            - sudo npm install -g @brightsec/cli --unsafe-perm=true
            - |
Scan Setup
The scan setup includes the following details:
- A crawler will be used on the target to define the attack surface and optimize the security tests.
- BRIGHT_TOKEN (API key) is required to use the Bright CLI.
- Interval of polling the scan results (detected issues).
- The length of the scan (timeout).
- When polling the scan results, it is recommended to follow the fail-fast principle by using the
breakpointcommand. The scan stops automatically once a high severity issue is detected. See the Bright CLI command list for a full list of commands you can use for a scan.
 SCAN_ID=$(bright-cli scan:run                                                \
                  --name "💎 Broken Crystals for a #${res_jfrognexploit_commitSha} #${run_id}" \
                  --crawler https://brokencrystals.com                                         \
                  --token $BRIGHT_TOKEN)
            - printf "Scan was started with ID https://app.brightsec.com/scans/$SCAN_ID"
            - |
              bright-cli scan:polling               \
                --interval 30s                        \
                --timeout 12m                         \
                --token $BRIGHT_TOKEN  \
                --breakpoint high_issue $SCAN_ID
          onComplete:
            - bright-cli scan:stop --token $BRIGHT_TOKEN $SCAN_ID
Step-by-Step Guide
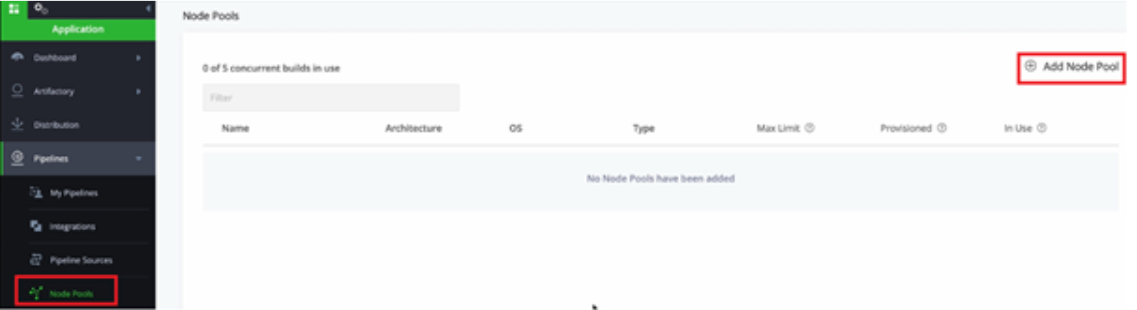
Step 1: Set up an Automatic Scan in JFrog
On the Node Pools page, click Add Node Pool and configure.
Step 2: Integrate GitHub with JFrog
- Get a GitHub token. In GitHub, select Settings > Developer Settings > Personal Access Tokens > Generate New Token.
- Copy the generated token.
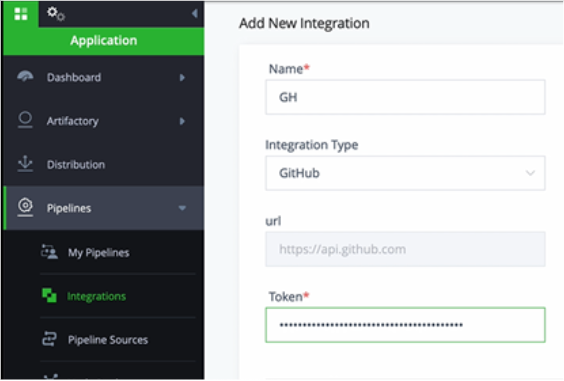
- In JFrog, select Integrations > Add an integration.
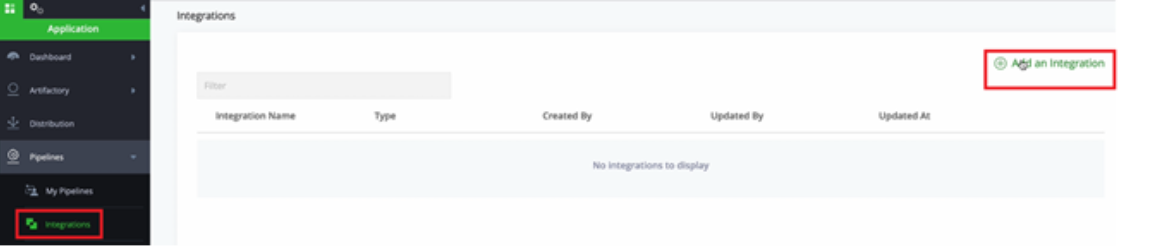
- Give the integration a name, select the type and paste the token.
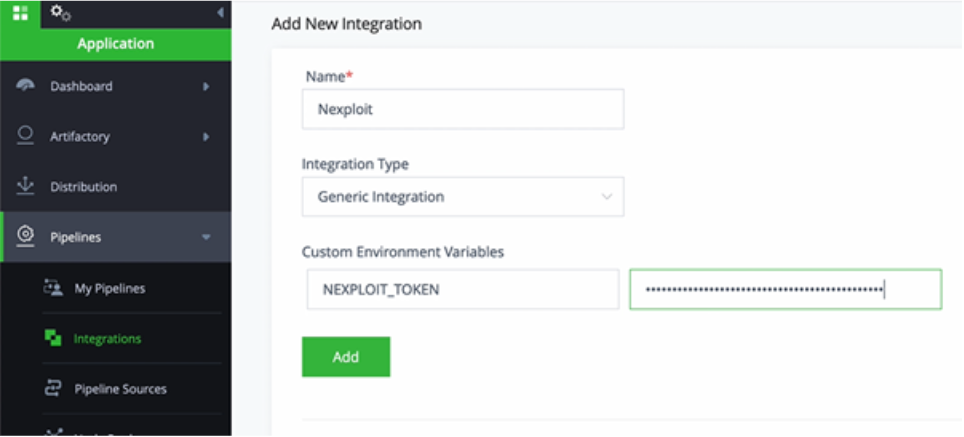
Step 3: Integrate Brightsec with JFrog
- Generate an API key (
BRIGHT_TOKEN) in the Bright app. Go to User Settings > Create New API Key > Select All > create and copy the token. - In JFrog, select Integrations > Add an integration.
- Give the integration a name, select the type and paste the token.
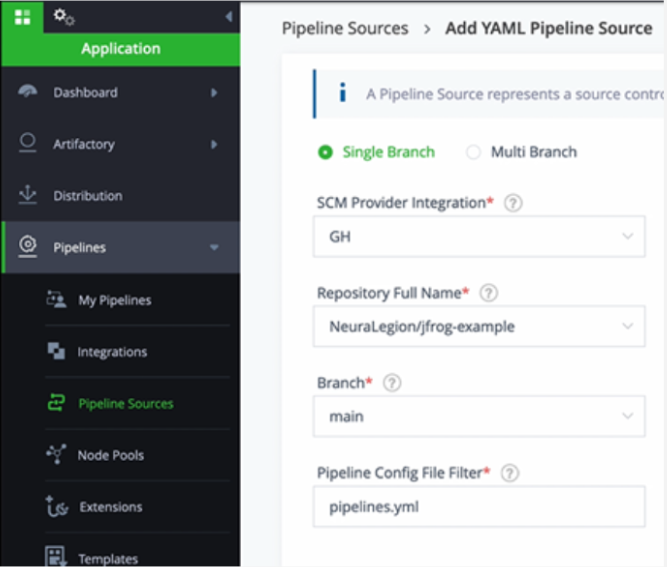
Step 4: Add YAML Pipeline Source
- In JFrog, select Pipeline Sources > Add Pipeline Source > From YAML.
- Select your GitHub integration for SCM provider integration and enter the repository name with JFrog configuration and the branch.
- Select Create Source.
You are now ready to build and run a new scan!
Step 5: Run a New Scan
In JFrog, select Pipelines > nexploit > nexploit > Trigger this step.

You will then get a view of your current CI process.
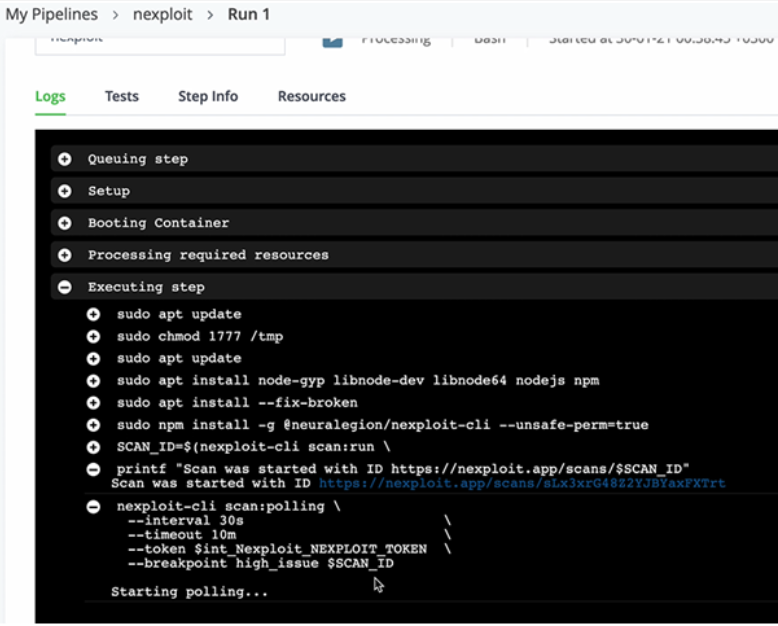
In the image above, you can see the security scan has started and the results are being polled.
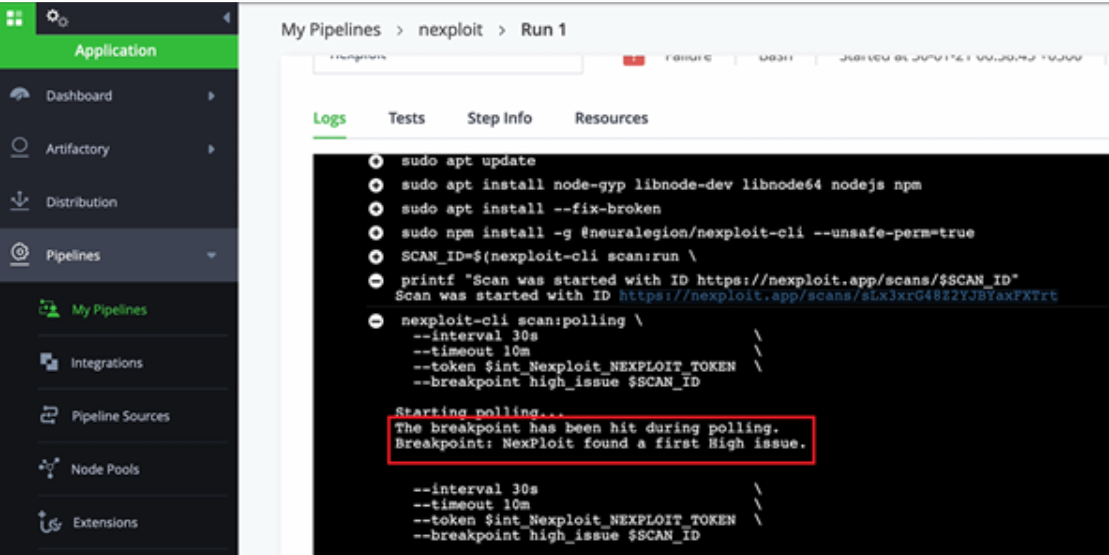
You can now view the security scan status and results in the dashboard in the Bright app.
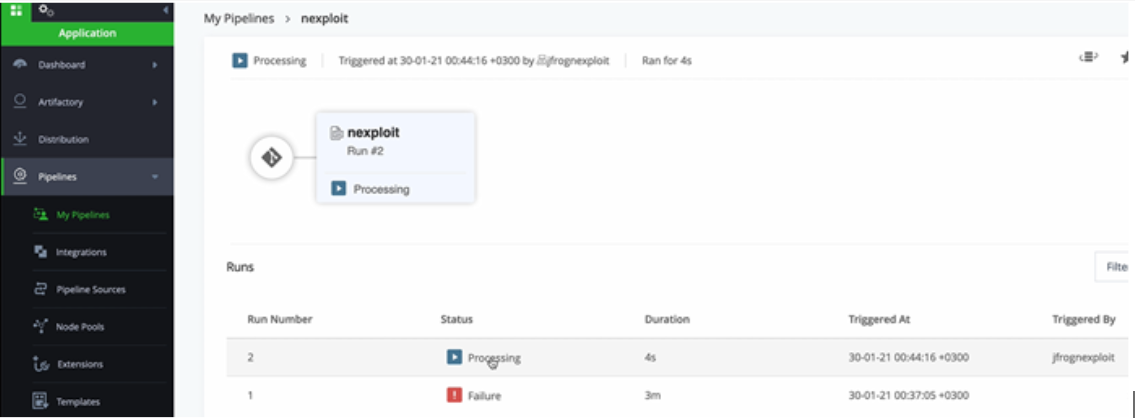
On detection of a high severity issue, the build is failed, and the scan is stopped automatically.
The scanner is set to automatically scan every time there is a change committed in the repository, enabling developers to run an automated, comprehensive and accurate security scan on every commit.
Updated 12 months ago