Managing Repeaters
The Bright Repeater is a scan proxy which provides a secure connection between the Bright cloud engine and a target on a local network. The Repeater mode enables you to securely scan targets on a local network, without having to allowlist the Bright IP address in your firewall for incoming traffic. See Repeater (Scan Proxy) for more information.
Creating (registering) a new repeater
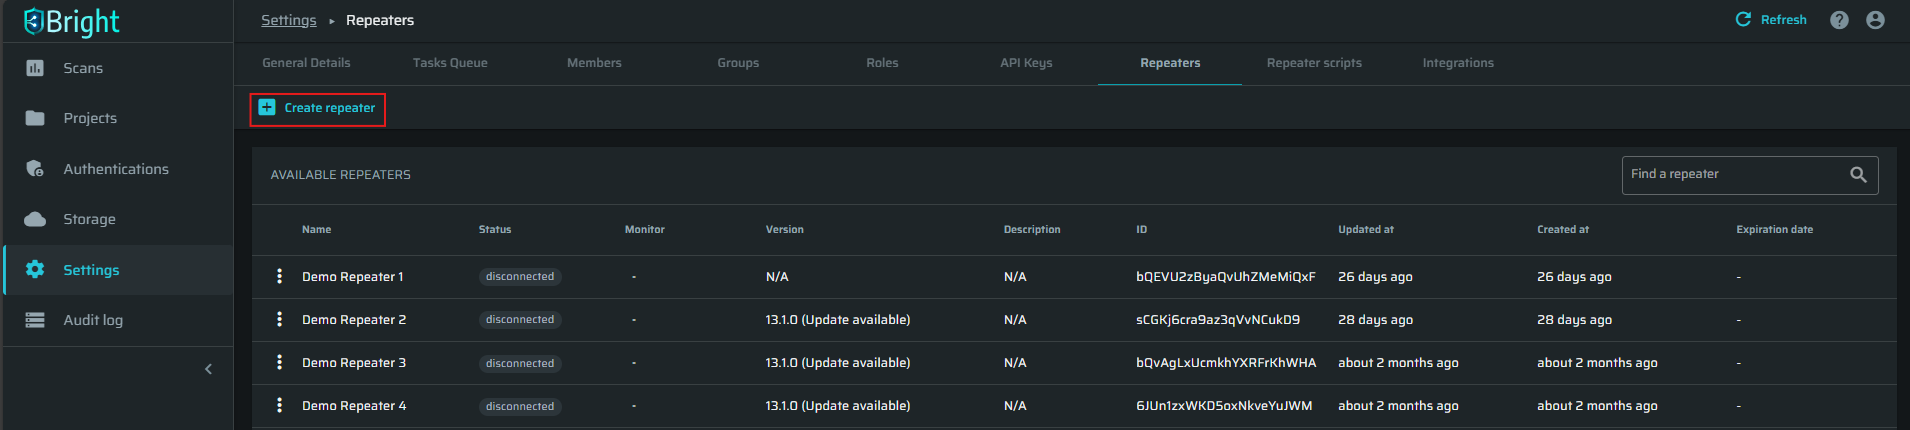
To create (register) a new Repeater, follow these steps:
-
Open the Settings page and switch to the Repeaters tab.
-
In the upper left corner, click + Create Repeater.
-
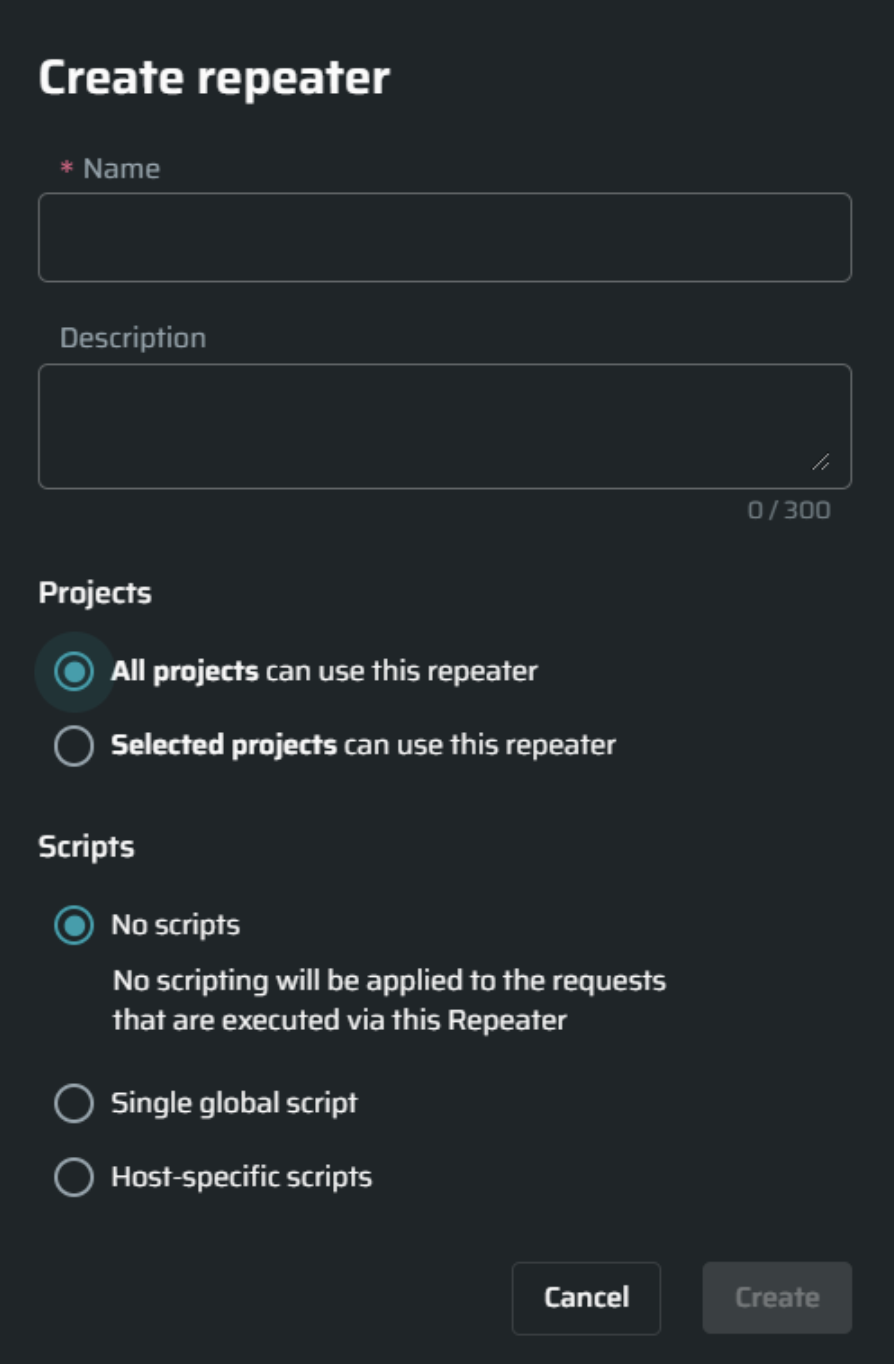
In the Create Repeater dialog box, fill the following:
- Type a Name.
- (Optional) Enter a Description.
- In the Projects section, select either to create the Repeater for all projects or only for specific ones. If you select the second option, the created Repeater will only be available when configuring scans for the predefined projects.
- (Optional). In the Scripts section, add a script to be used with the created Repeater. The scripts should be created in advanced on the Repeater scripts tab. To learn more, read Using Repeater Scripts.
- Click Add.
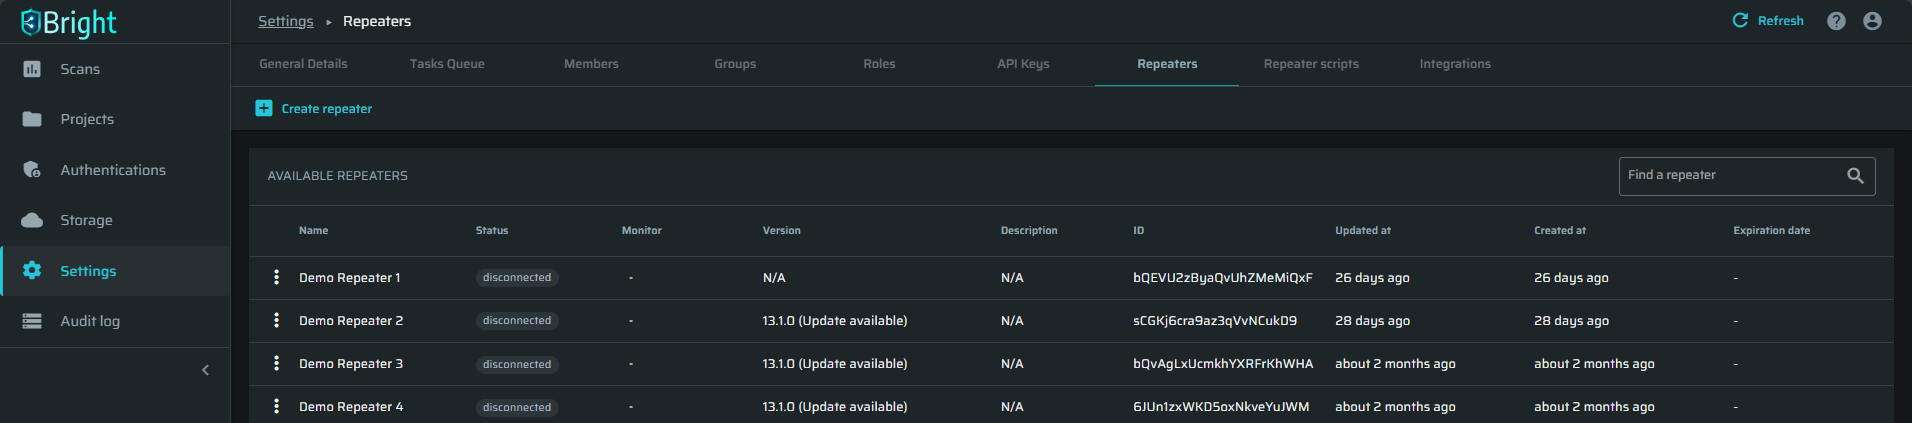
Reviewing all repeaters
To review the list of all existing repeaters, select the Repeaters tab in the Settings page. Each Repeater appears as a single row.
Copying the Repeater ID
To initialize and run a repeater, you will need the repeater ID. To get the ID of a repeater:
-
Open the Settings page and switch to the Repeaters tab.
-
Click on an existing Repeater and open the
 menu and select Copy repeater ID.
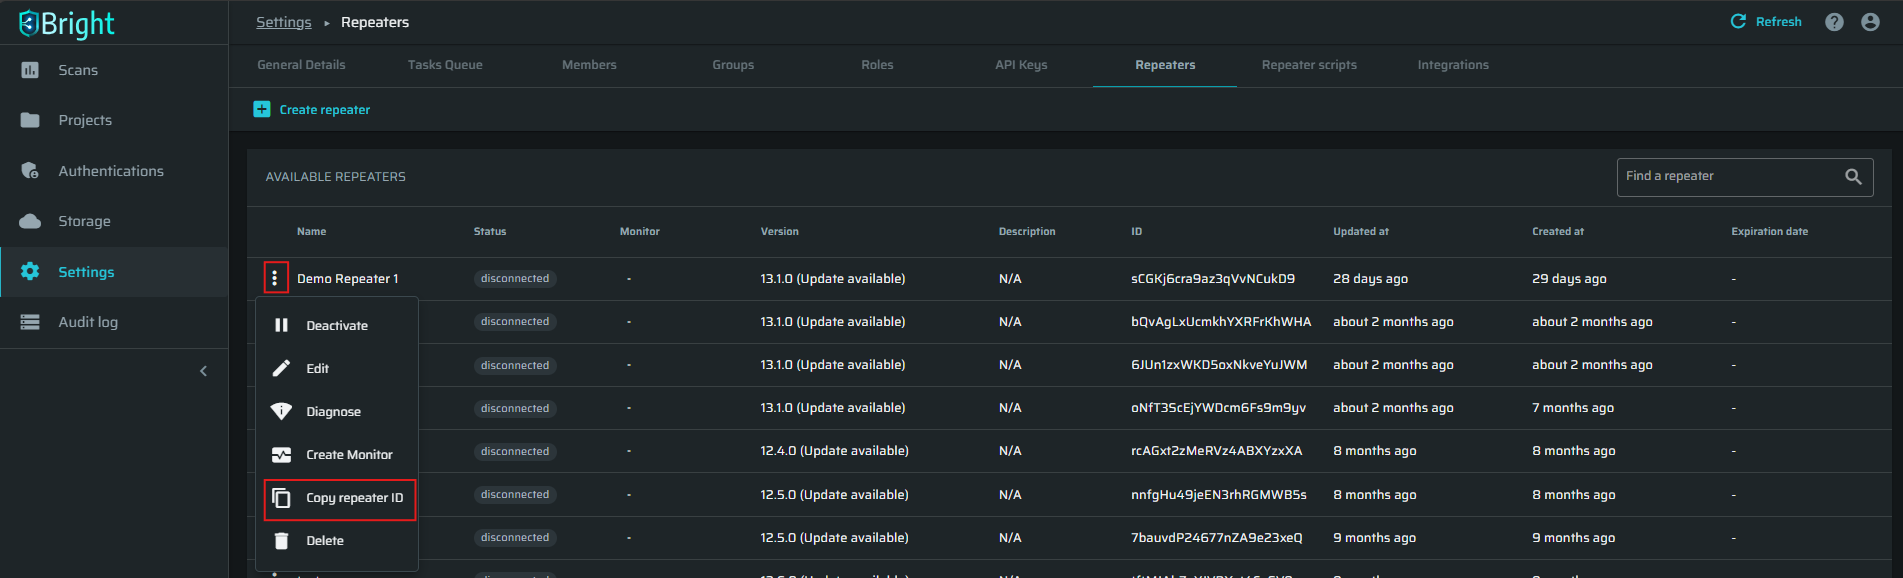
Editing repeater details
To edit Repeater details, follow these steps:
-
Click the
 button next to a Repeater name and then select the Edit option.
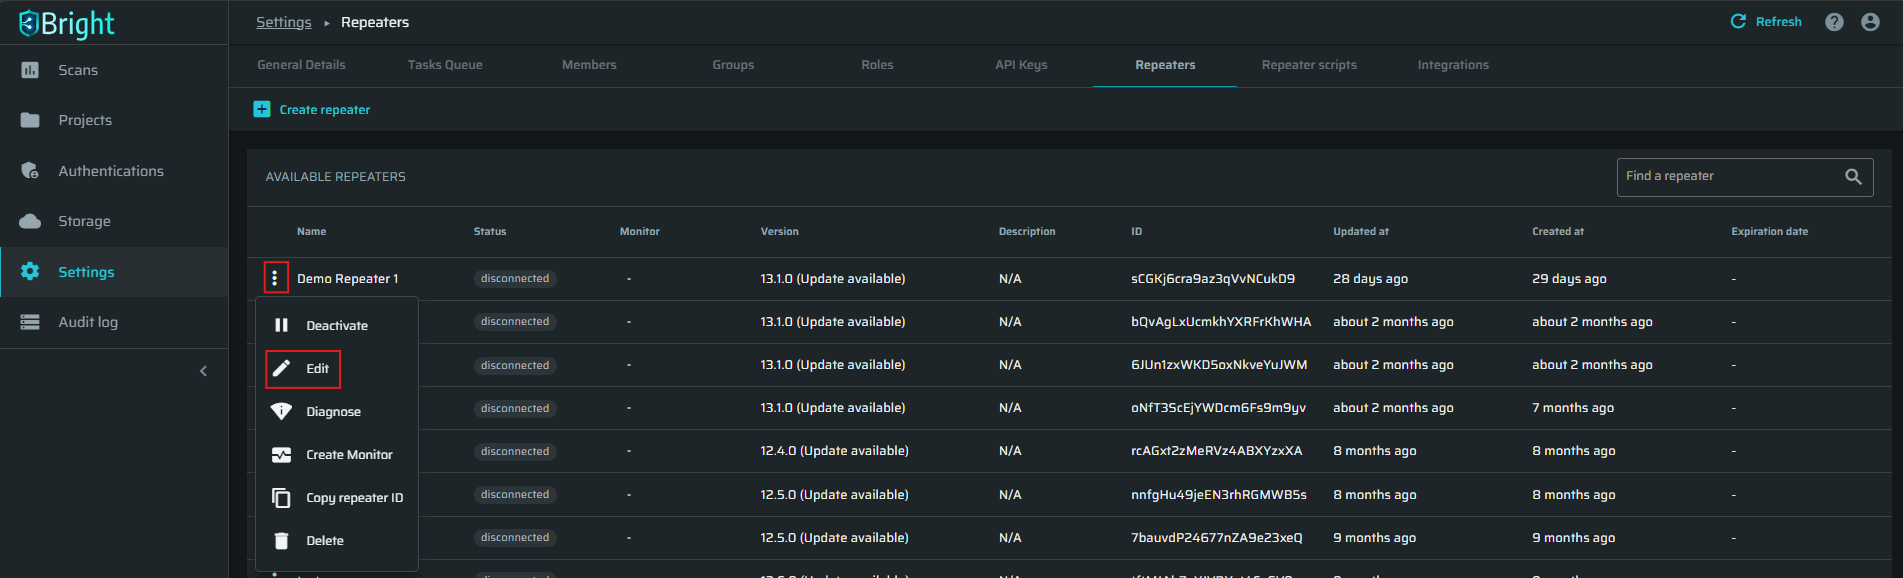
-
Modify the Repeater details as you need, and then click Save.
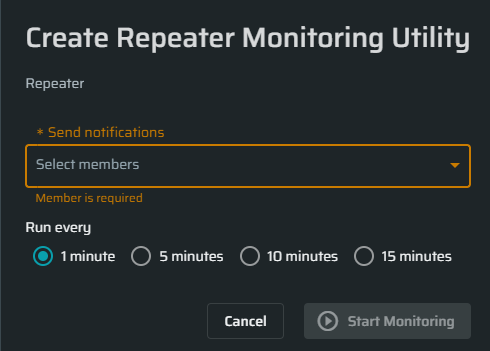
Monitoring the repeater
-
Click the
button next to a Repeater name and then select the Create Monitor option.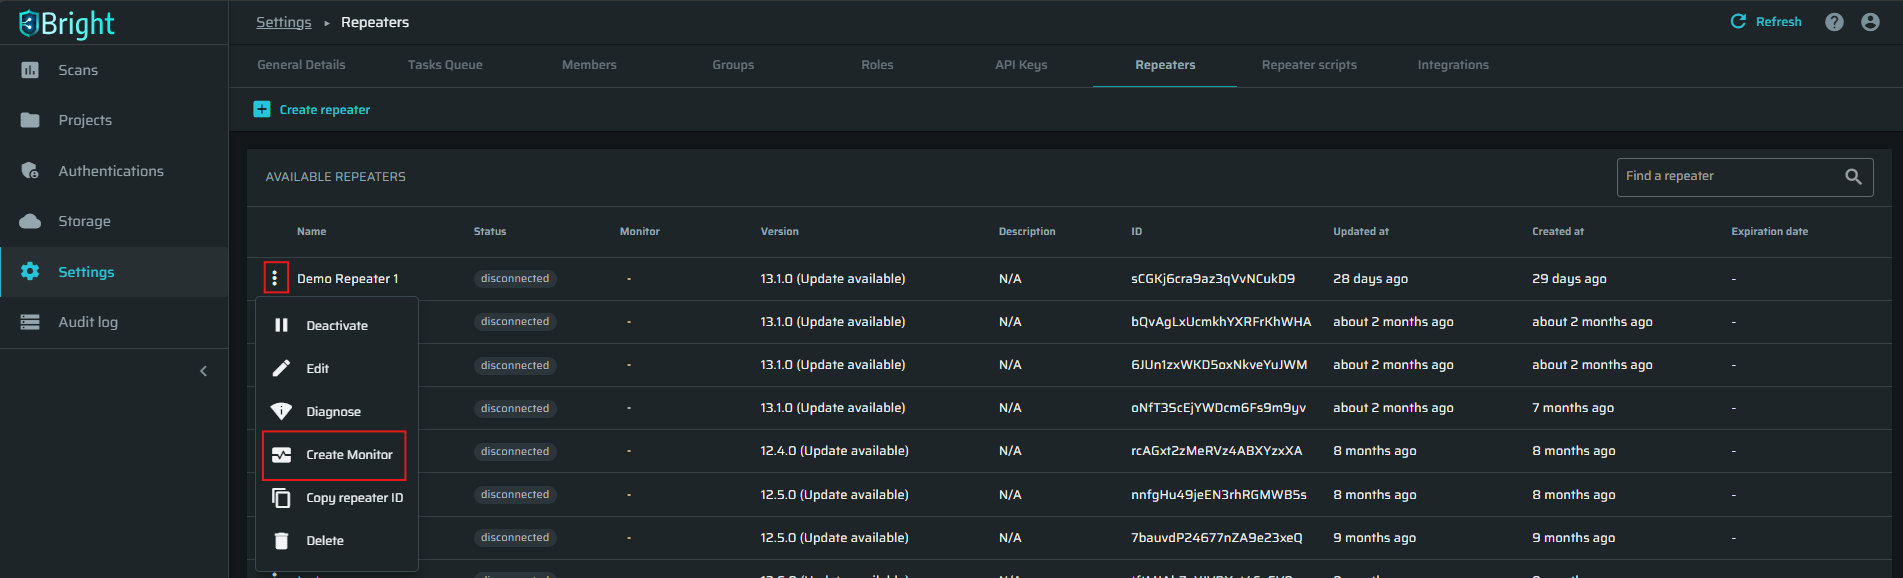
-
Select the members that will get the notification and the running interval., and then click Start Monitoring.
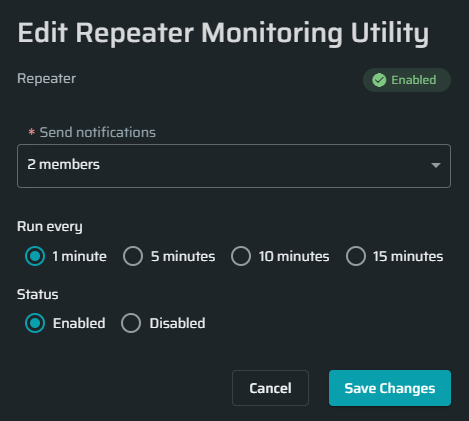
Editing a monitor
You can edit an existing monitor and edit the members who will receive notifications, the running interval and to enable/disable the monitor.
-
Click the
button next to a Repeater name and then select the Edit Monitor option.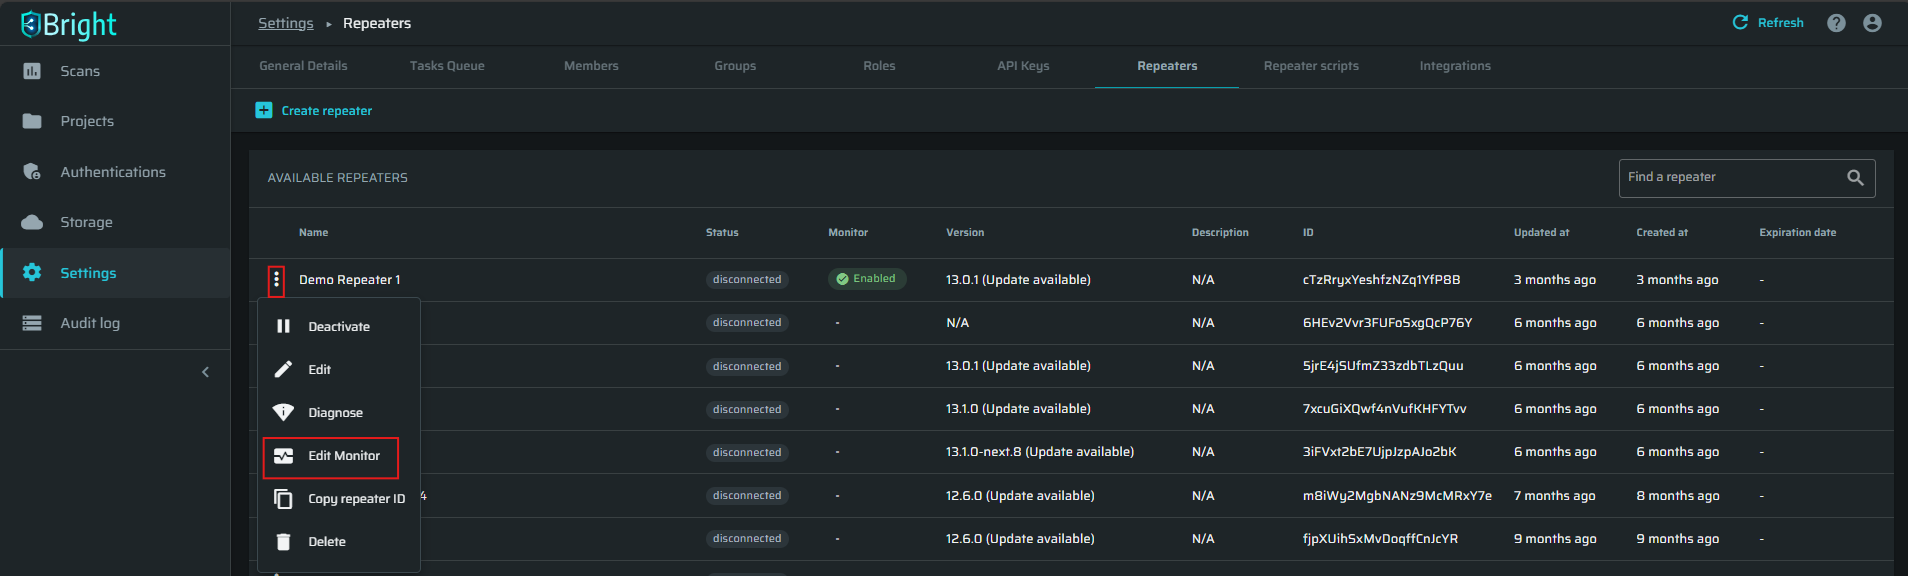
-
Adjust the monitor settings and click Save Changes.
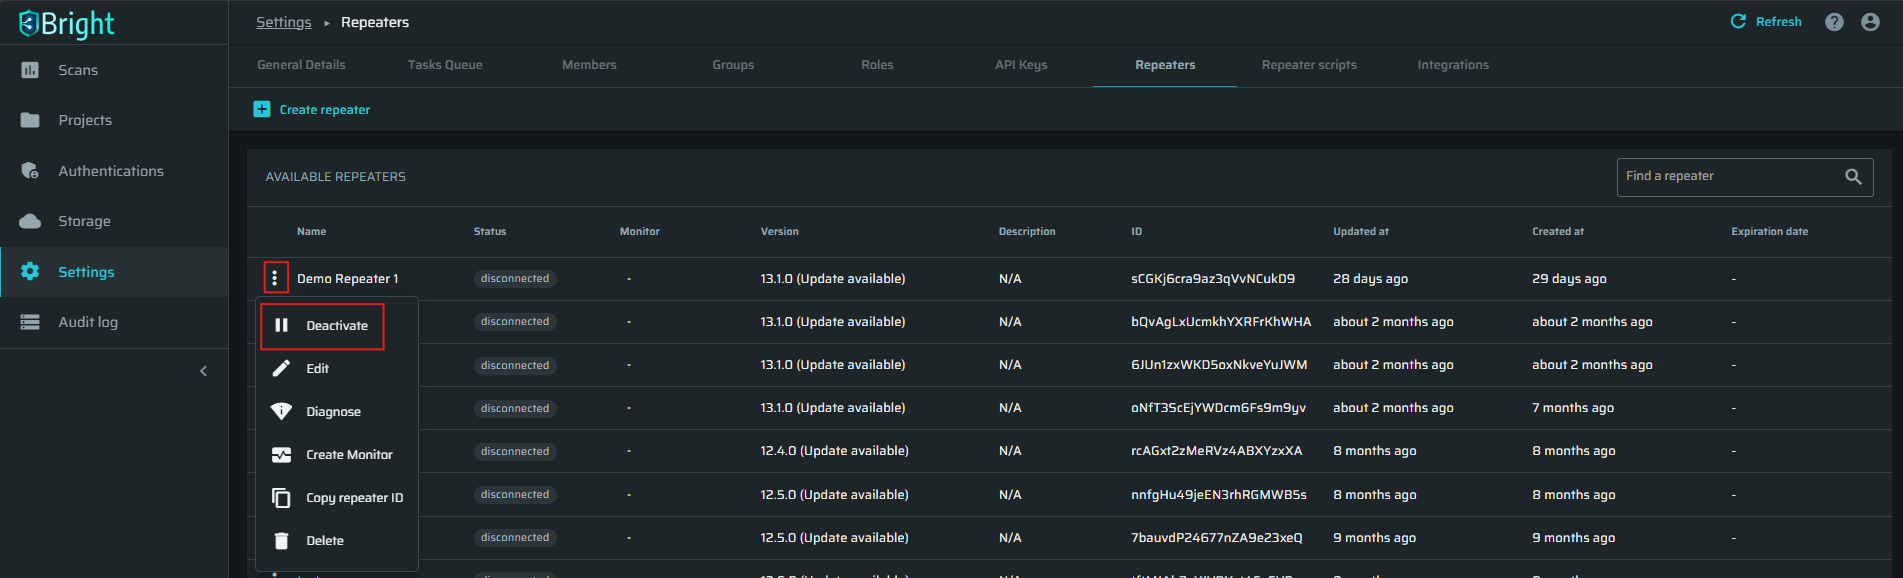
Deactivating the repeater
To deactivate the Repeater, click the ![]() button next to the Repeater name, and then select the Deactivate option.
button next to the Repeater name, and then select the Deactivate option.
Activating the repeater
To activate the Repeater, click the ![]() button next to the Repeater name, and then select the Activate option.
button next to the Repeater name, and then select the Activate option.

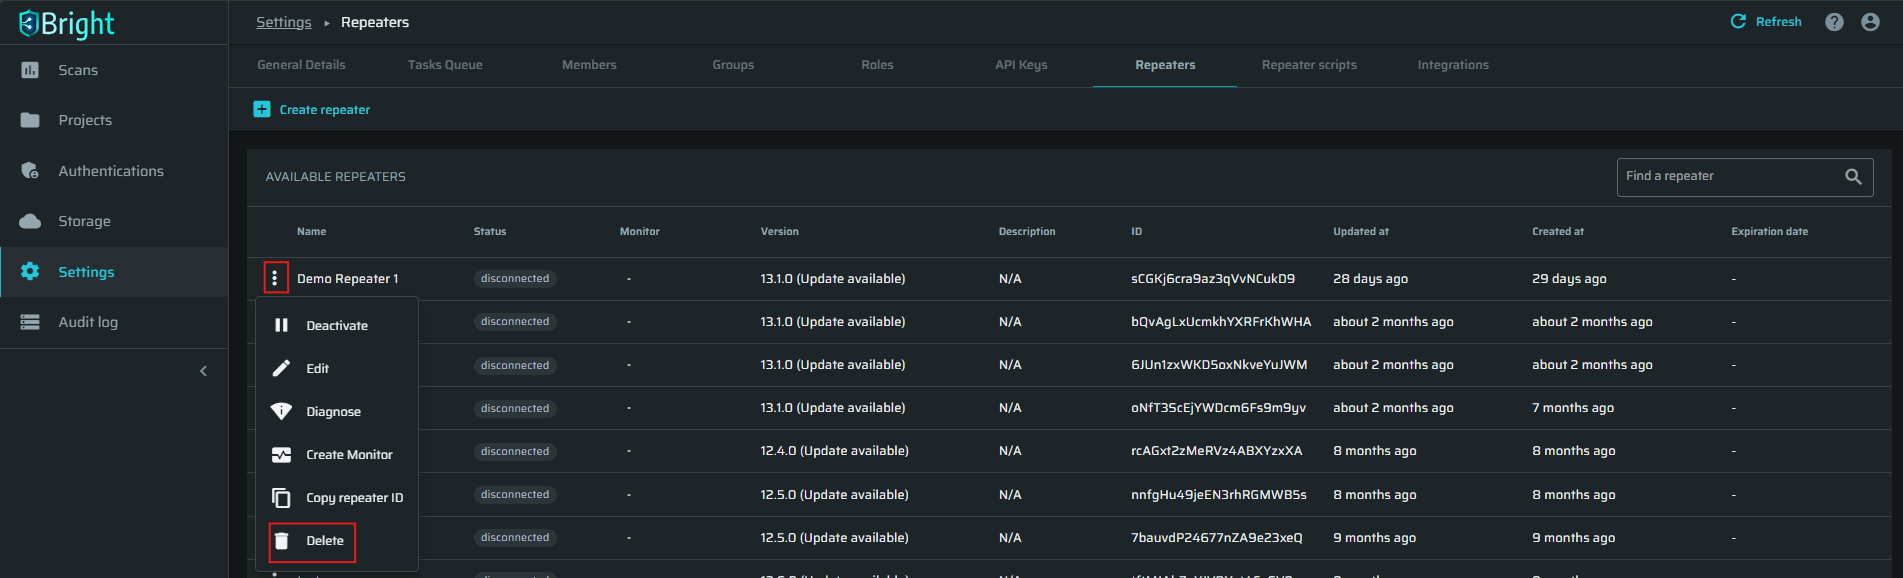
Deleting the repeater
To delete the Repeater, click the ![]() button next to the Repeater name, and then select the Delete option.
button next to the Repeater name, and then select the Delete option.
Updated 12 months ago