Create Scan By Status
Introduction
Scan by Status is a scan type that lets you run on-demand or scheduled scans based on the status of Entry Points (EPs) in your project. Giving you more control over what to scan and when to run it.
Available Statuses
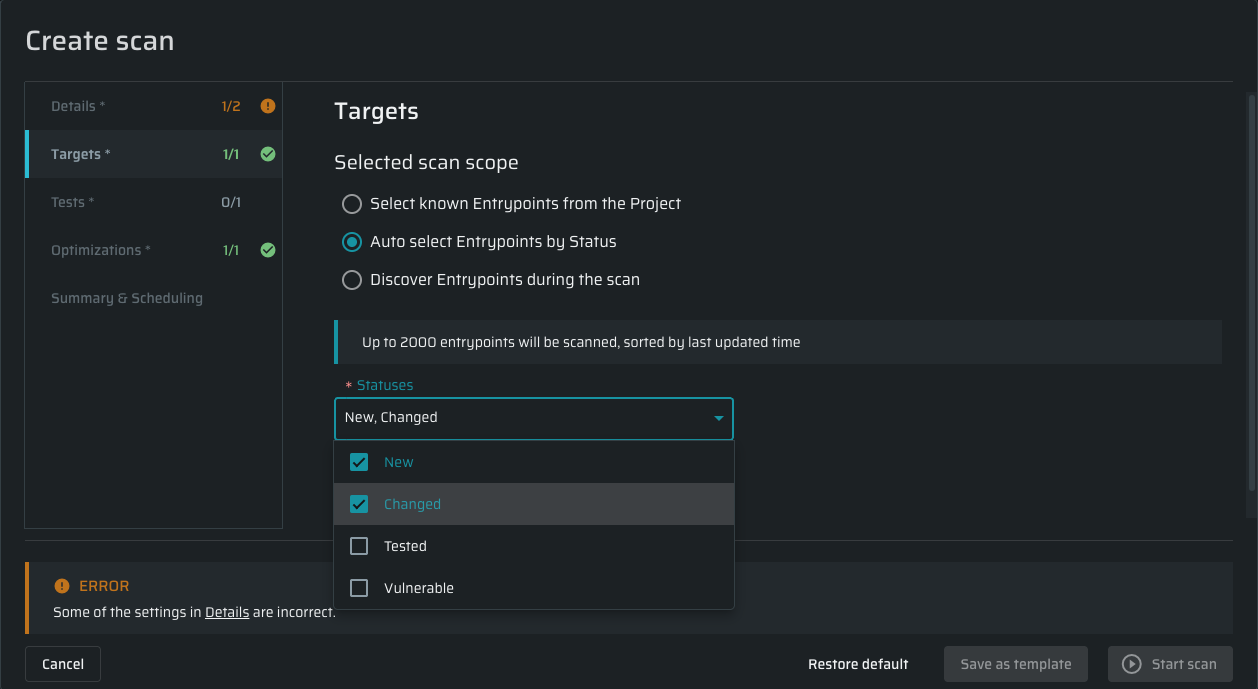
You can select one or multiple statuses when setting up the scan:
- New - Entry Points that were newly discovered and have not yet been scanned.
- Changed - Existing Entry Points that have been modified since the last discovery scan.
- Tested - Entry Points that have already been scanned.
- Vulnerable - Entry Points with known vulnerabilities.
You can also:
- Attach a Repeater to the scan.
- Define a schedule via the Summary and Scheduling tab when creating the scan.
Where Can You Run a Scan by Status?
-
From the Project Page
Select EPs from the project EP list - there’s no need to pre-filter by status.
The scan will run on the selected EPs, filtered by the chosen statuses.
Best for: Running a scan right away on a specific set of EPs. -
From the Create Scan Page
Create a new scan from the Scans page and link it to a project.
This configuration always uses the latest EP list from the project’s Discovery results (no need for manual EP selection).
Best for: Scheduled scans. -
Retest
Reuse an existing scan that was previously run and restart it using the kebab menu in the scans page or inside the scan configuration page. If EPs were selected in the original configuration, they’ll be reused while the system will re-filter based on updated statuses at runtime.
Best for: Verifying changes.
Tip: Automate your workflow by scheduling a Discovery scan first, followed by a status-based DAST scan with a short delay. To ensure your DAST scan always uses the latest Entry Points without manual selection, we suggest configuring it from the "scans" page.
Where to See the Scan Configuration
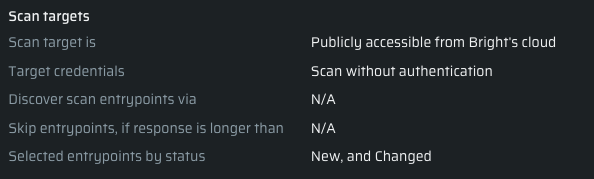
You can view the scan’s configuration summary and selected statuses in:
- The Summary and Scheduling section is inside the scan setup box.
- The Configuration tab on the Scan Page.
Error Handling & Limitations
Limit: 2,000 EPs per scan.
If the EP list exceeds 2,000, only the first 2,000 will be scanned, while the rest will be picked up in the next scheduled scan. You’ll get an email warning before the scan runs, explaining the situation and how to troubleshoot it.
No EPs found for the selected status:
If you picked a status that is irrelevant to the updated EPs list.
Manual Scan: You’ll see an immediate UI error below the configuration box.
Scheduled Scan: The engine will start and then stop immediately. You’ll get an email with a link to the scan page for more information.
API Support for Scan by Status
Endpoint:
POST /api/v1/scans
Request Body:
"entryPointsStatuses": ["new","changed","tested", "vulnerable"
Key Parameter for Status Scans:
- entryPointsStatuses (array, required) - The list of statuses to filter by.
- Possible values:
- "new"
- "changed"
- "tested"
- "vulnerable"
Updated 12 months ago