CircleCI
|
|
| You can configure your CircleCI pipeline to automatically run a Bright scan with every new build. Once a build is made to the pipeline, Bright initiates security tests and provides all the information that developers need to fix the detected vulnerabilities, without having to leave their development environment. | |
| Although it is possible to configure a CI pipeline with the Bright REST API, it is recommended to use the Bright CLI for an easier, more robust configuration of your pipeline. |
For this guide, we are using an intentionally vulnerable benchmark application called Broken Crystals and a preconfigured YAML file to set up a CircleCI workflow.
Prerequisites
To configure security testing for your CircleCI pipeline, you will need to have a few things in place:
- You have an active GitHub account.
- You have an active CircleCI account.
Step-by-step guide
We will run an initial security scan using Bright against the target, where CircleCI will break the build as per our configuration and the results can be viewed for remediation. The code repository for this example contains a publicly available CircleCI YAML configuration file. This runs a scan against an intentionally vulnerable benchmark application called Broken Crystals. You can use this target as a test project. The YAML file contains the configuration for the security scanning and execution steps.
Step 1. Configure a workflow
Configure a YAML file in your GitHub repository that will be integrated with your CircleCI project or create a configuration file directly in the GircleCI project. You can use our CircleCI YAML configuration file as an example.
- Install the NodeJS and Bright CLI so you can use the Bright API to run, poll status, and stop scans.
steps:
      - checkout
      - run:
          name: Install NodeJS and bright-cli
          environment:
            DEBIAN_FRONTEND: 'noninteractive'
          command: |
            apt -y update
            apt-get -y install libnode-dev node-gyp libssl-dev
            apt-get -y install nodejs npm
npm install -g @brightsec/cli --unsafe-perm=true- Proceed to scanning. The following command starts a scan once a commit is pushed to the pipeline.
- run:
          name: Start Bright Scan 🏁
          command: |
            SCAN_ID=$(bright-cli scan:run                                                 \
            --test csrf dom_xss xss header_security secret_tokens open_buckets                 \
            --name "💎 BrokenCrystals for CircleCI" \
            --crawler https://brokencrystals.com/  \
            --token $BRIGHT_TOKEN)
            printf "Scan id is: $SCAN_ID"
            echo "export SCAN_ID=\"$SCAN_ID\"" >> $BASH_ENV

      - run:
          name: Output scan URL
          command: |
            printf "Scan was started with ID https://app.brightsec.com/scans/${SCAN_ID}"
You need to give a name for the scan, specify the discovery type (for us, it’s a crawler with the target URL). If you want to use a .HAR file or an OpenAPI schema for the scan, you will need to upload the file to the Bright app storage in advance and copy the generated ID.
In our configuration, we are also specifying the tests that will be applied to the target and the authorization token that was already set as an environment variable.
After the scan is started, the scan ID is generated. This ID can then be used to re-run the scan as well as to check the scan results in the Bright app.
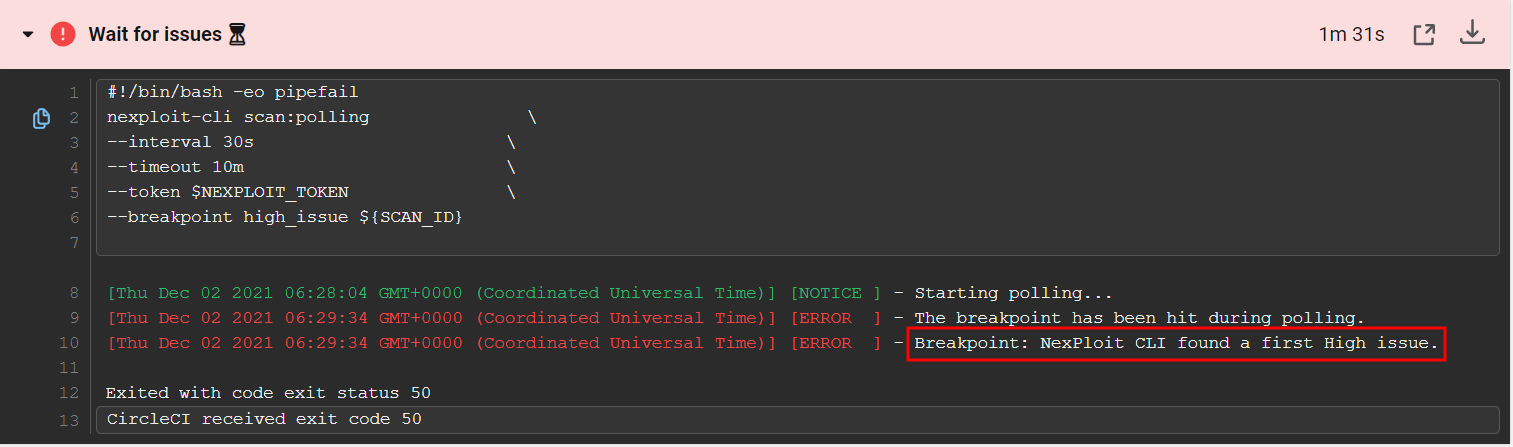
- After the scan is started, we need to poll the scan status until it returns a detected issue. This is enabled by the following command:
- run:
          name: Wait for issues ⏳
          command: |
            bright-cli scan:polling               \
            --interval 30s                        \
            --timeout 10m                         \
            --token $BRIGHT_TOKEN               \
            --breakpoint high_issue ${SCAN_ID}
The “Wait for issues” command allows you to follow the “fail-fast” approach by interrupting the build with the first issue found. Moreover, you can set the severity of the first issue to wait for using the --breakpoint option. In our example, it is set to high_issue, meaning that the build will stop automatically if a high severity issue is found. You will also be able to manage the polling frequency and entire duration by specifying the request interval (for us, it is 30 seconds) and timeout (10 minutes) respectively. The scan will stop upon the timeout expiration if no issue of the specified severity level is detected so far.
Step 2. Integrate GitHub with CircleCI
Probably the most simple process, there are no plugins to install and integration really is out-of-the-box. Simply sign in to CircleCI with your GitHub account, and CircleCI mirrors your GitHub team permissions and privileges, so you can start building right away. CircleCI automatically runs your build and test processes whenever you commit code in GitHub.
Step 3. Set environment variables for the CircleCI project
- In CircleCI, navigate to your Projects and select the repository you would like to integrate with automated testing.
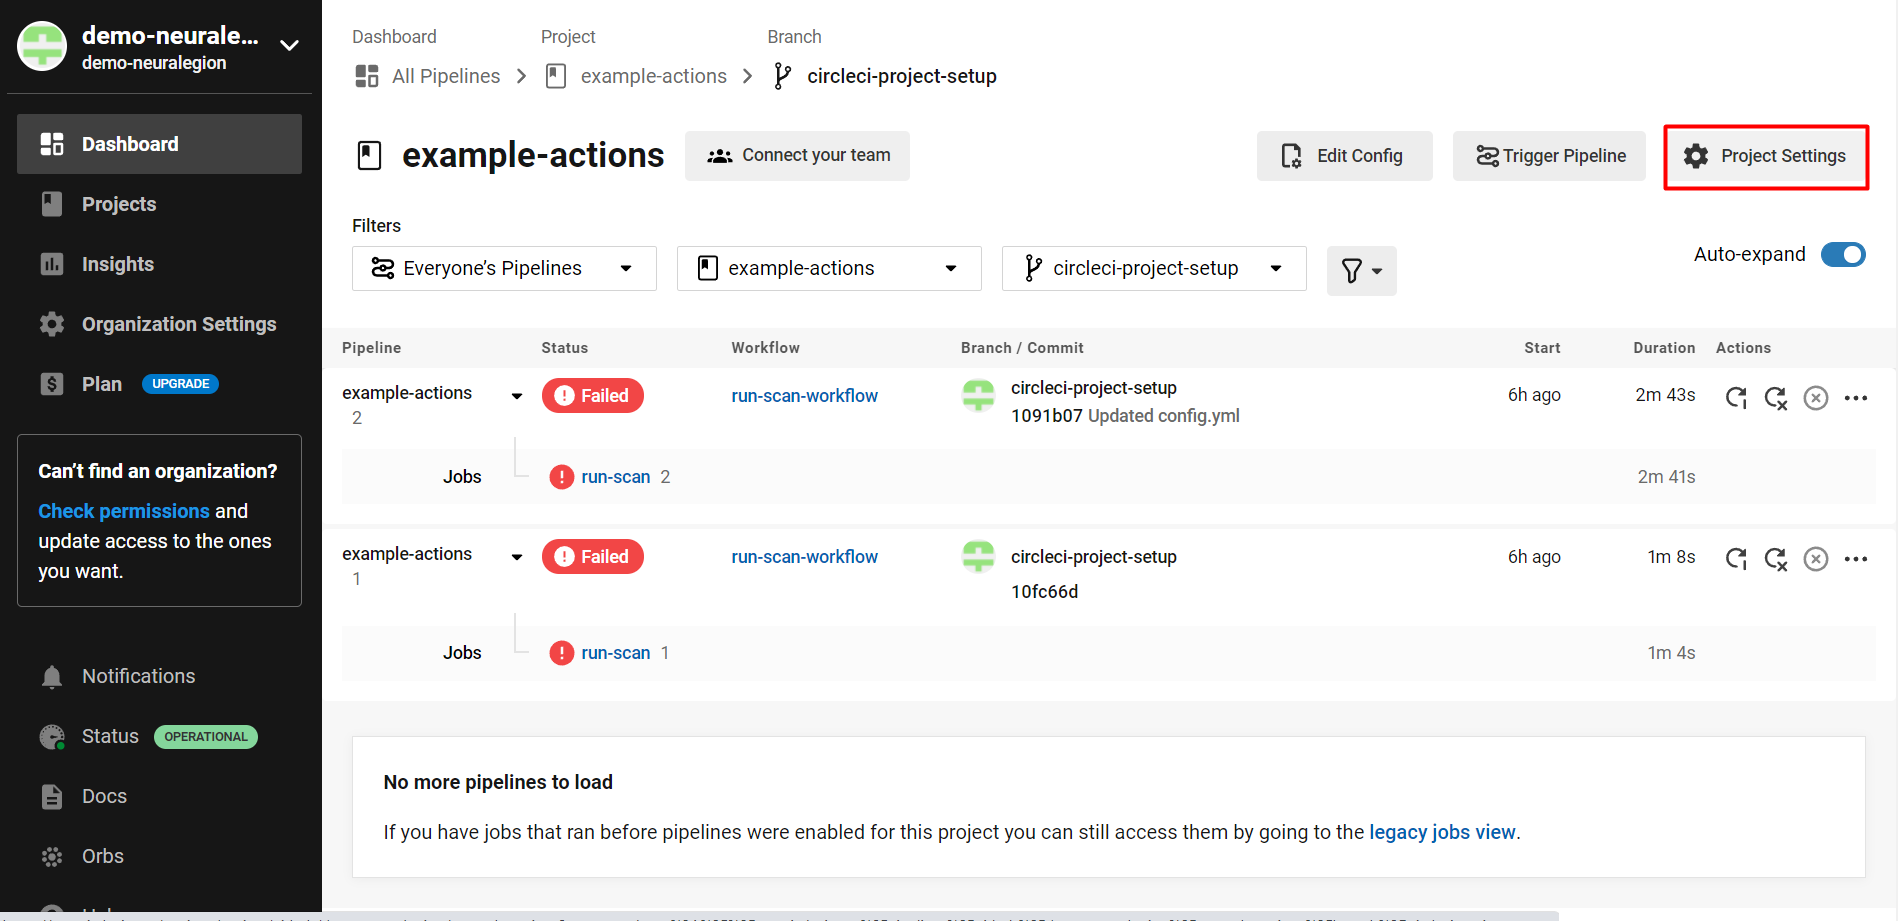
- On the selected project page, click Project Settings:
- From the left menu, select Environment Variables, and then click Add Environment Variable.
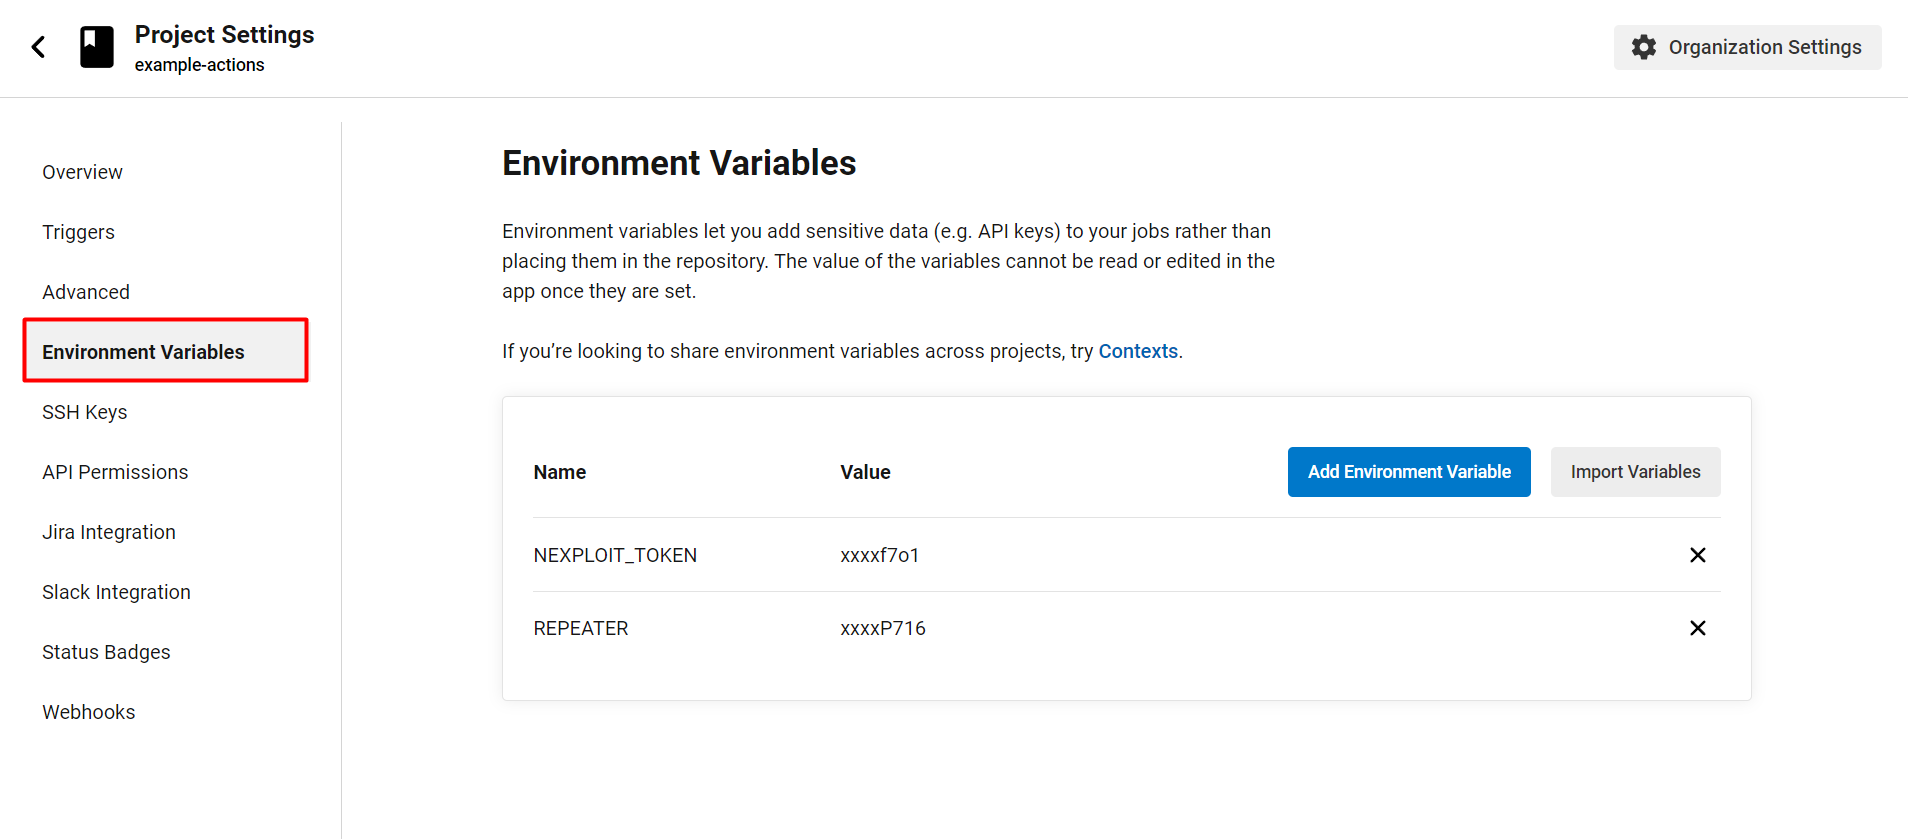
- Add the variables you need for the configuration. For our example, we need the following variables:
BRIGHT_TOKEN- a token (key) required to use the Bright API. To learn how to get the value of an API key in the Bright app, see either User Key, Project Key or Organization Key.REPEATER- a local agent that provides a secure connection between the Bright cloud engine and a target on a local network. The value of this variable is the ID generated upon Creating a Repeater in the Bright app.
Step 4. Push a commit to initiate a security scan
Your next commit will initiate a workflow and build with CircleCI. Bright will run a security scan against that commit.
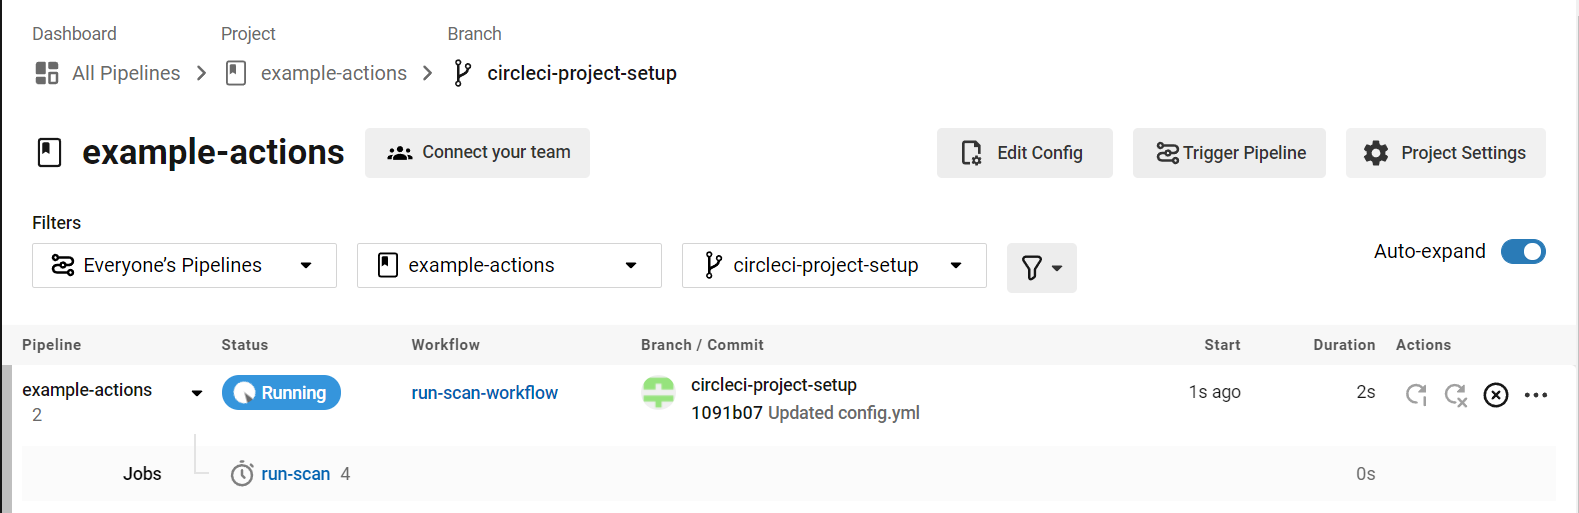
As specified in the configuration file, the environment is spun up, the environment variables are prepared, a new Bright security scan is started against the target, and we are polling for results.
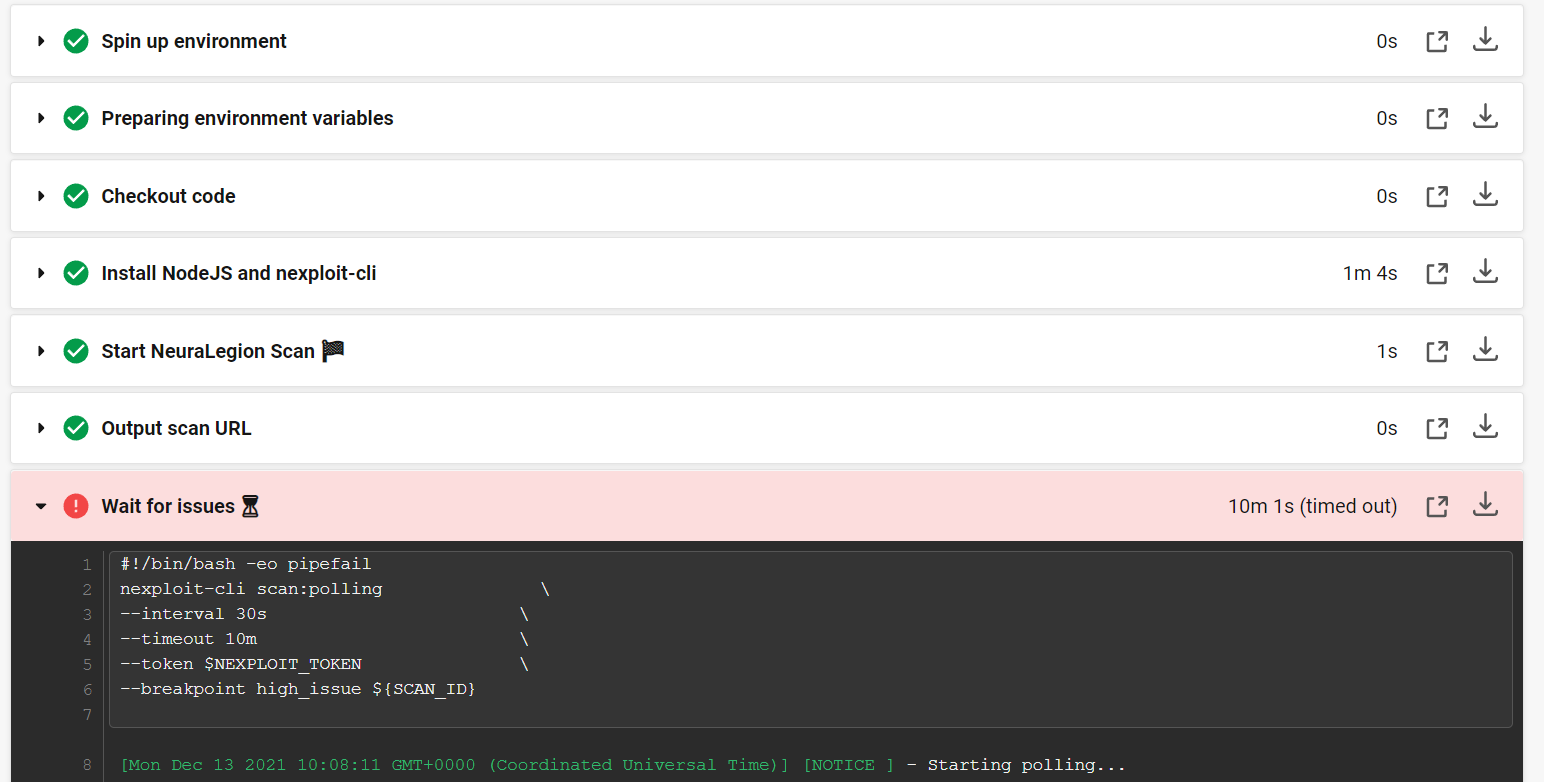
After a short time, Bright will find a high-level issue. As we specified in the configuration file when this breakpoint is met, the build fails and the scan is set to stop.
Step 5. Check the results
We can now look at the security scan status and results using the Bright dashboard to check the status.
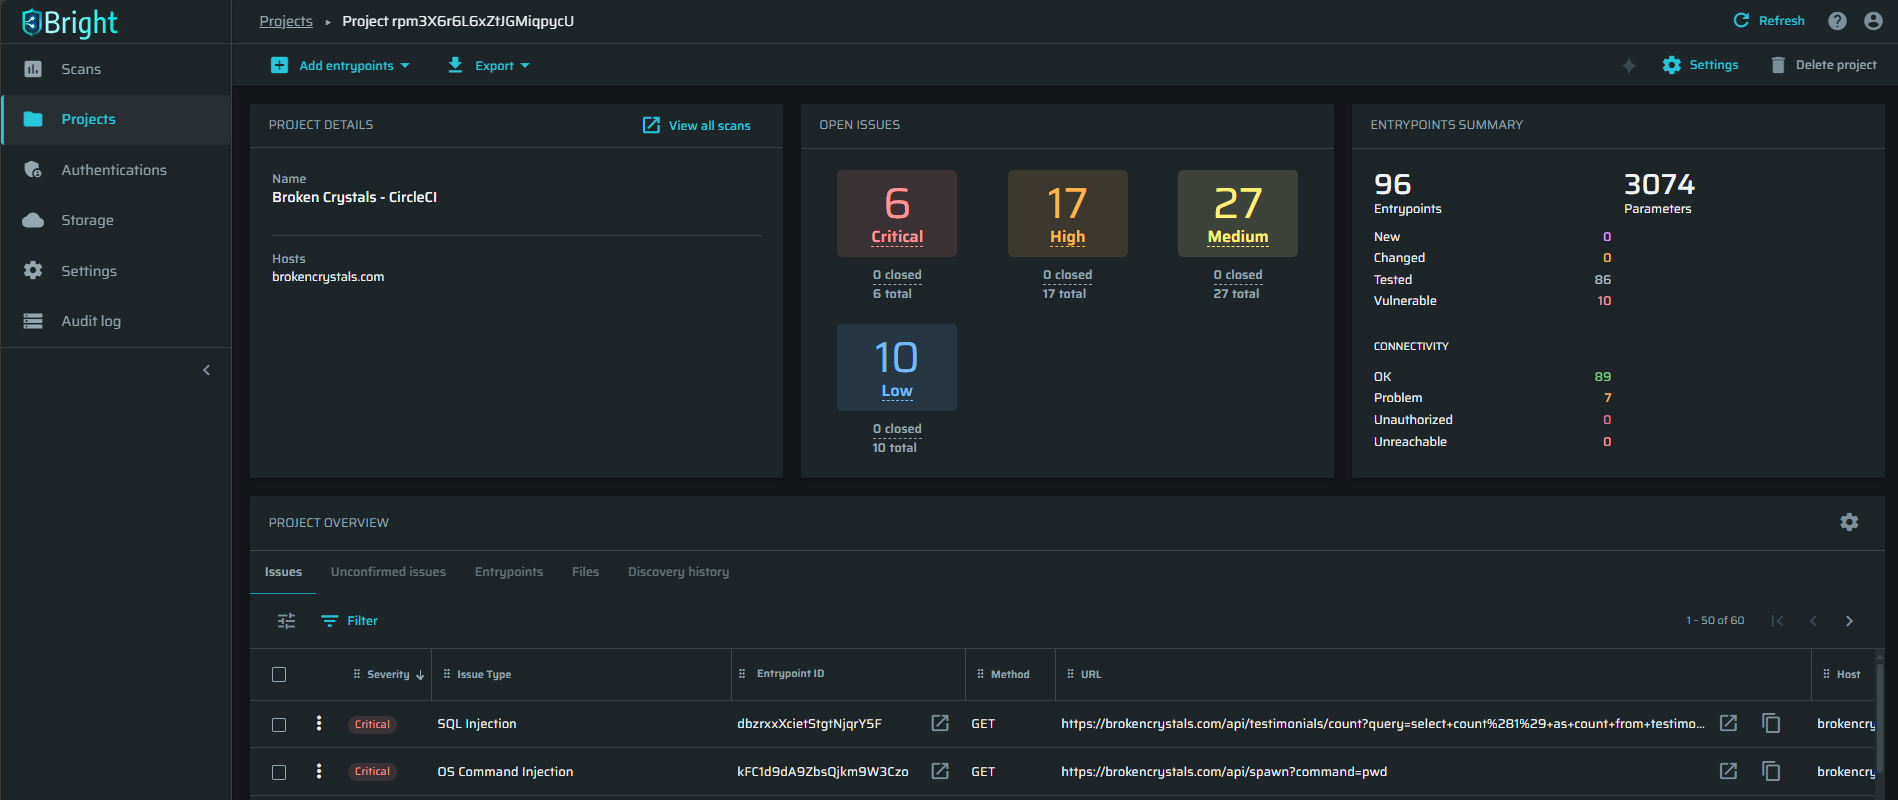
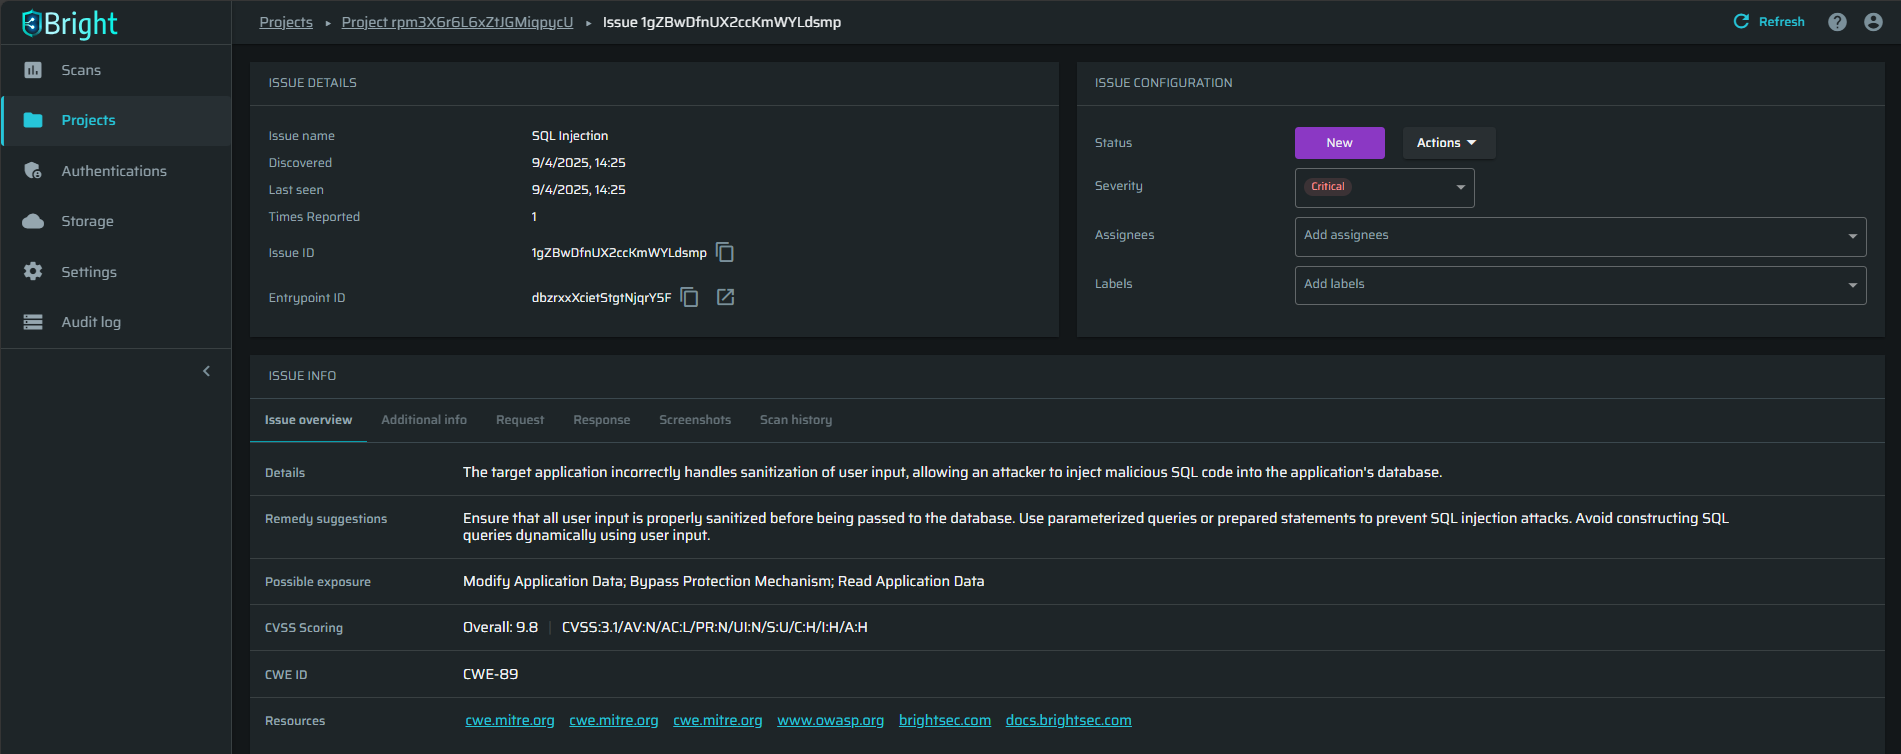
The scanner has already detected a number of automatically validated security issues on the target, ready to be fixed, without the need for any manual validation.
The results provide the developers with the information they need to understand the issue, how to replicate it, and how to fix it, with remediation guidelines.
Updated 12 months ago