Configuring Manual Browser-Based Form Authentication
Before following the instructions below, ensure that your application and authenticated resources are accessible to the Bright engine, either directly from the Internet or via the Repeater.
The manual browser-based form authentication is another method to mimic browser interactions, but instead of using a recorded session, you have to manually specify the interactions to be taken.
- From the Authentication type dropdown list, select Manual browser-based form authentication.
- Fill in the fields as described below to configure a valid authentication request to be sent to the end-point API.
| Field | Guidelines |
|---|---|
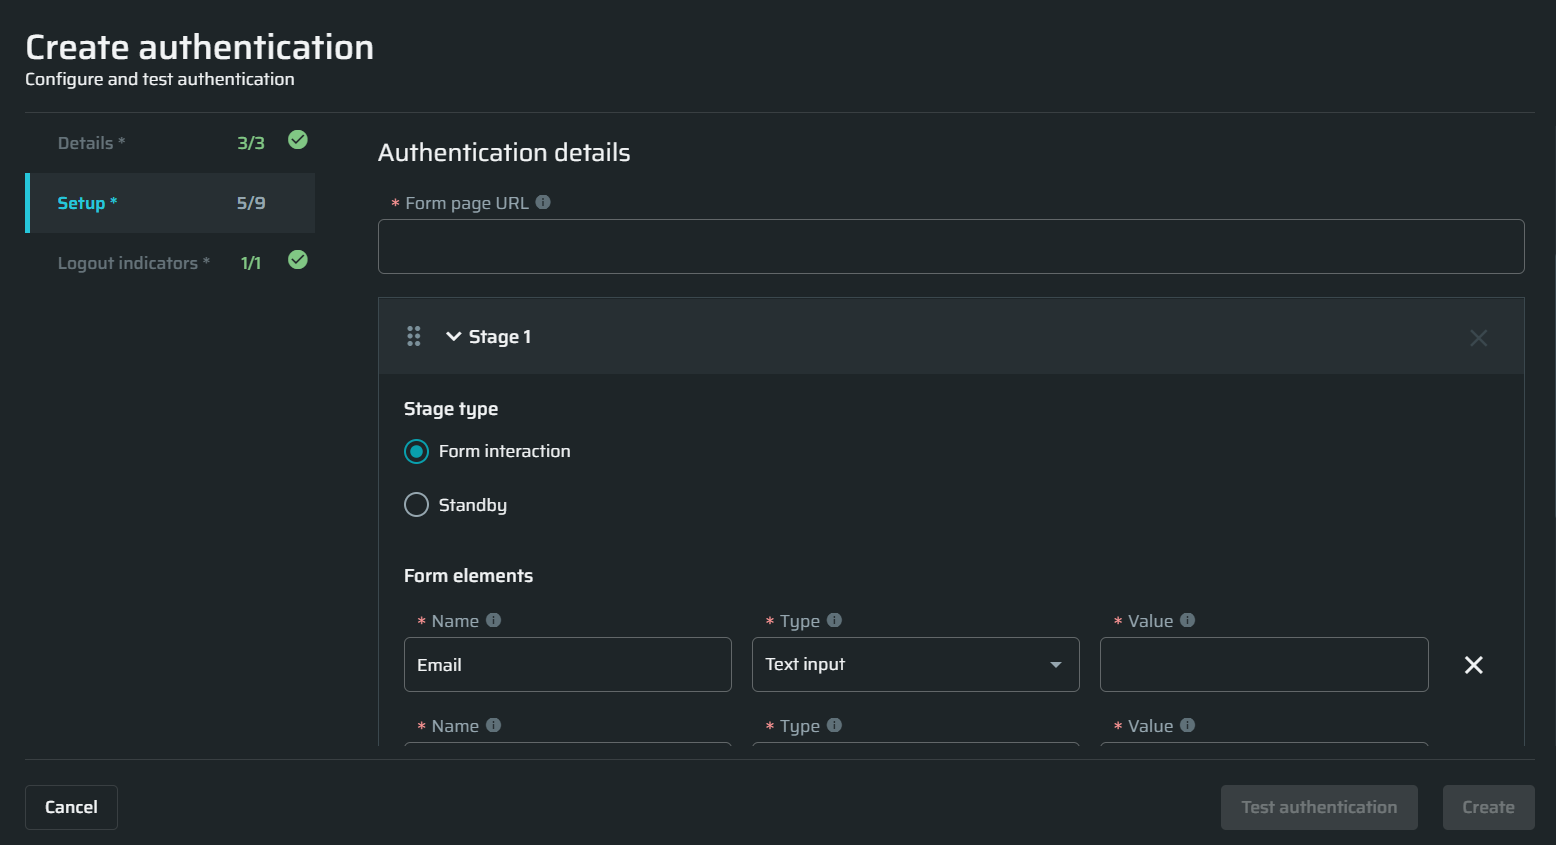
| Form page URL | Enter the URL of the page where the form is located. |
| Stage # |
Each stage represents a separate login page. Add as many stages as the login flow consists of by clicking + Add stage below the Form submission section. To change the order of the stages, simply drag-and-drop them using the Stage type Use the default Form interaction type unless the login page loads longer than 30 seconds (the generic timeout of the system). For a long-loading page, select the Standby type and specify the time for Bright to wait before to take the next step. Once the specified time is over, Bright sends a screenshot of the current state of the page. You can find it in the test authentication results. Elements represent the fields, buttons and other types of input given on the login page. Simply fill in the elements names and types as you see them on the login page and provide the valid values for them.
|
Updated 12 months ago
Did this page help you?