Configuring Custom API Authentication Flow
Before following the instructions below, ensure that your application and authenticated resources are accessible to the Bright engine, either directly from the Internet or via the Repeater.
The custom API authentication method is designed to easily create a single or multi-stage authentication flow. During the authentication object configuration, you can also create templates to extract dynamic information from the previous steps, easily performed by using the String Interpolation Syntax.
From the Authentication type dropdown list, select Custom API authentication flow, and then proceed to the authentication details.
Authentication Details
In this section, build the authentication flow. You can create a single-stage flow or add as many stages as the Bright engine should pass through to access the authenticated resource. To change the order of the stages, simply drag-and-drop them using the ![]() icon to the left of the stage name.
icon to the left of the stage name.
Start the setup by creating the first stage. In the Name field, enter the stage name that can be used further for the creation of interpolation expressions.
Request
Note:To target all the requests/responses for the authentication flow regardless of the total number of stages or redirects, use the
anyreference.For example,
{{ auth_object.stages.any.request.headers | get: 'test_name' | match: sid=(.+) : 1 }}will allows Bright app to go all over the requests of the authentication flow, including redirects and will return the last match.
In this section, set up a valid authentication request to be sent to the end-point API. For that, complete the Authentication Setup fields.
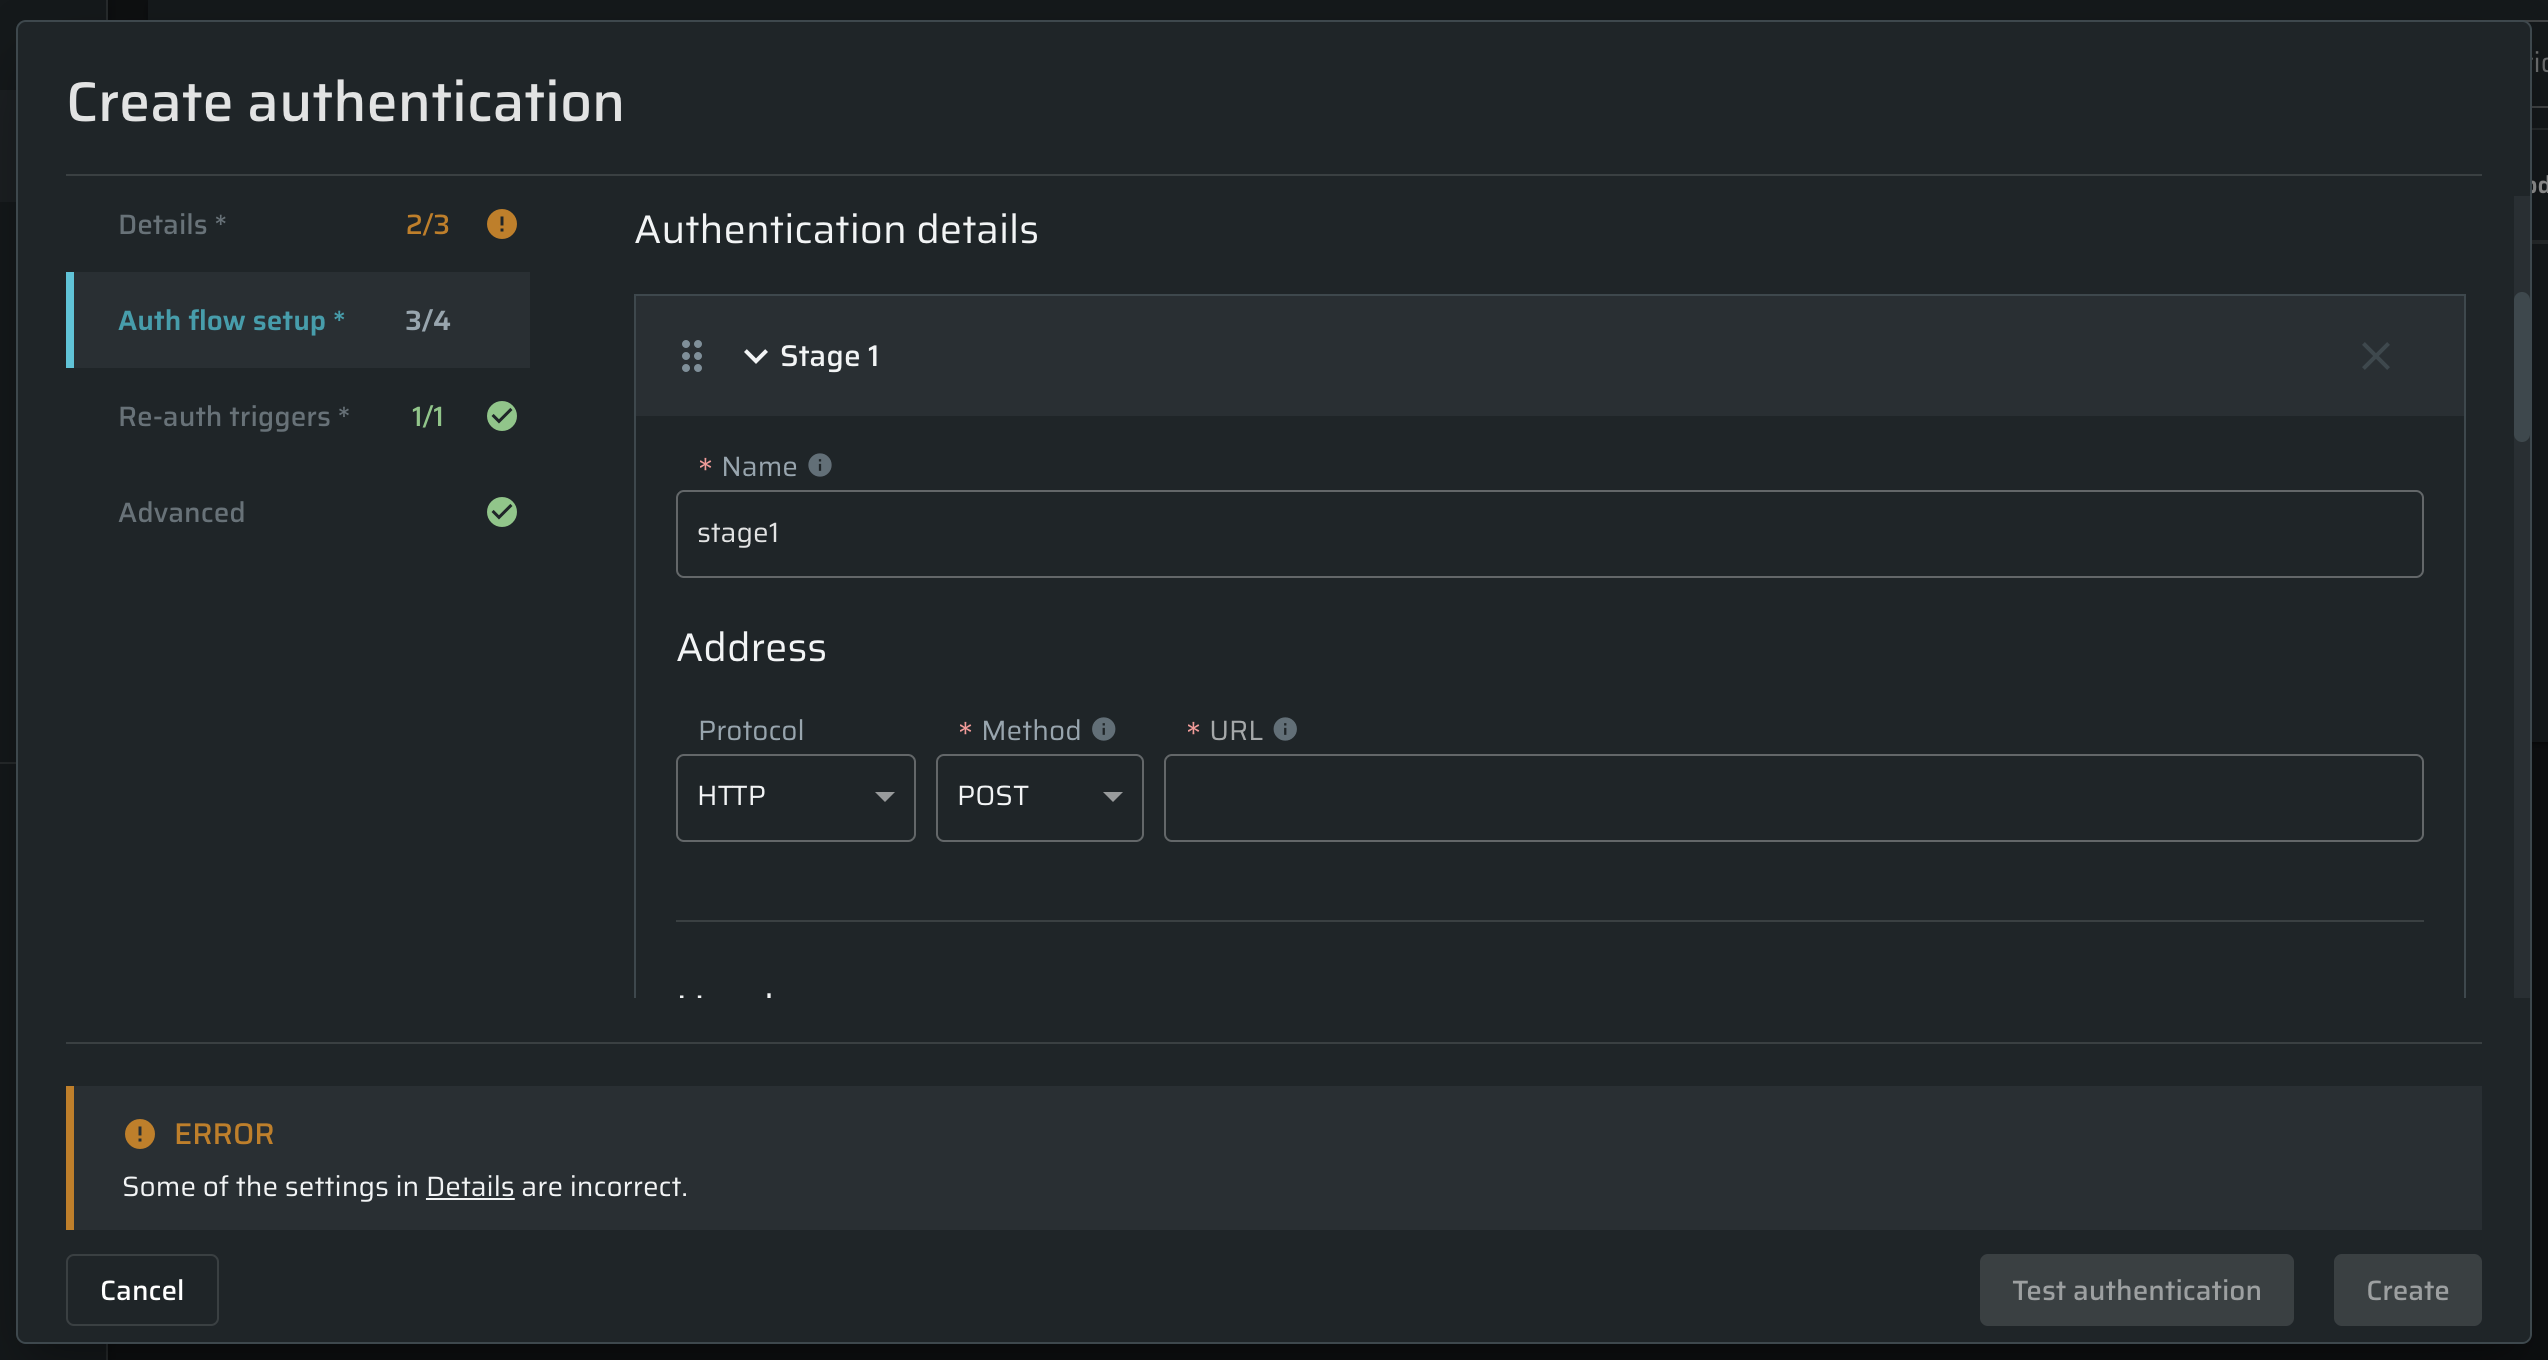
| Field | Guidelines |
|---|---|
| Protocol | From the drop-down list, select the HTTPS protocol to be used for authentication. |
| Method | Enter the HTTP method of the relevant API endpoint. |
| URL | Enter the URL of the relevant API end-point. The URL can contain an interpolation string that you can create using the String Interpolation Syntax. |
| Headers | Enter an additional header that you may need to use for each request and specify its value. You can interpolate the header name and value using the String Interpolation Syntax. For example, a value of an Authorization header can be retrieved from an application response header as {{auth_object.stages.stage1.response.headers\|get:\"Authorization\"}}.To replace or append the specified header before sending each request, select the corresponding option from the Merge Strategy drop-down list. |
| Body | Enter the HTTP request body to use it with the request sent to the API end-point, for example: {“user”: “foo”, “pass”: “bar”}. You can interpolate the body using the String Interpolation Syntax. For example, a value of a token can be retrieved from an application response body as username=admin&password=password&Login=Login&user_token={{ auth_object.stages.stage1.response.body \| match: /value=.(.{32})./ }}. |
| Maximum number of redirects to follow | Enter the maximum number of redirections that Bright should follow during the authentication process.
|
- You can add as many headers as you need by clicking + Add header at the bottom of the Headers section.
- To delete a header, click
 next to the corresponding header field.
Valid authentication response
In this section, define how the Bright's engine determines a success in performing this stage.
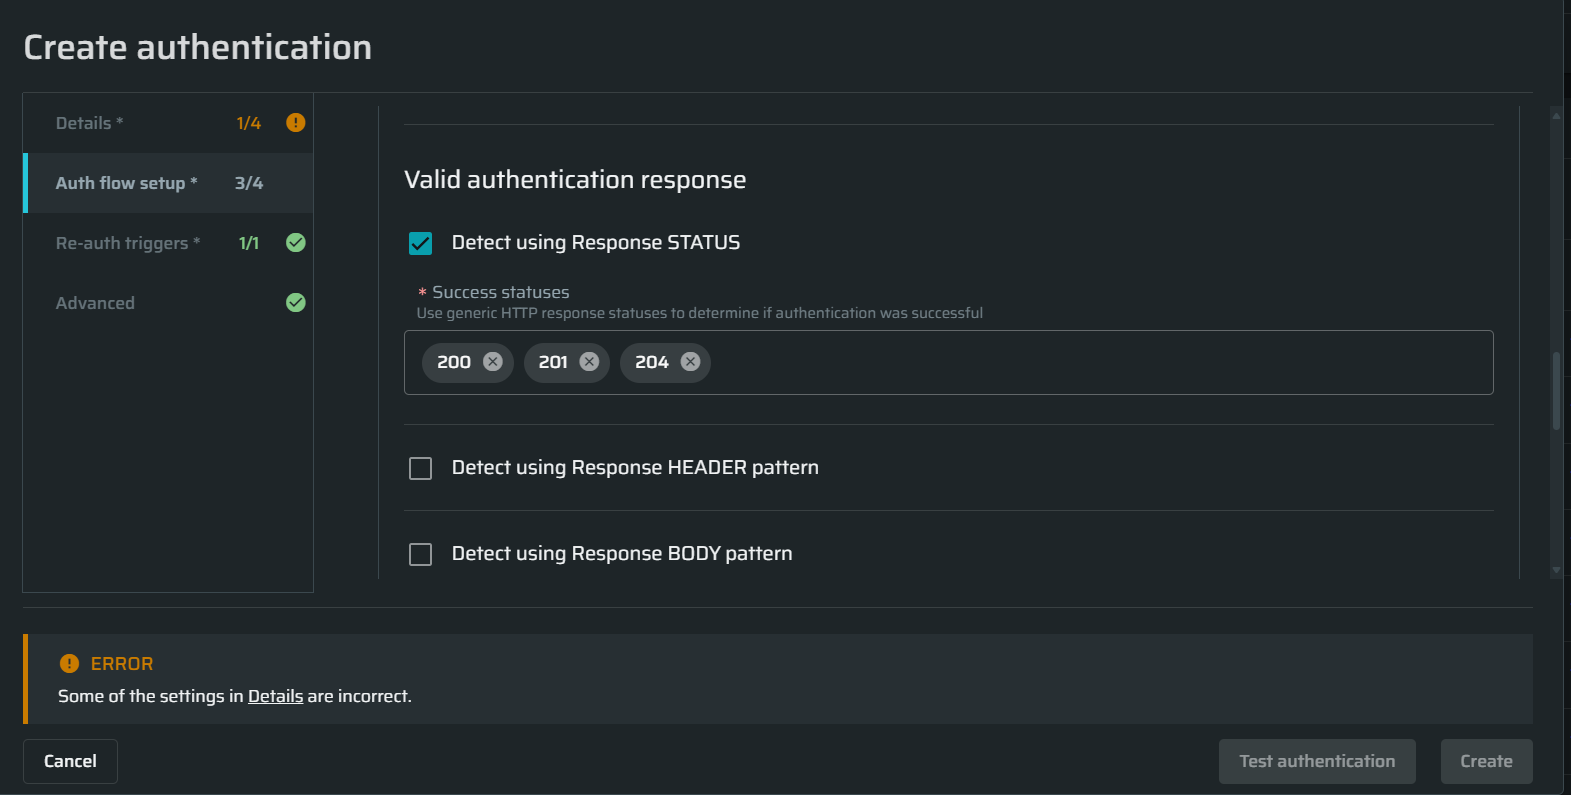
| Field | Guidelines |
|---|---|
| Detect using Response STATUS | Enter the HTTP response status that will tell you about the authentication success. |
| Detect using Response HEADER pattern | Enter the header name and Regex pattern that will help you identify the authentication success. For example, you can use a simple Regex pattern, such as index. |
| Detect using Response BODY pattern | Enter the body pattern that will help you identify the authentication success. For example, this Regex pattern detects a body looking for a UUID in a sessionId parameter: sessionId: \"\\b(uuid:){0,1}\\s_([a-f0-9\\-]_){1}\\s\*\". |
To add another stage required for authentication, click + Add another Stage.
Authorized requests setup
In this section, specify the values to be added to each request sent to the authenticated resource.
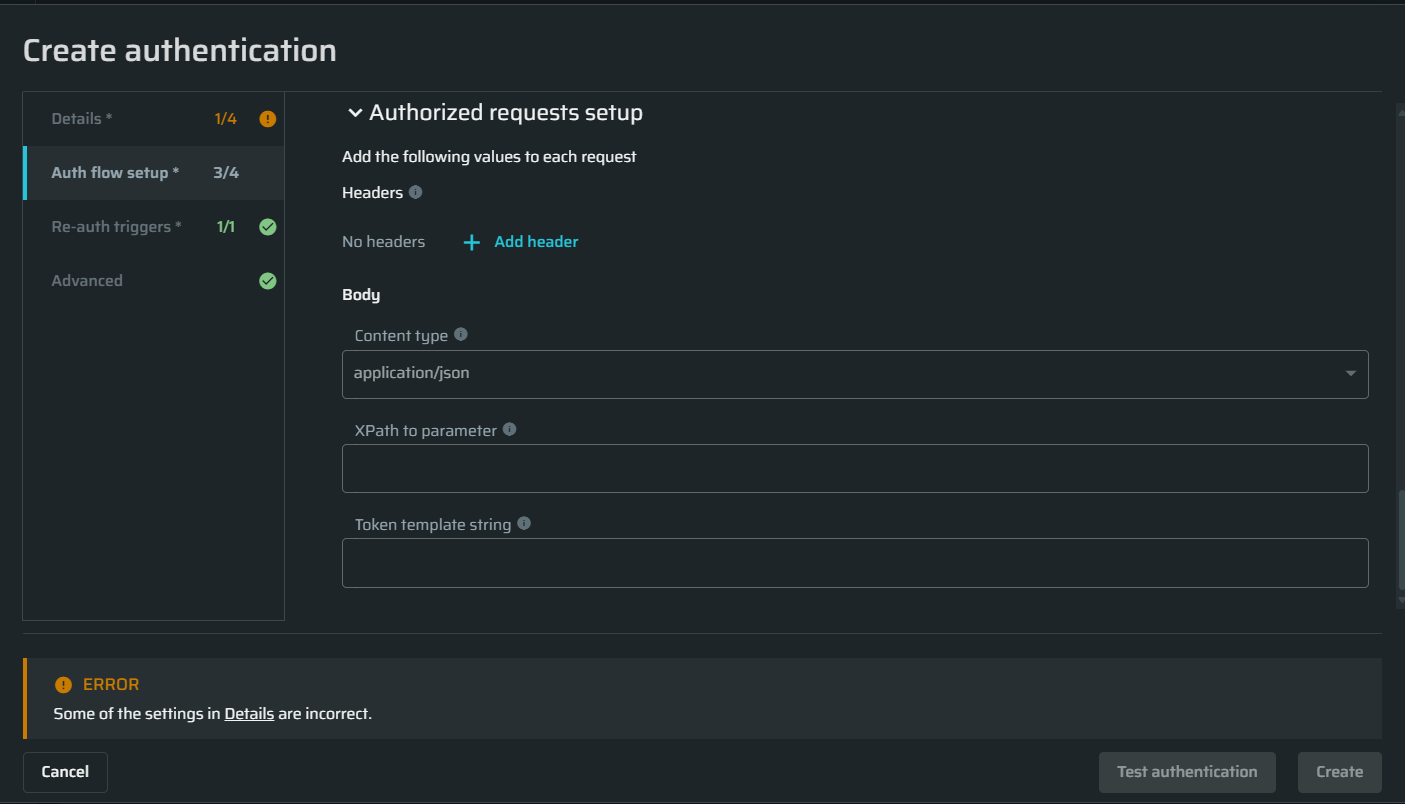
| Field | Guidelines |
|---|---|
| Headers | Specify the name and expected value template of an additional header to be appended to each request. To create the value template, use the String Interpolation Syntax. |
| Content-Type | Specify the content type of the request body. Note: Currently only |
| XPath to parameter | Specify the exact location of the parameter in the object sent with the requests to the target. For example, a path to a session token may look like metadata.authorization.sessionToken. |
| Value | Specify the template of the expected value (interpolation string) to be embedded into the target parameter. To create the value template, use the String Interpolation Syntax. For example, a token template string may look like {{token}} . |
- For some parameters, you can add more fields by clicking
 at the upper-right of the relevant setup section.
 - To delete a parameter, click
 to the left of the relevant field.
Updated 12 months ago