Installation Guide
Introduction
The Bright Command Line Interface (CLI) is a toolkit designed for ease of use when working with the Bright solutions as part of your CI/CD and automation tools. Using multiple Bright CLI commands and options, you can have full control over the entire scanning process, take advantage of CI integrations and achieve maximum flexibility for your automation needs.
Bright provides two ways of installing Bright CLI: in-app installation using a Quick start wizard, or manual installation for automation testing.
Note:Keep the Bright CLI updated for the best experience. Get the latest version for each major release and avoid errors.
In-app CLI installation
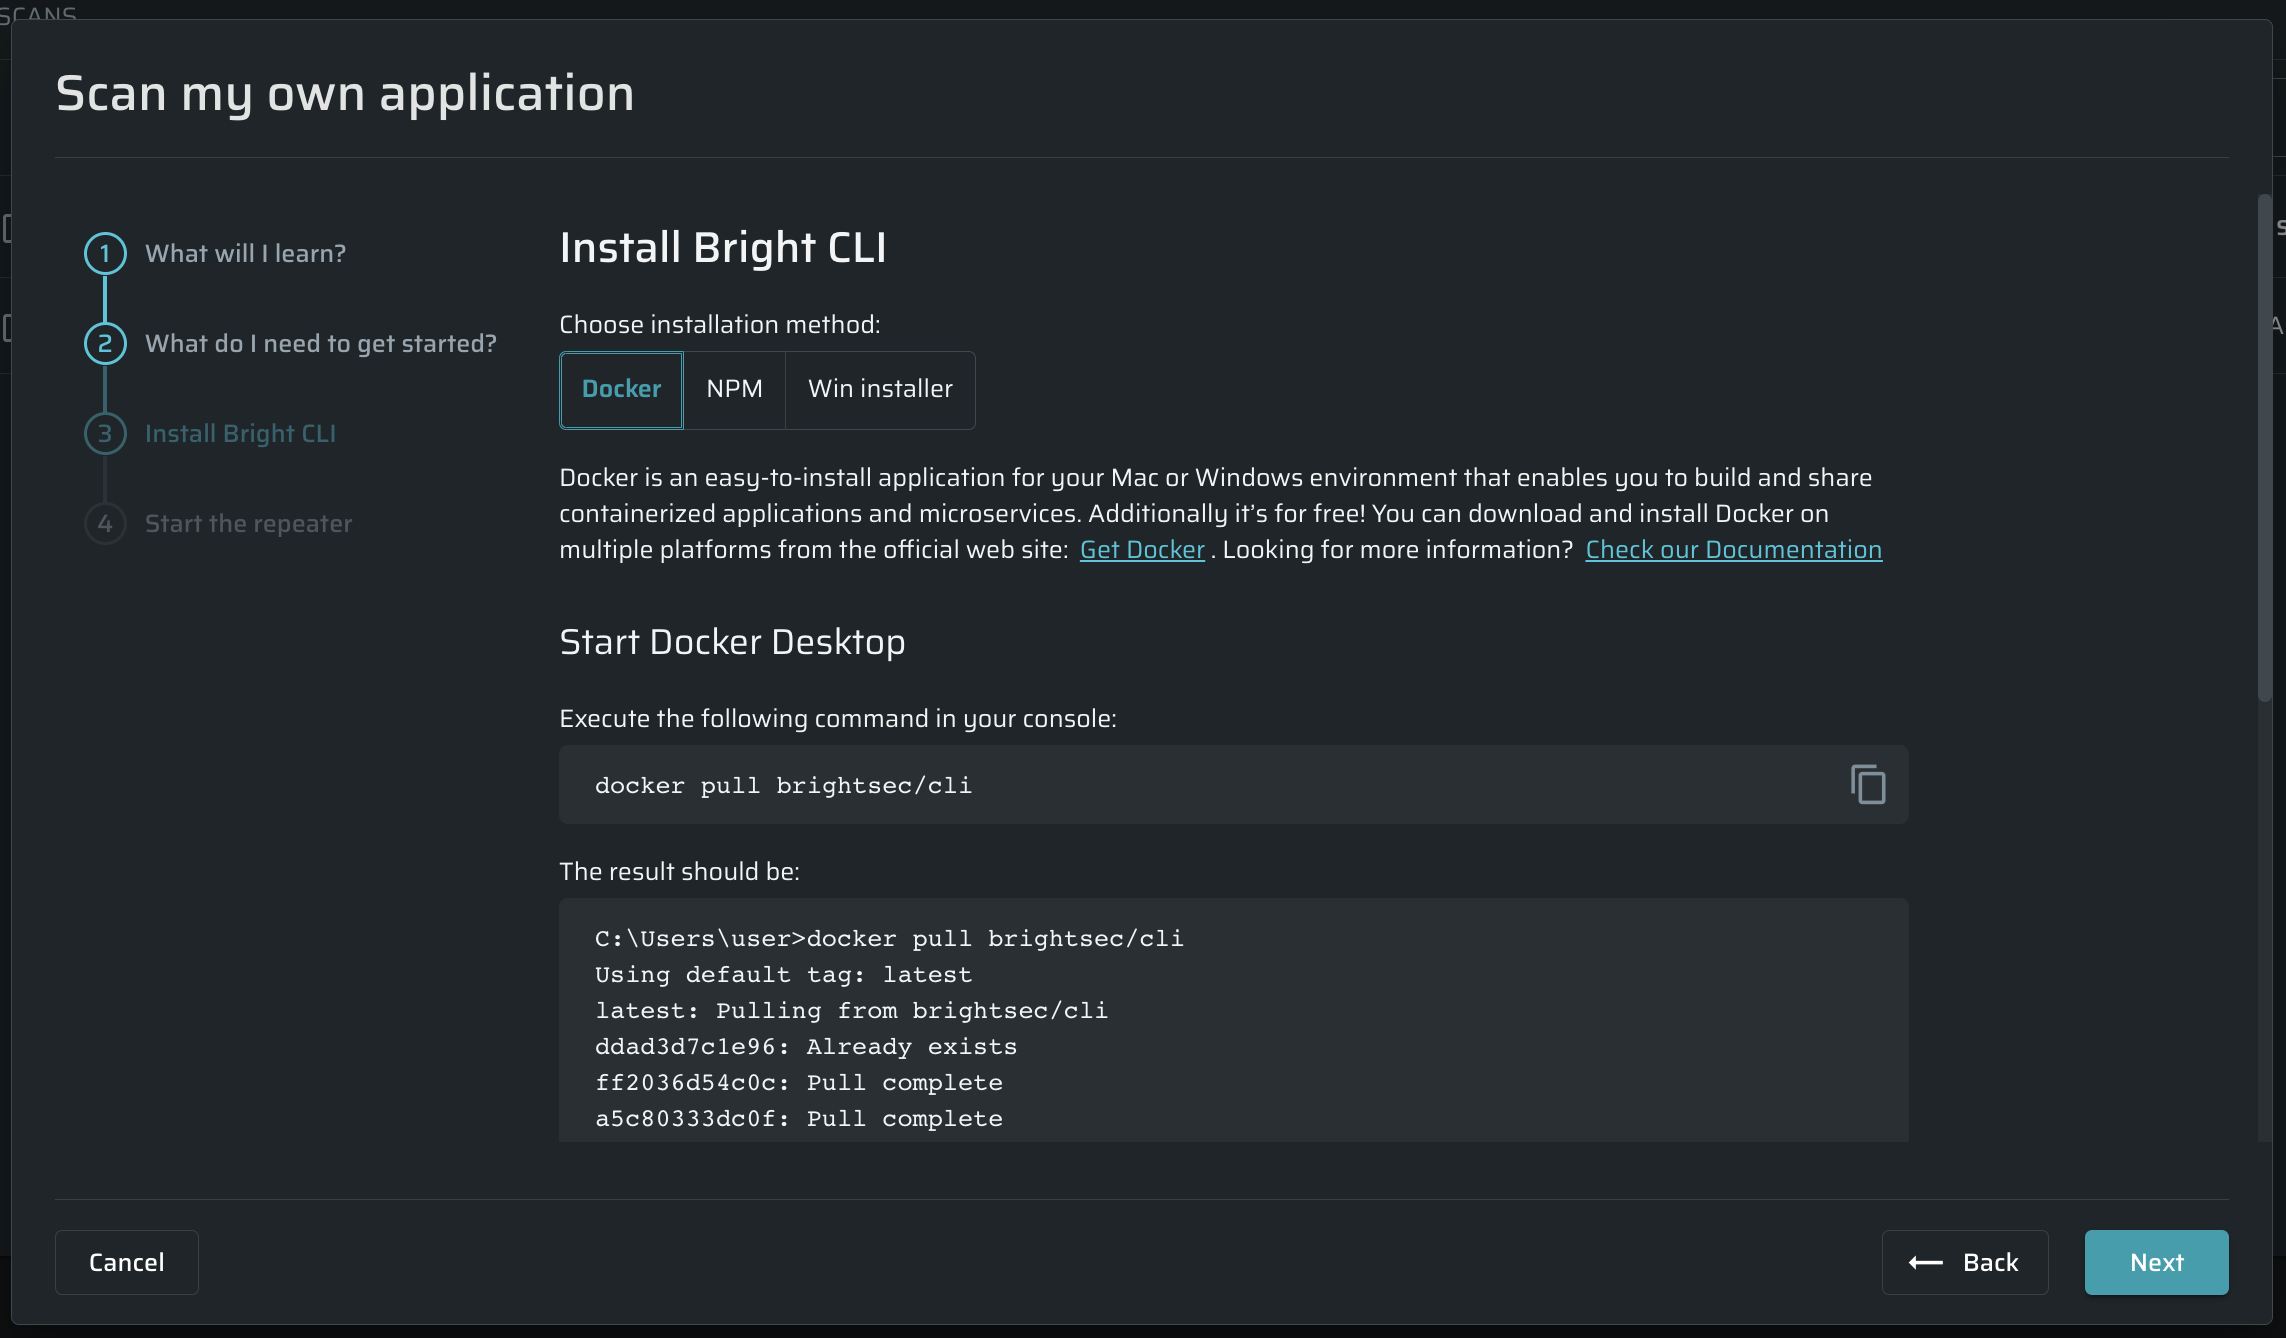
This page describes how to install Bright CLI via the in-app Quick start wizard. To install Bright CLI:
-
Open the wizard from any page of the Bright app: click
 → Quick-start wizard.
 -
Select the Scan my own application (full installation guide) option and click Next
-
The information about general installation steps will appear. Click Next to move to the next step.
-
After learning the basic installation steps, click Next to start the installation.
-
Select the installation option from Docker, NPM and Windows installer and follow the instructions.
-
Make sure Bright CLI has been installed successfully by commands:
-
Docker:
docker run -it brightsec/cli -v -
NPM:
bright-cli --version -
Windows:
bright-cli --versionThe successful result for all options should be:
v10.2.0.
-
-
If you have issues with installation, use the Troubleshooting section at the bottom of the wizard.
-
Optional. You can also install a Repeater using this wizard by clicking Next, if needed.
Step-by-step installation
Prerequisites
Installation Guide
Updated about 2 months ago