

Protocol-Based Authentication
Some applications delegate authentication to a standard protocol, so there is no login form or custom login API to replay. Bright follows the protocol itself to get access.
Two protocol-based methods are available:
- OpenID Connect (OAuth) - for applications that use the standard OAuth 2.0 flow with client or user secrets. Bright requests a token from the OpenID provider and embeds it in each request.
- NTLM Authentication - for target networks that verify access rights with the NTLM protocol, using a username, a password and, optionally, a domain.
OpenID Connect (OAuth)
The OIDC (OAuth) authentication method is designed to configure the standard OAuth 2.0 flow, which requires the use of client or user secrets.
NoteCurrently, only the Client Credentials and Resource Owner Password grant types of OIDC are supported.
If your application is using PKCE, please use the Recorded Browser-Based Form Authentication or Manual Browser-Based Form Authentication authentication options.
From the Authentication type dropdown list, select OpenID Connect (OAuth), and then proceed to the authentication details.
Authentication Details
In this section, complete the provided fields to set up a valid authentication request for the end-point API.
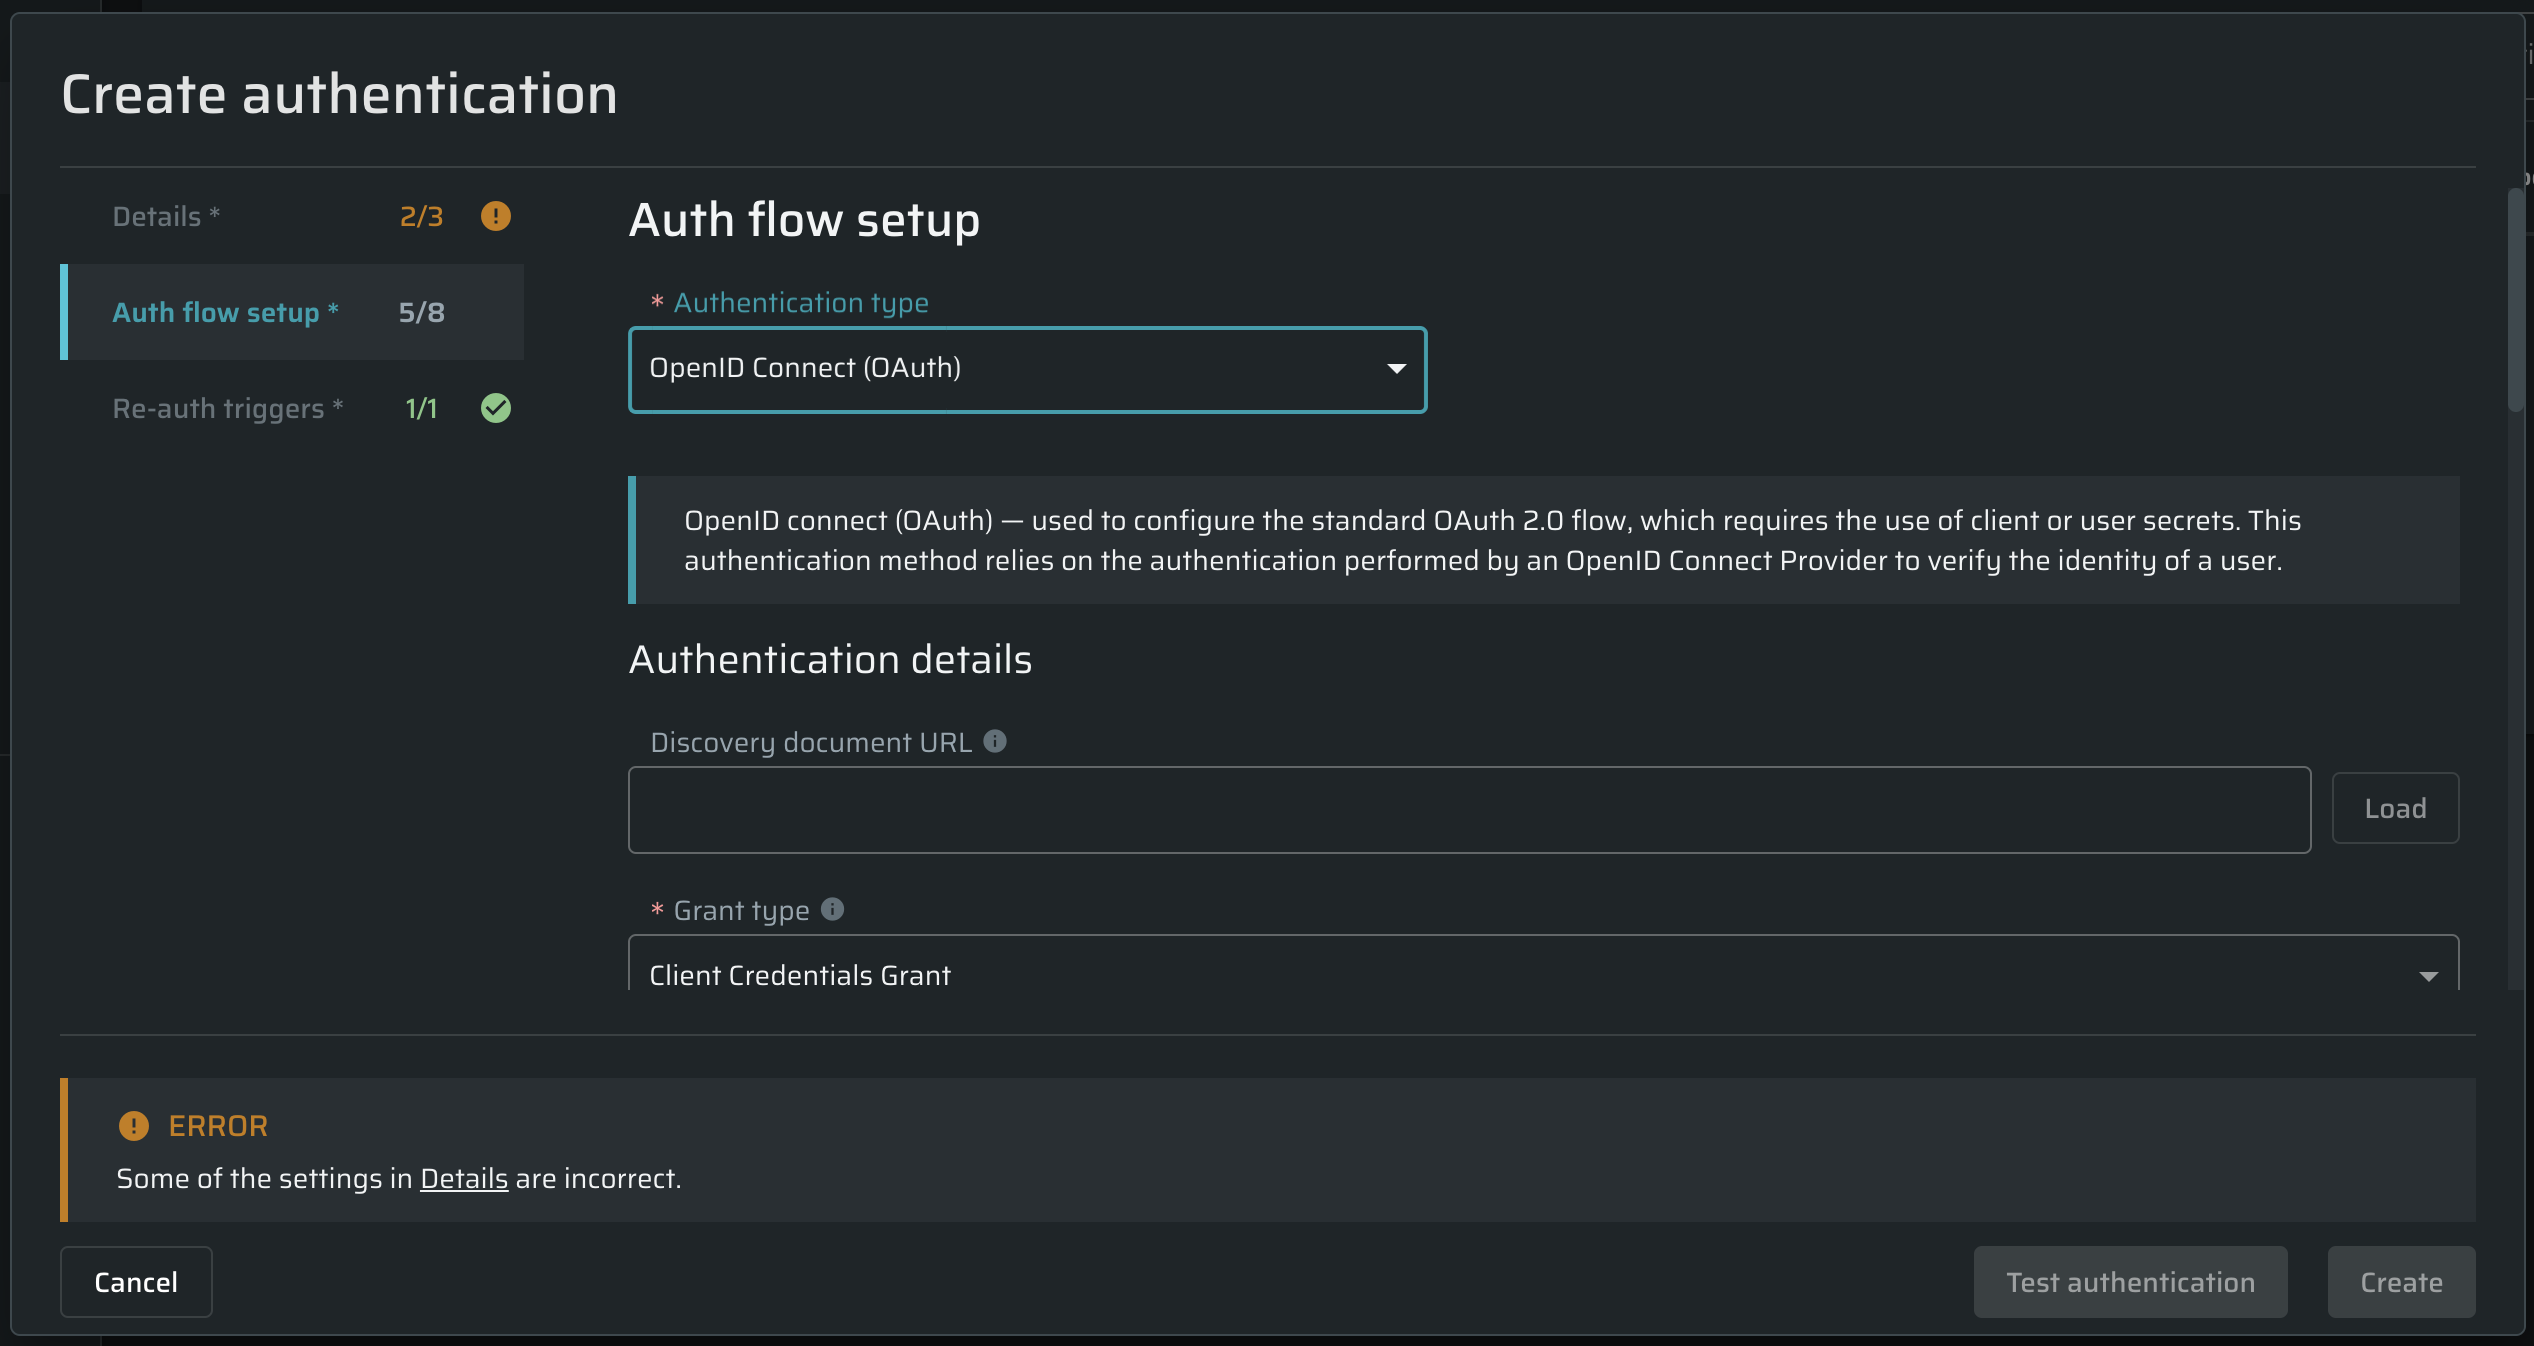
| Field | Guidelines |
|---|---|
| Discovery document URL | Provide a discovery document URL (https://your_host/.well-known/openid-configuration) to populate endpoint URLs automatically or leave this field empty to enter endpoint URLs manually. |
| Grant type | From the drop-down list, select the grant type you need:
|
| Token Endpoint | Obtain an access and/or ID token by presenting an authorization grant or refresh token. |
| Client ID | Enter your application client ID, a unique client identifier preregistered in OpenID Provider. |
| Client Secret | Enter your application client secret, which is used to authenticate to the Token Endpoint. |
| Scope | (Optional) Enter a space-separated list of scopes. |
| Resource | (Optional) Enter a line-separated list of resources. |
| Audience | (Optional) Enter the intended recipient of the token. |
| Embed in | Select where to embed the token in the request.
|
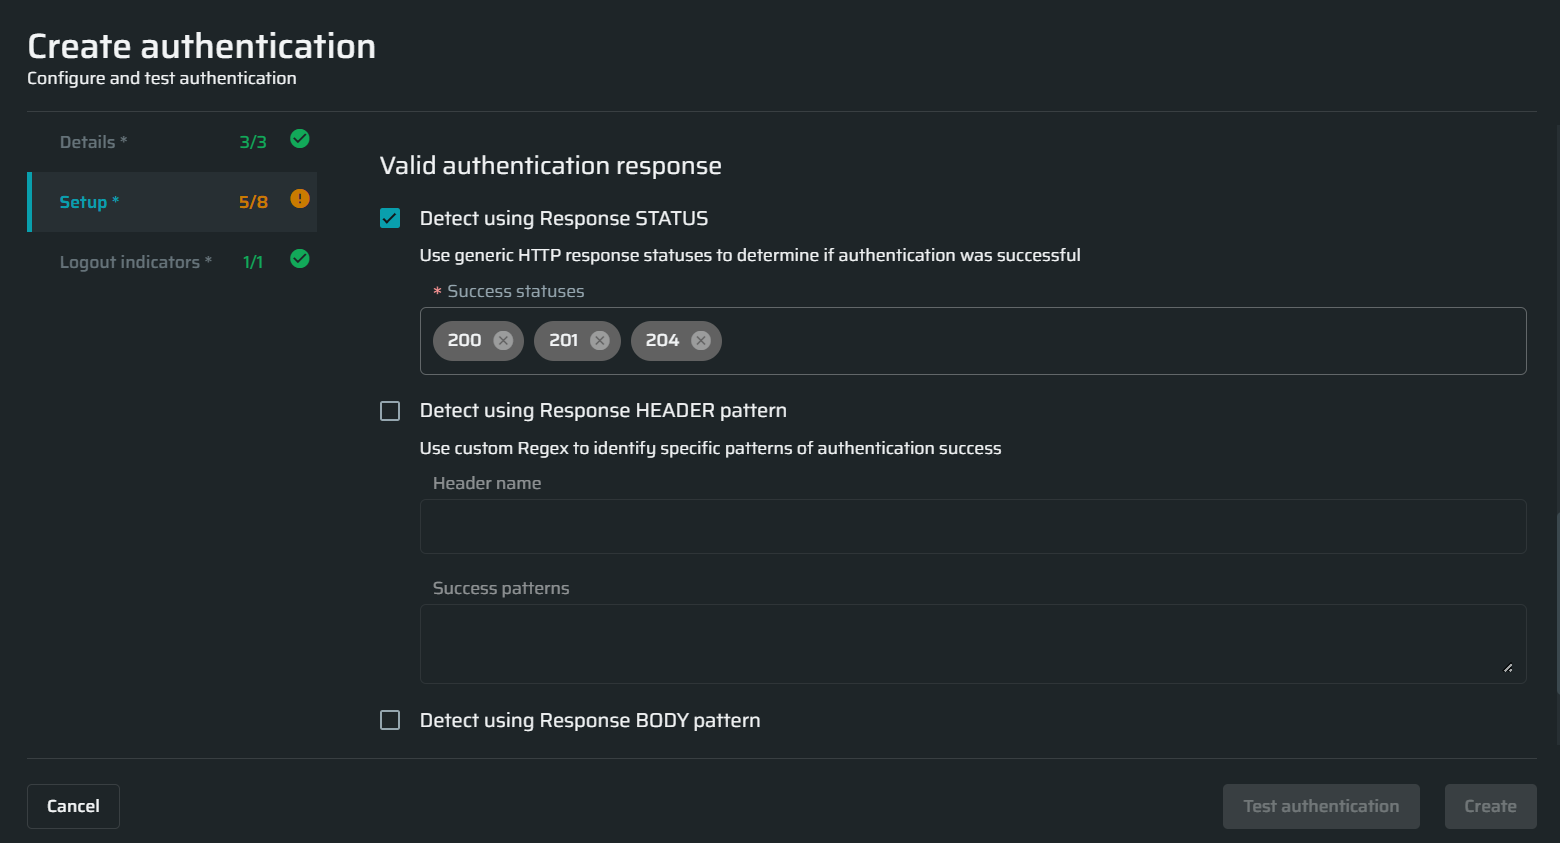
Valid Authentication Response
In this section, select the options you want to use during the application scanning to determine that the authenticated resource has been reached. The options define how the application responds if a full authentication flow passes successfully.
NTLM Authentication
If the target network uses the NTLM protocol to verify the user’s access rights, you need to set up an NTLM authentication object. The protocol requires a user to be authenticated by providing a username and a corresponding password. After the user’s log-in credentials are recognized, the network can check access rights and allow the user to enter.
ImportantIf using a Repeater, add
--ntlmflag to keep an open connection between a Repeater and the target. To learn more about Command Language Syntax, see the article.
From the Authentication type dropdown list, select NTLM authentication, and then proceed to the authentication details.
Authentication Details
In this section, complete the provided fields to set up a valid authentication request for the end-point API.
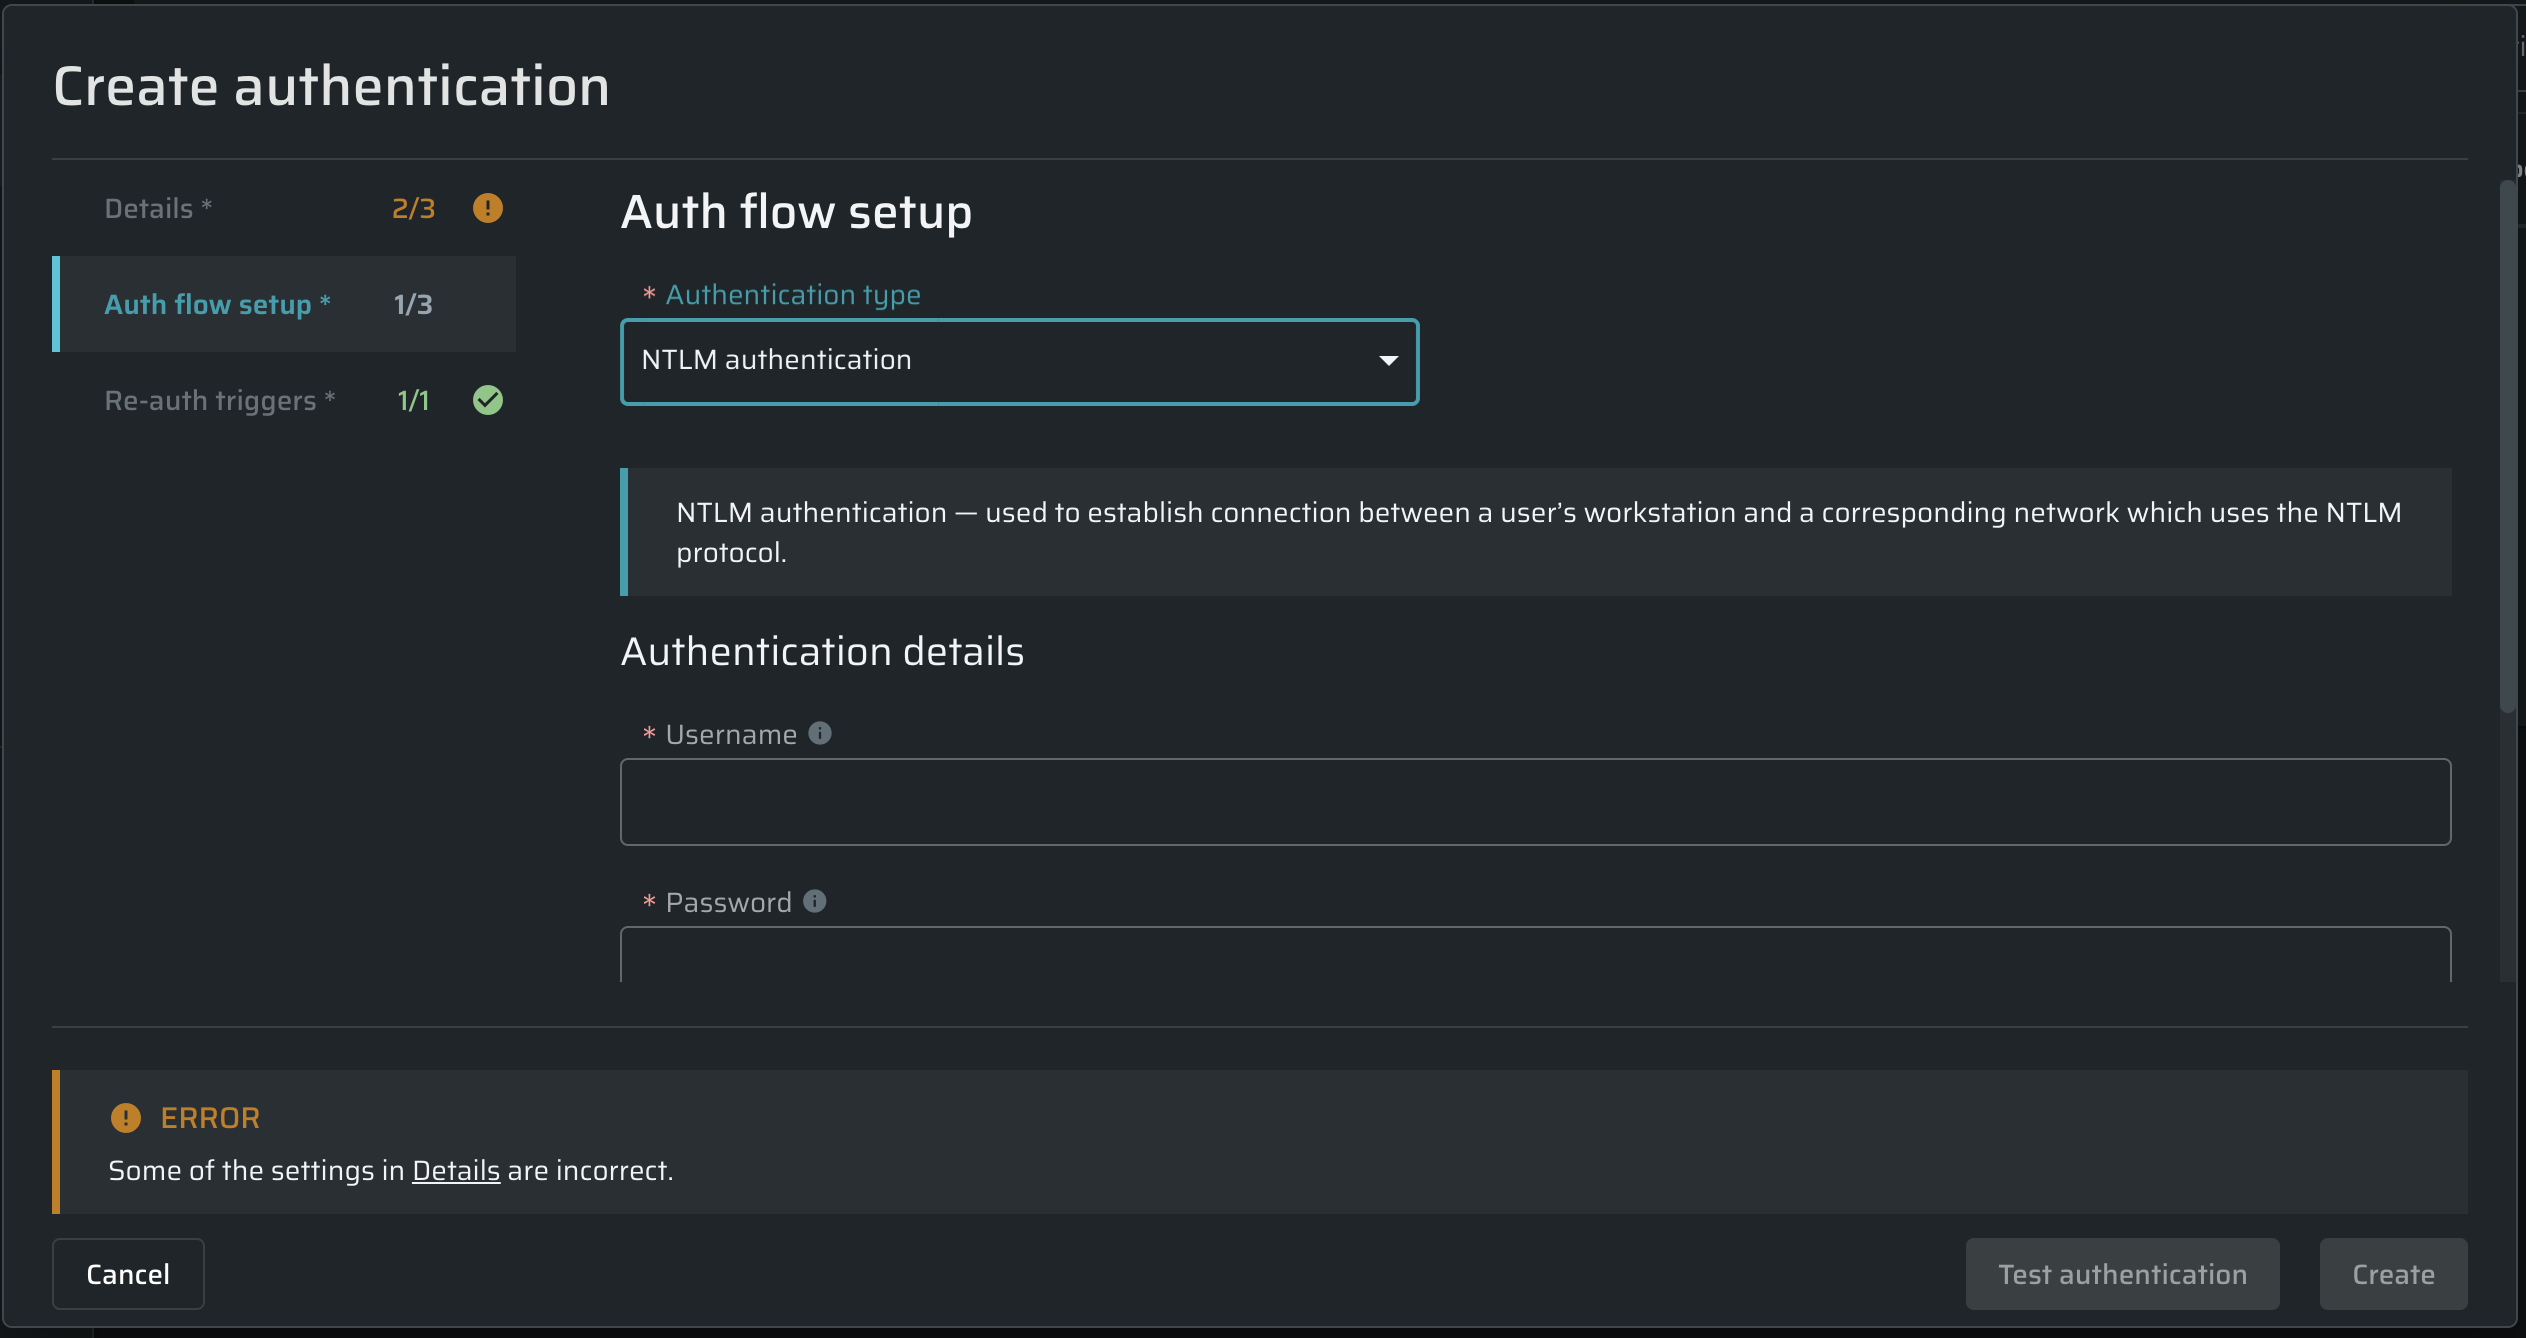
| Field | Guidelines |
|---|---|
| Username | Enter the username. |
| Password | Enter the password. |
| Domain | (Optional): Enter the domain of the NTLM network you need to get access to. |
| Workstation | (Optional): Enter your workstation name, for example, a computer name. The maximum length of a workstation name is 64 characters. |
Updated about 7 hours ago