

Browser-Based Authentication
Some applications require a user to log in through a web page, with no API you can call directly. Bright can authenticate to these applications by opening the page in a browser and performing the same login a user would.
Two browser-based methods are available:
- Recorded Browser-Based Form Authentication - record the login once, either with Bright's built-in recorder or the Chrome DevTools recorder, and Bright replays the recorded interactions.
- Manual Browser-Based Form Authentication - manually specify the login page's fields and how to submit the form, without recording a session.
Recorded Browser-Based Form Authentication
The recorded browser-based form authentication method allows you to create/use a recorded session. The recording contains browser interactions (e.g.: clicks, form values population, navigation) which are replayed by our engine.
Recording/Uploading a New Login Session
To record your login session, follow these steps:
-
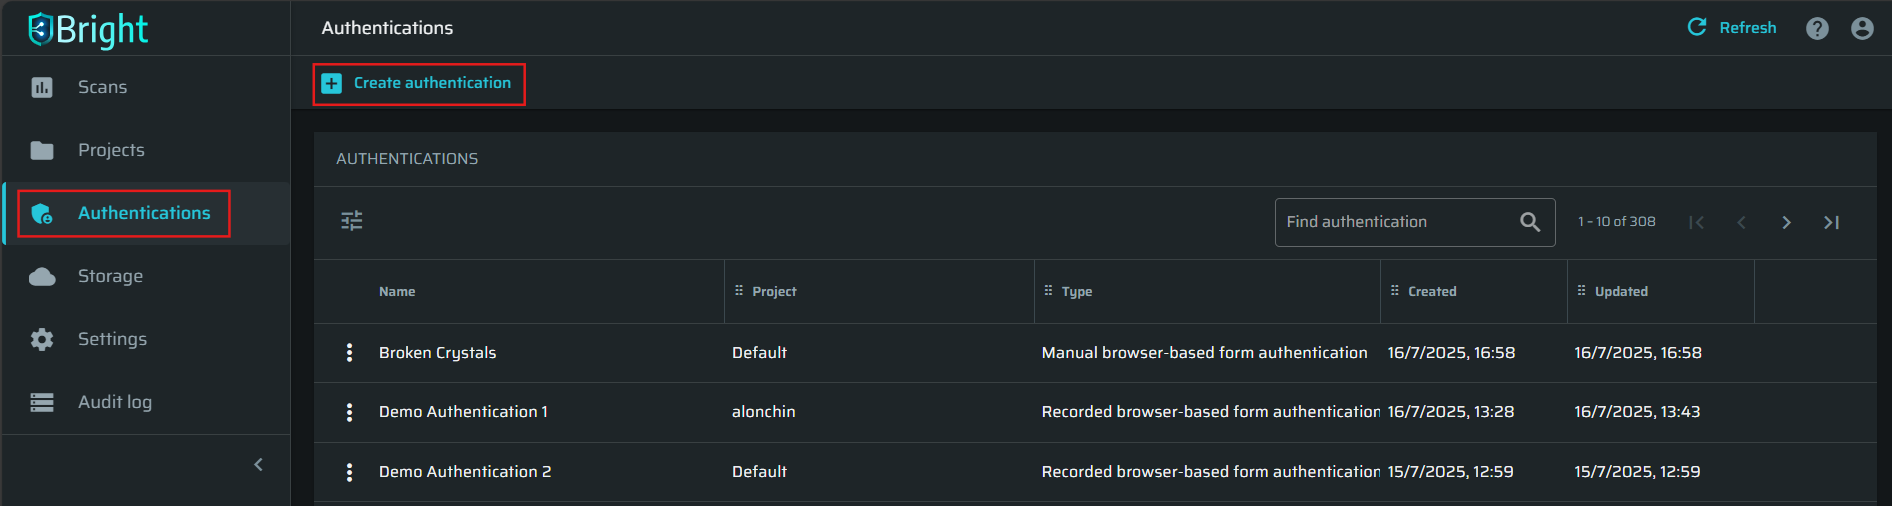
Open the Authentications tab on the left menu and click +Create authentication:
-
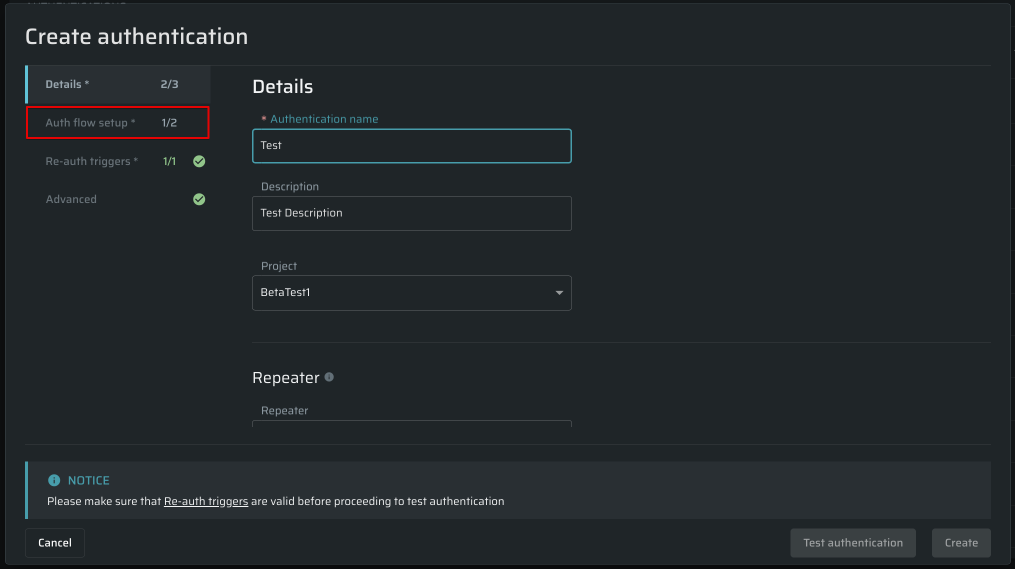
Specify the required details: enter your Authentication name (this name aims to provide context when selected later while defining a discovery or a scan). Select a Project from the available projects and a Reapeater, if needed:
-
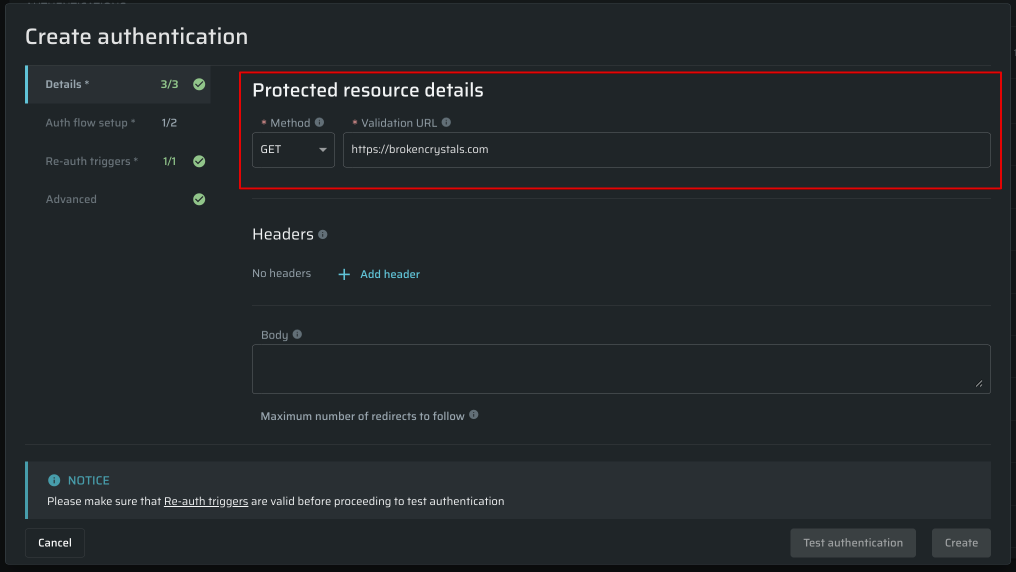
Enter the target's address in the Protected resource details section to proceed:
-
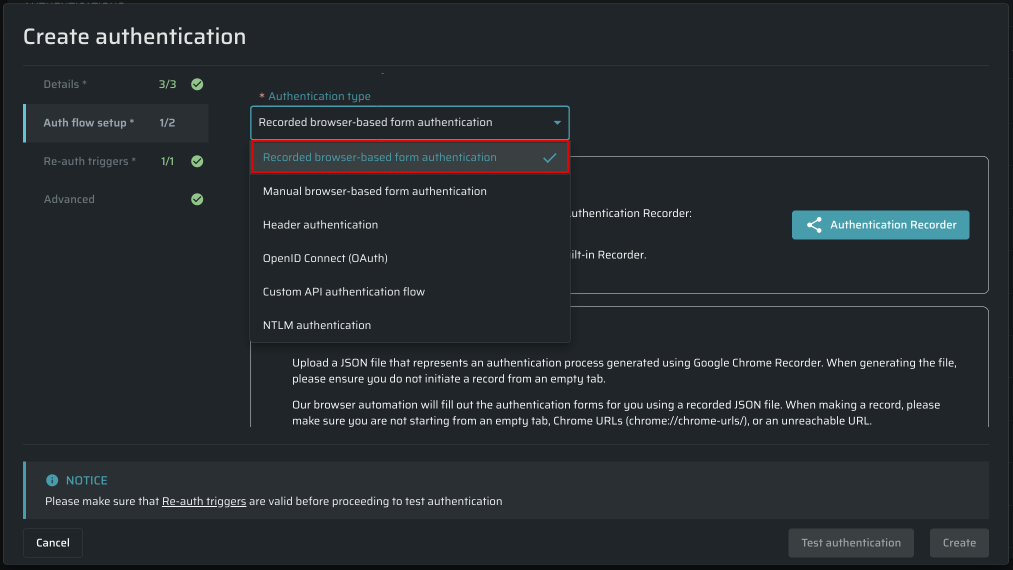
Select the next tab in the flow called Auth flow setup. In the Authentication type field, select the Recorded browser-based form authentication:
-
Select either Record with Bright to use our built-in recorder, or Upload JSON File to upload your own recording.
To learn more, see Recording with the Authentication Recorder, or Google Chrome DevTools.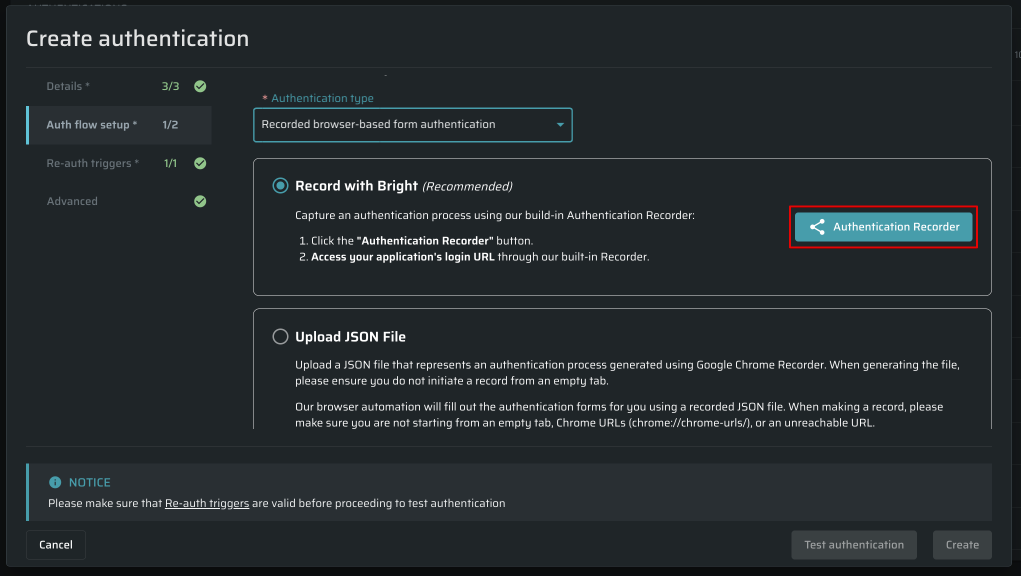
Recording with the Authentication Recorder
The Bright Authentication Recorder is a simple utility that assists practitioners in setting the authentication object for the scanning flow. The idea is to start a recording session in the background. The user performs a regular login flow, and Bright captures all actions in the background to be re-played later during the scan automation.
After you select Record with Bright in the Auth flow setup step, follow these steps:
-
Click the Authentication Recorder button:
-
After the Authentication Recorder is started, you'll see a browser window:
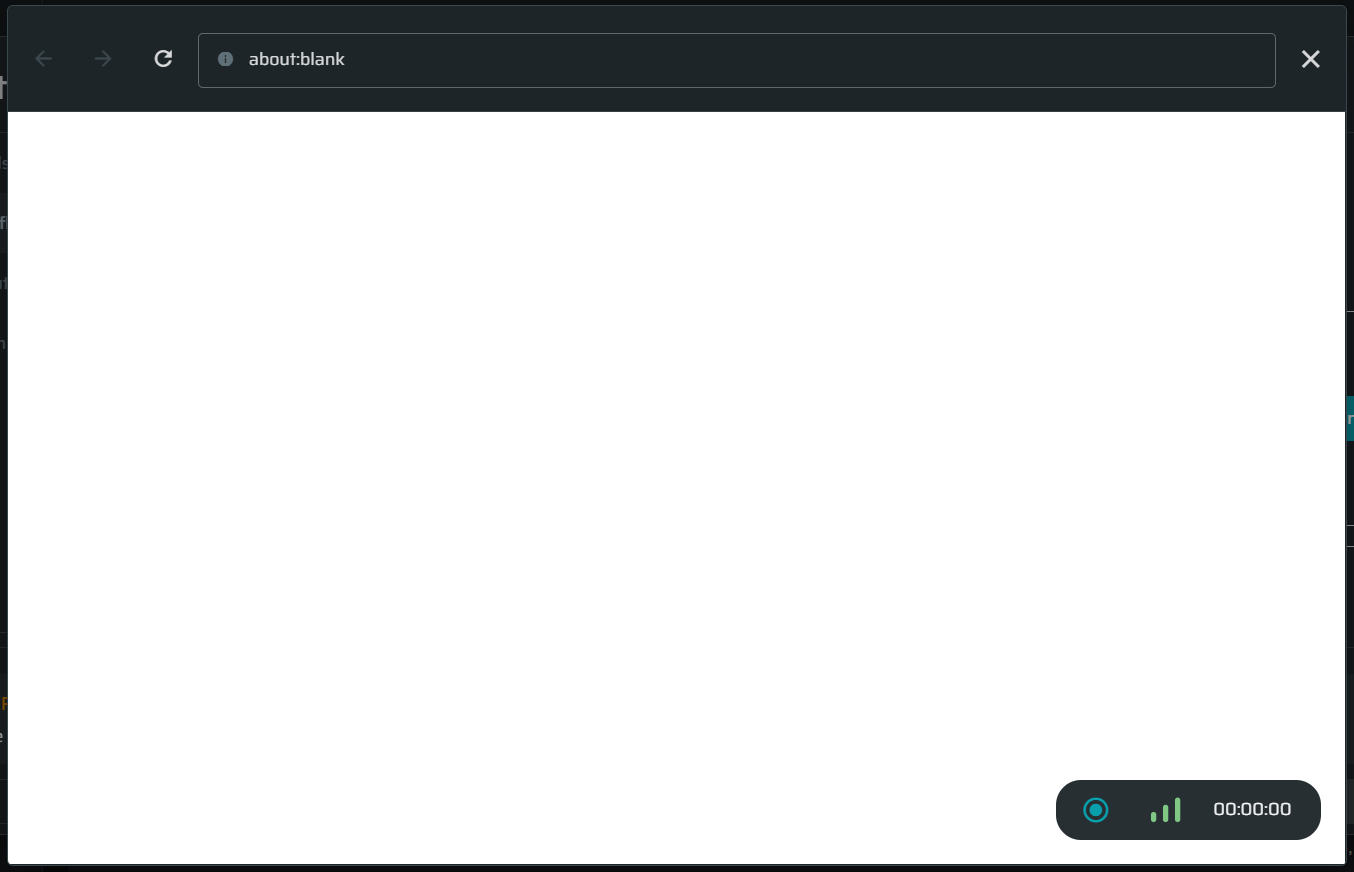
The navigation is simple as in any other browser: use the address bar to access web pages, the arrows to go forward and backward, and the reload button to refresh the page.
-
Click the Recording button to start the recording. Perform the required login steps of the authentication process.
-
After finishing the authentication process, click the Save button to stop and save the recording.
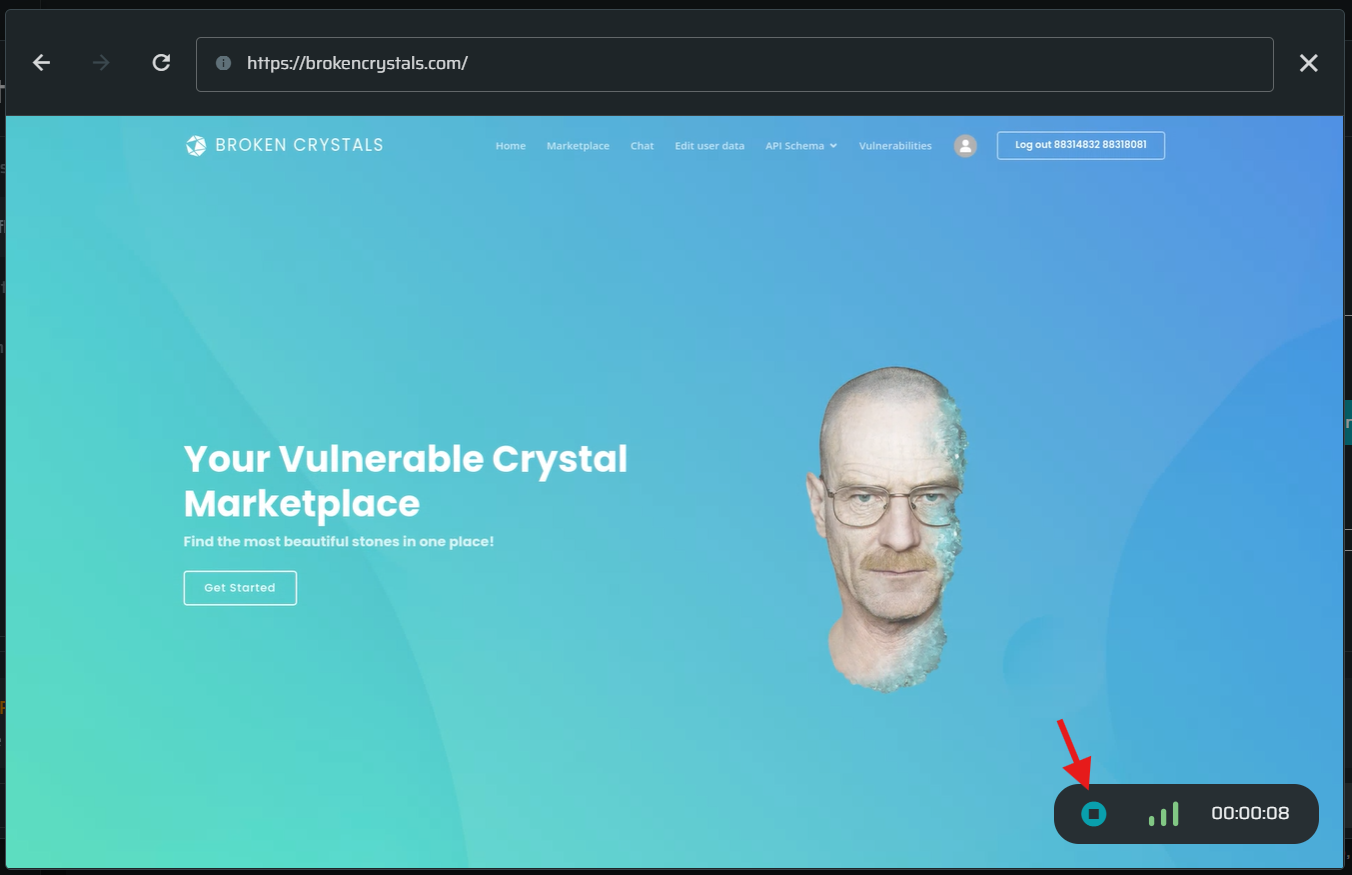
-
Once the saving is done, close the recorder window. The recording will be attached to the authentication:
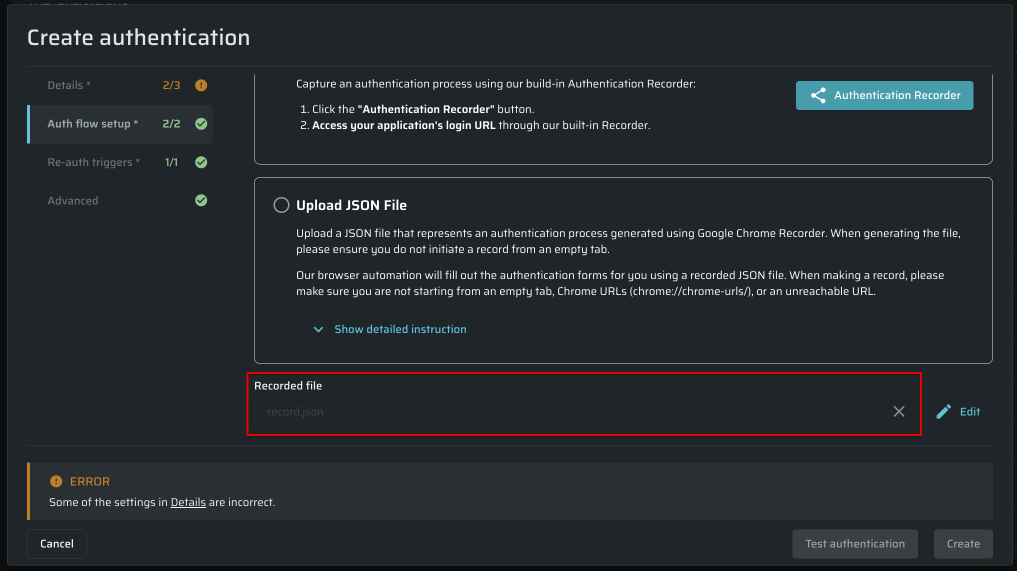
If the recorder window shows ERR_BLOCKED_BY_CLIENT, see ERR_BLOCKED_BY_CLIENT error in the Authentication Recorder.
Editing a Recorded Login Session
Bright app allows you to edit the values captured as part of a recording without having to create a new recording.
To do so, click the Edit button in the Auth flow setup step:
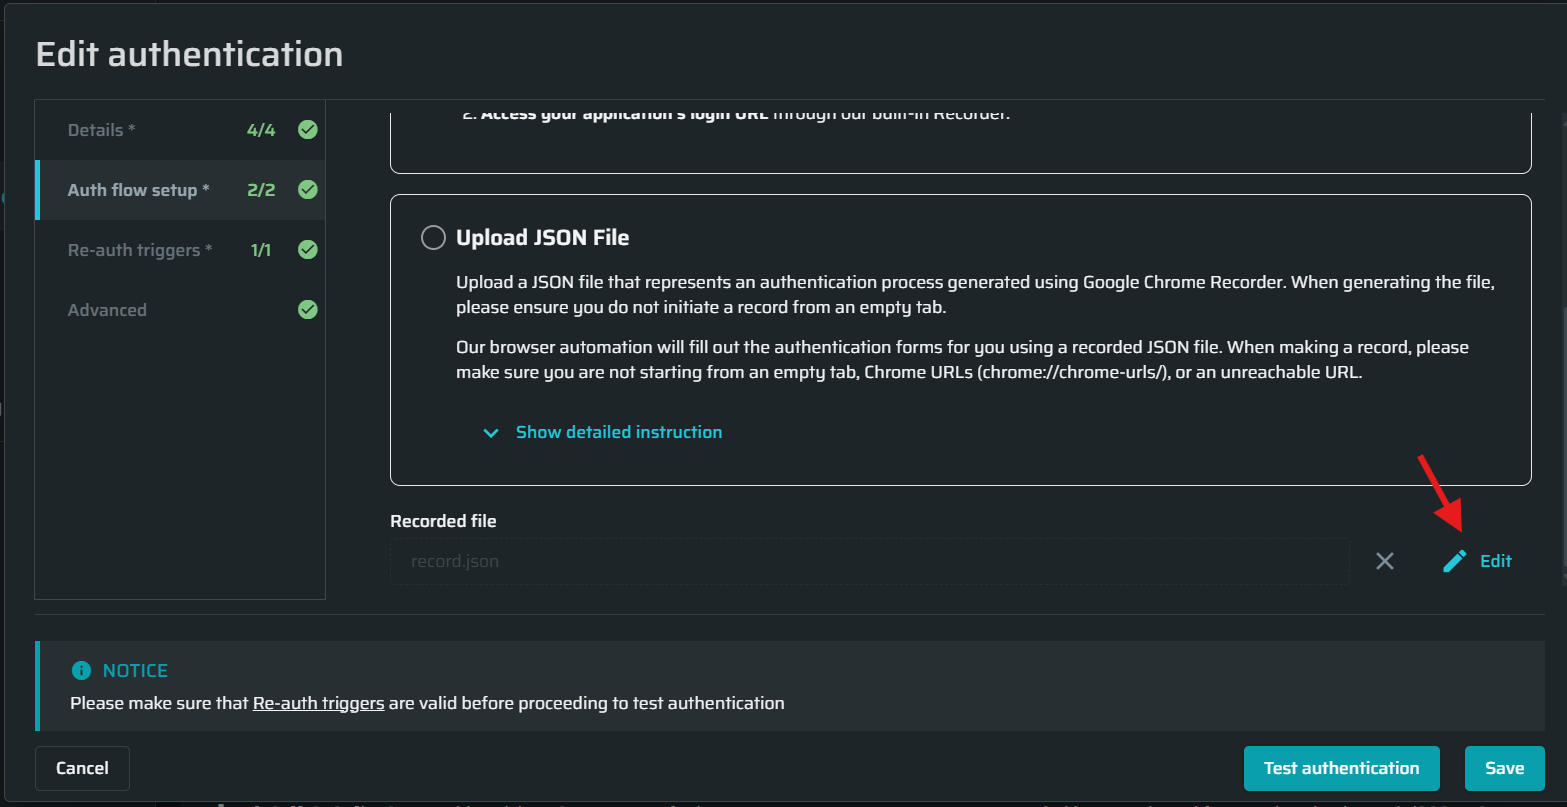
- Field value: You can edit the authentication field value, such as username or password.
- Page Timeouts: Adjust how long each page waits before timing out (from 1 to 120 seconds) to address slow page loading speed.
- One-Time Passwords: Insert an OTP generated on the OTP Configuration page by entering the marker
{{ auth_object.otps.<OTP_NAME> }}, replacing the static OTP saved by the page recording (e.g.763041).
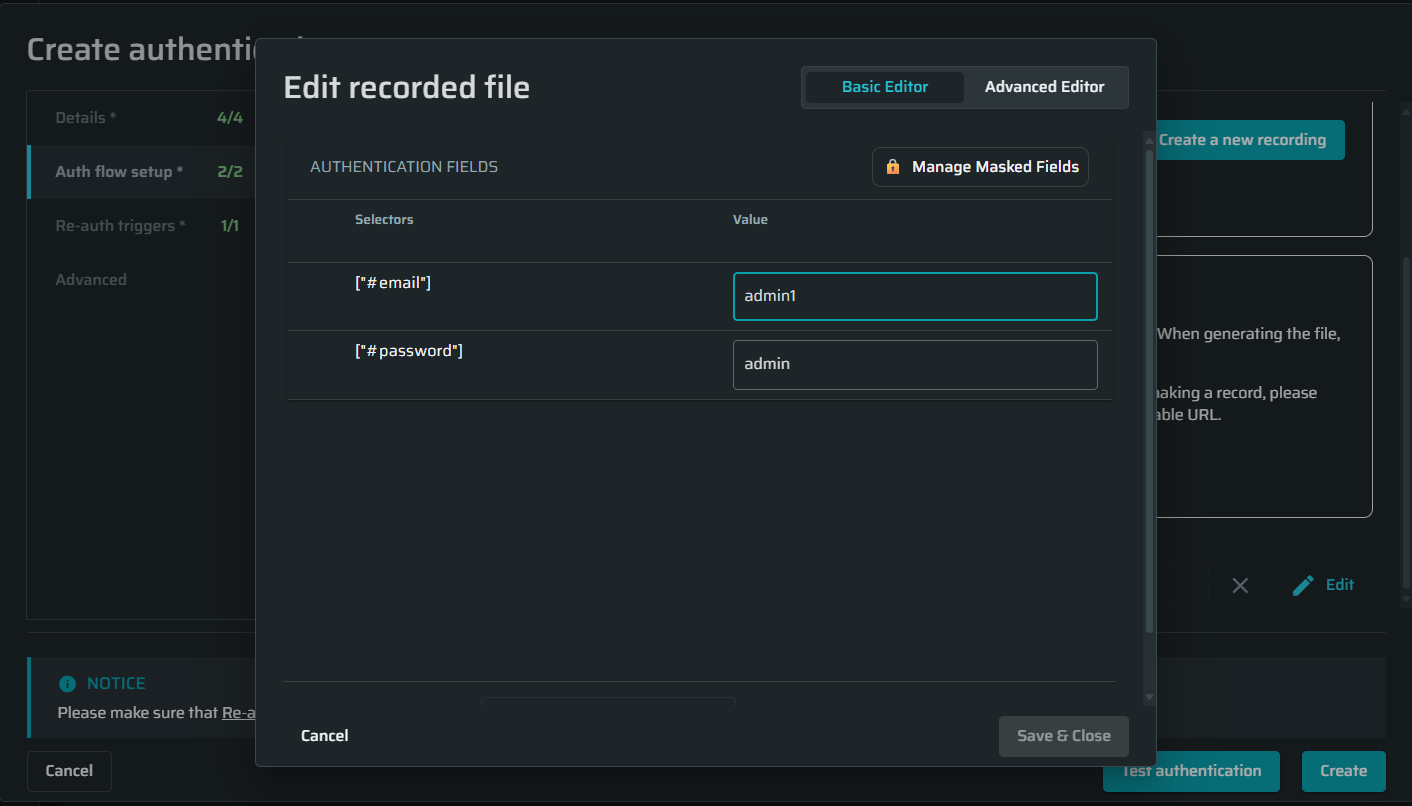
Protecting Fields as Secrets
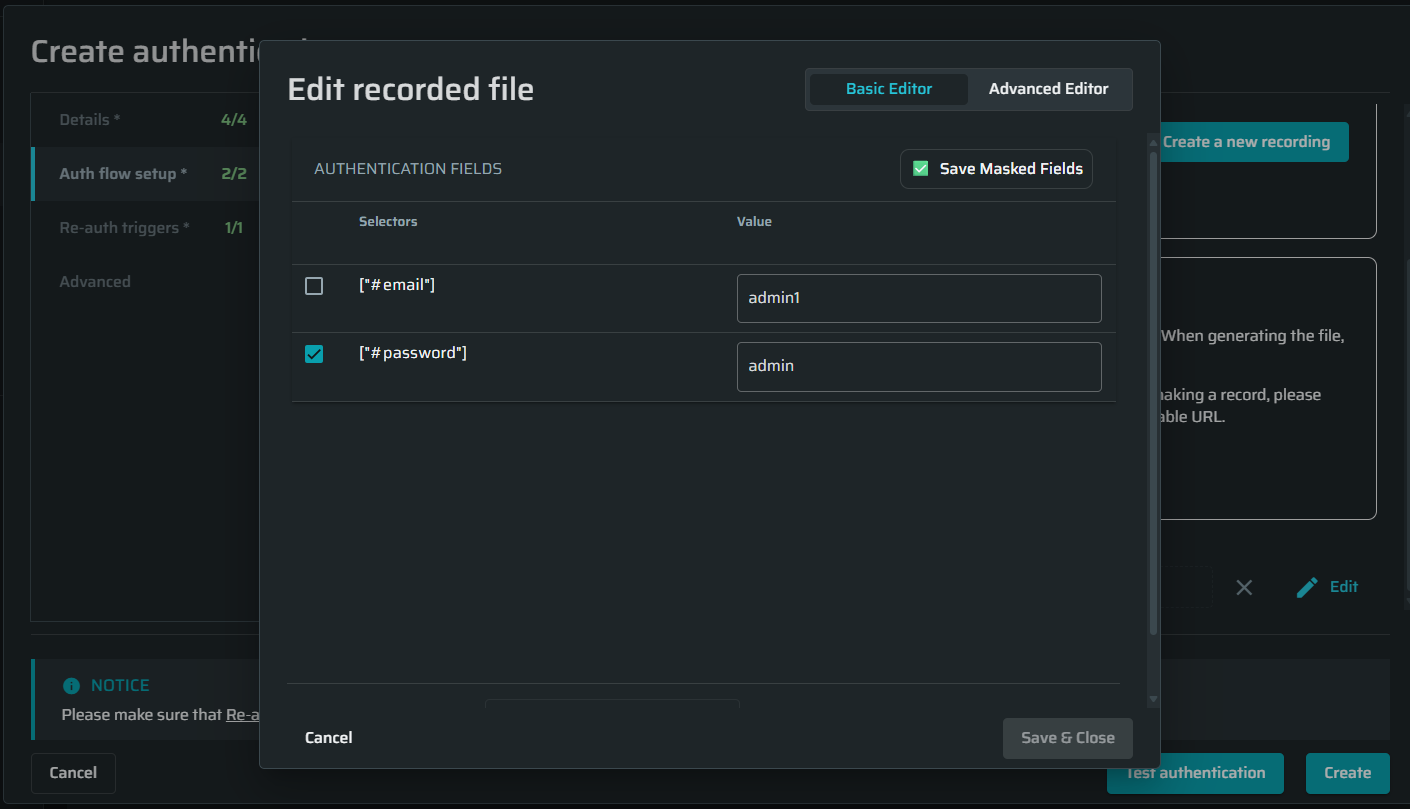
To protect input fields as secrets, click Manage Masked Fields, select the fields you want to protect and confirm by clicking on Save Masked Fields.
Marked fields will require the unmask-password scope to be able to present the value.
Advanced Authentication Editor
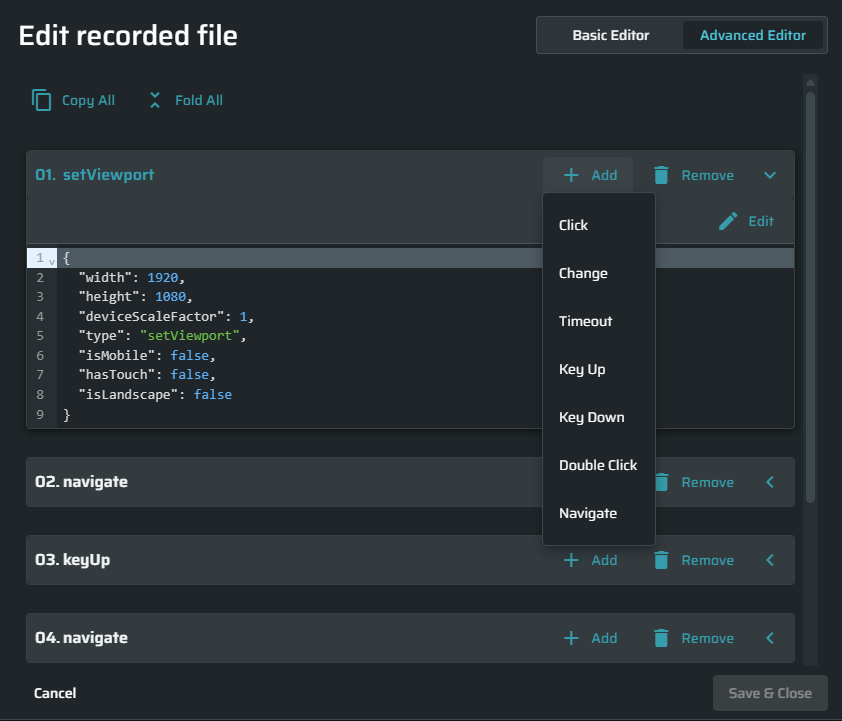
The Advanced Authentication Editor provides a step-based interface for viewing and managing authentication flows.
Instead of editing the entire authentication flow as a single JSON block, each authentication step is displayed separately. This makes complex flows easier to understand and reduces the risk of syntax errors, accidental changes, or lost values.
Manage Authentication Steps
Use the Advanced Editor to:
-
View each authentication step separately.
-
Add new steps.
-
Edit, copy, or delete existing steps.
-
Drag and drop steps to change their order.
-
Save changes or revert unsaved updates.
-
View validation errors when the JSON is invalid.
Sensitive Values
Sensitive values can be masked to prevent them from being exposed in the editor.
Use the available controls to show or hide a value and configure whether it should remain masked.
Permissions
Editing requires the auth-objects:write permission.
Users without this permission can view the authentication flow in read-only mode but cannot change its steps or values.
Deleting a Login Session
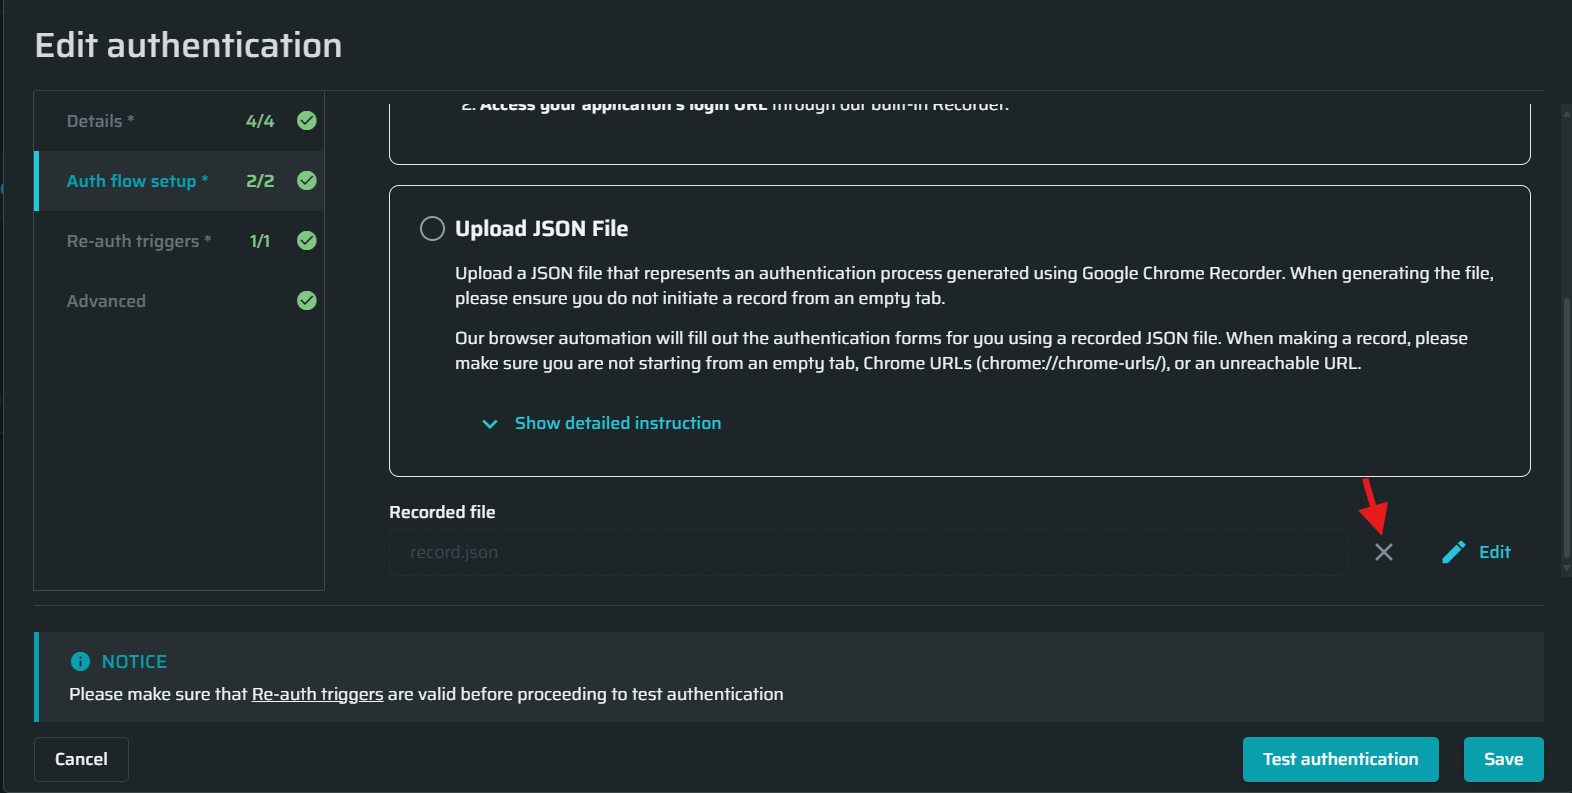
If you decide to record a new file, click the X button to delete the uploaded recording.
Manual Browser-Based Form Authentication
The manual browser-based form authentication is another method to mimic browser interactions, but instead of using a recorded session, you have to manually specify the interactions to be taken.
- From the Authentication type dropdown list, select Manual browser-based form authentication.
- Fill in the fields as described below to configure a valid authentication request to be sent to the end-point API.
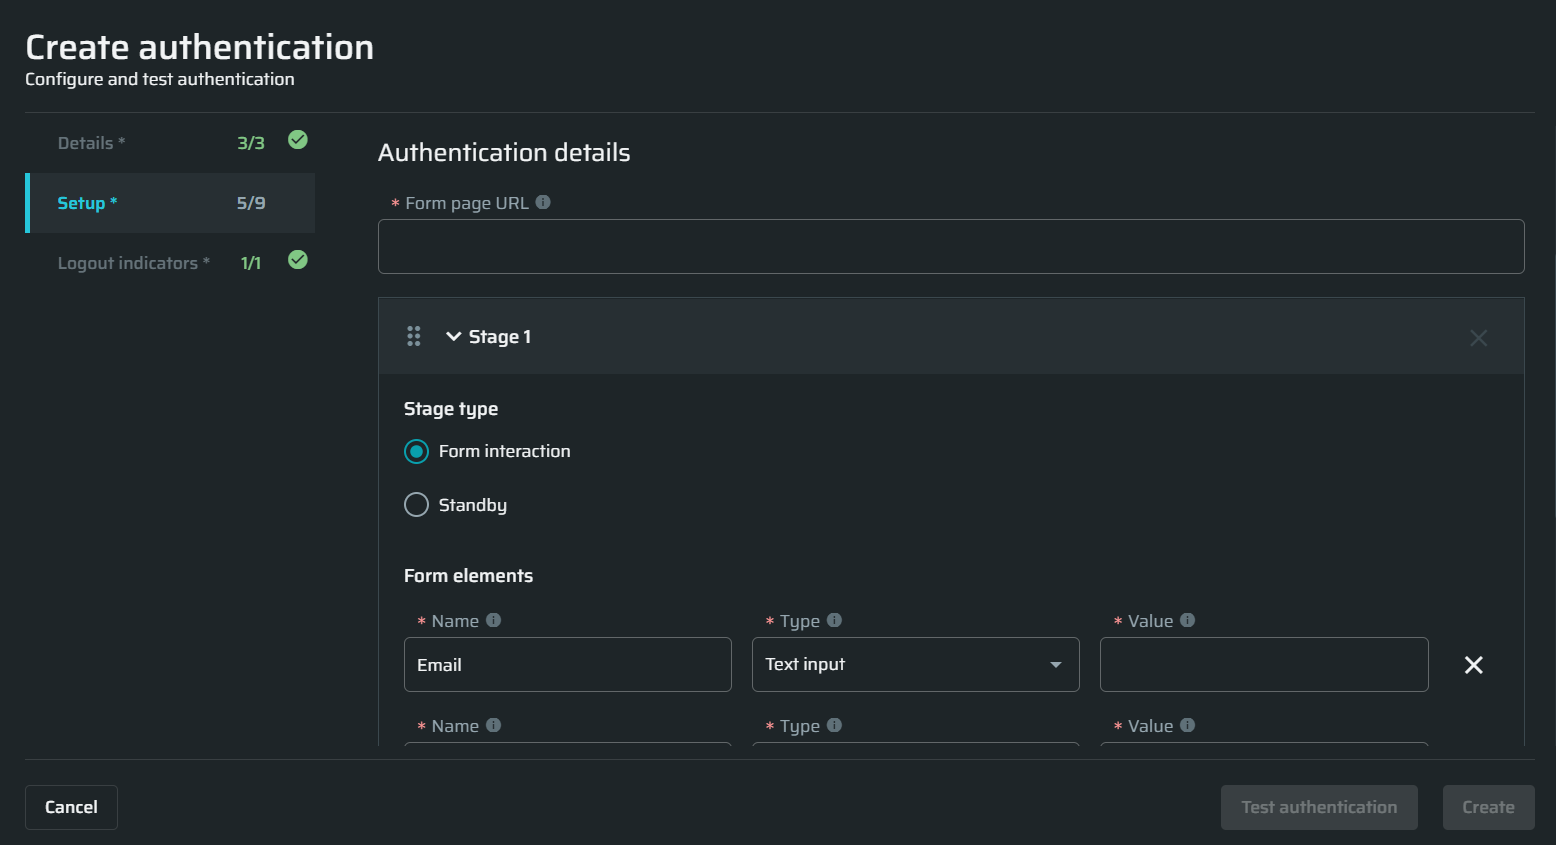
| Field | Guidelines |
|---|---|
| Form page URL | Enter the URL of the page where the form is located. |
| Stage # |
Each stage represents a separate login page. Add as many stages as the login flow consists of by clicking + Add stage below the Form submission section. To change the order of the stages, simply drag-and-drop them using the  icon to the left of the stage name. Stage type Use the default Form interaction type unless the login page loads longer than 30 seconds (the generic timeout of the system). For a long-loading page, select the Standby type and specify the time for Bright to wait before to take the next step. Once the specified time is over, Bright sends a screenshot of the current state of the page. You can find it in the test authentication results. Elements represent the fields, buttons and other types of input given on the login page. Simply fill in the elements names and types as you see them on the login page and provide the valid values for them.
|
 next to the corresponding element.
Updated about 6 hours ago