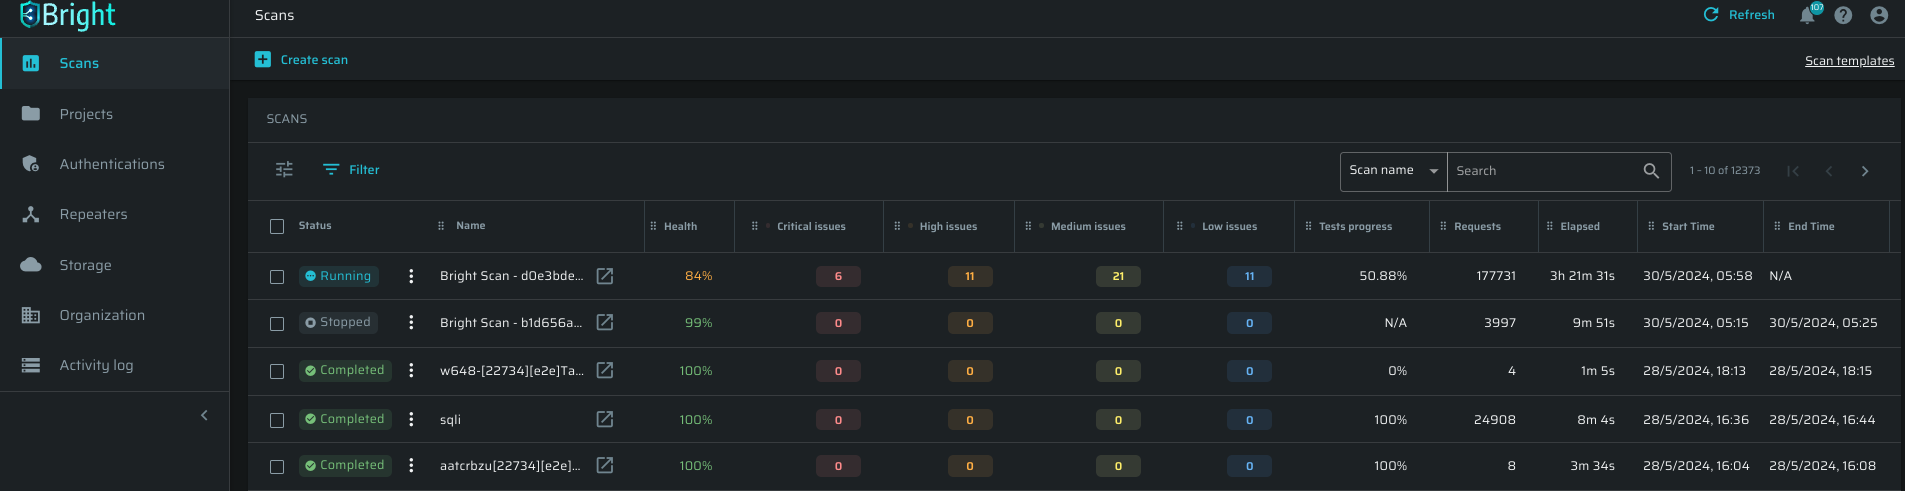
Scans Summary
You can view the scanning log of your organization, including completed, pending, and scheduled scans. To display the scans list, in the left pane, select the Scans option. Each scan appears as a single row.
You can set the information scope to display in the MY SCANS table settings. Bright allows you to change the order of the columns, select additional columns to be visible, and adjust their width.
By default, the scans table includes the following columns:
- Name - the custom name of a scan.
- Health - indicates a scan's overall performance and reliability, calculated by dividing the number of successful requests by the total number of requests. A successful request is a request which doesn't match any of the following:
- TCP errors.
- Network timeouts and gateway errors - HTTP response status codes: 502, 503, 504.
- Rate-limiting - HTTP response status code: 429.
- Authentication errors - when accessing an entrypoint using an authentication object fails (results in the re-auth triggers).
- Issues - number of detected vulnerabilities grouped by the severity level (red - critical, orange - high, yellow - medium, blue - low).
- Test progress - a percentage estimation of the test progress.
- Requests - total number of requests sent to the endpoints during the scan.
- Elapsed - total duration of the scan.
- Start time - date and time when the scan started.
- End Time - date and time when the scan ended.
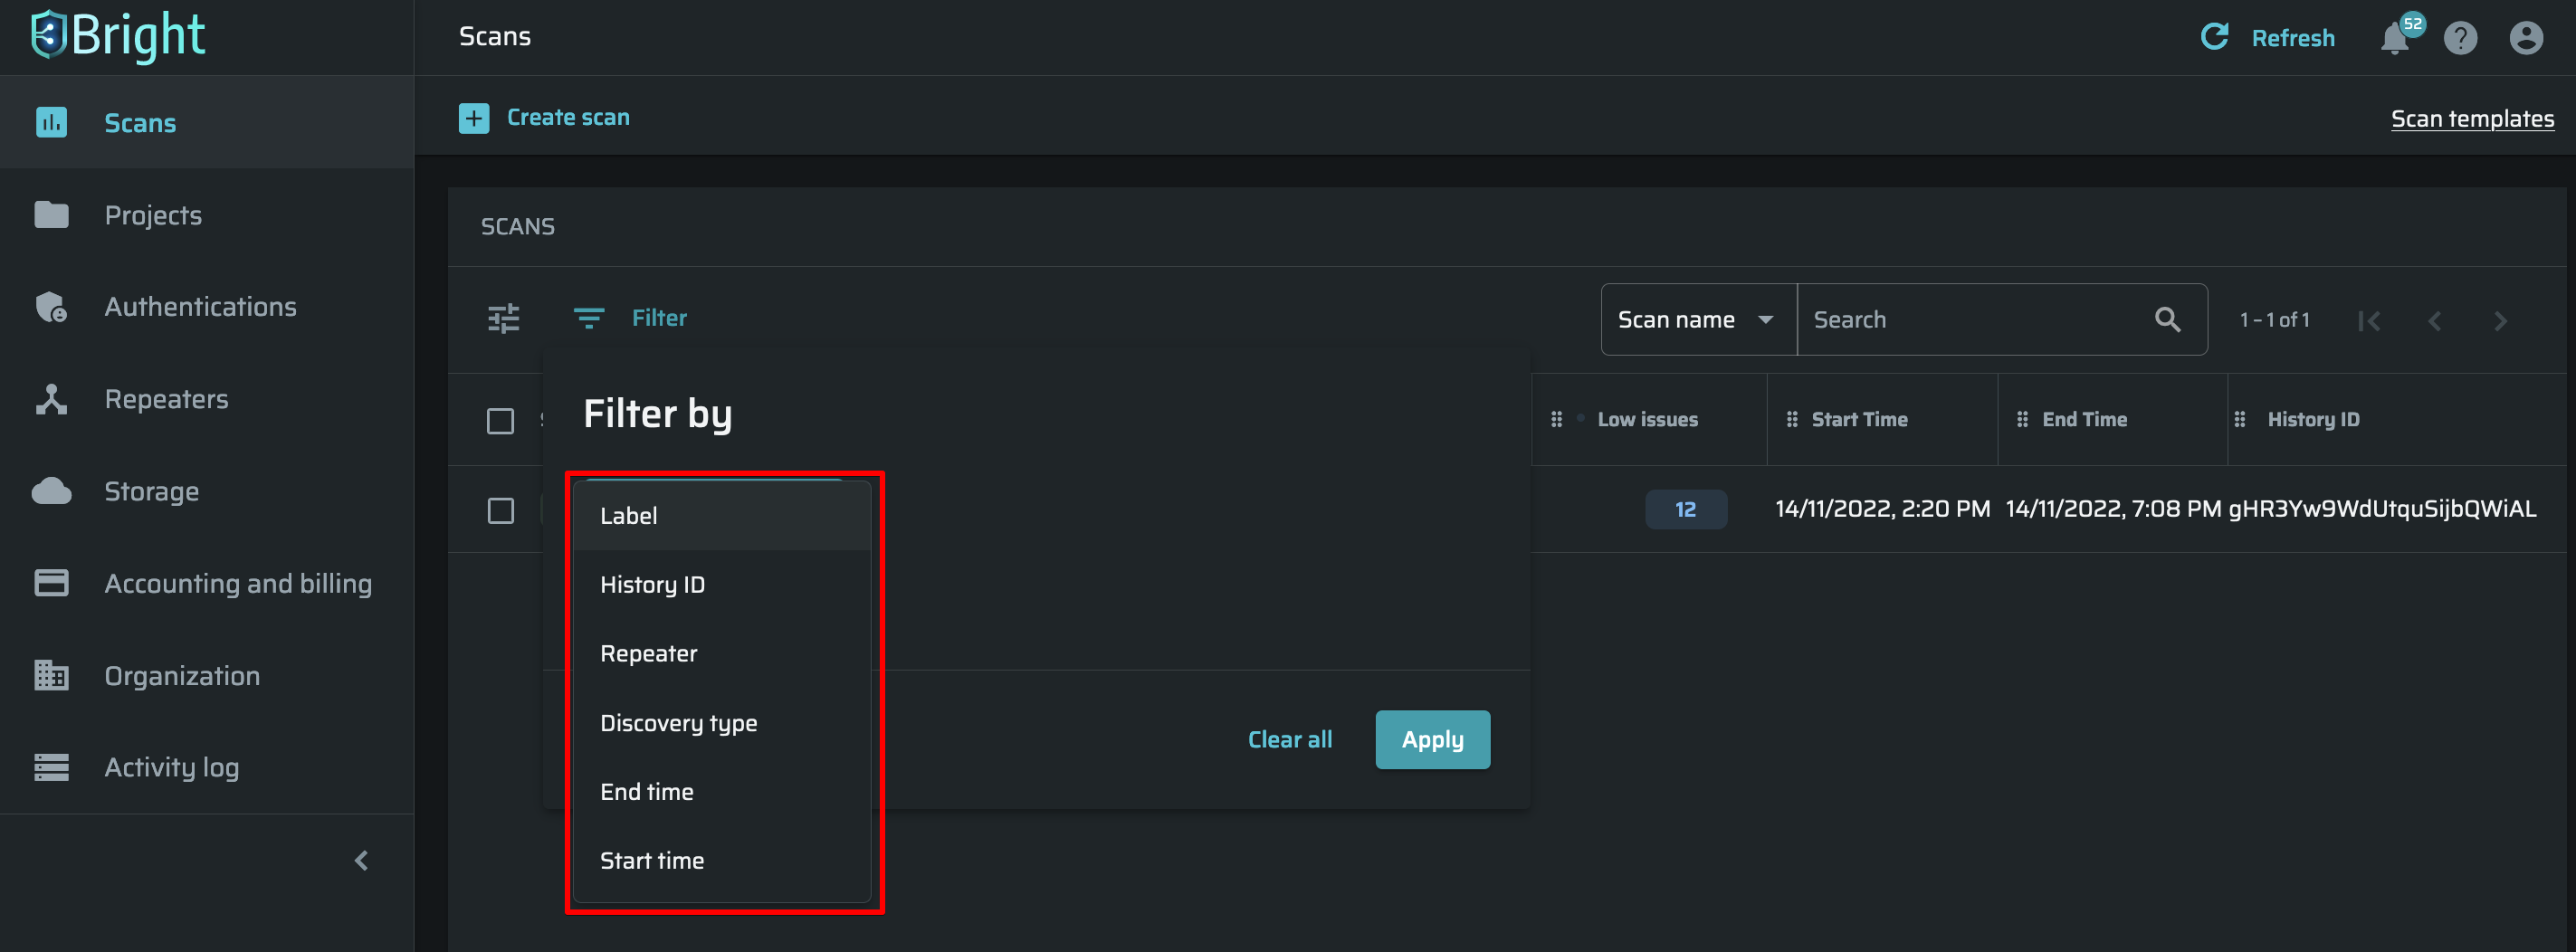
Filtering scans
To simplify searching for a particular scan, Bright allows you to filter scans by multiple parameters, such as:
- History ID - ID of a scan history to distinguish all the re-run and scheduled scans
- Discovery type - archive, crawler, OAS (Open API Specification)
- End time - when a scan finished
- Start time - when a scan started
- Initiator - a user who created a scan
- Issues by severity - high, medium, low
- Project - a Bright project name
- Status - completed, stopped, failed, running, queued and scheduled
- Repeater - a Repeater name
- Labels - labels, appeared during new scan creation
To apply a filter, follow these steps:
- In the header of the SCANS table, click
 .
. - In the Filter by dialog box, select the necessary filter option and set up the relevant filter parameters.
- (Optional). If you need to apply several filters at once, click + Add filter to apply one more filter.
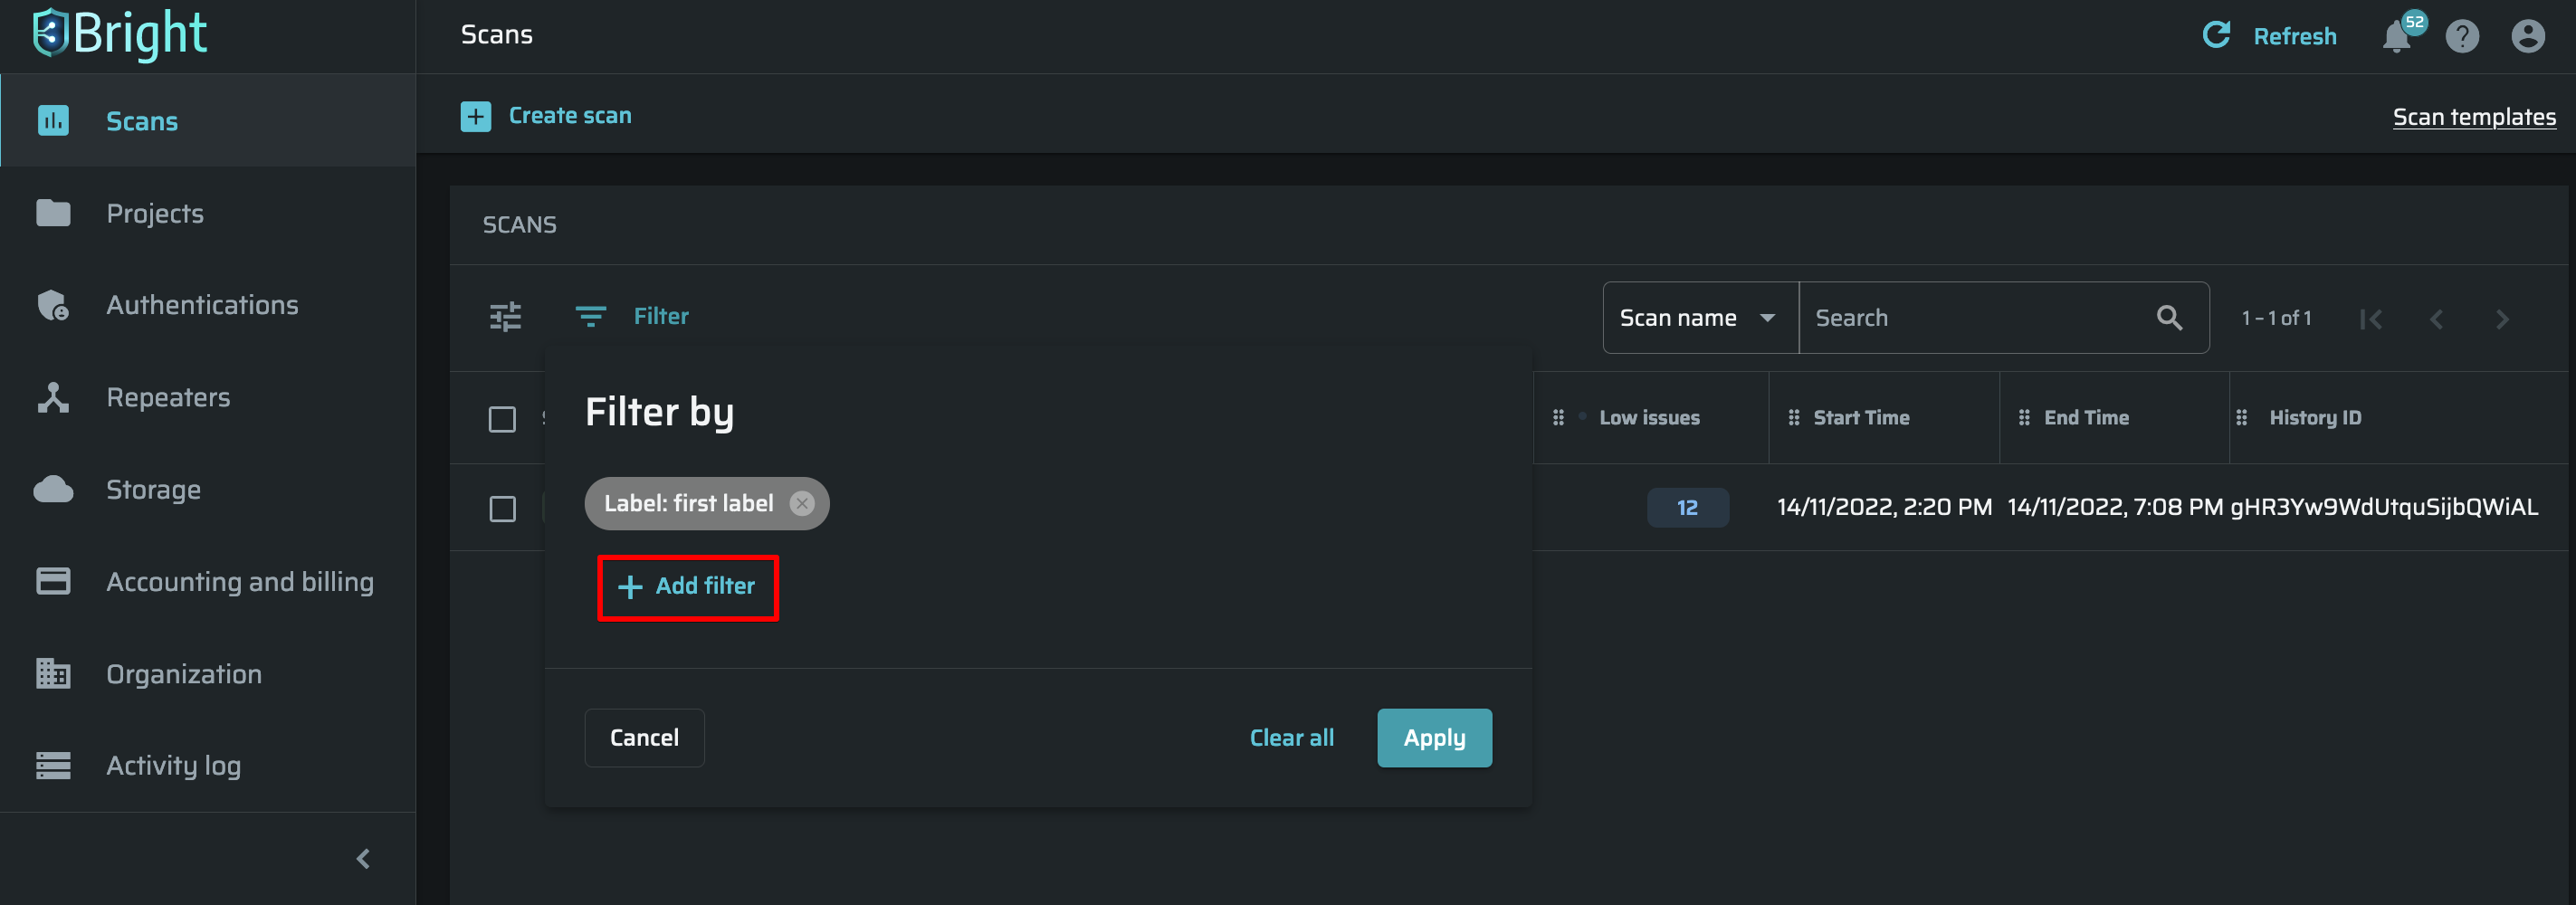
- Click Apply.
To reset the filter parameter(s), follow these steps:
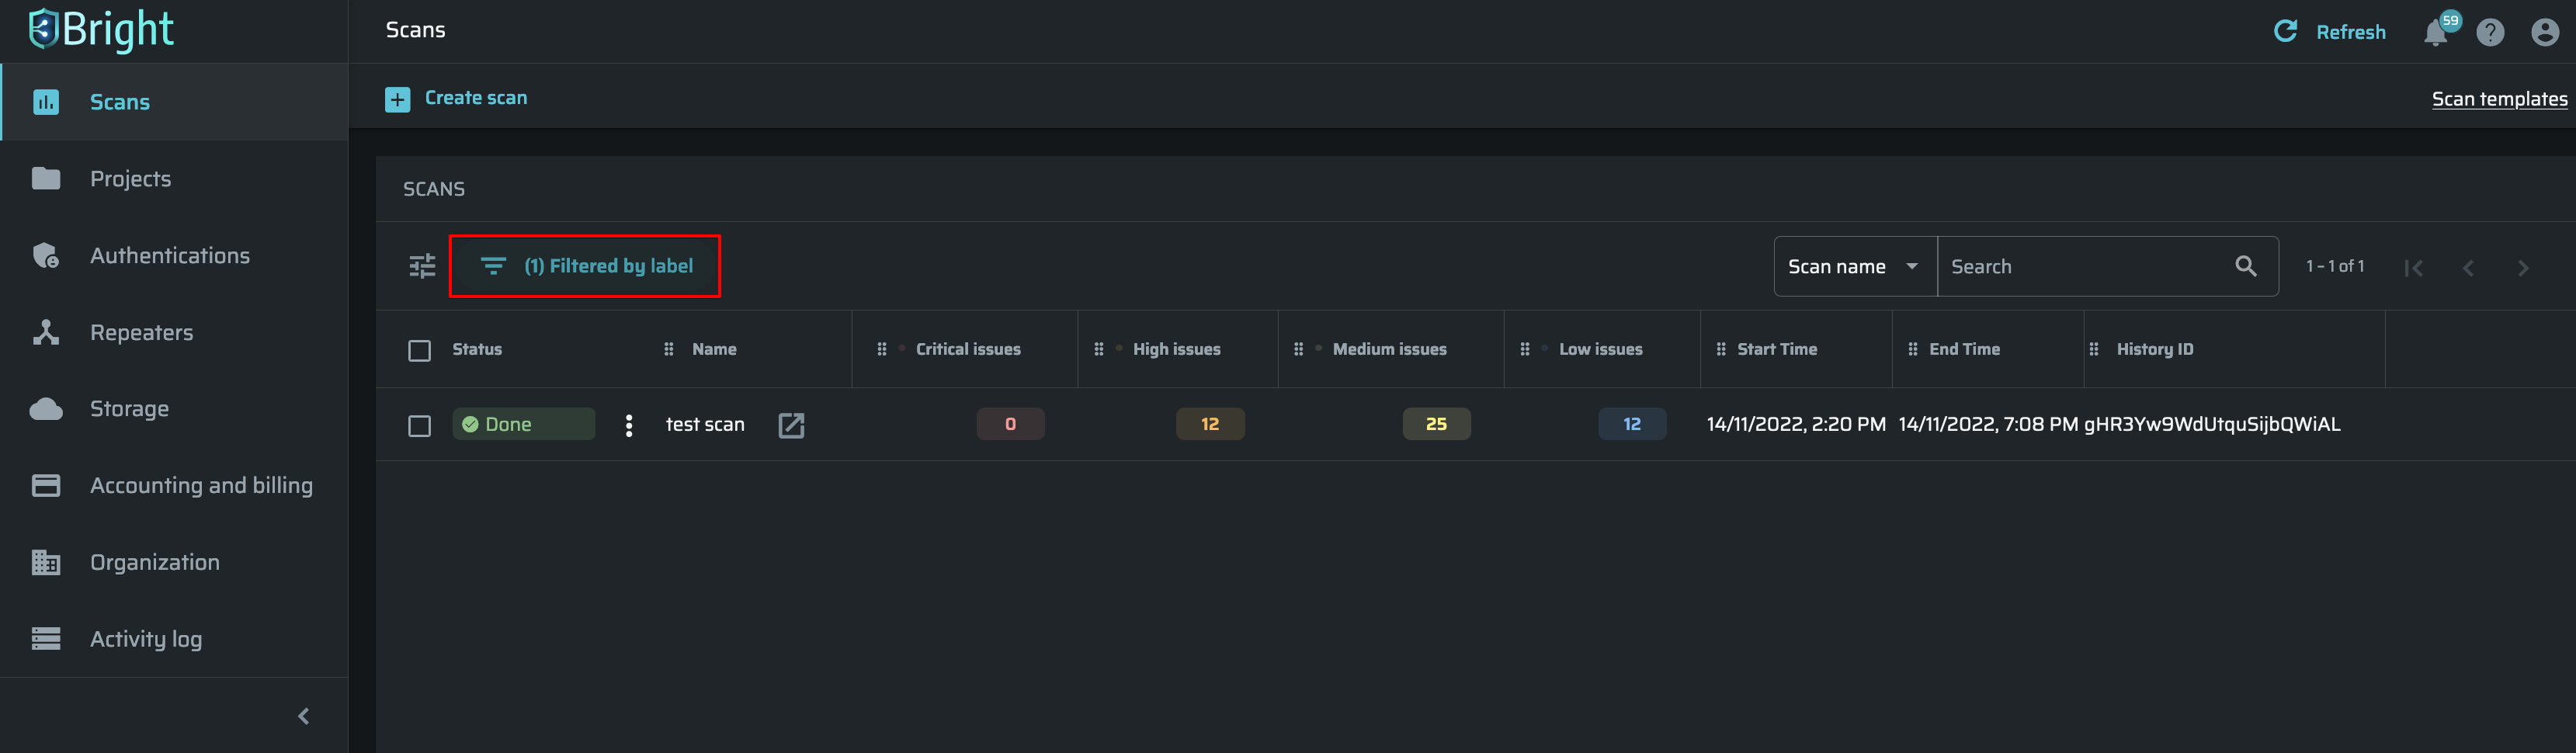
- In the header of the SCANS table, click the applied filter parameter(s).
- In the Filter by dialog box, click Clear all and then Apply.
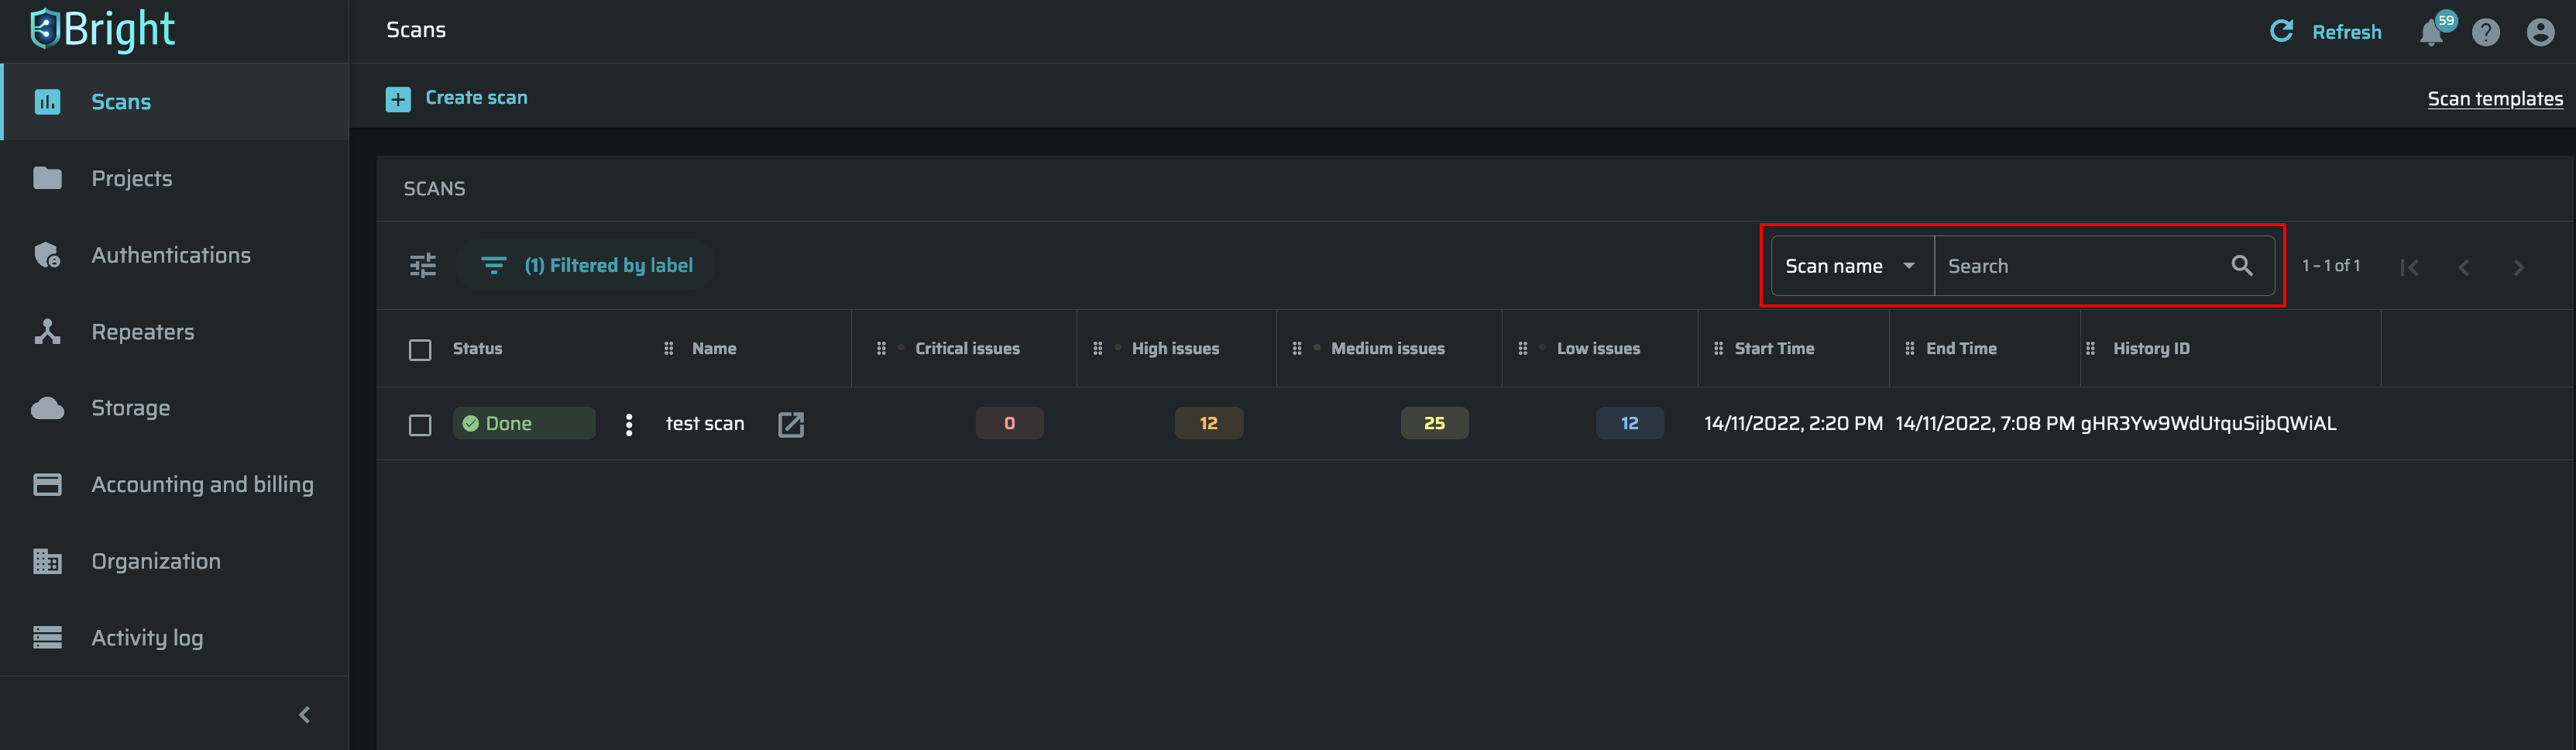
You can also search for a certain scan by its name or ID across the table using the Search bar.
Sorting scans
Scans can be sorted by column parameters, either in ascending or descending order. For example, you may need to move the most recent scans up in the table, or put the scans that detected the high severity issues first.
To do that, click on the arrow next to the parameter in the header of the scans. Click on the arrow again to change the item order between ascending and descending.

Adjusting scans table
To configure the scans table view, follow these steps:
- Below the + Create scan button, click
 to open the table settings.
 - In the dialog box, do the following:
- (Optional). Using the Items per page option, select the number of rows to be displayed on a single Scans page.
- Using the toggle buttons, select the columns you want to view in the table.
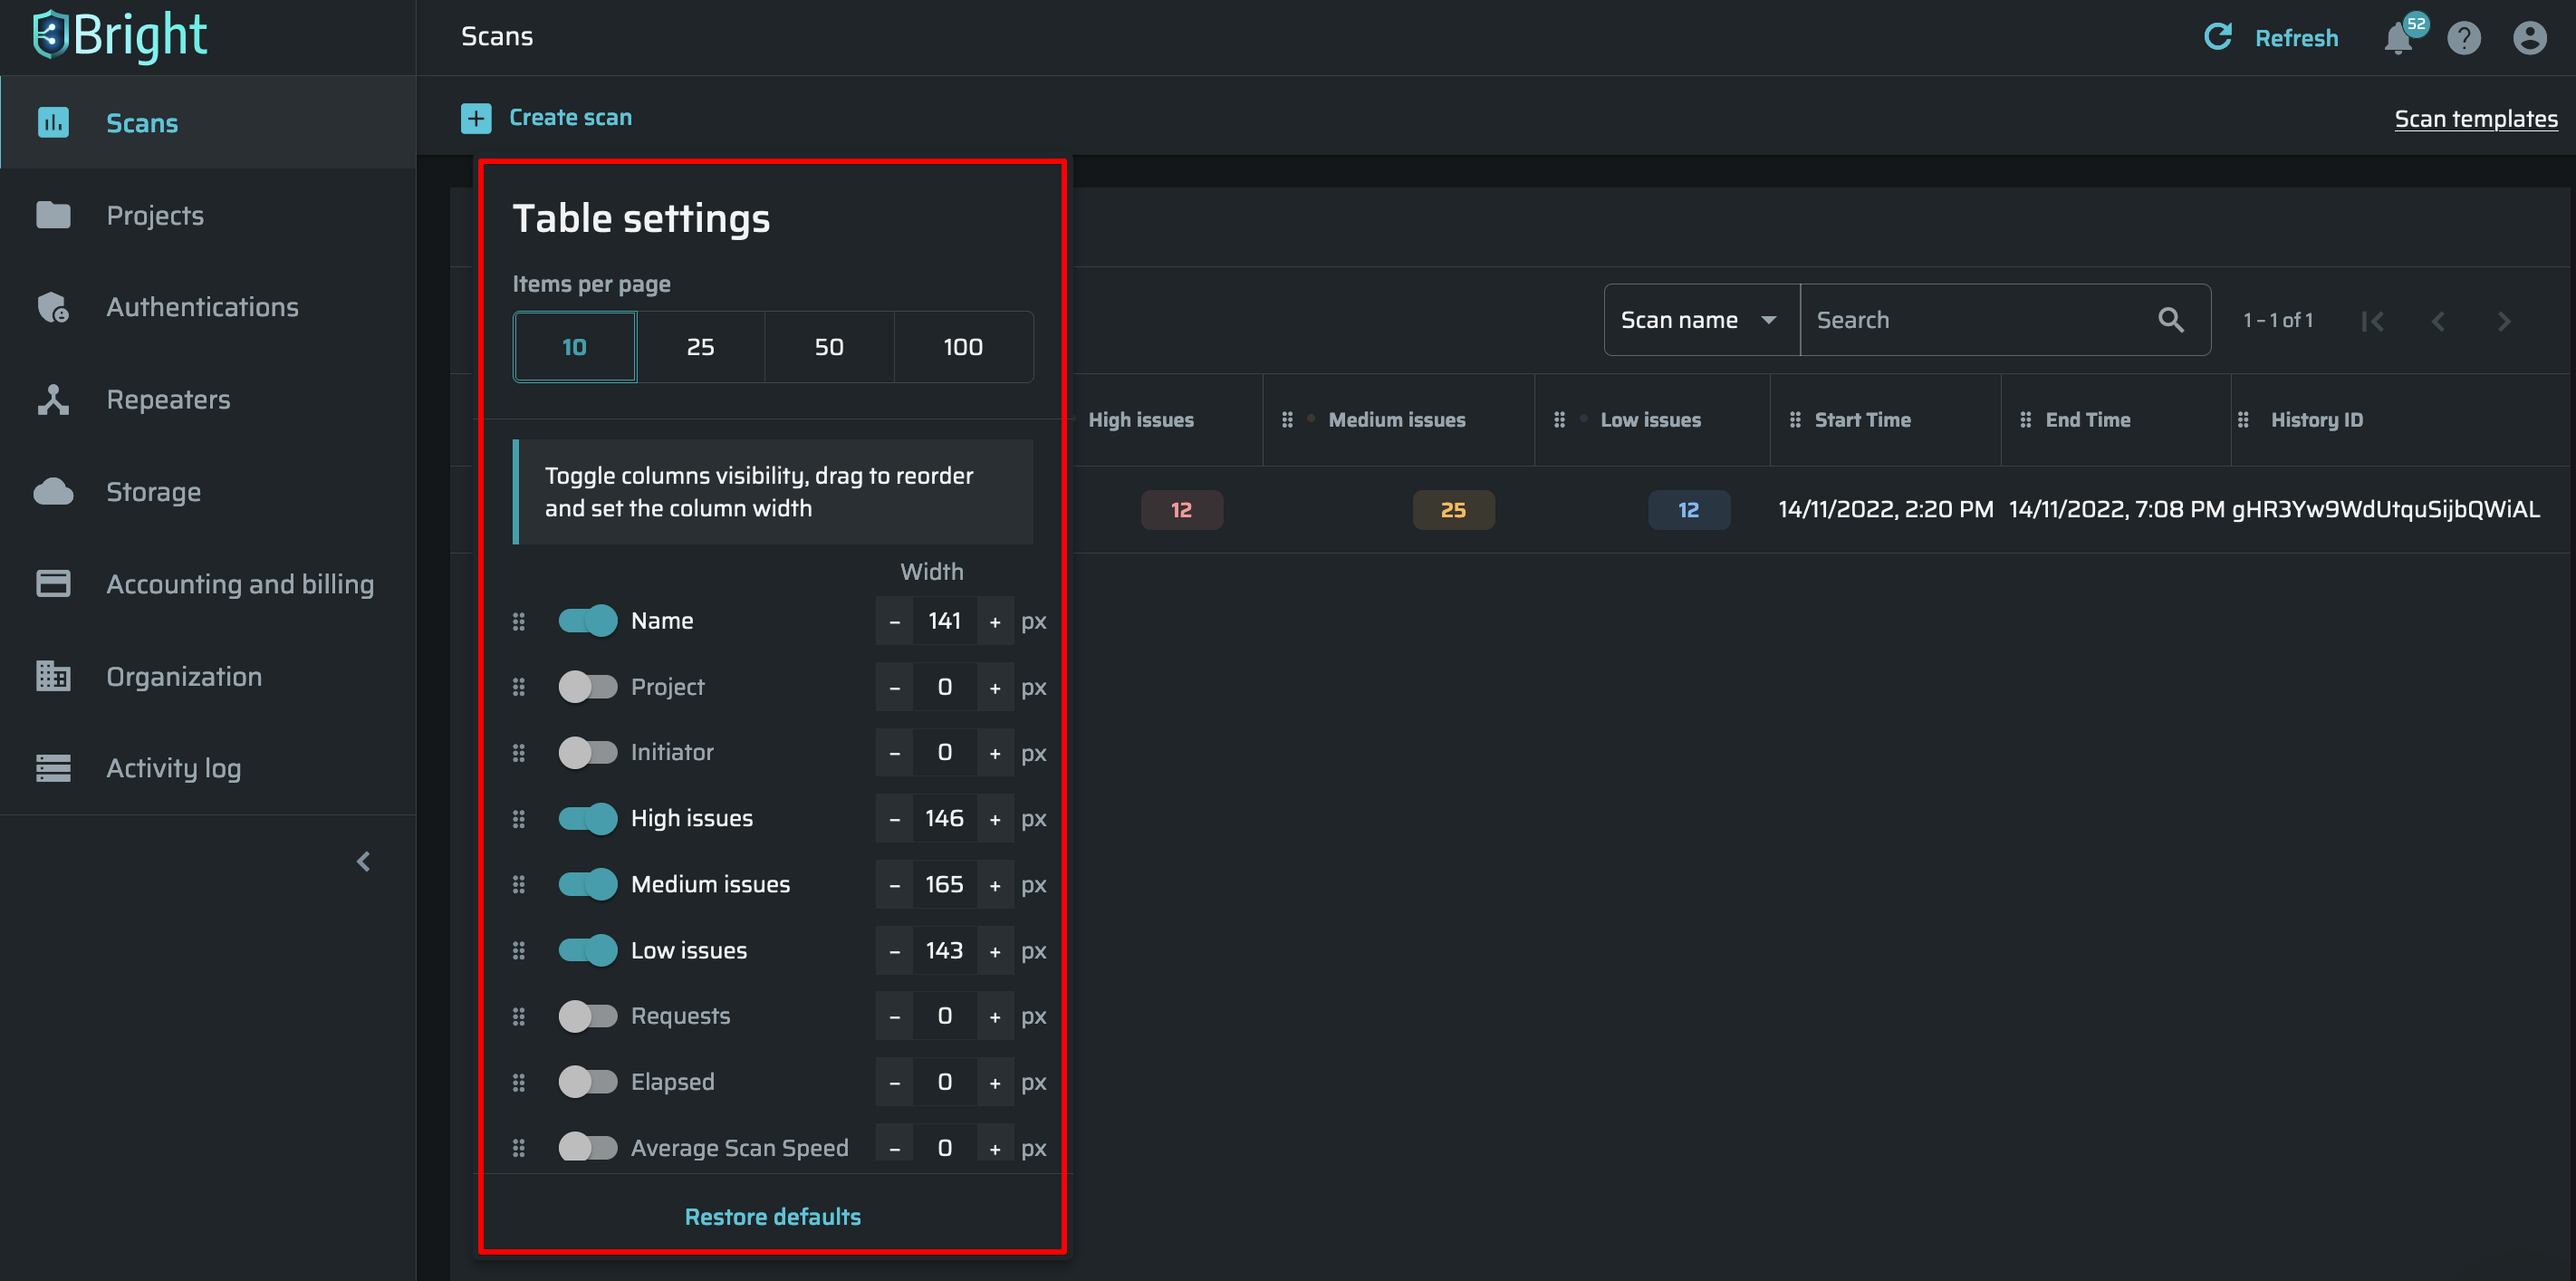
- Drag the selected columns to put them in the desired order.
- (Optional). Adjust the width of the selected columns in the corresponding Width boxes.
- (Optional). To reset the table settings to default, click Reset defaults at the bottom of the dialog box.
Managing scans from the scans table
To display the options menu for a scan run, click ![]() in the corresponding row.
in the corresponding row.
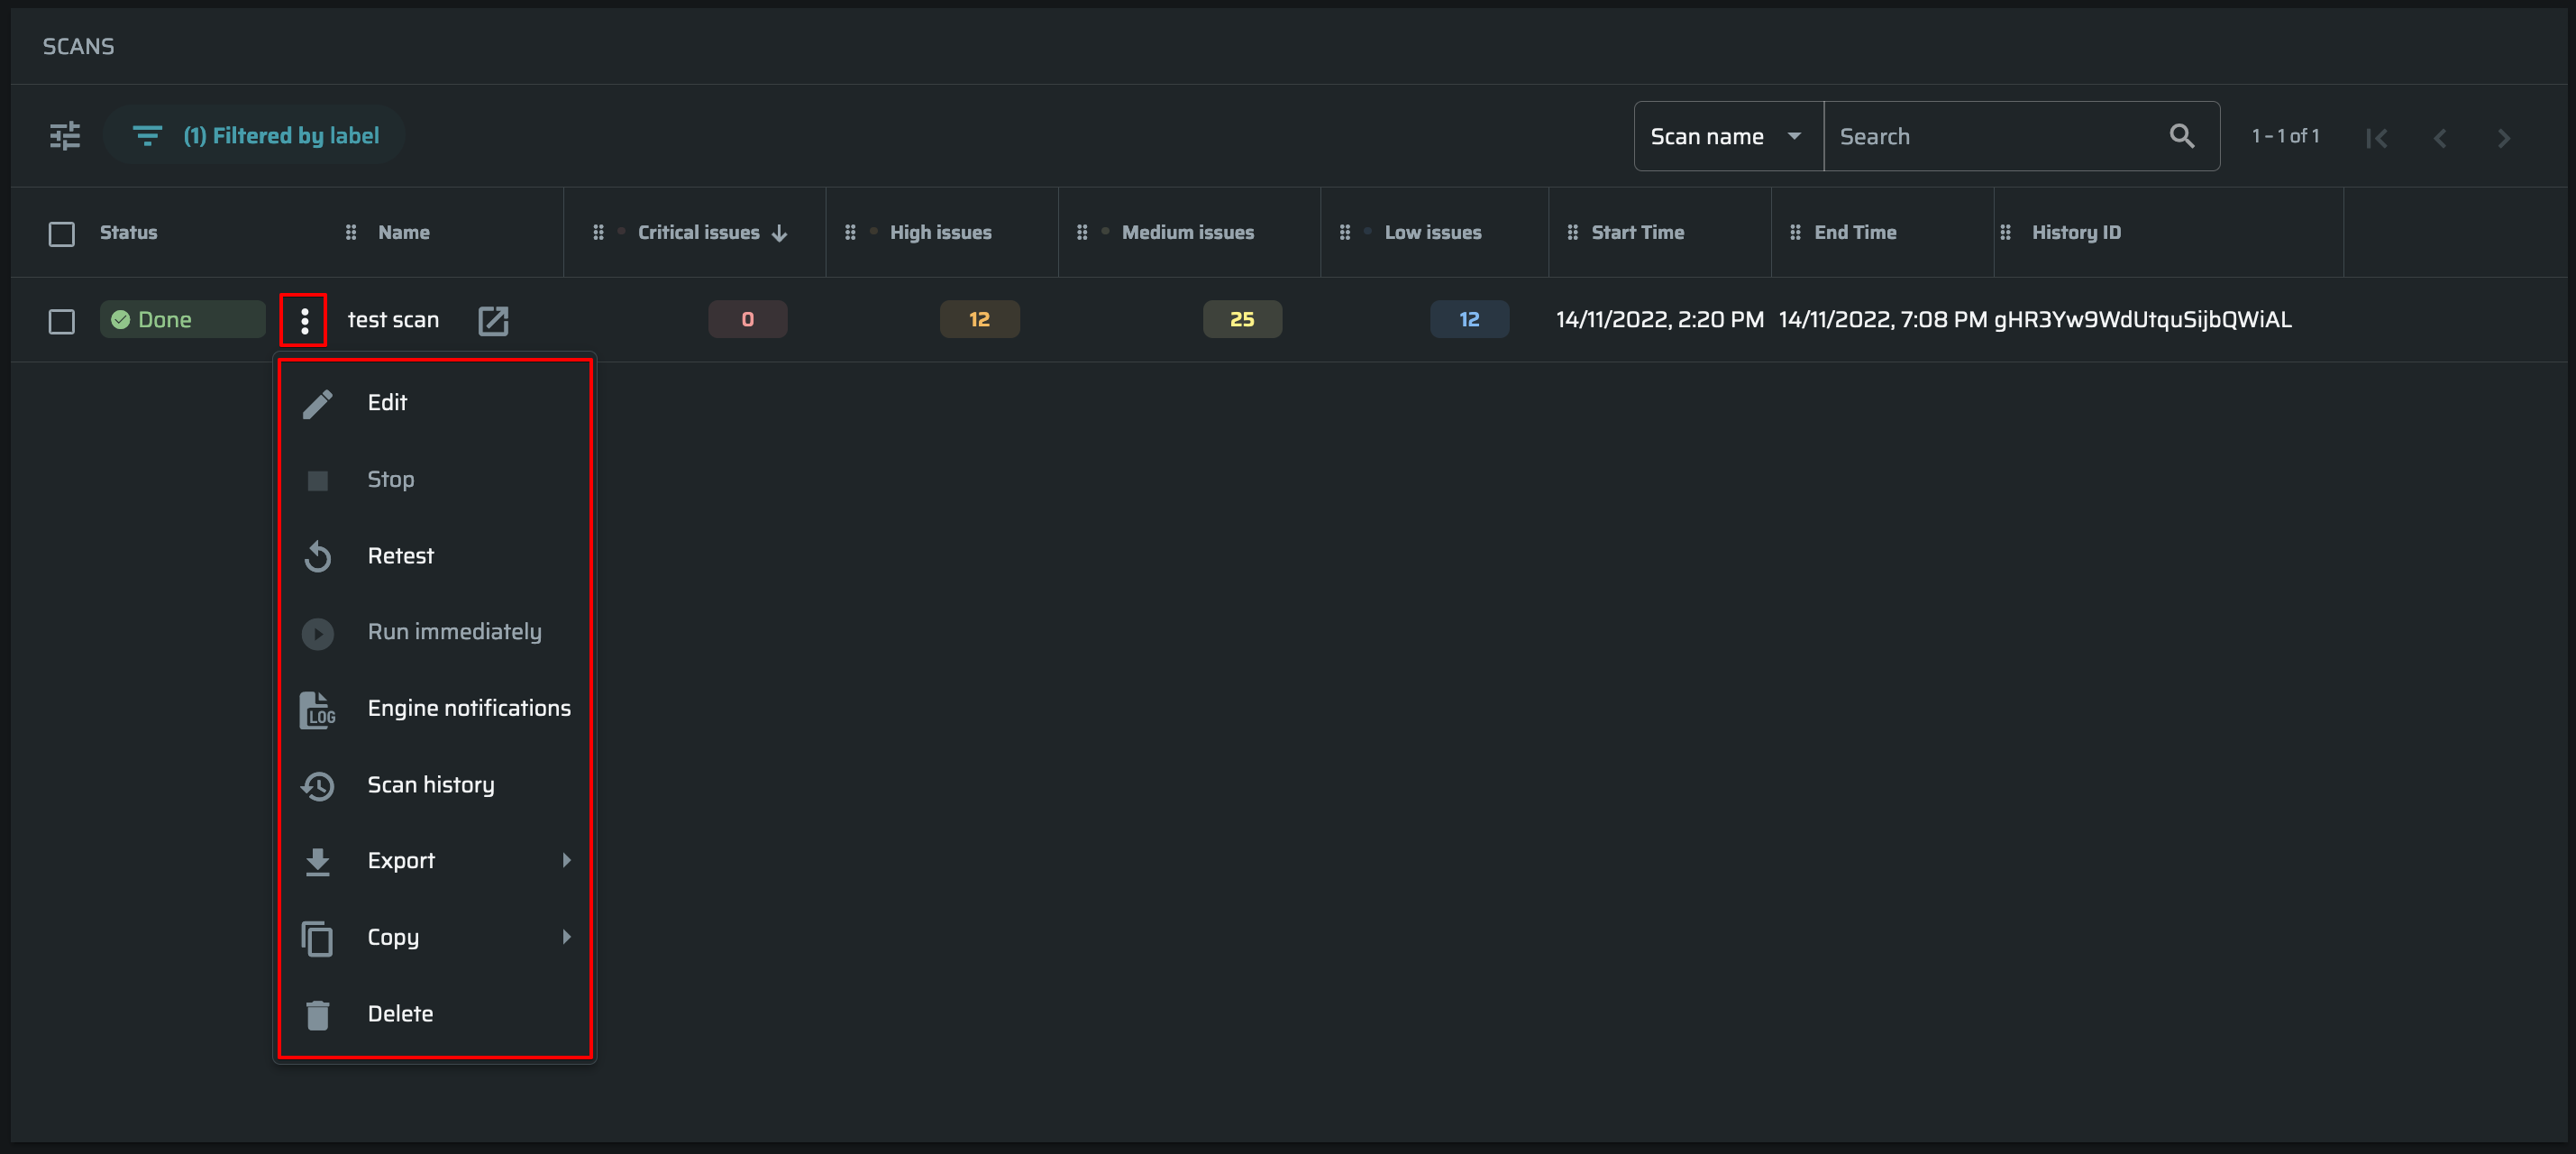
Different options appear depending on the Status of the run. The following options are available:
- Edit – When a scan has the Scheduled status, the Edit option enables you to modify the start time and settings of the next scan to be run. The settings options are the same as on the Scans page. Modifying the scan settings using this option retains the same scan history.
By default, a scan run is assigned the same name as the original scan. The Edit option always enables you to rename a specific run (regardless of its status) to give it a more indicative name. For example, this can be done to indicate an important finding or event, such as the installation of a new product version. - Stop – Stops a scan that is running.
- Retest – Creates a separate scan entity that is a duplicate of the selected scan. Initially, the settings are identical, but you can modify them without affecting the original scan settings. A separate scan history is maintained for this retested scan.
- Run Immediately – Runs a scheduled scan immediately using its most recently defined settings.
- Engine notifications –Opens a scan log in a new window.
- Scan history – Creates a filter by history ID.
- Export – Exports the scan results and details as a CSV or PDF.
- Copy – Copies scan ID, history ID, or project ID.
- Delete – Deletes all data about the selected scan run, cancels the next scheduled run of a recurring scan, and stops its recurrence. You can delete multiple scan runs by selecting their checkboxes and then by selecting the Delete option.
Updated 3 months ago