Handling Discovered Issues
Reviewing all discovered issues
- Select the Scans option in the left pane to display the Scans List. Each scan appears as a single row.
- Click on the row of a scan to display its details.
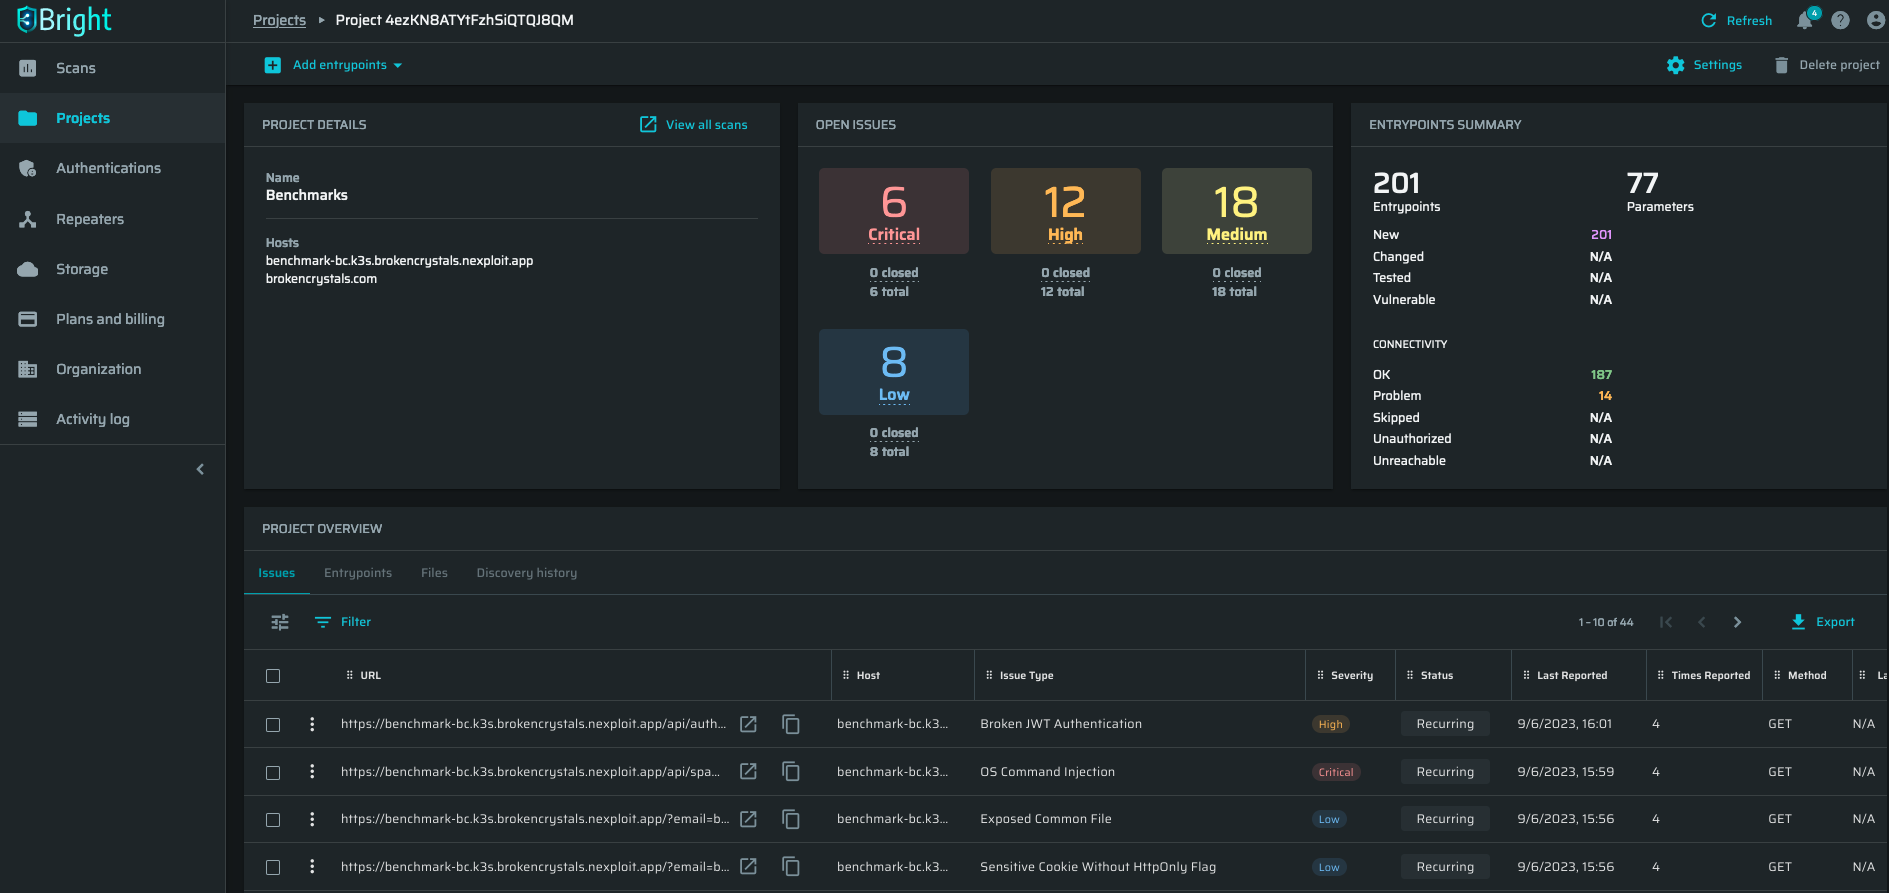
- Scroll down to the DISCOVERED ISSUES section, which shows a row representing each type of issue (vulnerability) discovered by the scan and the quantity of each.
TipThe top of this section provides various options for filtering the discovered issues that are displayed.
Reviewing discovered issue details
To display the detailed results of each discovered issue:
- Select the Scans option in the left pane to display the Scans List. Each scan appears as a single row.
- Click on the row of the scan to display its details page.
- Scroll down to the DISCOVERED ISSUES section, which shows a row representing each type of issue (vulnerability) discovered by the scan and the quantity of each.
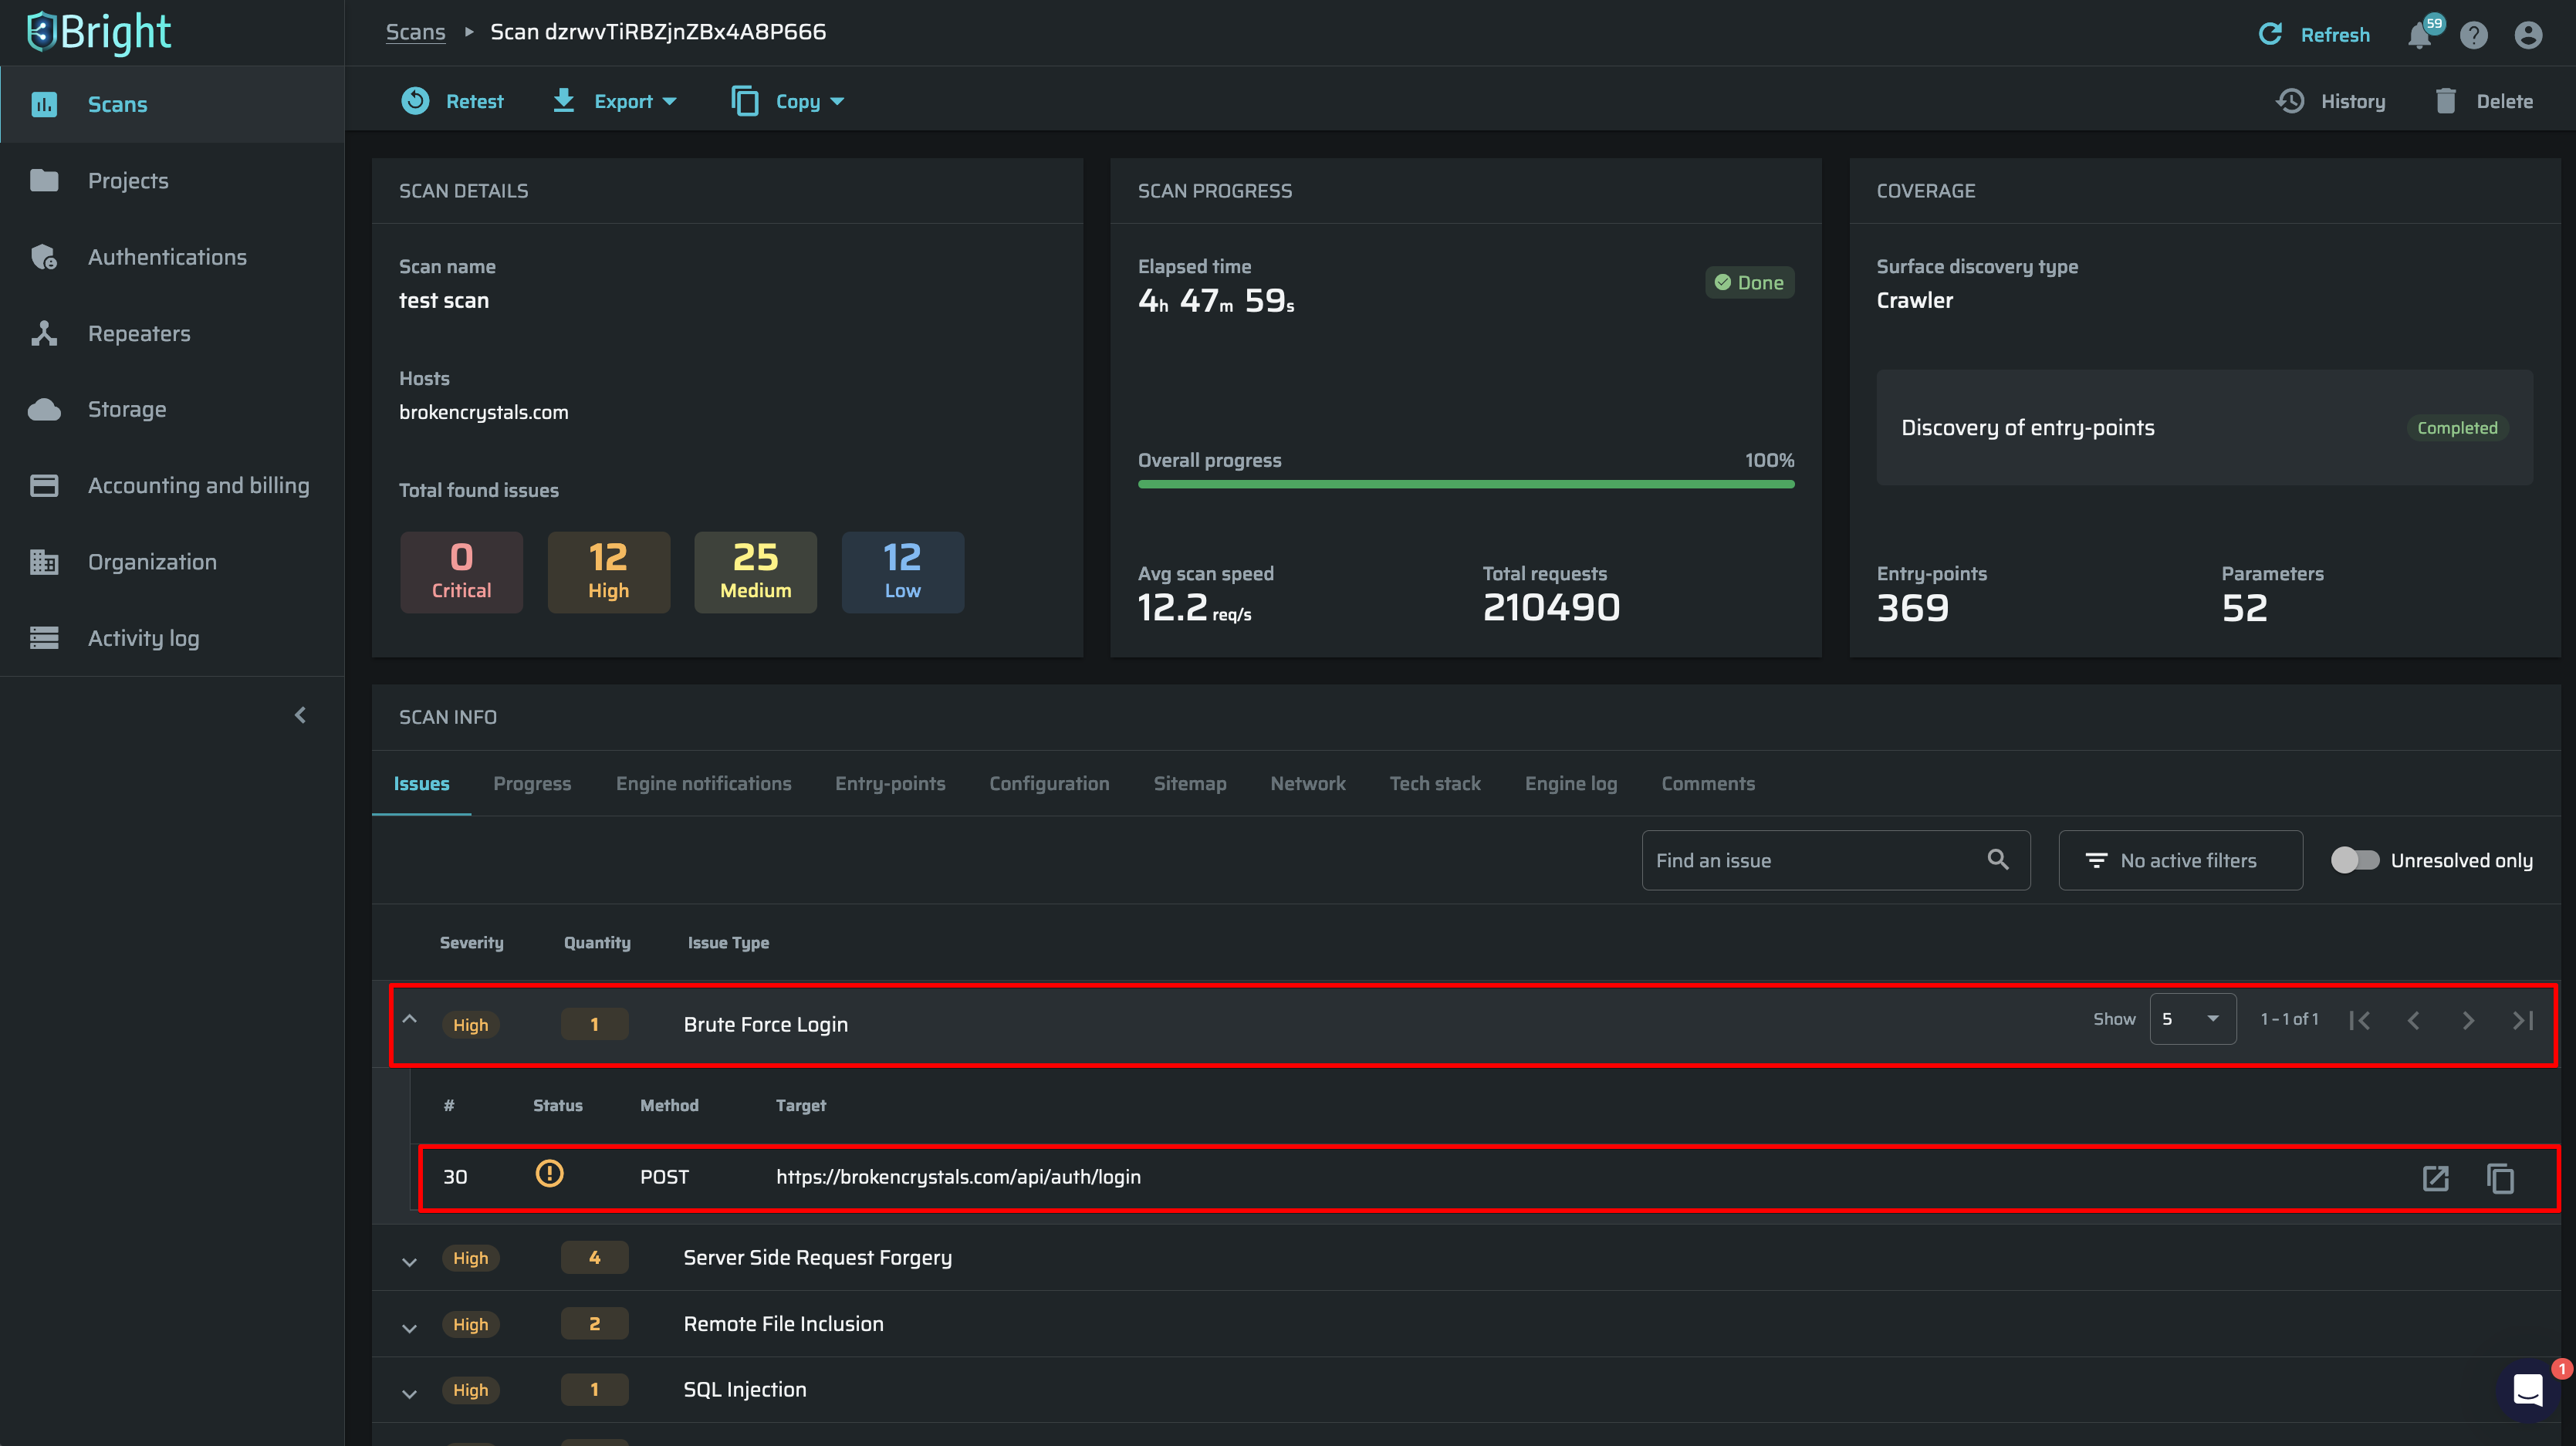
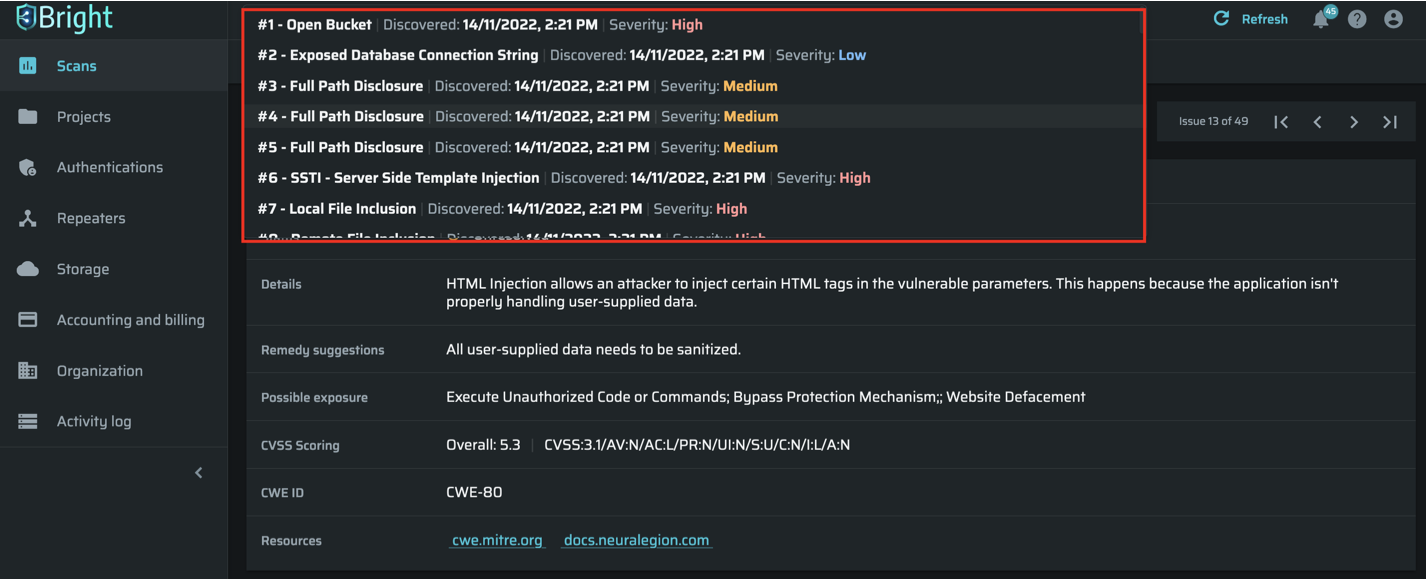
- Click on the issue type row (1) to display a row for each discovered issue of that type.
- To display details about a specific issue, click on its row (2).
Issue overview
This section provides general useful information about the issue:
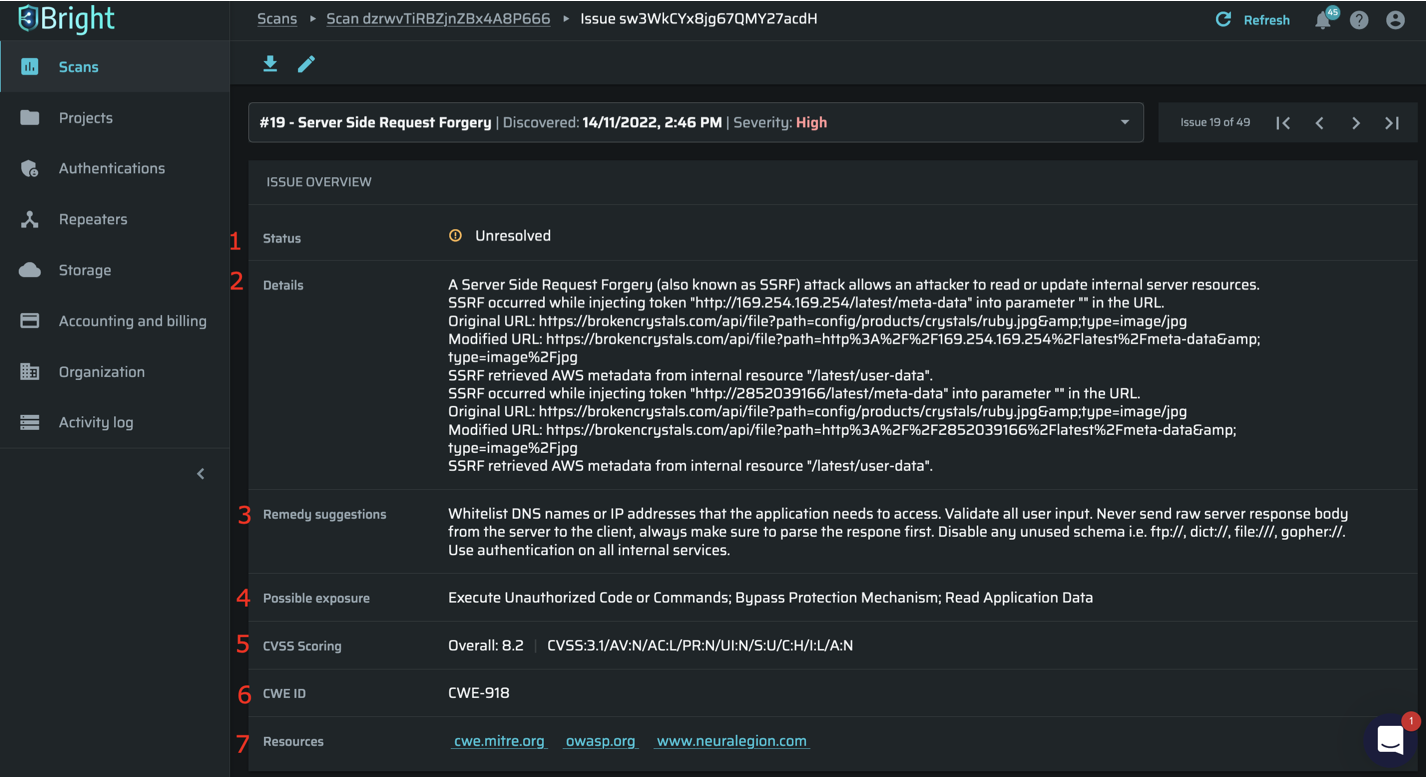
- Status – Specifies the current status of this specific issue. The status of this issue is Unresolved until it is changed in the project issue configuration.
- Details – Provides a short description of this issue. It also displays dynamically generated information about what happened at the bottom of the explanation.
- Remedy Suggestions – Provides a short explanation about how this issue should be fixed.
- Possible Exposure – Provides a brief non-technical explanation about what kind of impact this specific issue might have on the application in case of a malicious breach.
- CVSS Scoring – Provides a Common Vulnerability Scoring System score summarizing this specific issue.
- CWE-ID – Provides a Common Weakness Enumeration ID number of this specific issue.
- Resources – Provides references to resources in case more detailed explanations are required.
Additional information
When relevant, this section provides additional technical information about the specific issue, which includes – database enumeration information, targeted DOM element information, and so on.
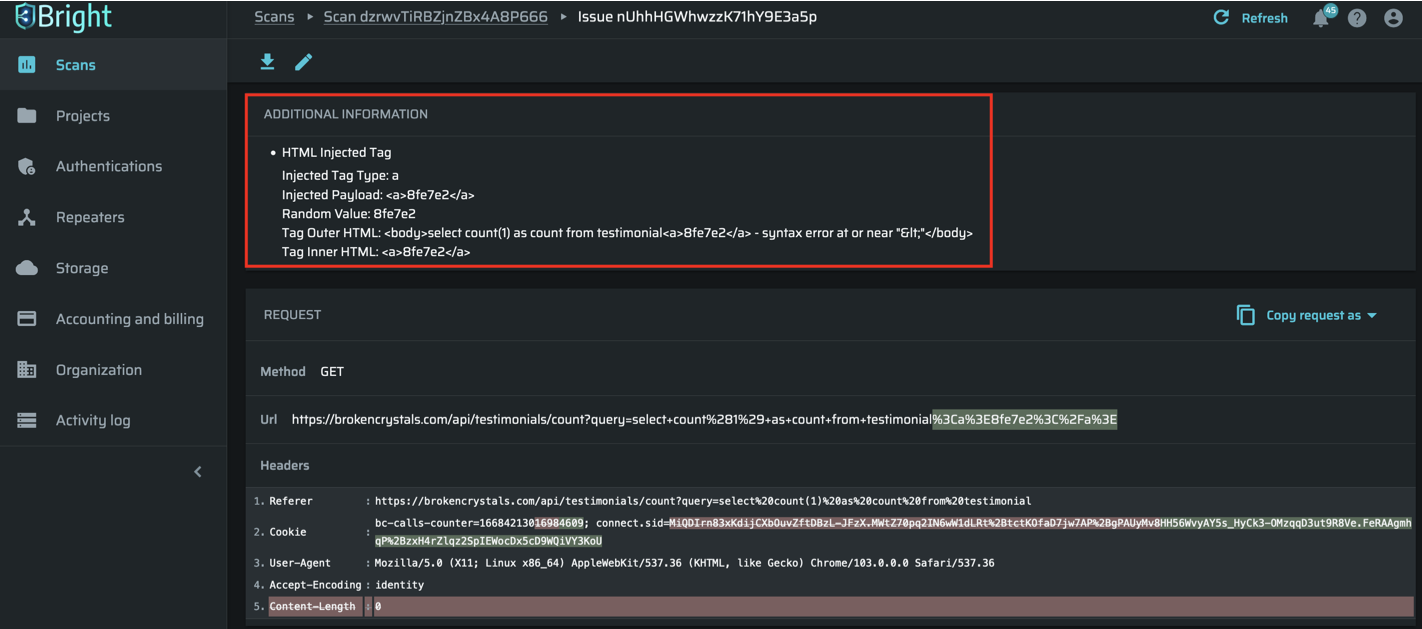
Request
Displays the request info in a diff-like view that shows what was changed in the request in order to execute this type of attack.
TipYou can use the Copy as CURL button at the top right of the request display in order to execute it manually.
Response
Provides all the response information.
Screeenshot
When relevant, shows a screenshot demonstrating the attack execution.
User comments
The section at the bottom of the page enables you to enter comments and notes describing the discovered issue for yourself or notes for other people in the organization. You can format the comment using markdown or using the provided formatting tools. To mention other users in your organization use the @ symbol.
After you enter the comment, click the Preview button to display it. Click the Comment button to post the comment. After a comment has been posted, a new section appears at the bottom called ALL COMMENTS showing all previously posted comments.
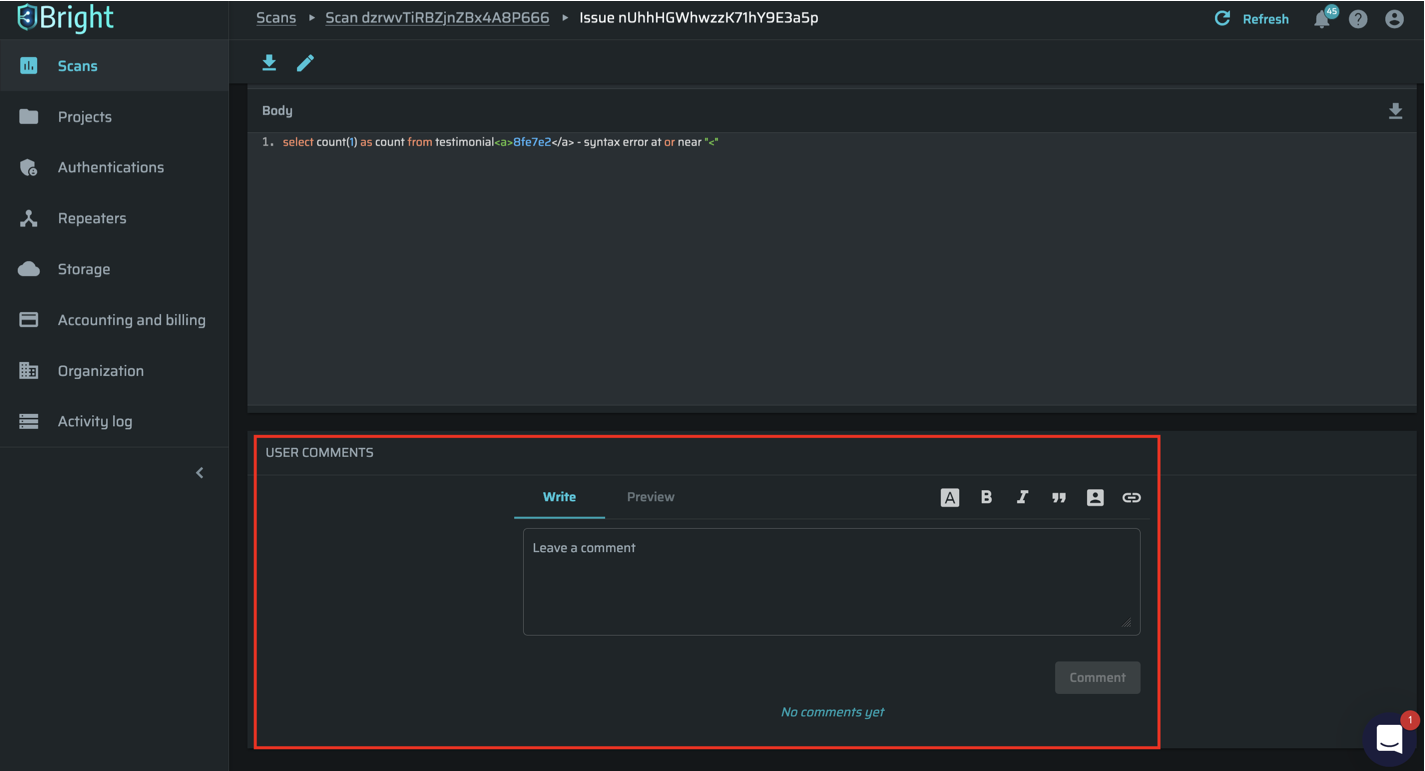
To include this comment in the scans report, check the Include in report checkbox under the comment.
Navigating between issues
To quickly navigate between issues click the title of an issue to open a scrollable list of all the issues in this scan.
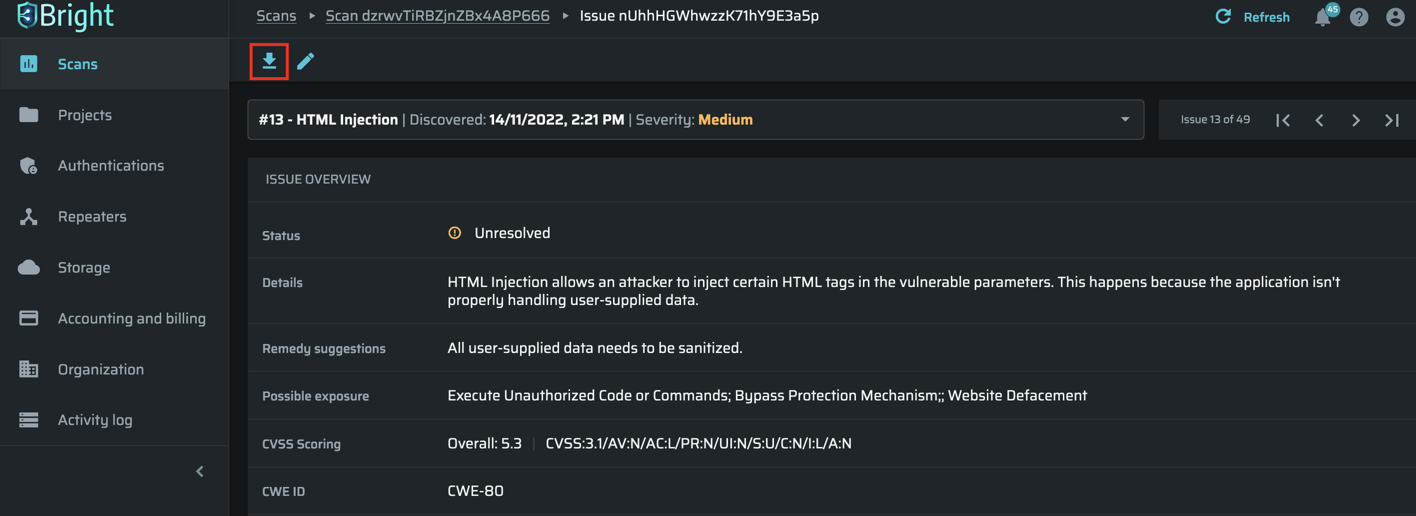
Downloading an issue script
To download the specific issue details as a .JSON file to be used later click the Download script ![]() button.
button.
Example script:
{
  "method": "GET",
  "url": "https://unintentionally-open-bucket.s3.amazonaws.com/?list-type=2",
  "headers": {
    "Cookie": "bc-calls-counter=1; connect.sid=Mddt-tFZwphRs5j7OfQinnPAZ6AW7piQ.Zpt5j%2F2IZCg2US2k6iALU3%2Fz5mEvh2OyQRBgTI28QE8",
    "User-Agent": "Mozilla/5.0 (X11; Linux x86_64; rv:68.0) Gecko/20100101 Firefox/68.0",
    "Accept-Encoding": "identity"
  }
}
Retesting an issue
Retesting at issue creates a separate scan entity that is a duplicate of the selected scan. Initially, the settings are identical, but can be modified by you without affecting the original scan settings.
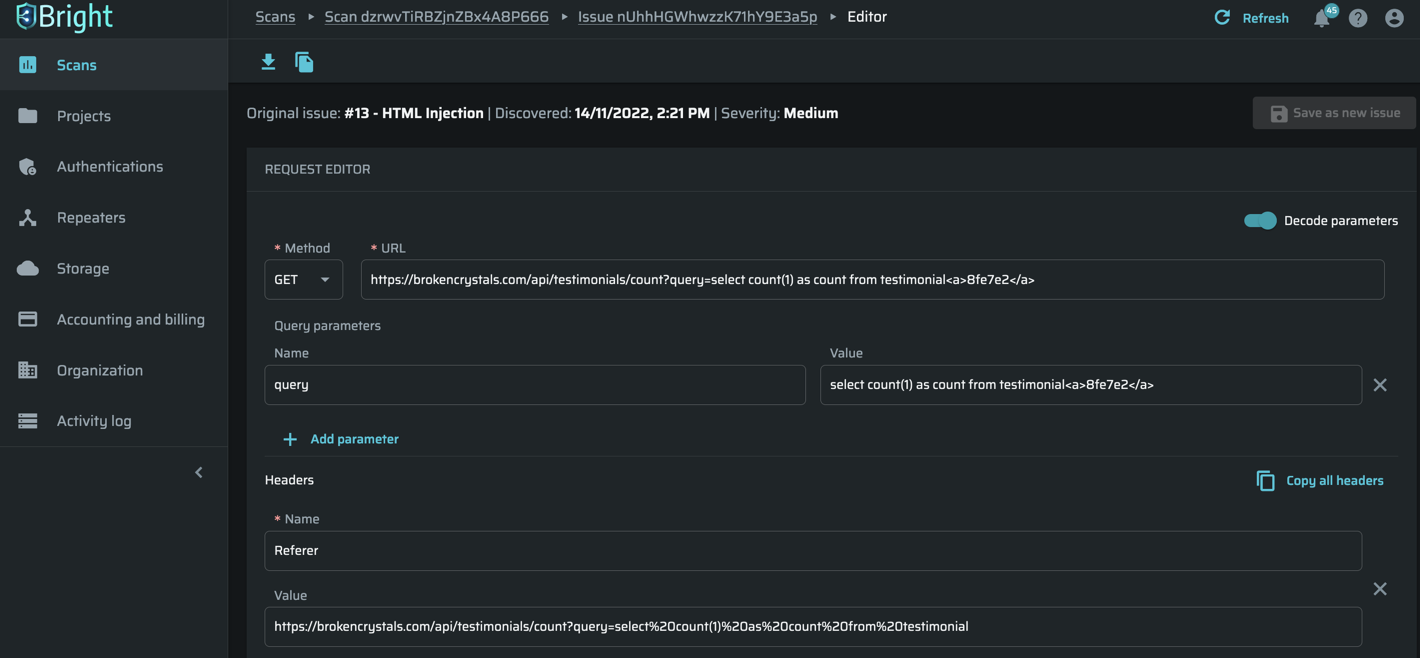
To modify and re-test a specific issue by using the script editor:
- Click the Modify script
 button.
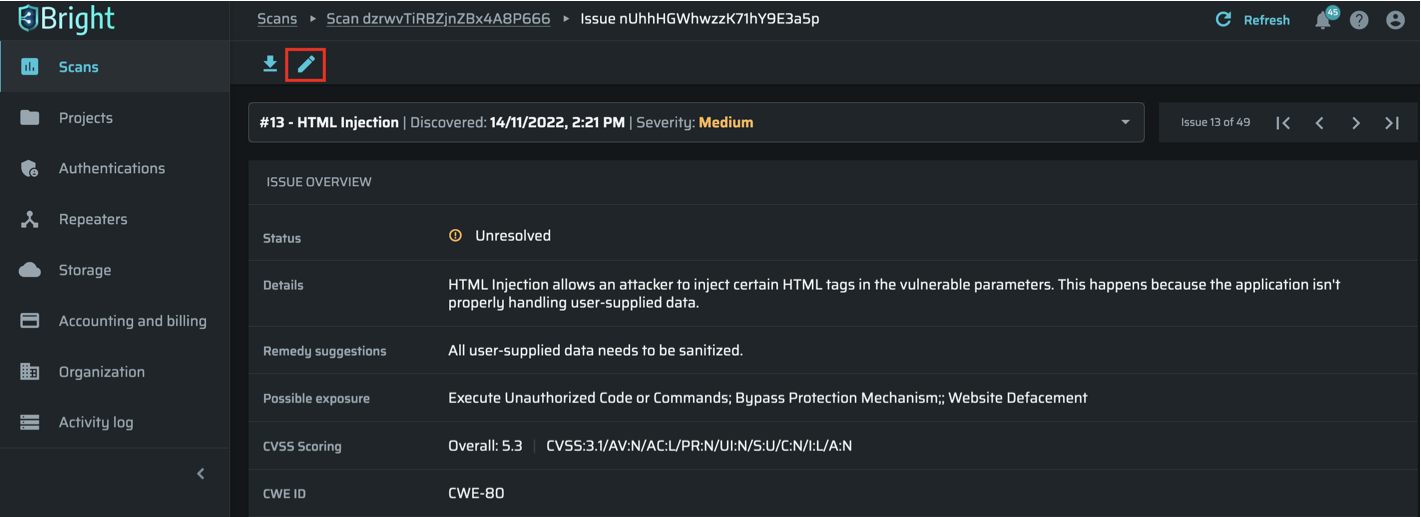
- In the script editor, you can edit any request field and retest it (scan it again) by clicking the Execute button.
Updated about 2 months ago