Configuring Form Authentication
Deprecation noticeThe Form authentication type is deprecated. Your existing authentication objects of this type are currently working, and later will be converted in to the Custom API authentication objects automatically.
You can use the form authentication if the login-protected resources within the application you want to scan use
the application/x-www-form-urlencoded content type of the HTTP requests.
The form authentication type is set by default when you create an authentication object in the Bright app.
NoteThis topic describes only how to fill in fields specific for form authentication (the Setup tab). For general steps, see Creating Authentication.
NoteBefore following the instructions below, ensure that your application and authenticated resources are accessible to the Bright engine, either directly from the Internet or via the Repeater.
From the Authentication type dropdown list, select Form authentication, and then proceed to the authentication setup.
Authentication setup
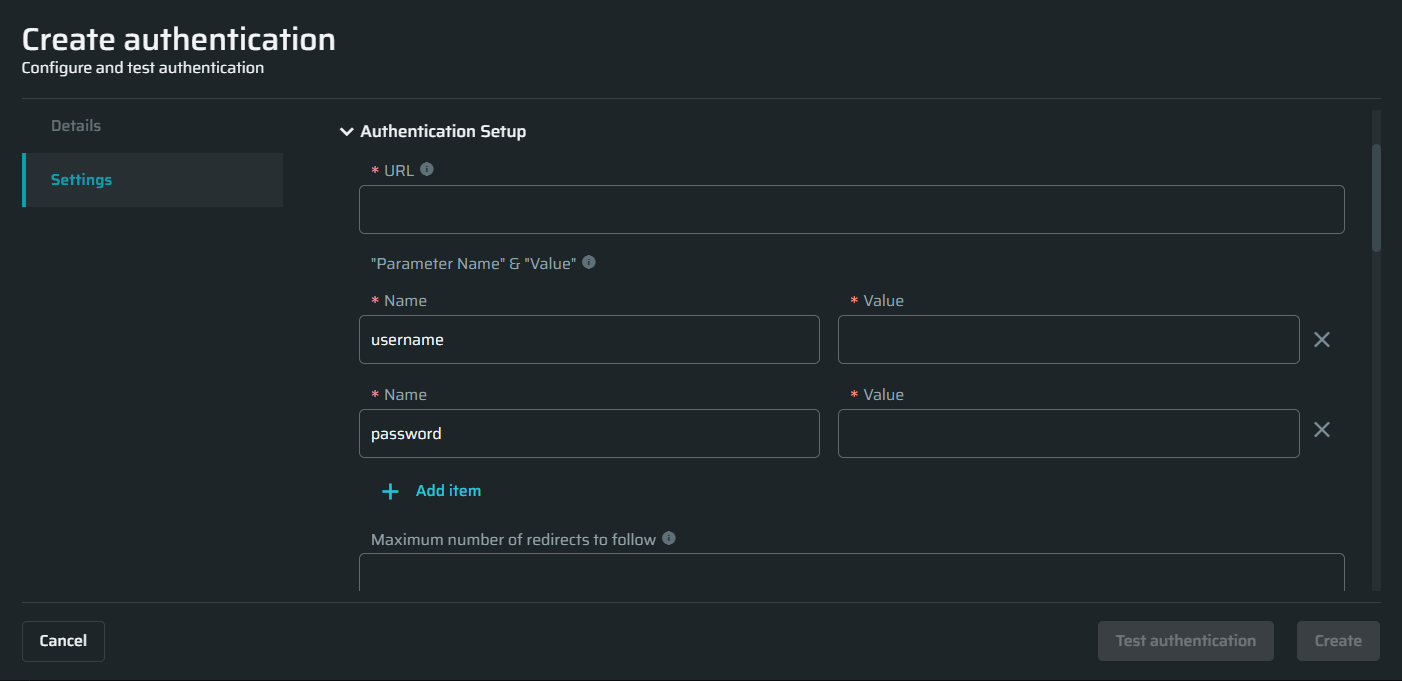
In this section, set up a valid authentication request to be sent to the end-point API by completing the provided fields.
| Field | Guidelines |
|---|---|
| URL |
Enter the relevant URL for the HTTP request. The POST method is set by default for the form authentication. Pro Tips:
|
| Parameter name | Enter the form parameters from the request body. For example, username and password. |
| Parameter value | Enter the values of the form parameters (credentials) from the request bodies. |
| Maximum number of redirects to follow |
Enter the maximum number of redirects that the Bright should follow during the authentication process. Pro Tips: Select the checkbox Change redirected method to get for the redirects with code 302, where the server expects the following methods to always be GET during redirects and not the original method that triggered the redirect. |
| Additional headers |
(Optional) Select an additional header you need to use for each request and enter its value. For example, additional cookies that might be needed for the authentication such as host-related metadata. To replace or append the selected header before sending each request, select the corresponding option from the Merge strategy dropdown list. Pro Tips:
|
- You can add as many parameters as you need by clicking + Add item at the bottom of the Parameter Name & Value section.
- To delete a parameter, click
 next to the corresponding parameter field.
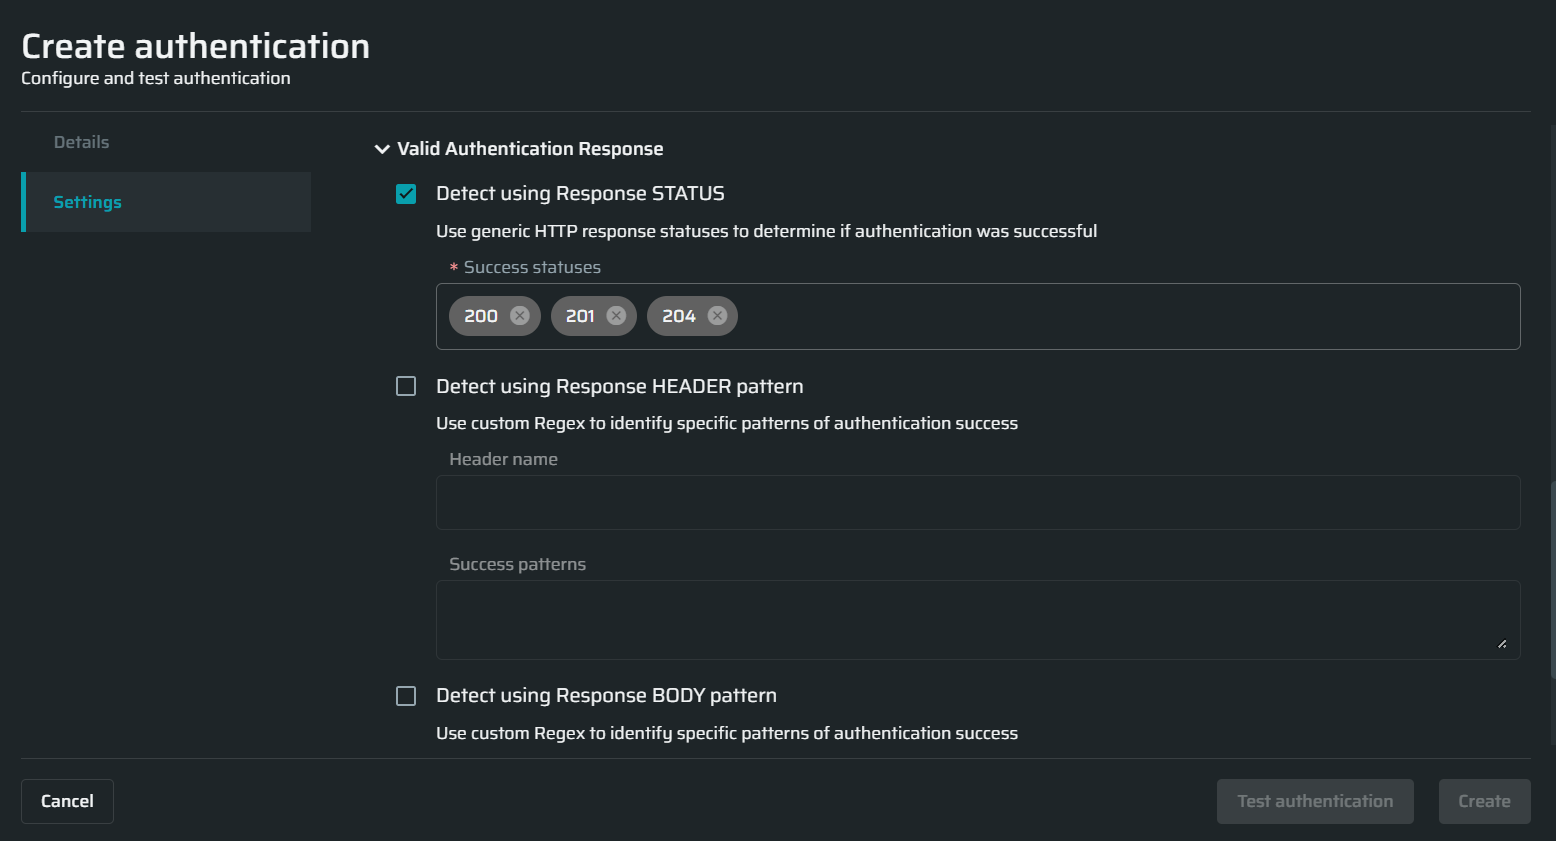
Valid authentication response
In this section, select the options you want to use during the application scanning to determine that the authenticated resource has been reached. The options define how the application responds in case a full authentication flow passes successfully.
| Field | Guidelines |
|---|---|
| <Detect using Response STATUS | Enter the HTTP response status that will tell you about the authentication success. |
| Detect using Response HEADER pattern | Enter the header name and Regex pattern that will help you identify the authentication success. |
| Detect using Response BODY pattern | Enter the body pattern that will help you identify the authentication success. |
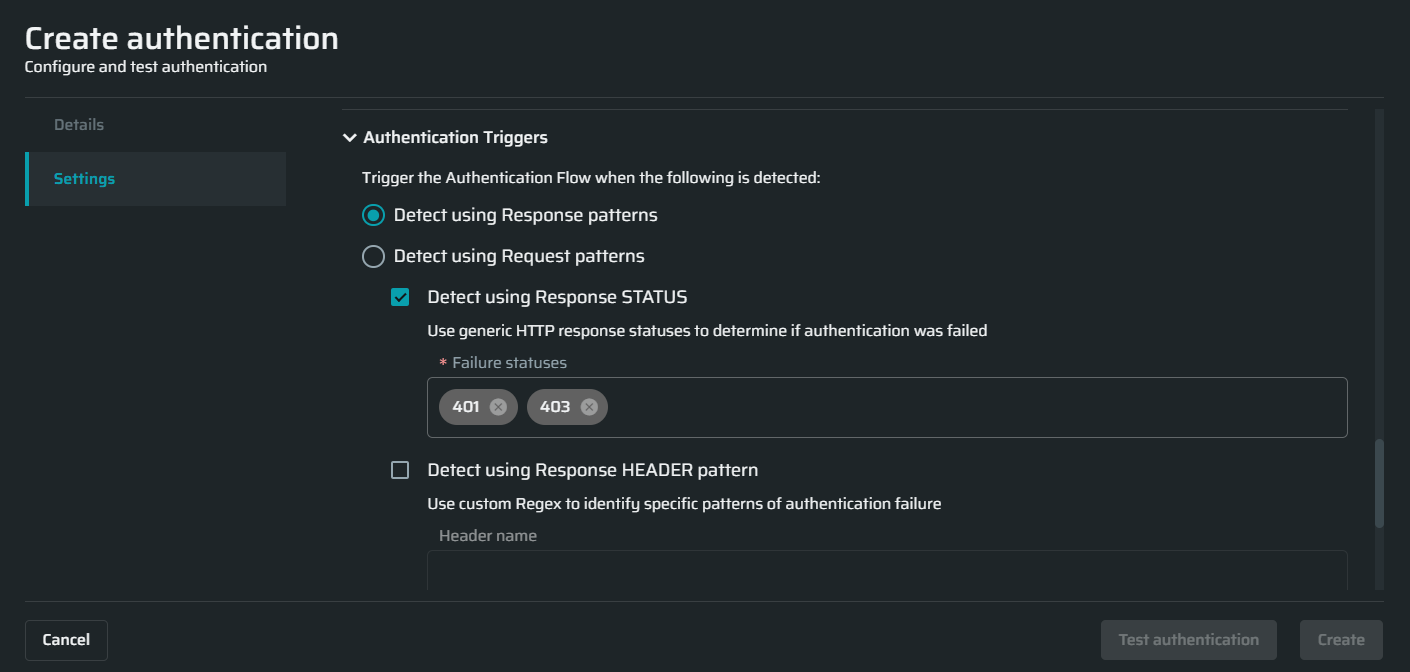
Authentication triggers
In this section, select the options you want to use during the application scanning to determine if the authentication flow is no longer valid and the authenticated resources cannot be reached. The options define how the application responds in case the authentication flow fails.
| Field | Guidelines |
|---|---|
| Detect using Response patterns | Select if your application explicitly indicates the authentication session expiration in the body or headers, or using status codes. |
|
Enter the HTTP response status that will tell you about the authentication failure. |
|
Enter the header name and Regex pattern that will help you identify the authentication failure. |
|
Enter the body pattern that will help you identify the authentication failure. |
| Detect using Request patterns | Select if your application does not provide any explicit indication in the body or headers when the session expires, but the client-side code redirects you to the login page, for example, based on absence of cookies or cookies expiration. In this case the only way to detect the re-login requirement is by detecting the redirect to the login URL. |
|
Enter the URL pattern that will help you identify the authentication failure. |
NoteBright allows testing a scan before saving it. For details, see the Testing Authentication.
Updated about 1 month ago