Authentication Recorder
Dynamic Application Security Testing (DAST) is based on a black-box approach. The DAST tool performs an attack simulation on all available entry points to identify vulnerabilities. In most cases, some of the entry points are internal to the application and require an authentication flow to access them and try to exploit them. Bright’s platform supports multiple authentication flow methods. The most common method for web applications is entering credentials through the application's login screen.
Bright’s authentication recorder is a simple utility that assists practitioners in setting the authentication object for the scanning flow. The idea is to start a recording session in the background. The user performs a regular login flow, and Bright captures all actions in the background to be re-played later during the scan automation. Below are the details of how to perform this activity.
Recording a new login session
To record your login session, follow these steps:
-
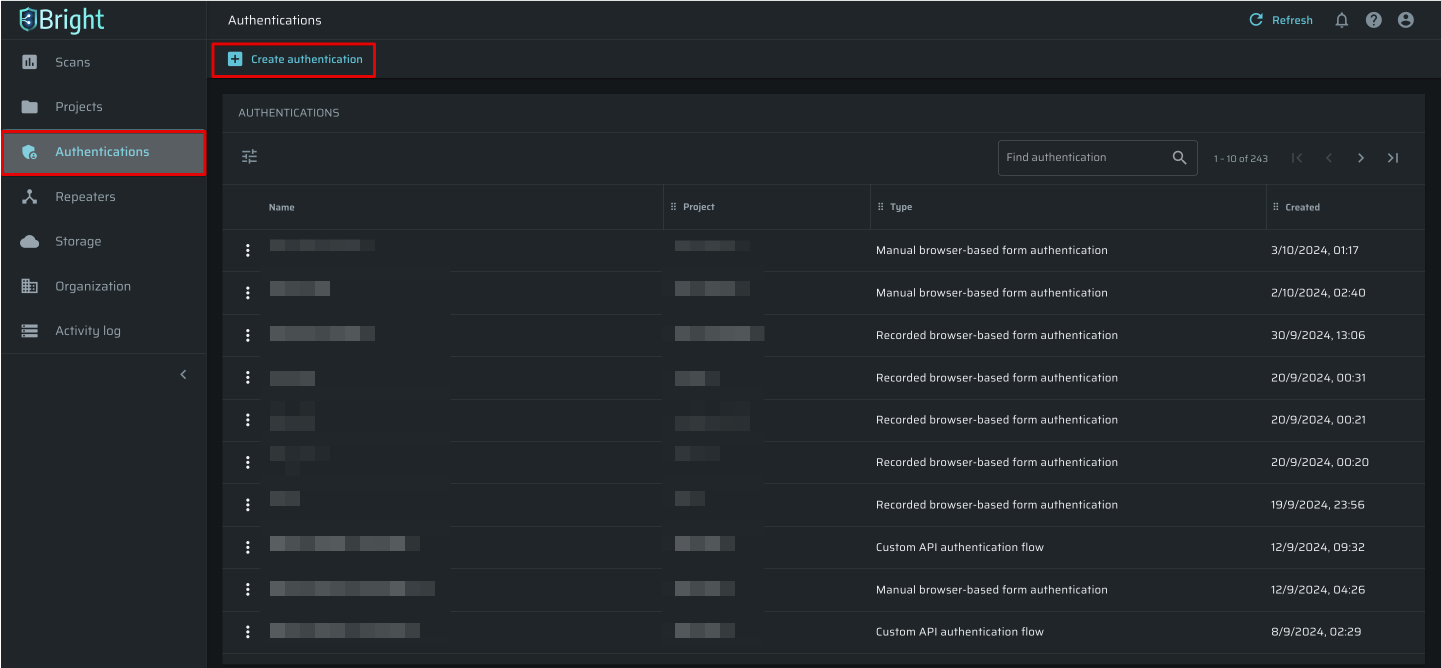
Open the Authentications tab on the left menu and click +Create authentication:
-
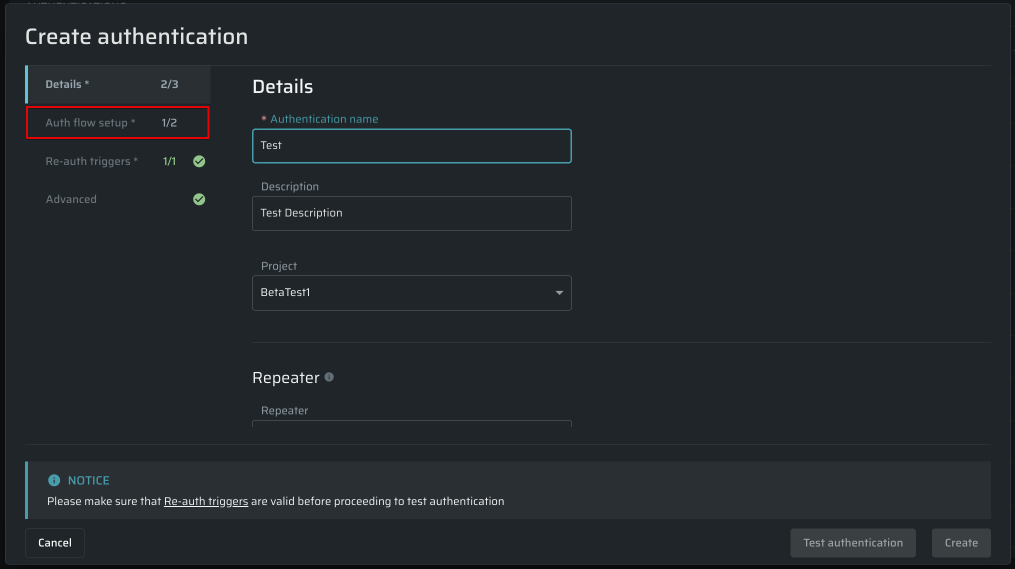
Specify the required details: enter your Authentication name (this name aims to provide context when selected later while defining a discovery or a scan). Select a Project from the available projects and a Reapeater, if needed:
-
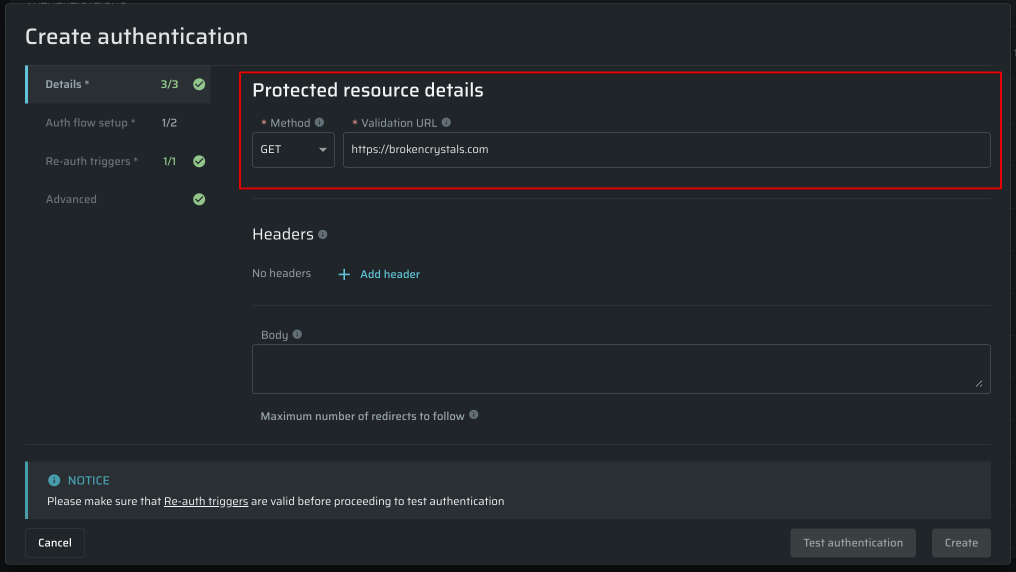
Enter the target's address in the Protected resource details section to proceed:
-
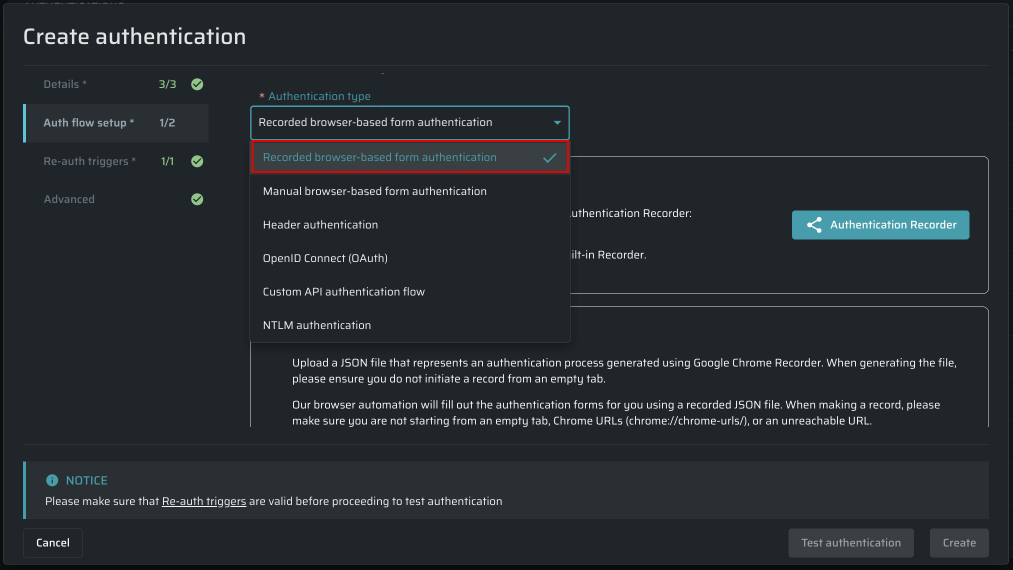
Select the next tab in the flow called Auth flow setup. In the Authentication type field, select the Recorded browser-based form authentication:
-
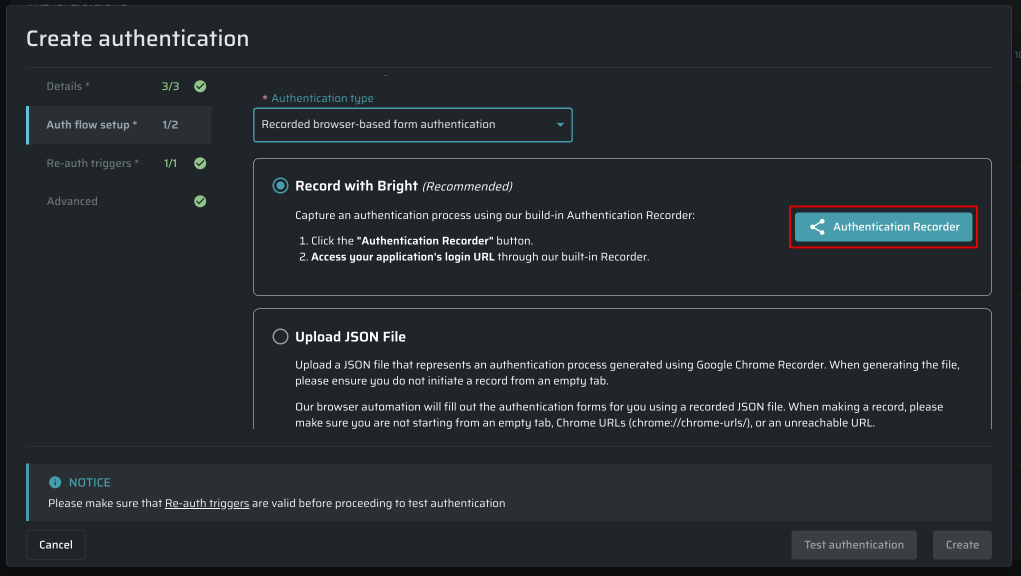
Select the Record with Bright option and click the Authentication Recorder button:
 Note
NoteWhen you first run Authentication Recorder, your browser may request permission to access your clipboard. Grant the permission to proceed.
-
After the Authentication Recorder is started, you'll see the window to operate with:
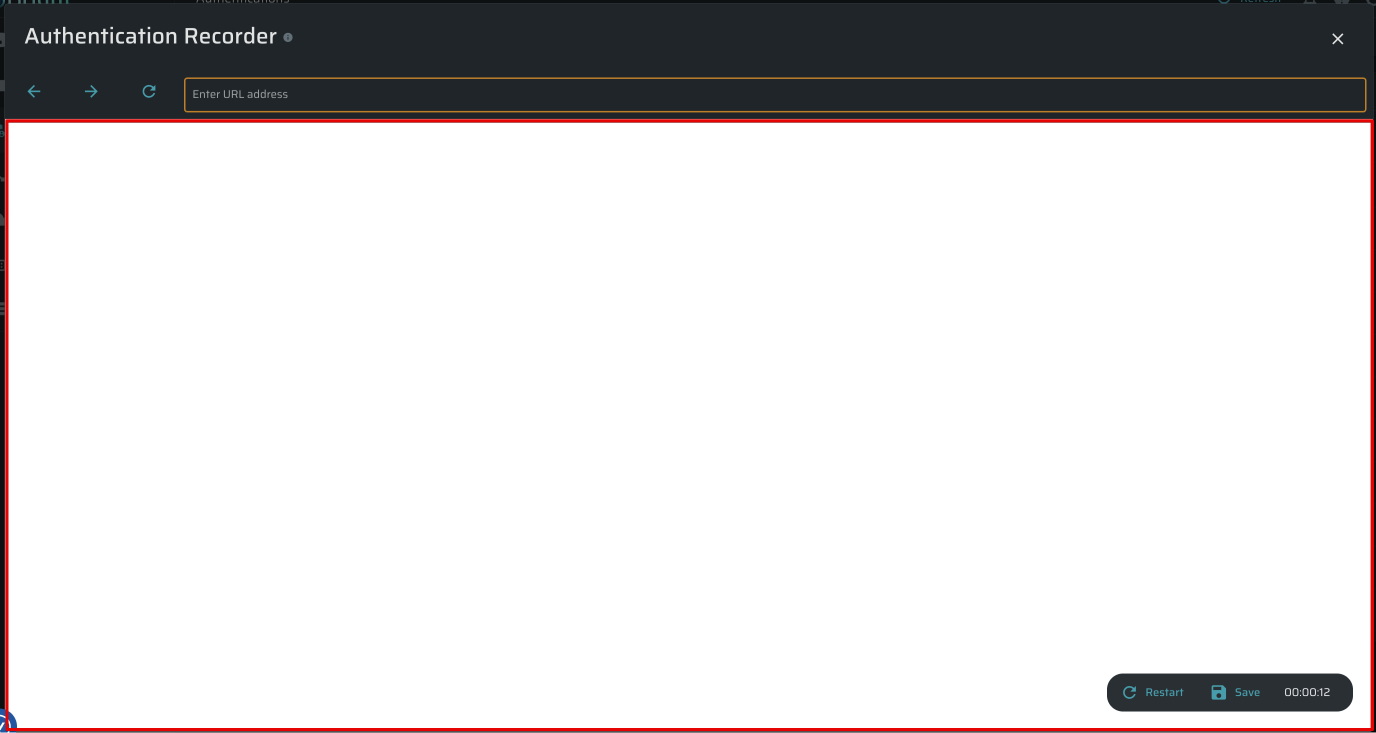
The navigation is simple as in any other browser: use the address bar to access web pages, the arrows to go forward and backward, and the reload button to refresh the page.
The recording will start automatically when the browser window appears
Use the buttons in the bottom right corner of the window to control the Authentication Recorder:

- Restart - to close the current session and automatically create a new one.
- Save - to stop the recording and return to the authentication settings.
MacOS usersTo paste the text within the Authentication Recorder window, use the Control + V shortcut, instead of the Command+V.
-
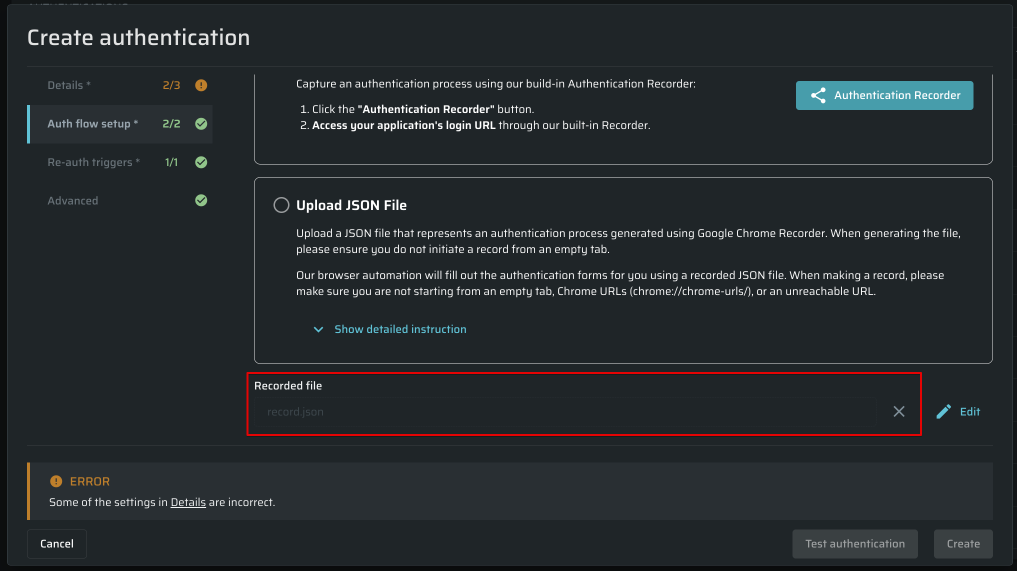
After finishing the authentication process, click the Save button to stop the Authentication Recorder. Once the saving is done, the recording will be attached to the authentication:
Editing a recorded login session
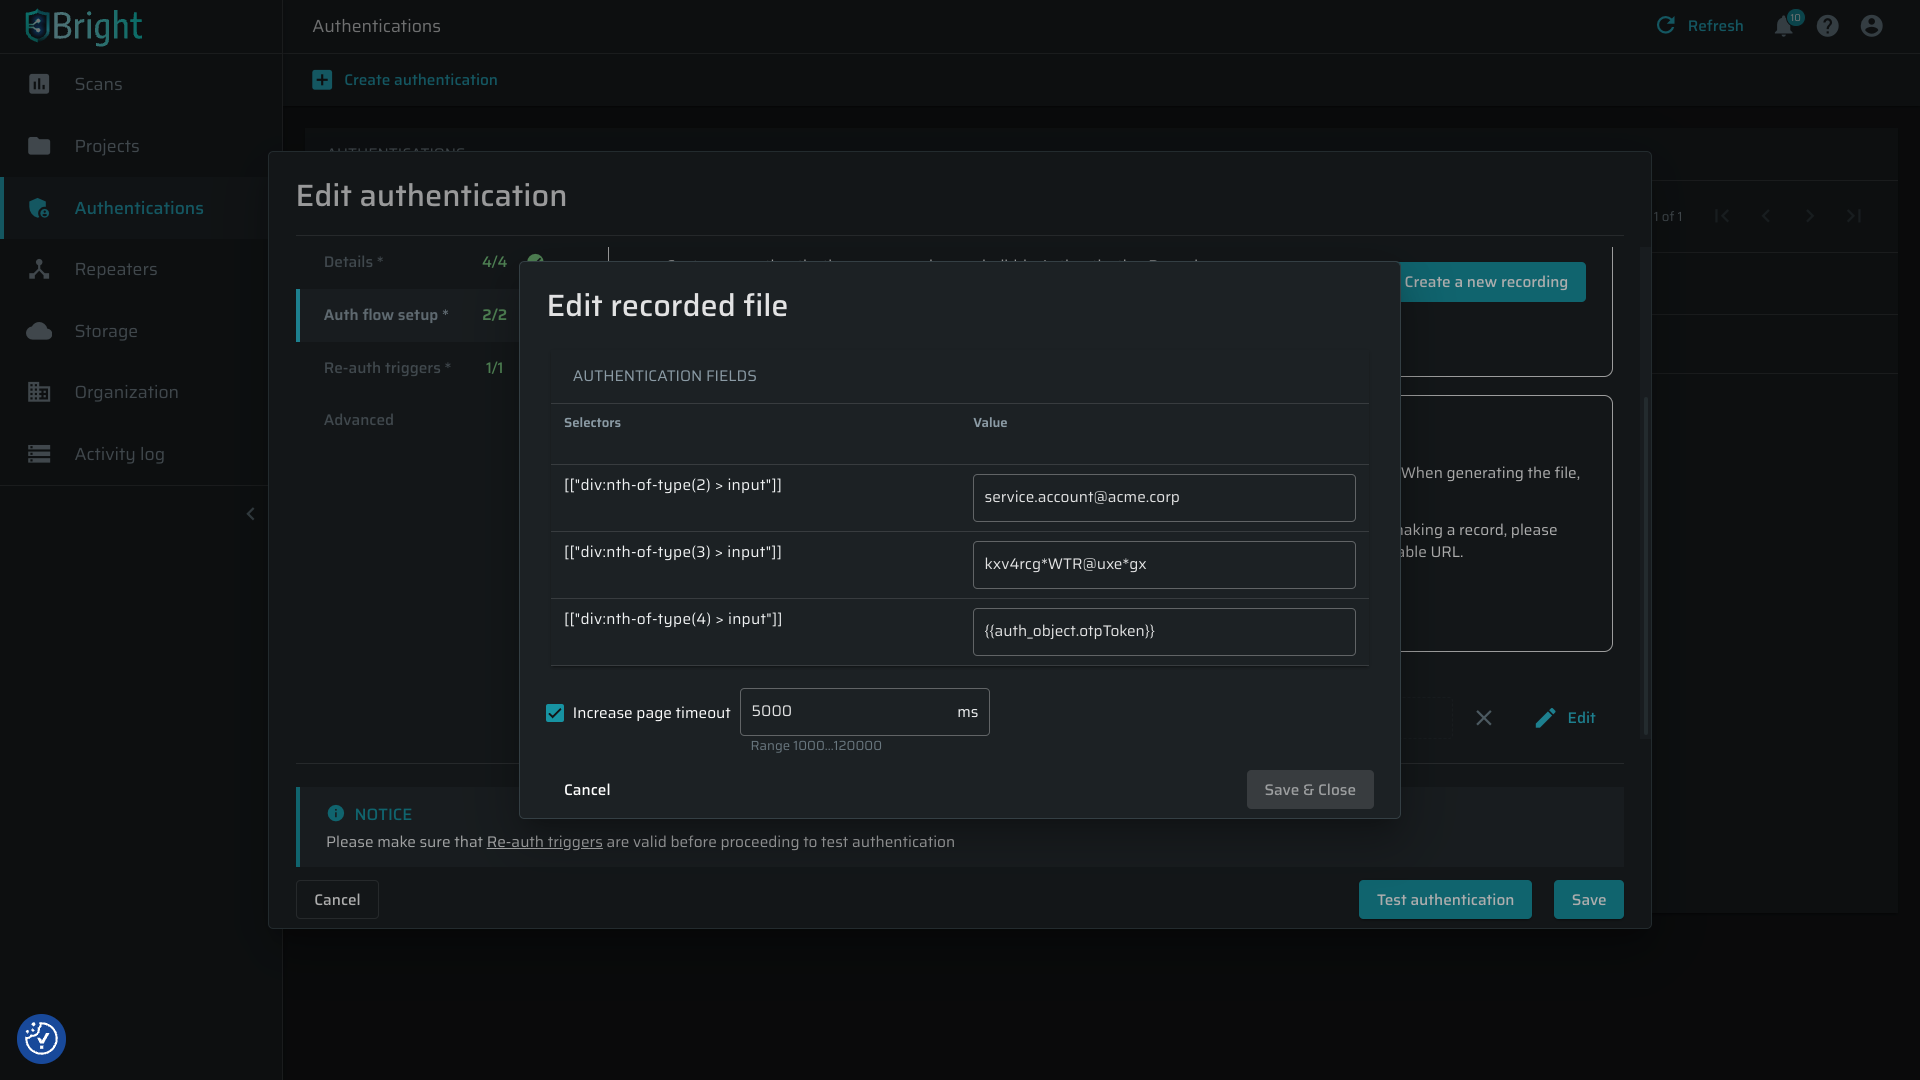
Bright app allows you to edit a record by manually changing this information:
- Field value: You can now edit the authentication field value, such as user name or password, in the Create/Edit Authentication dialog under the Auth Flow Setup tab.
- Page Timeouts: Adjust how long each page waits before timing out (from 1 to 120 seconds) to address slow page loading speed.
- One-Time Passwords: Append one-time passwords (OTP) generated by the OTP Generation settings under the Advanced tab by entering the marker
{{auth_object.otpToken}},replacing the static OTP saved by the page recording (e.g.763041).
Deleting a login session
If you decide to record a new file, click the X button to delete the uploaded recording. If you want to double-check the authentication process, click the Test authentication to test it.
Notes
- The entire authentication process takes no longer than 5 minutes. Otherwise, the Authentication Recorder will be closed without saving the progress.
- The Authentication Recorder can work only on one tab in a browser.
Updated about 2 months ago
