Retesting a Scan
Retesting at issue creates a separate scan entity that is a duplicate of the selected scan. Initially, the settings are identical, but you can modify them without affecting the original scan settings. A separate scan history is maintained for each retested scan.
Since Bright provides a separate discovery and scanning, you can choose what process you want to restart.
- To restart a discovery (which equals creating a new one), open the Projects tab → Select a project → + Add Entrypoints → Create new Discovery. Learn more on how to create a new discovery in the article.
- To restart a scan, open the Scans tab → Targets → Select known Entrypoints from the Project. This will start a scan without a process of finding new entrypoints.
- To retest a scan in an old way, open the Scans tab → Targets → Discover Entrypoints during a scan. Learn more on how to retest a scan in the article.
Step-by-step guide
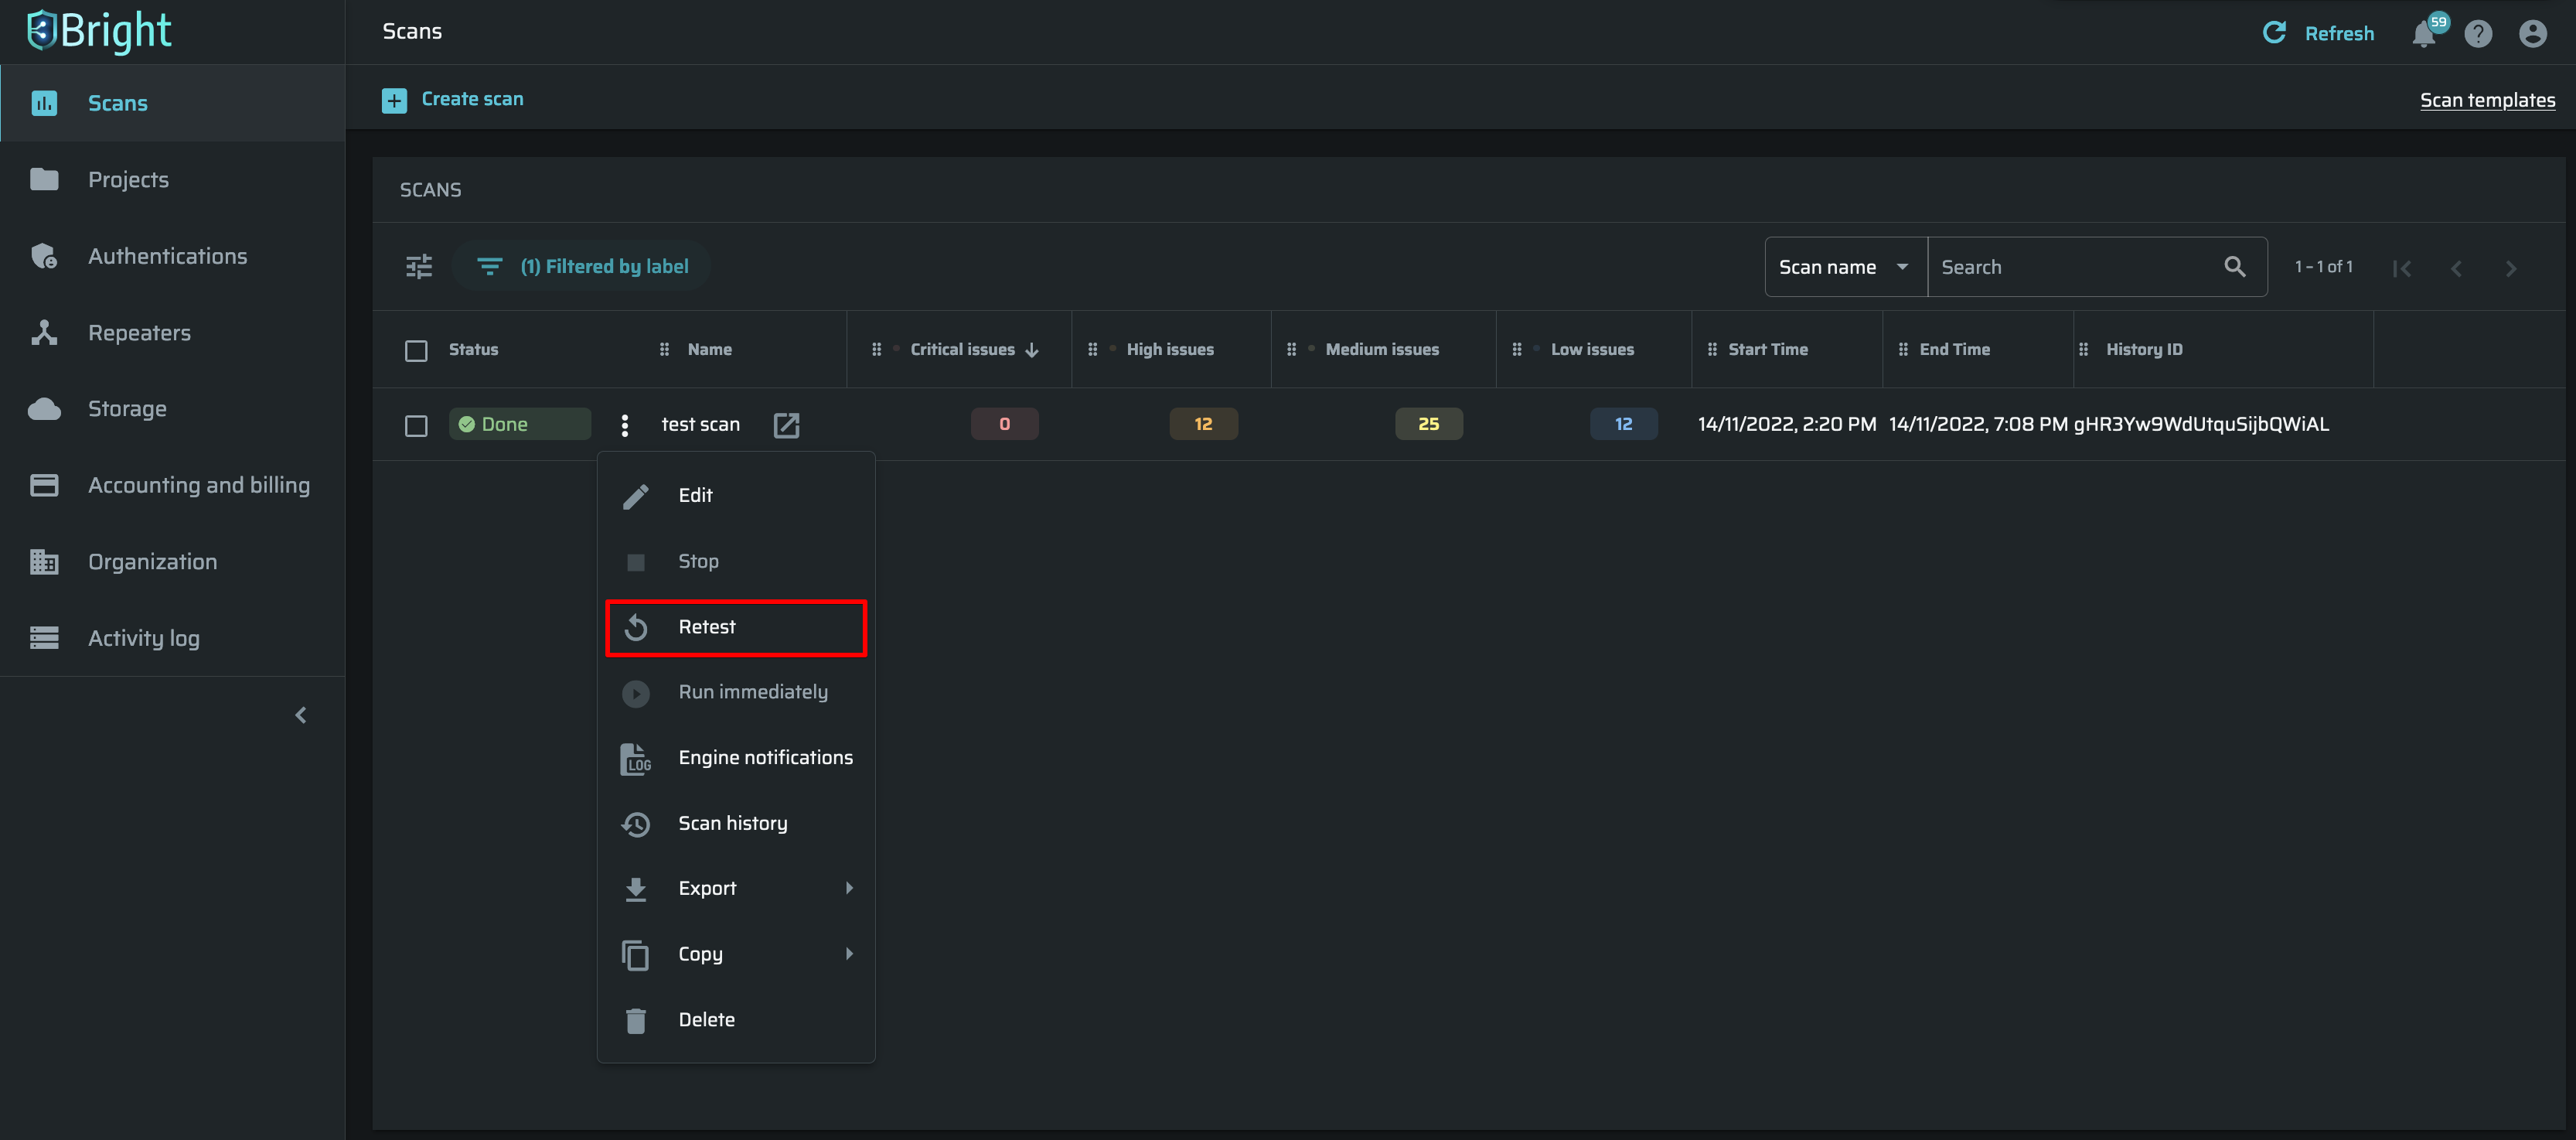
- In the left pane, select the Scans option to display the scans List.
- Click
 next to the scan to be retested.
 - From the dropdown list, select Retest.

- In the RETEST SCAN dialog box, check and, if necessary, modify the scan settings, and then click Retest scan. Depending on the settings, the scan will be run immediately or will be scheduled for later.
Updated about 1 month ago
