Using Repeater Scripts
If you use the Repeater to scan a target, you can manipulate the scan request before dispatching it to the target. Bright allows you to create a script that can add, change or compute some part of the request after you apply it for a specific Repeater.
You can load a script file which should modify the requests to the Repeater, either remotely from the Bright app or locally using the relative Bright CLI command. If you have loaded a local script using the Bright CLI, loading remote scripts from the cloud is disabled automatically.
You can also create and apply Repeater scripts using the Bright API. More information about it is provided on our API documentation page.
NoteCustom scripts are supported only for the scans run via the Repeater.
The most common case of using the Repeater script to manipulate a request is when you need to calculate a hash message authentication code (HMAC) token. The code involves a hash function in combination with a secret key. The HMAC authorization is required to enable interaction between the server and Bright. For each new request, the server generates a new HMAC code that should match (signed by) the token encoded in the Repeater script. Therefore, signing the server HMAC ensures the request authenticity.
ImportantIn a script, you should specify how exactly the server calculates the HMAC code to allow Bright to provide a valid HMAC token. Bright can reach targets ONLY after a successful HMAC authorization with the relative server.
The Repeater scripts also help you send some custom dynamic values per host and various other request pre-processing steps.
Script implementation flow
You first need to create a script file and then load it to a specific Repeater. It may take a few minutes before the file reaches the Repeater and updates it.
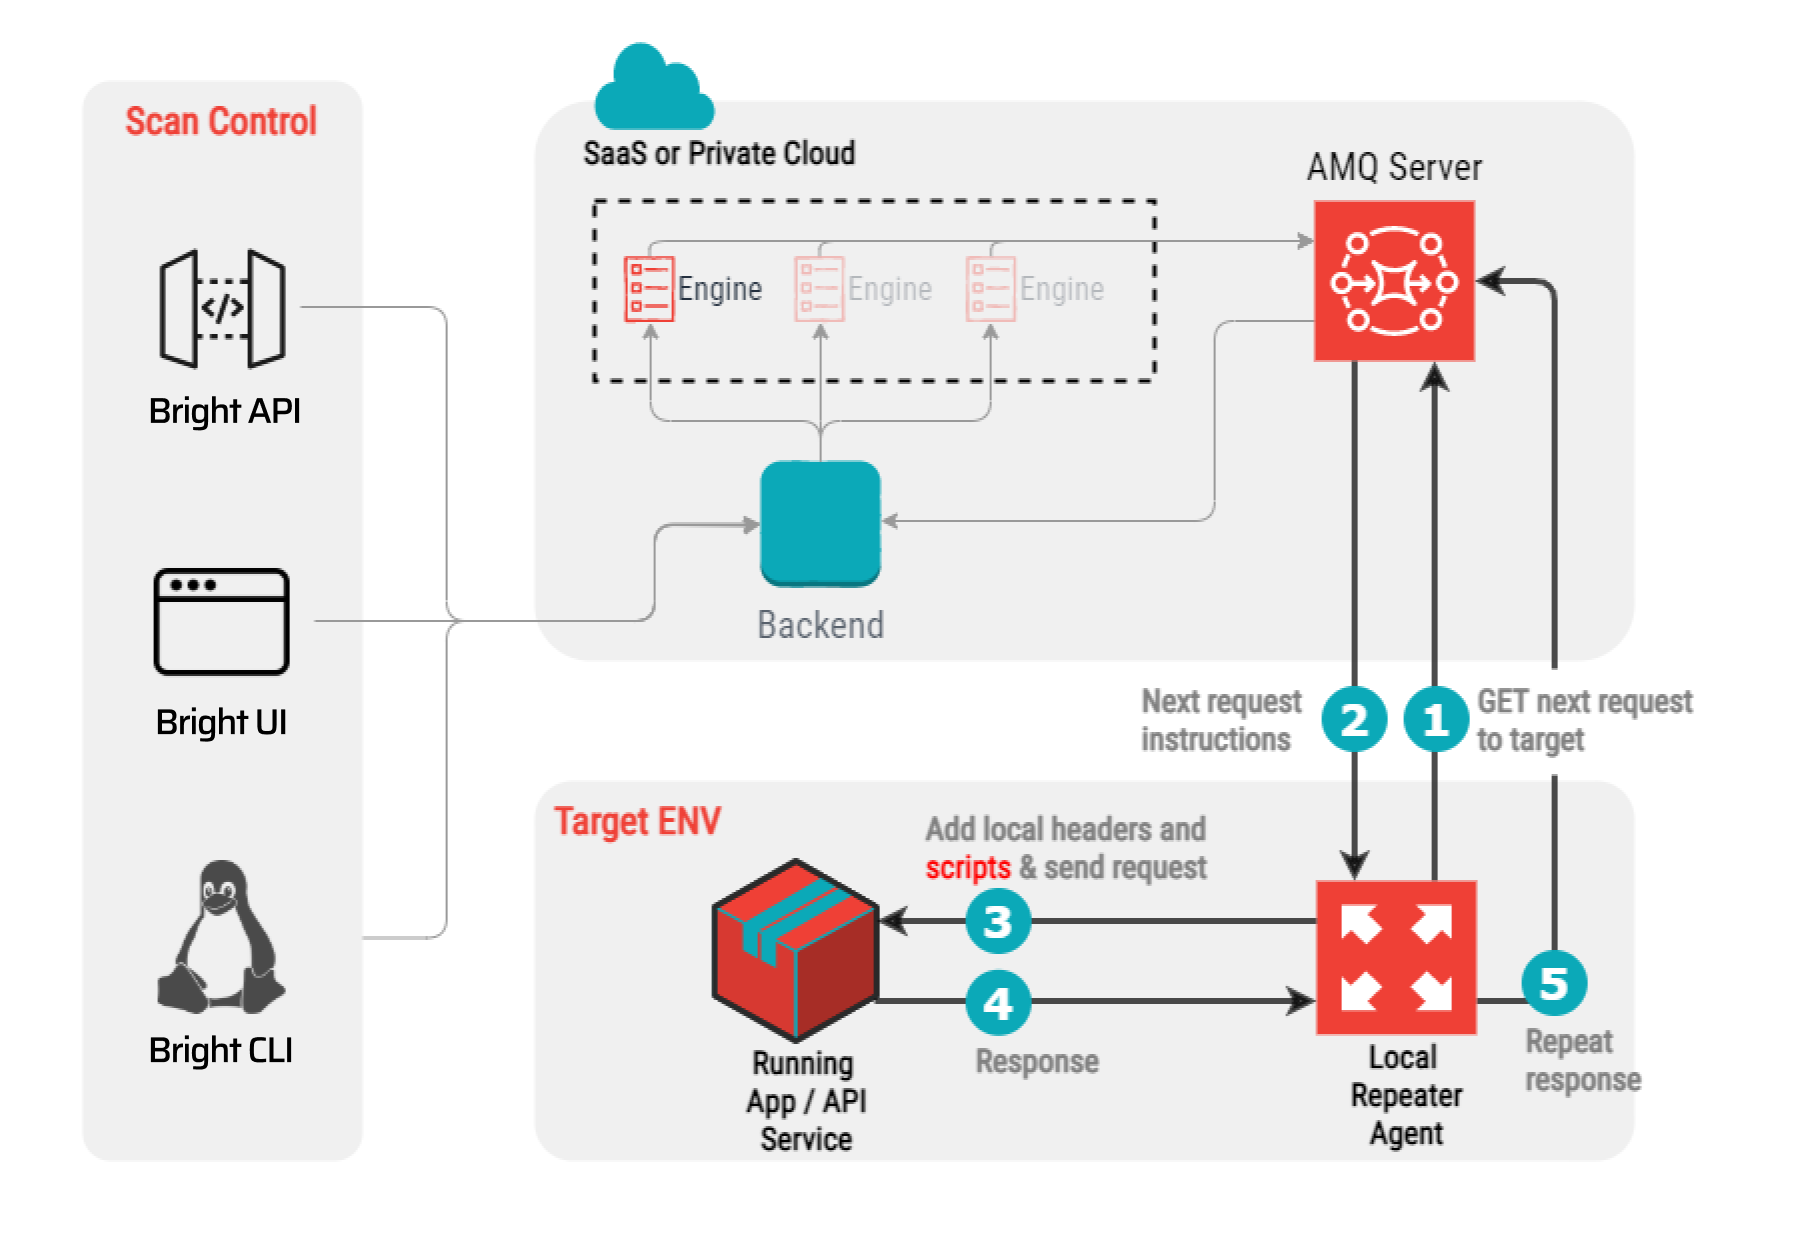
When receiving a scan request from Bright (step 2 on the diagram below), the Repeater applies the code from the loaded script to the request (step 3) and dispatches the modified request to the local target.

Building parameters of scripts
A script code must include a function with the hardcoded name ‘handle’ and a composite of any custom parameters (variables) . The script parameters are used for computing dynamic data, for example an authorization token, which can be added to the scan request. Here is a simple example of a script code.
const { createHmac } = require('crypto');
const handle = ({ method, url, headers, body }) => {
  const version = 'v1';
  const secret = 'someSecret';
  const timestamp = Date.now();
  const signature = createHmac('sha256', secret)
    .update([version, timestamp, body].join(':'))
    .digest('base64');
  return {
    url,
    method,
    body,
    headers: {
      ...headers,
      'x-request-timestamp': timestamp,
      'x-request-signature': signature
    }
  };
};
exports.handle = handle;
The most common script parameters that may be applied for calculating an authorization token are given below.
Parameter | Description |
|---|---|
| The parameter specifies the Node.js crypto module to be used for encoding some request values, for example, an HMAC token. You can find more info about the module here. |
| The function accepts the following parameters from each request automatically:
And must also return the same four parameters in the expected order.
|
custom parameters | Any custom parameters that are required for modifying the request, for example, ‘version’, ‘secret’, ‘timestamp’, ‘signature’, etc. |
Updated about 1 month ago
