Managing Scan Templates
A scan template enables the users to save and reuse a set of scan settings to start another scan more quickly. Bright provides a list of preconfigured scan templates to help users assess their vulnerabilities quicker and more efficiently.
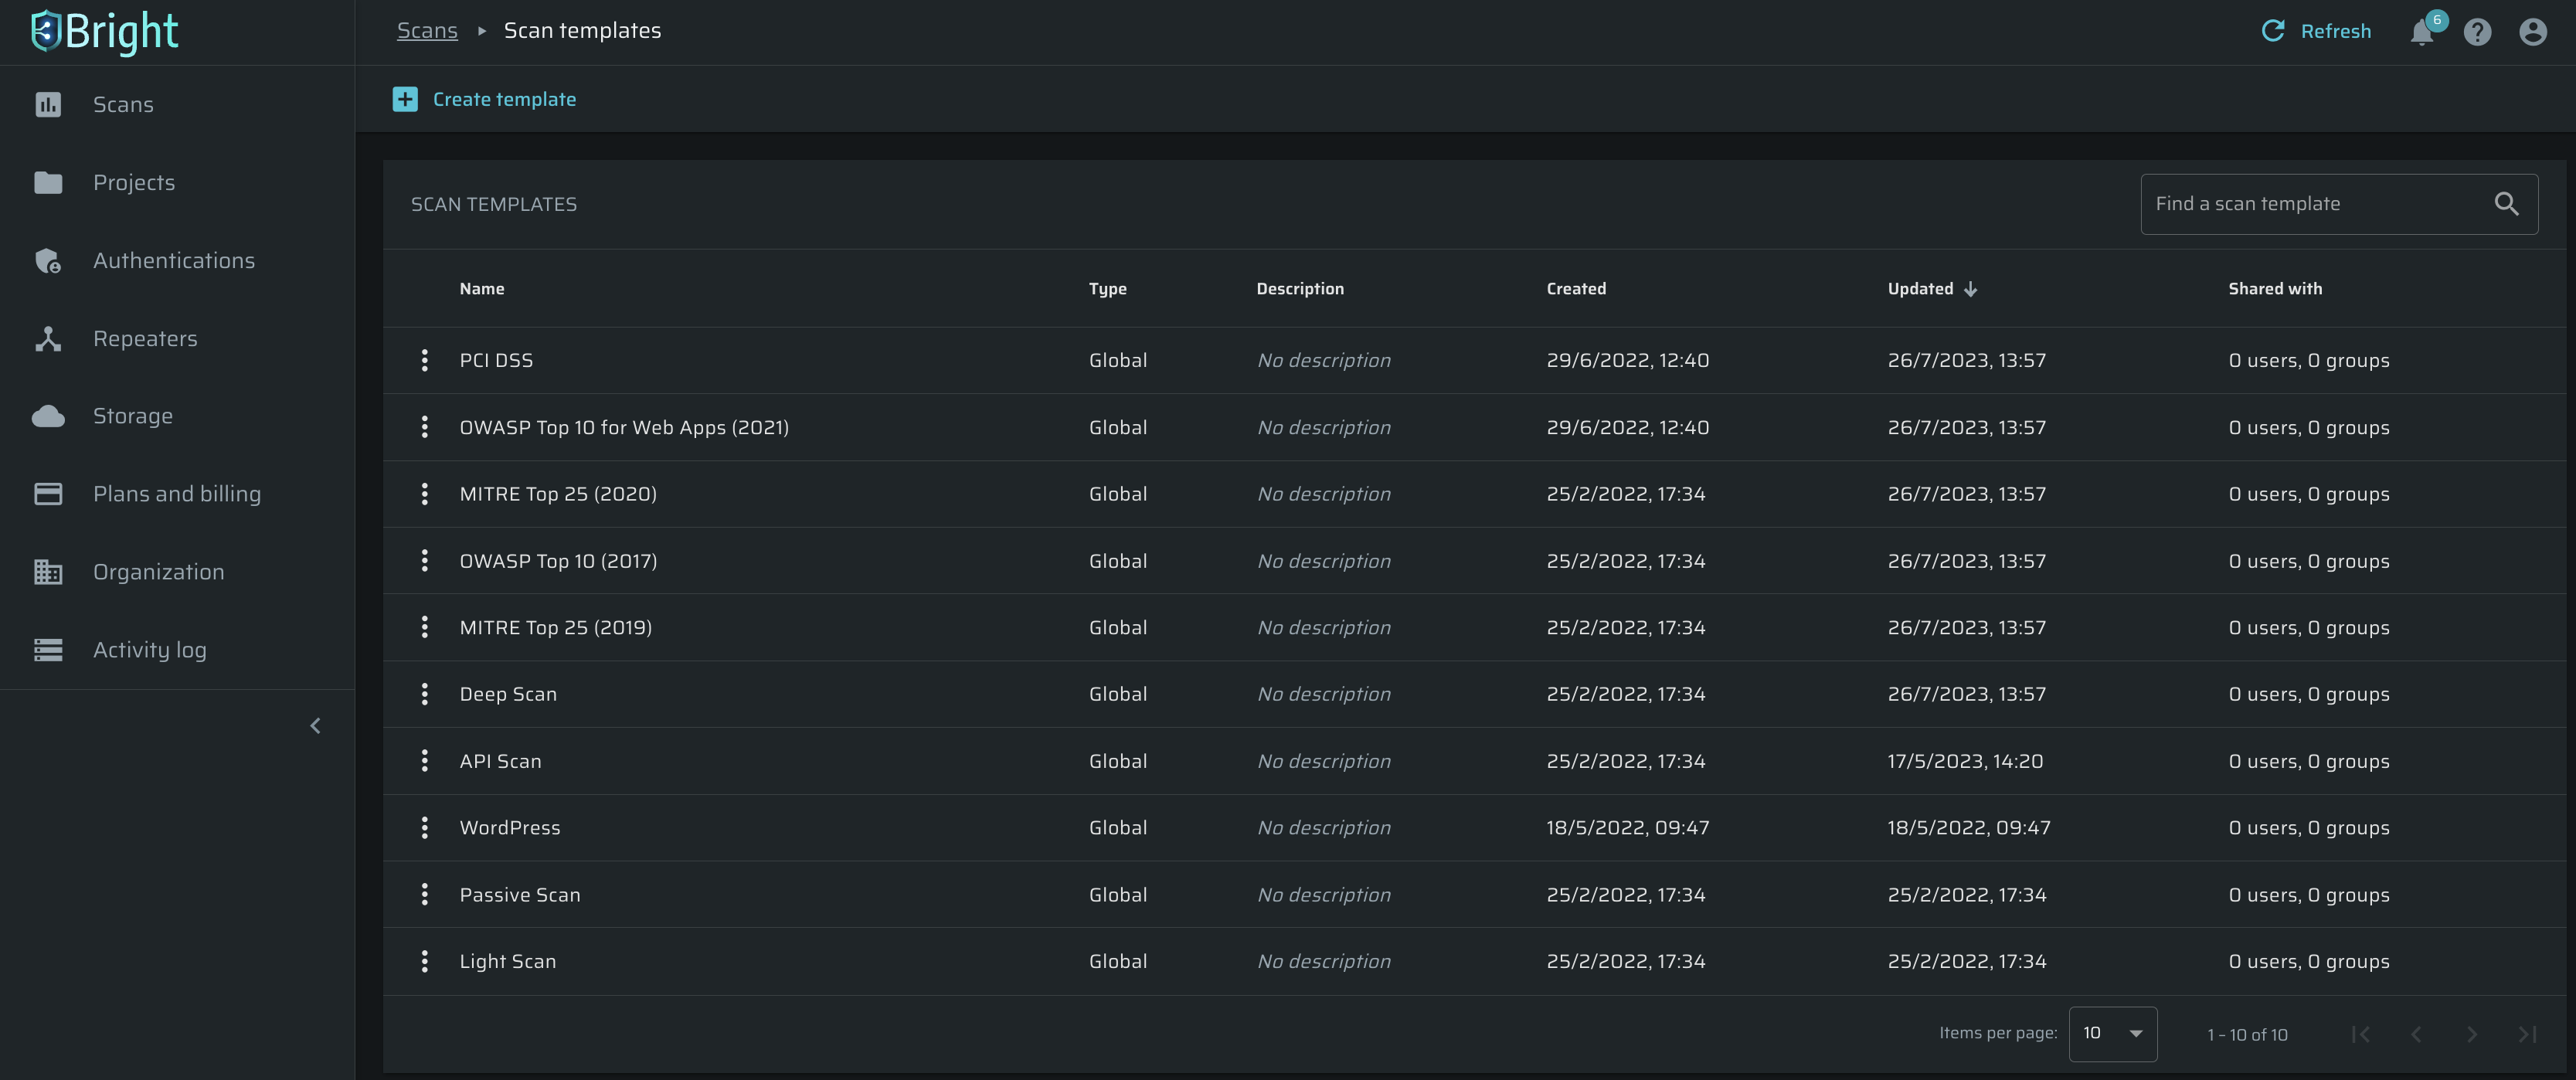
- OWASP Top 10 for Web Apps (2021) – The engine runs only the tests for the vulnerabilities included in the "OWASP Top 10" list for 2021.
- PCI DSS - The engine runs only the tests for the vulnerabilities included in to the PCI Data Security Standard.
- WordPress - The engine runs only WordPress-relevant tests.
- OWASP Top 10 (2017) – The engine runs only the tests for the vulnerabilities included in the "OWASP Top 10" list for 2017.
- MITRE Top 25 (2019) – The engine runs only the tests for the vulnerabilities included in the "MITRE Top 25" list for 2019.
- MITRE Top 25 (2020) – The engine runs only the tests for the vulnerabilities included in the "MITRE Top 25" list for 2020.
- API Scan – Predefined tests that are relevant for API targets.
- Light Scan – This is a preconfigured optimized scan, during which the engine automatically determines which tests to run based on the detected data types. Some tests will be skipped in favor of speed.
- Deep Scan – All possible tests are performed during the scan. This is the most thorough scan, which takes the longest time to complete.
- Passive Scan – The engine selects only host-based passive tests to be run.
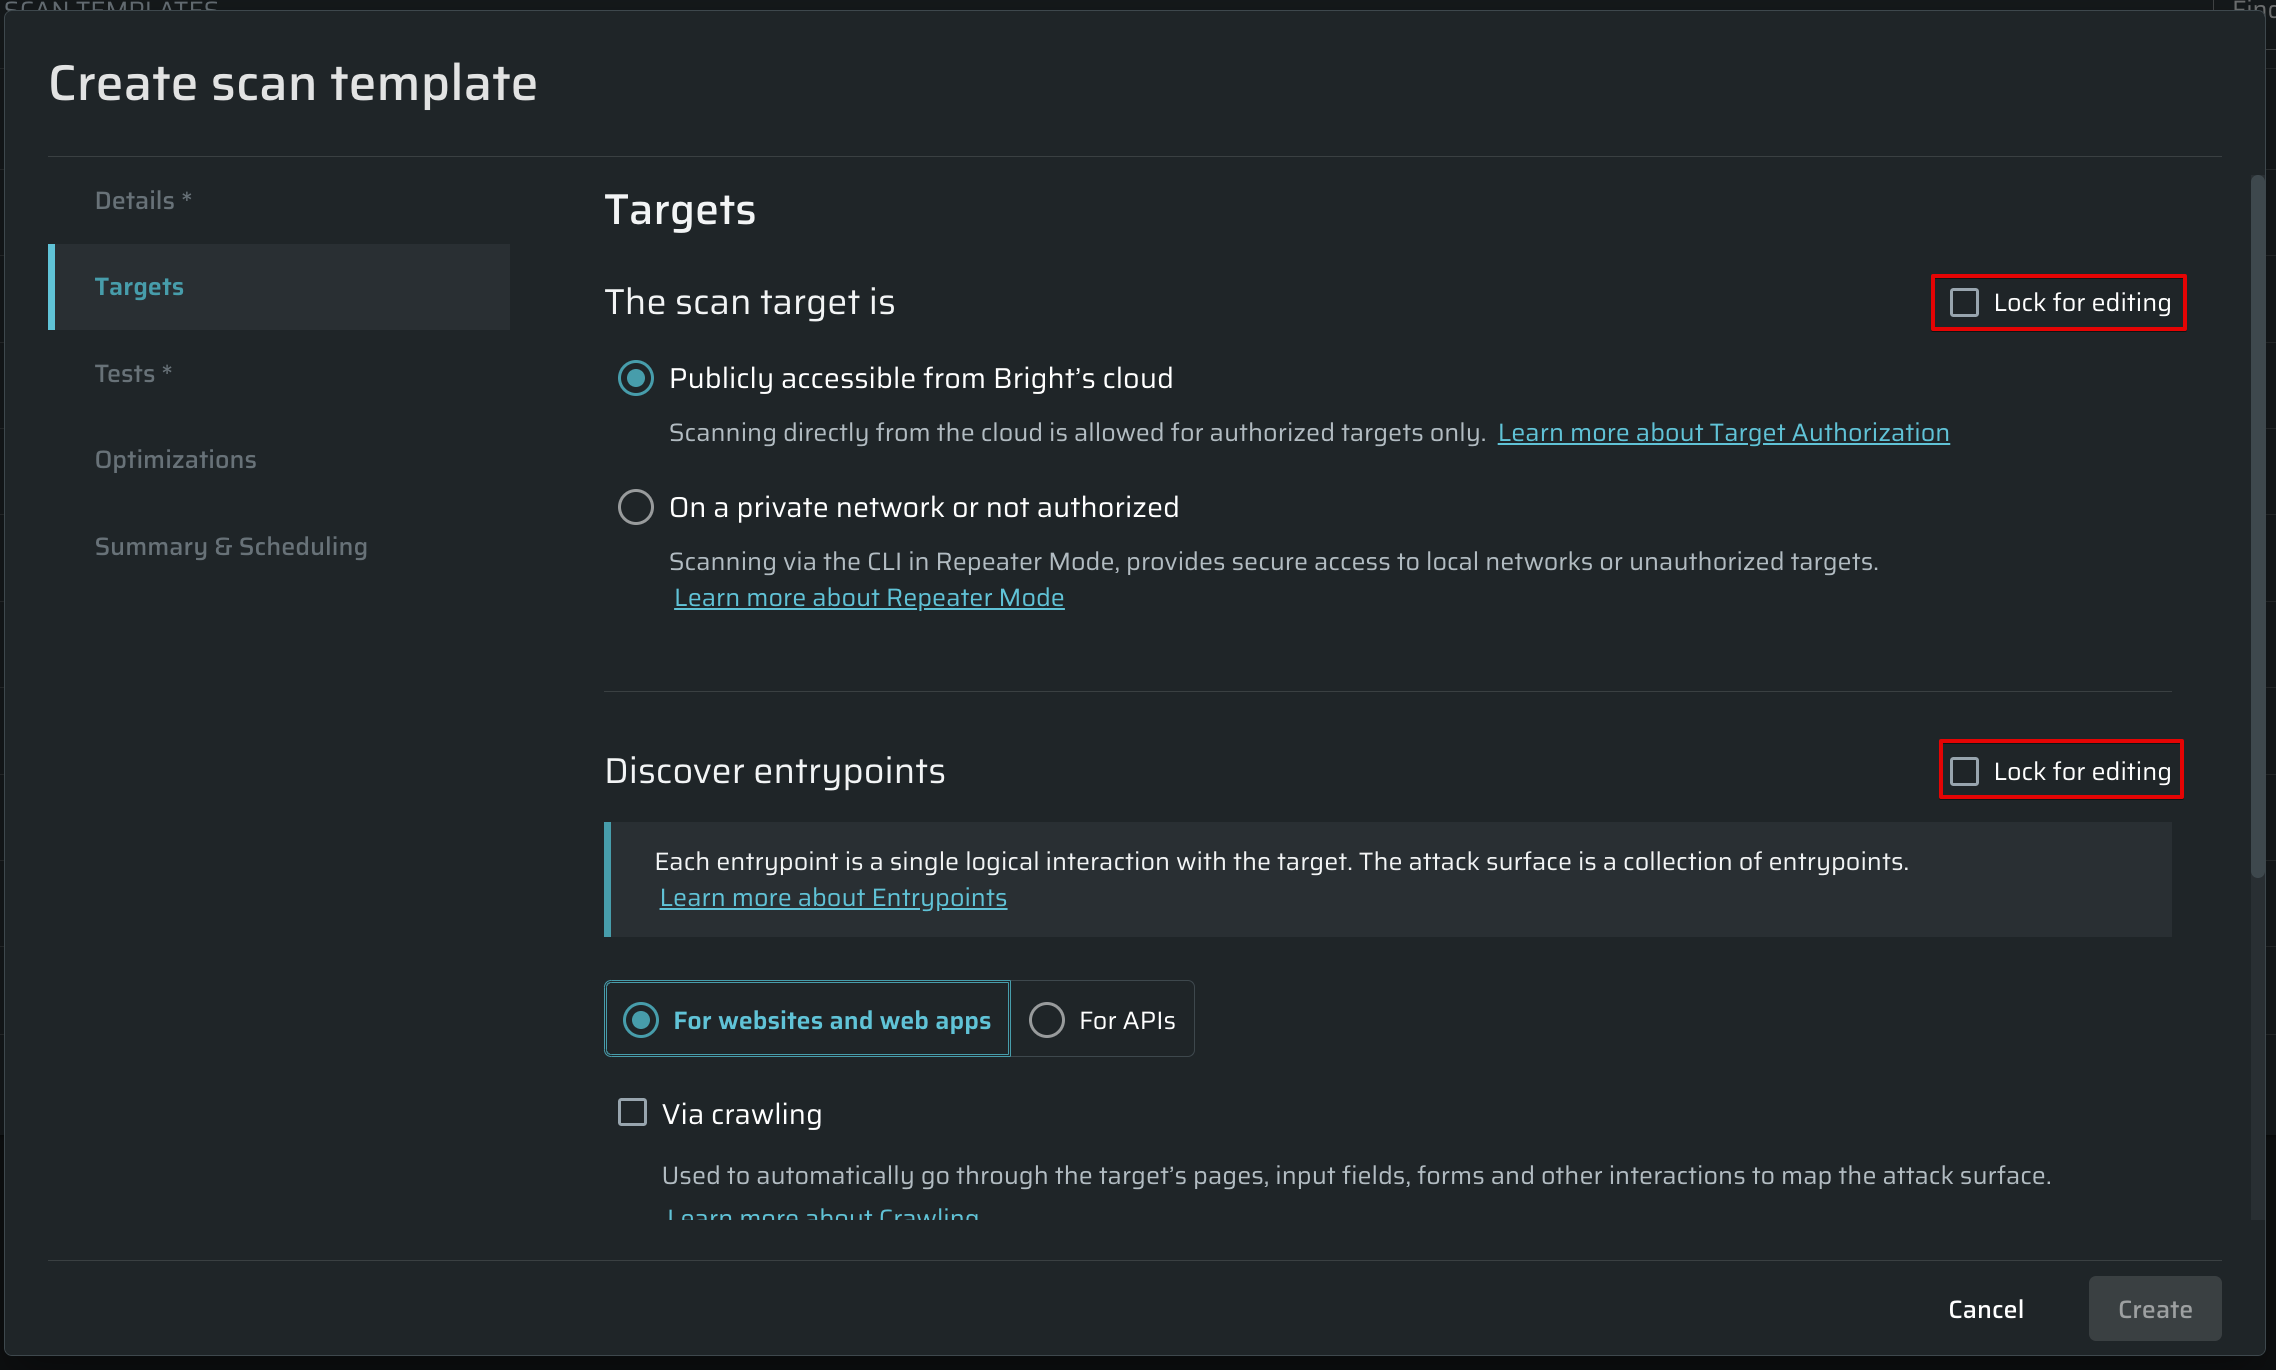
Note:Bright allows users to lock any adjusting parameters for editing due the scan template creation. The reason is to be sure that scans are performed with exactly the same configurations as provided. To lock the setting, click Lock for editing button next to the heading.
Viewing all scan templates
To open the list of scan templates, follow the steps below.
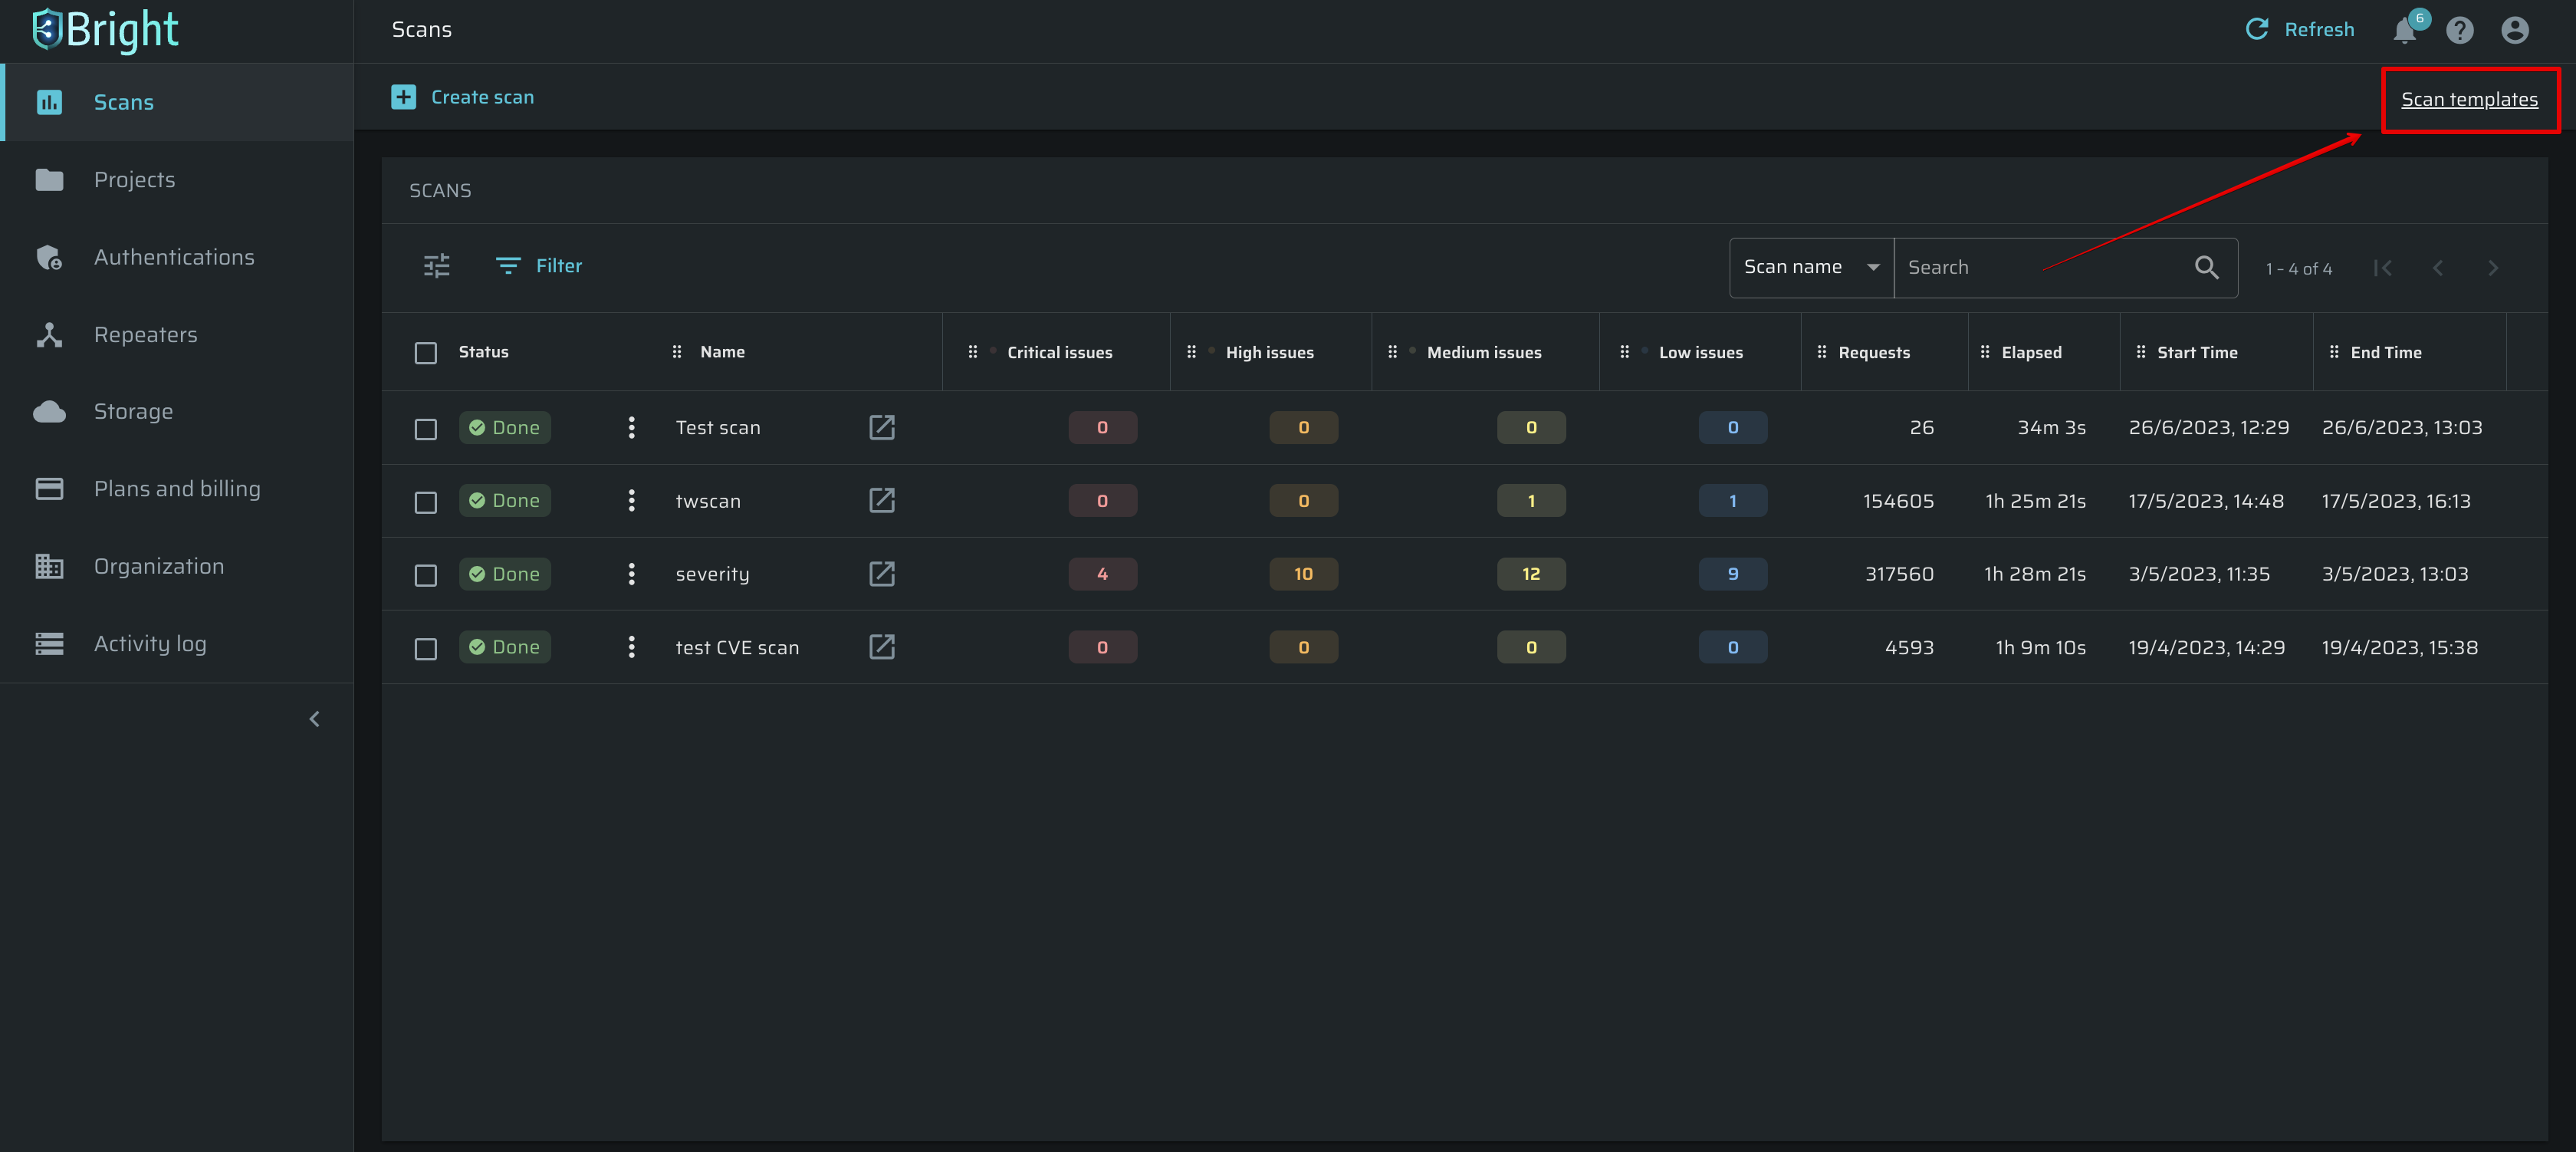
- From the left menu, select Scans.
- In the upper right corner, click Scan Templates.
The system displays the list of default and custom scan templates.
- To display the details of a specific template, select it from the list.
In the dialog box, you can view all the information about this scan template, including:- Scan details
- Scan targets
- Network and application settings
- Security tests to be run
Creating a new template
To create a new template, follow these steps:
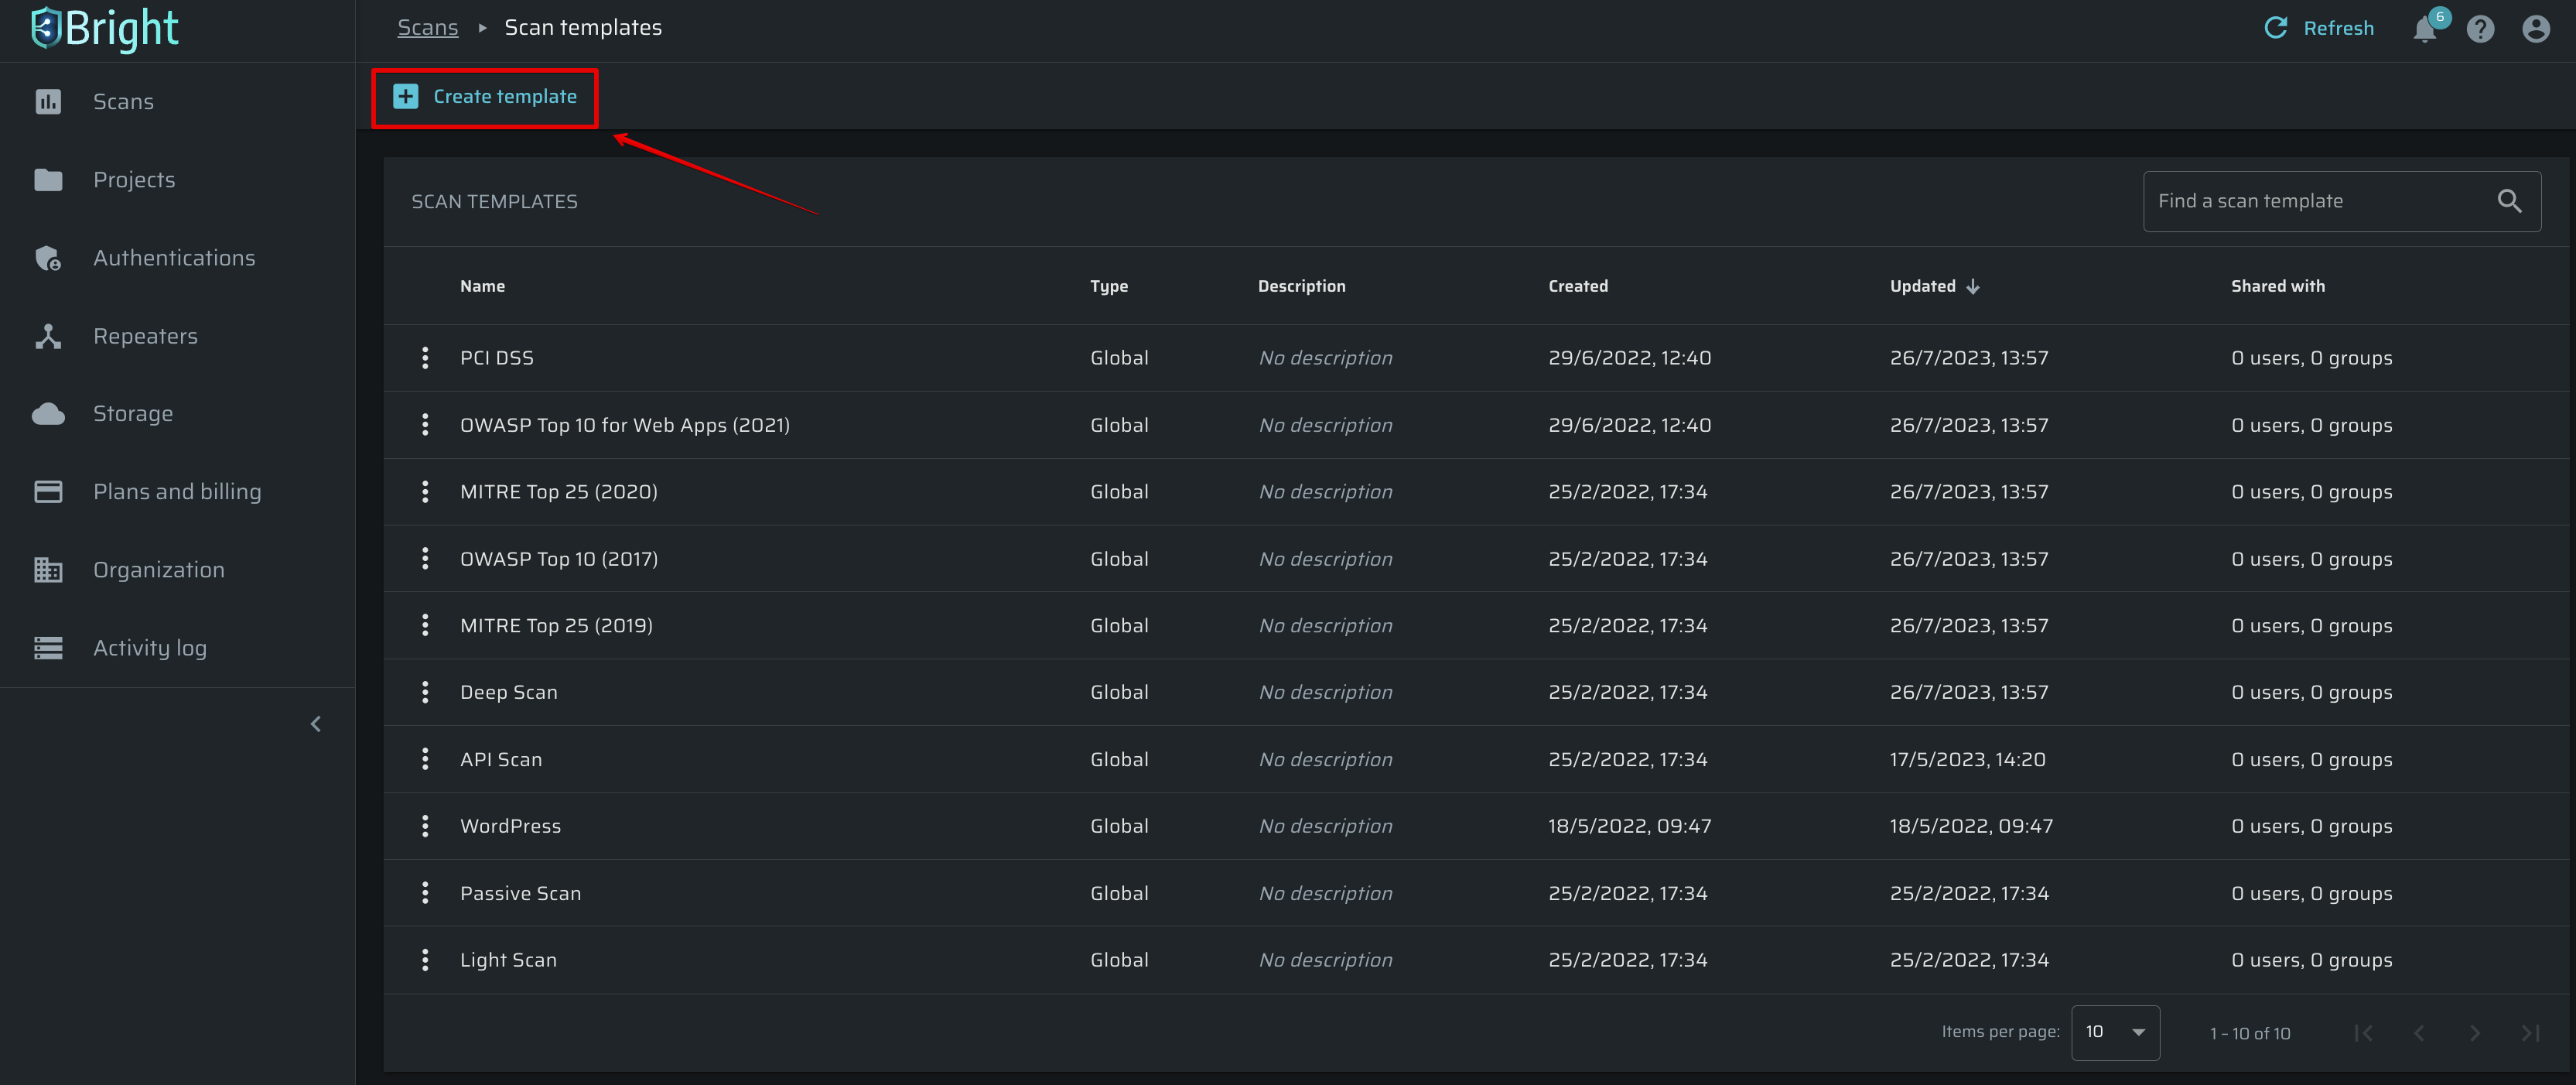
At the top of the Scan Templates page, click + Create Scan Template.
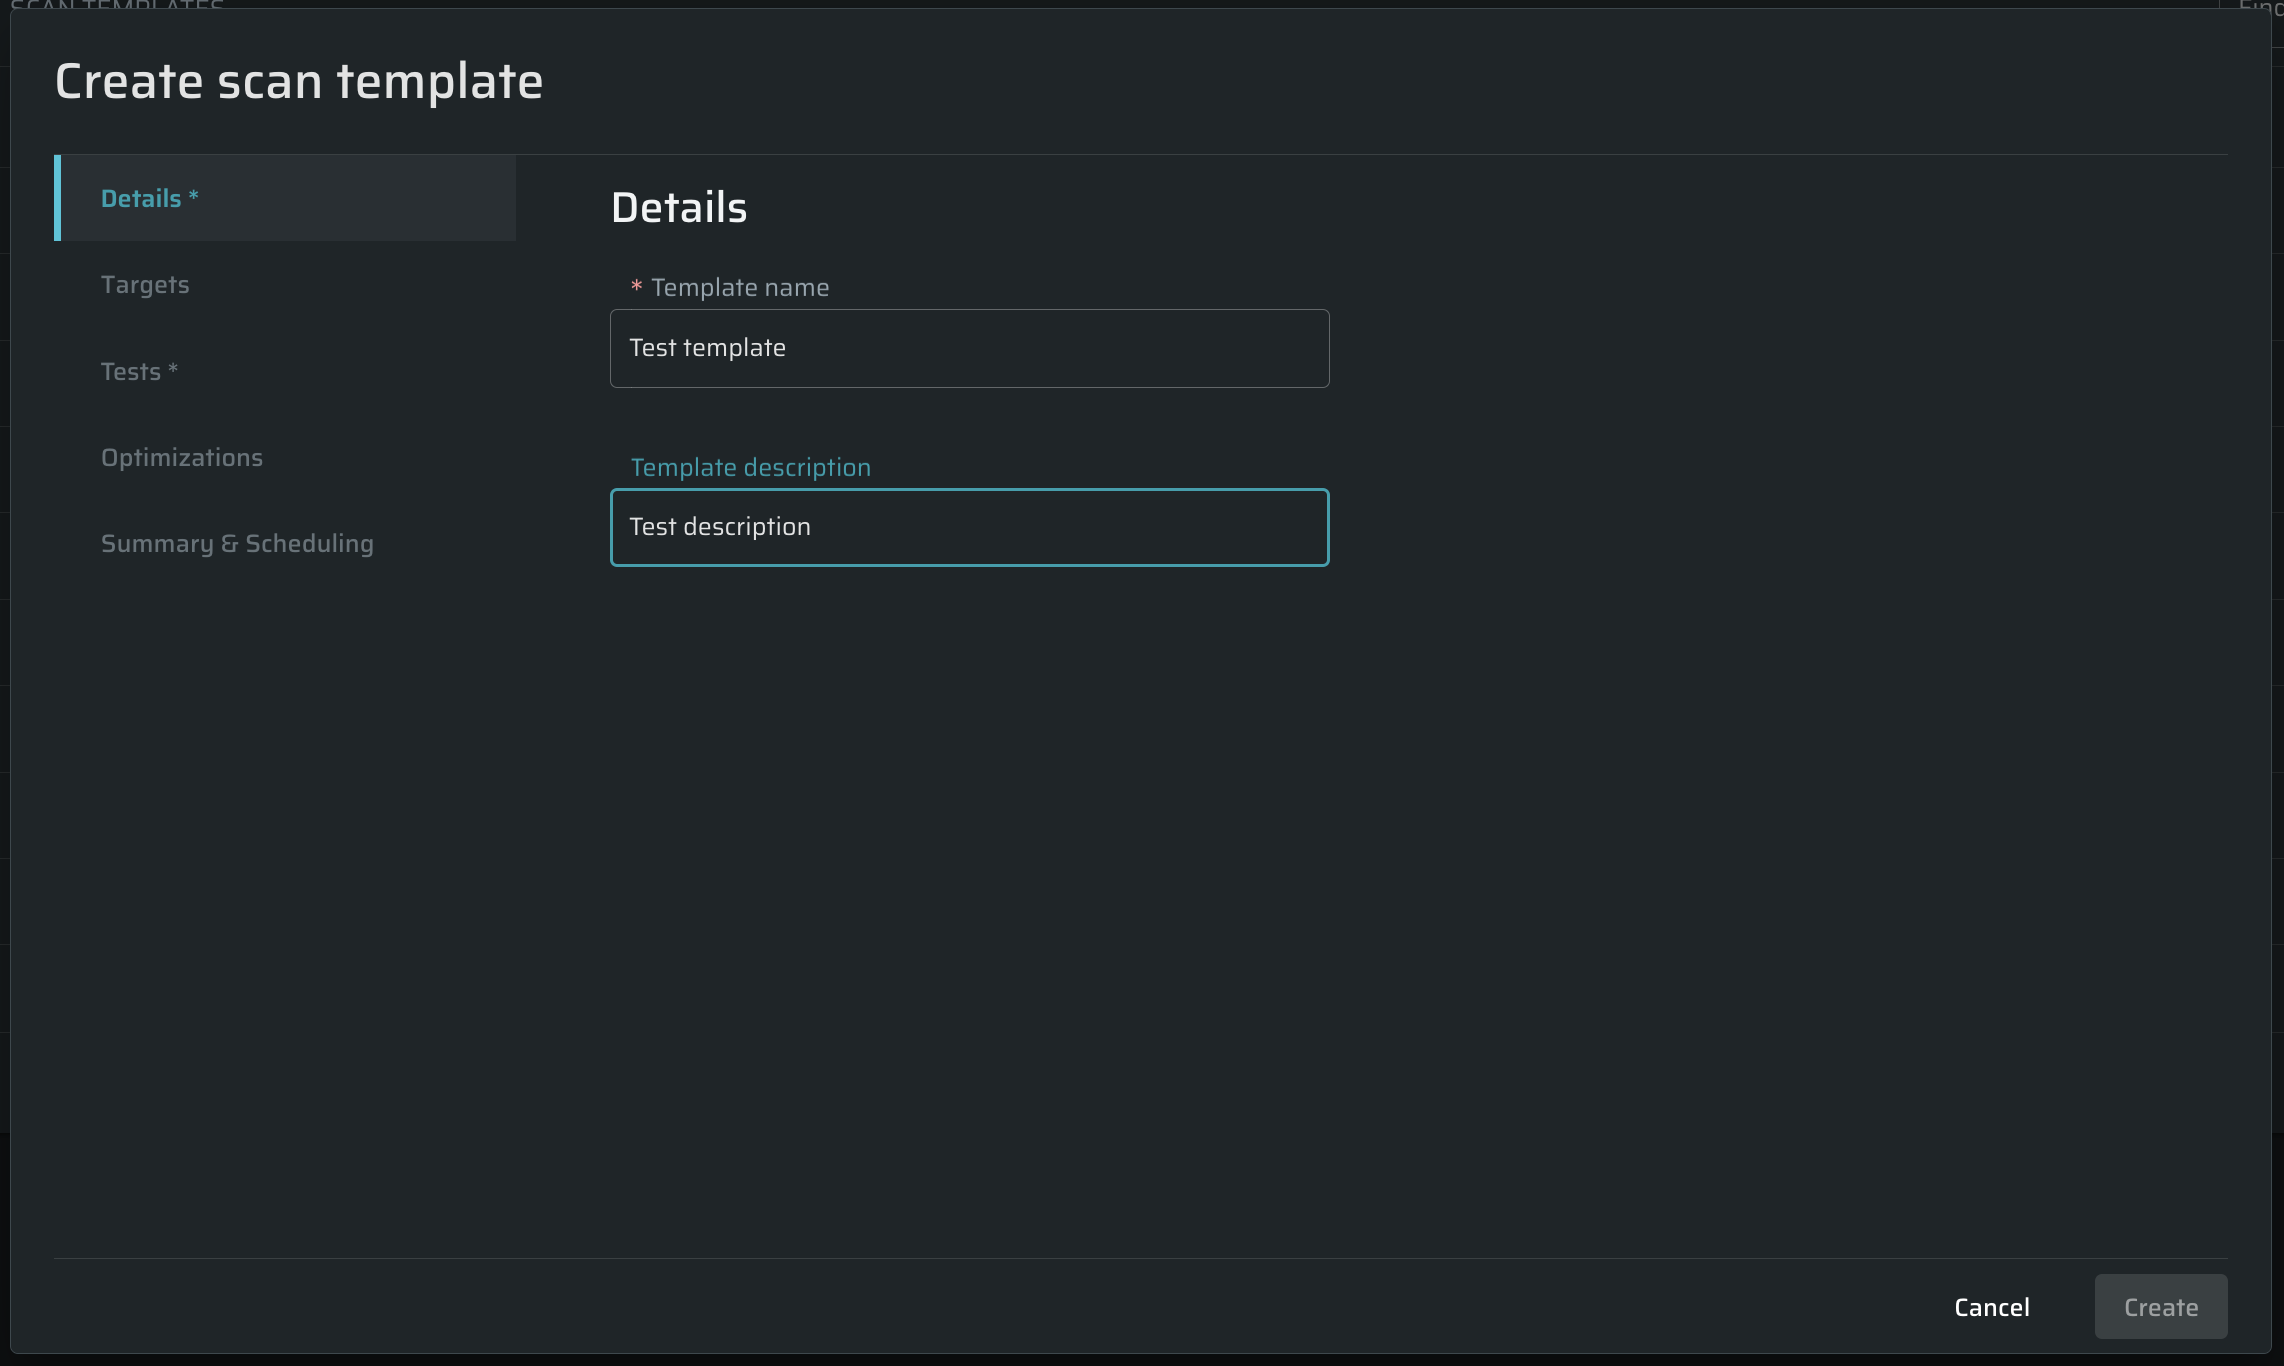
- In the CREATE SCAN TEMPLATE dialog box, define the settings for a new scan template. These are mostly the same settings as for creating a new scan.
Tip:If you need to add Additional headers in the Network Settings tab, you can copy-paste several headers in the Name field. The headers will be separated and broken down by the fields automatically.
- The following settings can be locked for editing:
- Scan targets
- Discover entrypoints
- Entrypoints discovery options
- Target specific settings
- Tests
- Optimization
To lock the setting, mark the checkbox next to it.
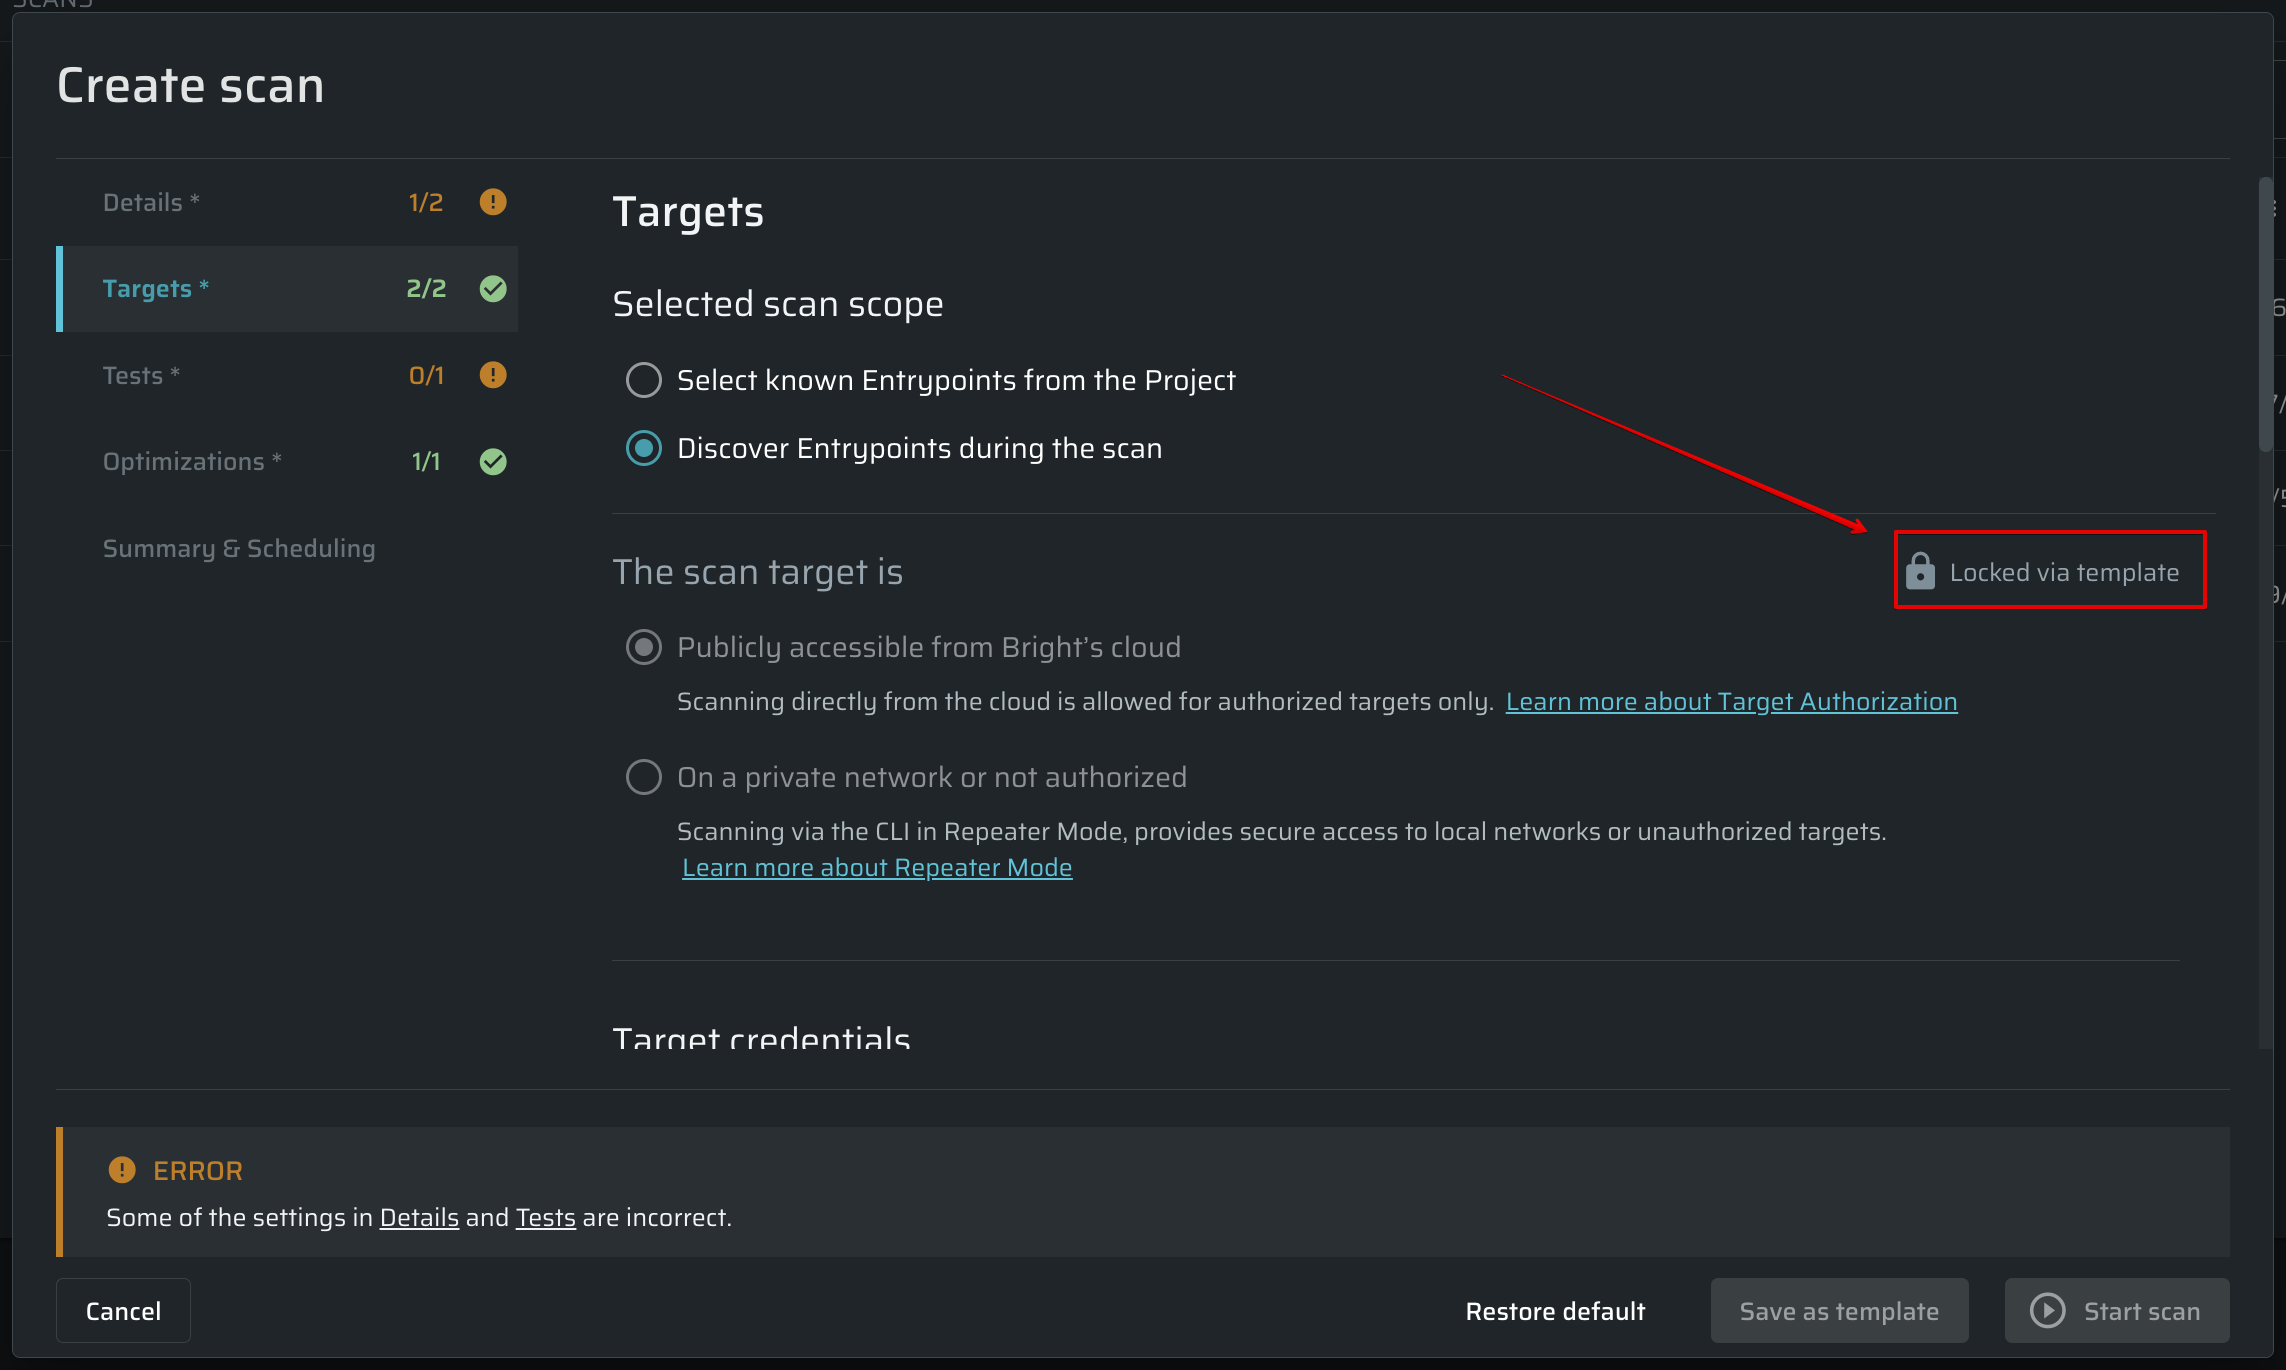
When the adjustments are done, locked settings are impossible to change while creating a new scan.
Once you complete the setup, click Create Template to save the defined scan template.
Note:Bright allows user to lock any adjusting parameters for editing due scan template creation. The reason is to be sure that scans performed with exactly the same configurations as provided. To lock the setting, click Lock for editing button next to the heading.
Editing a template
To edit a template, follow these steps:
- In the Scan Templates list, click
 next to the template you want to edit.
 - Select the Edit option.
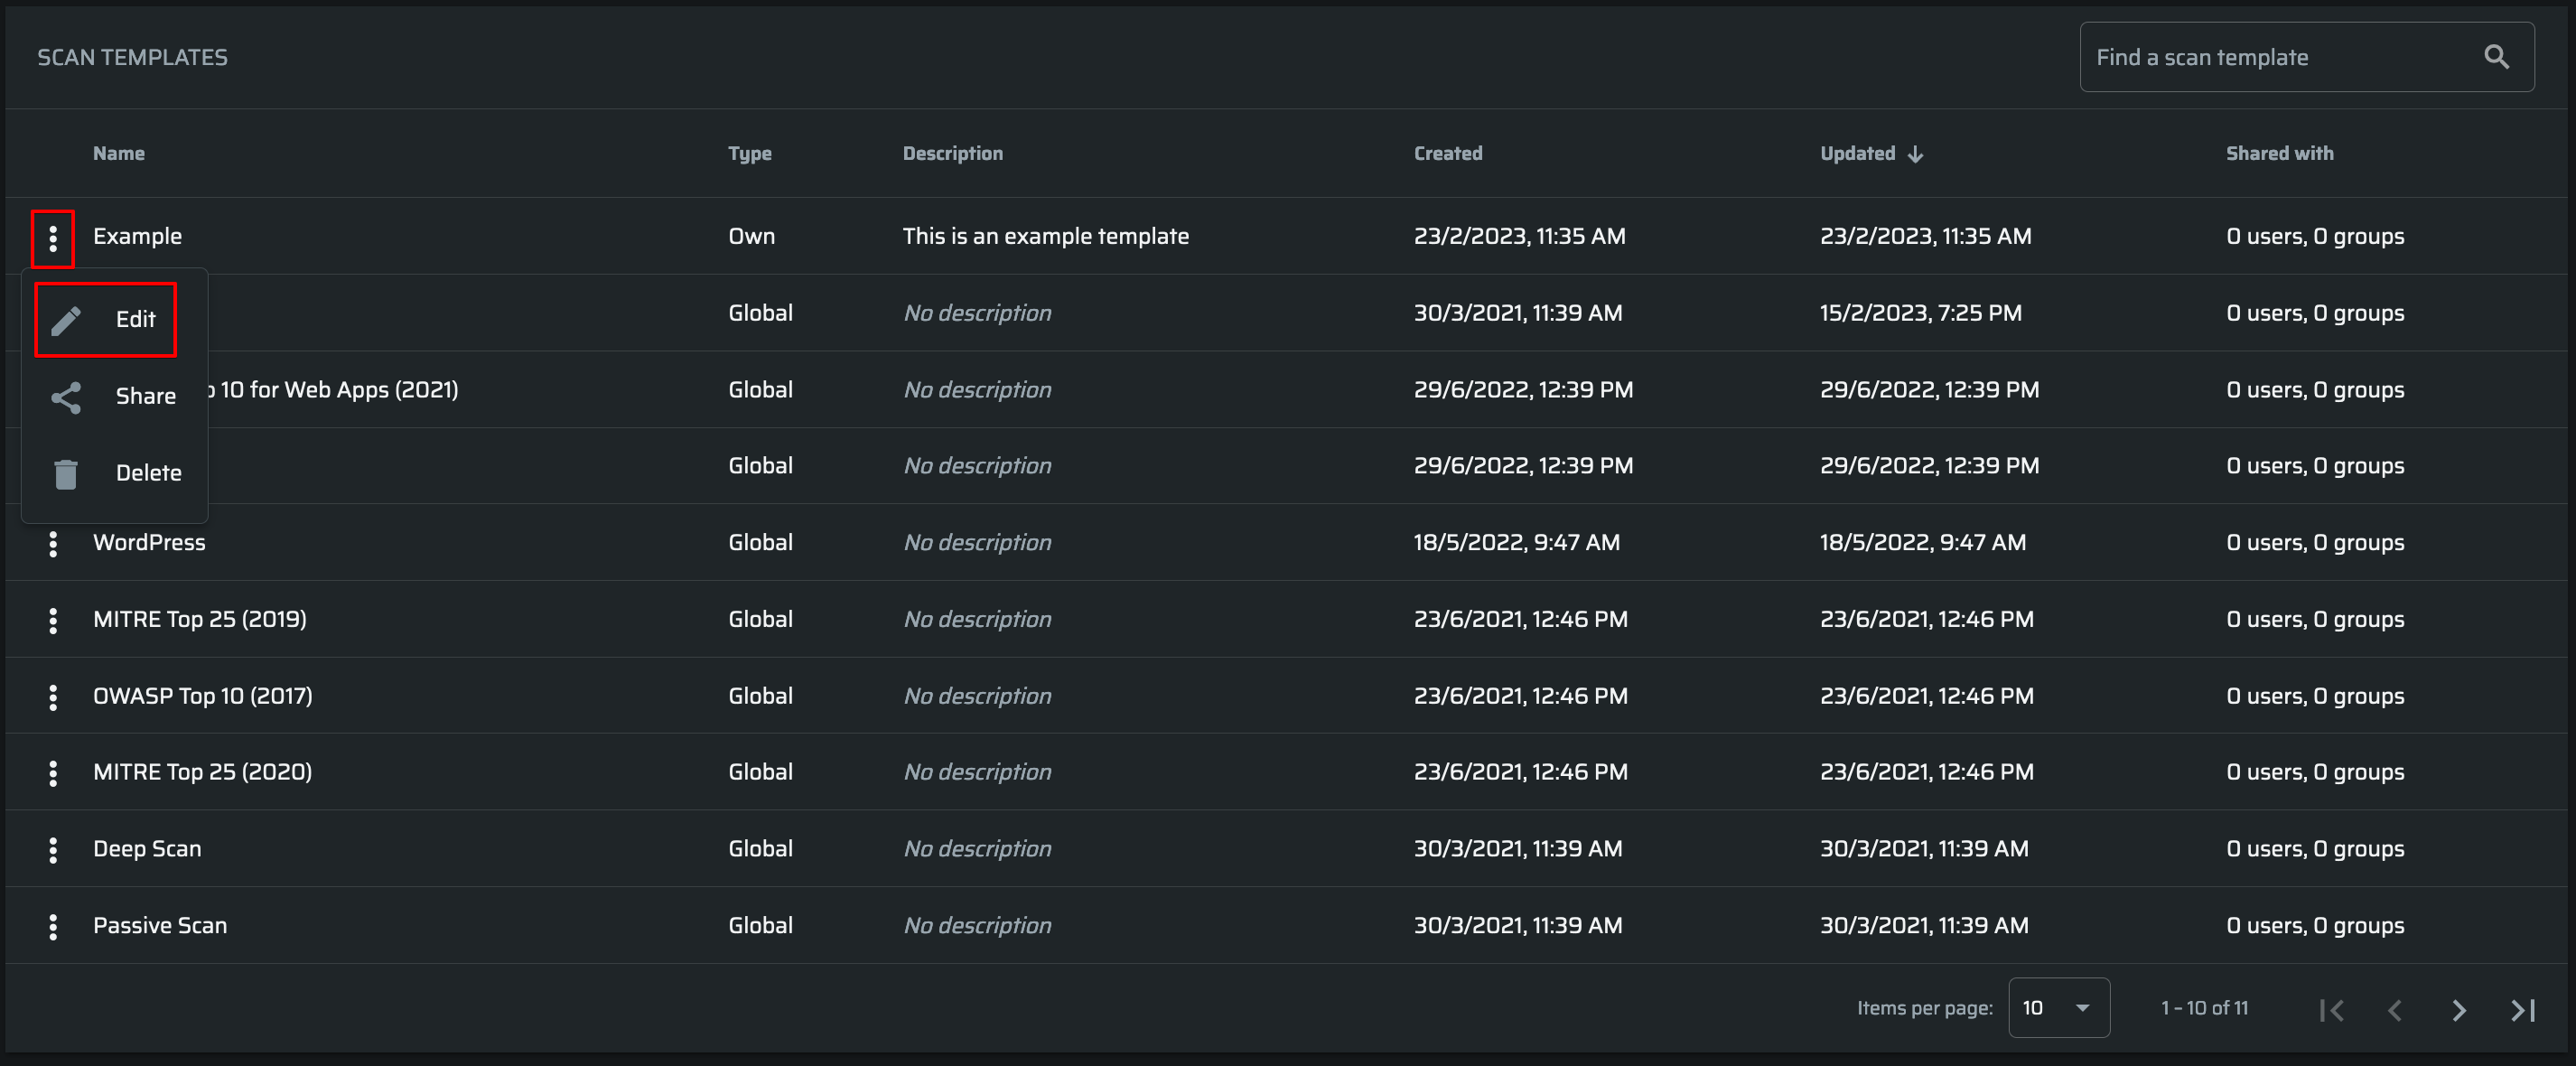
Important:The default templates cannot be edited.
- In the dialog box, make changes to the setup of the selected scan template. These are the same settings as for creating a new scan.
- Once you complete editing the template, click Update Template.
Sharing a template
Bright allows template sharing between a particular user or an entire organization.
Use these scopes to manage template permissions:
- scans-templates - allows sharing between users and groups and see shared templates
- scans-templates:read - allows to see shared templates
- scans-templates:write - allows sharing templates between users and groups
- org:scans-templates - allows sharing templates between users, groups, and organizations
To share a template, do the following:
- Go to Scans Tab → Scan Templates on the upper right of the screen
- In the Scan Templates list, click
 next to the template you want to share.
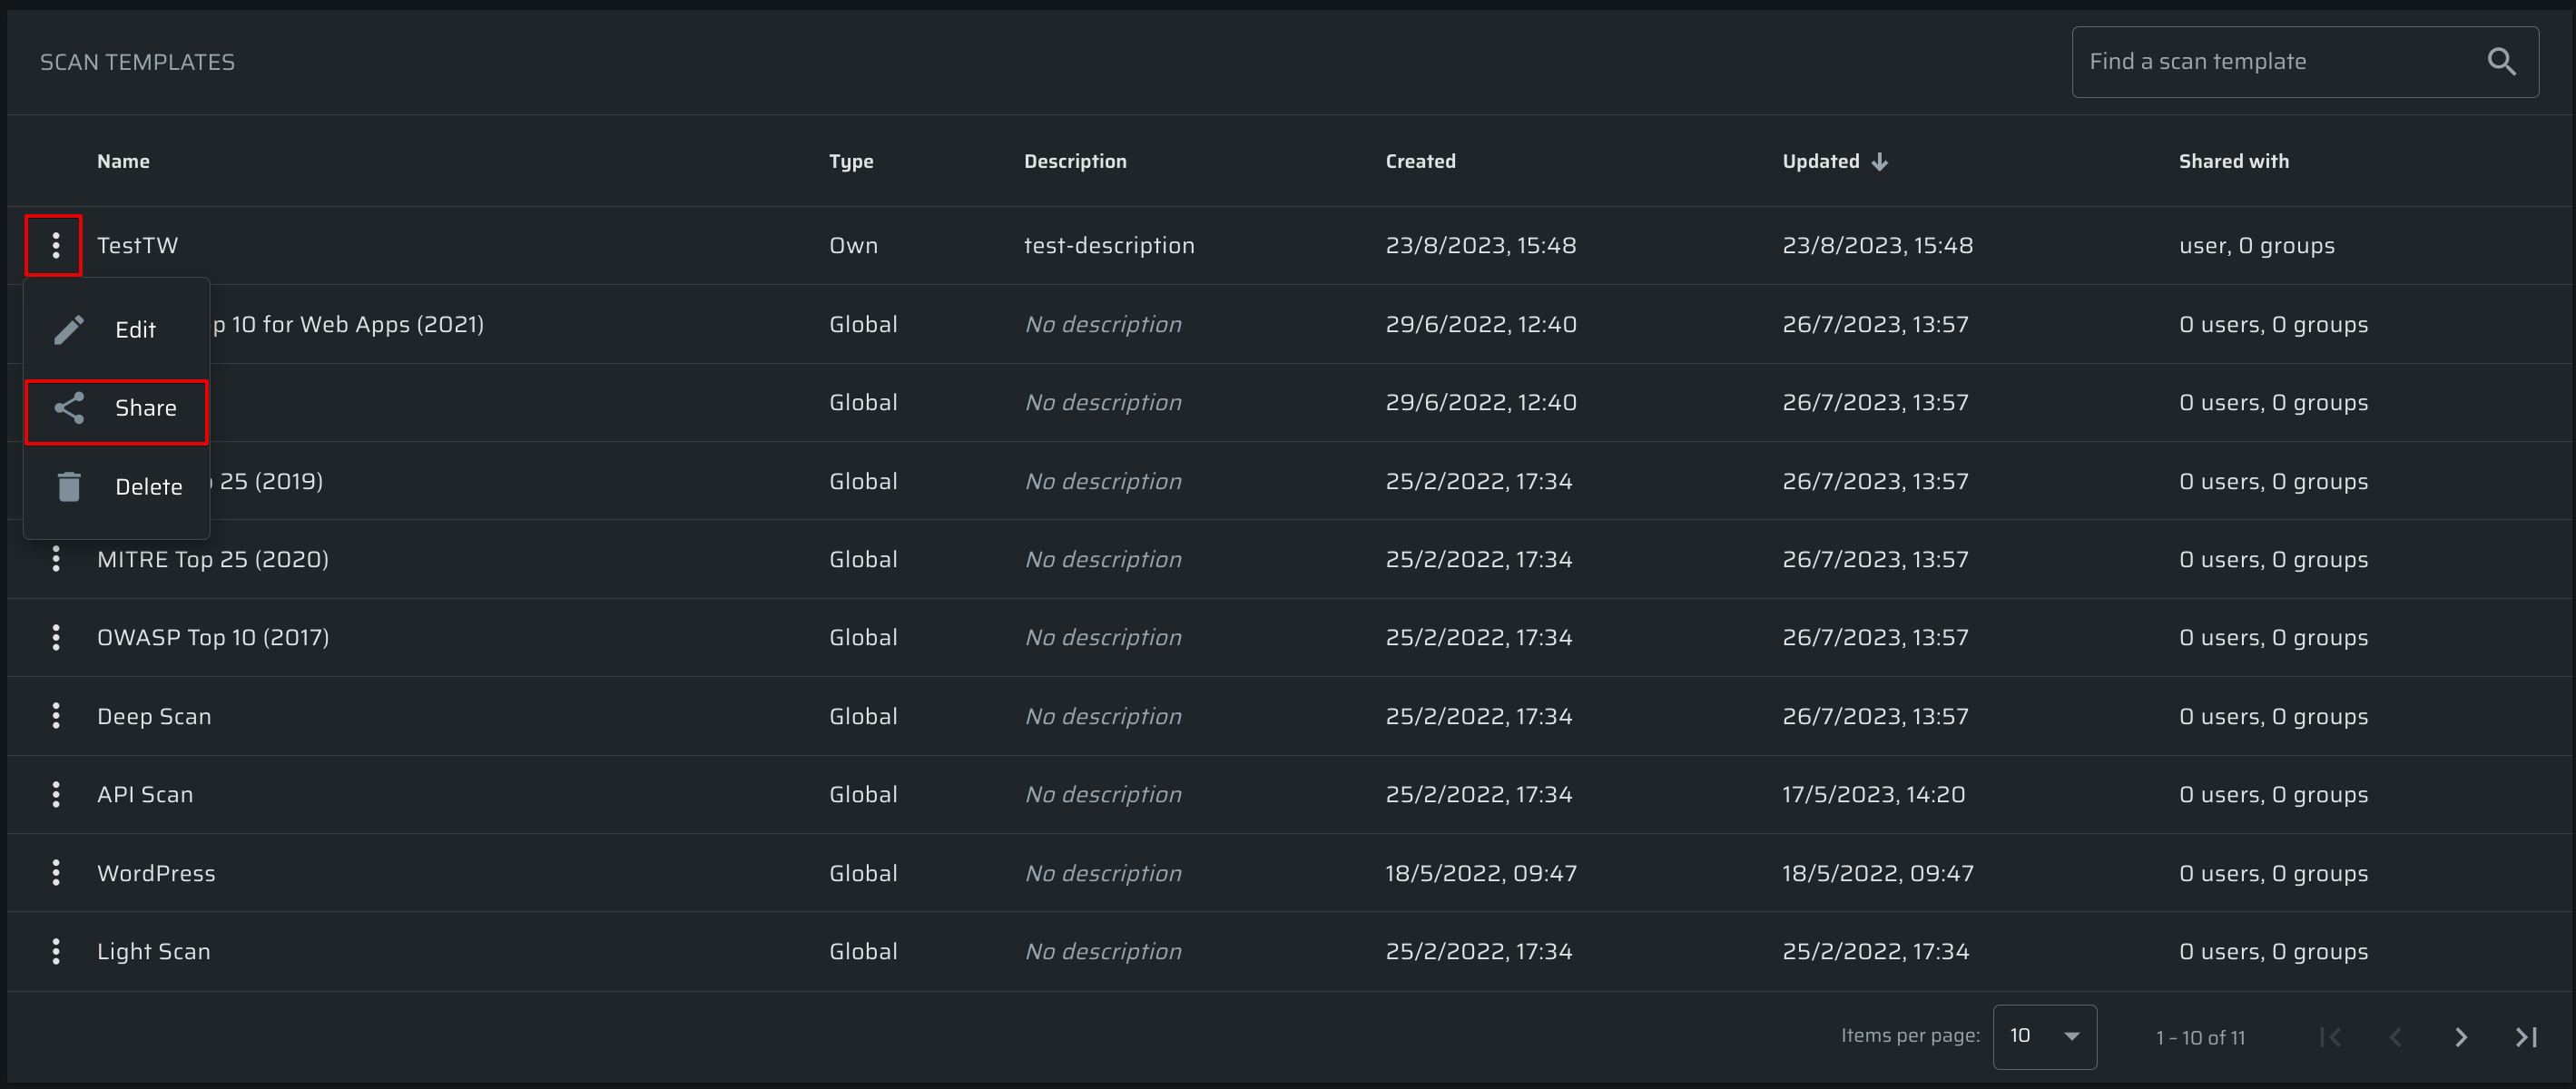
- Select the Share option
- In the popup, you can adjust a new share for a single user, group, or organization. Also, the level of permissions can be adjusted here.
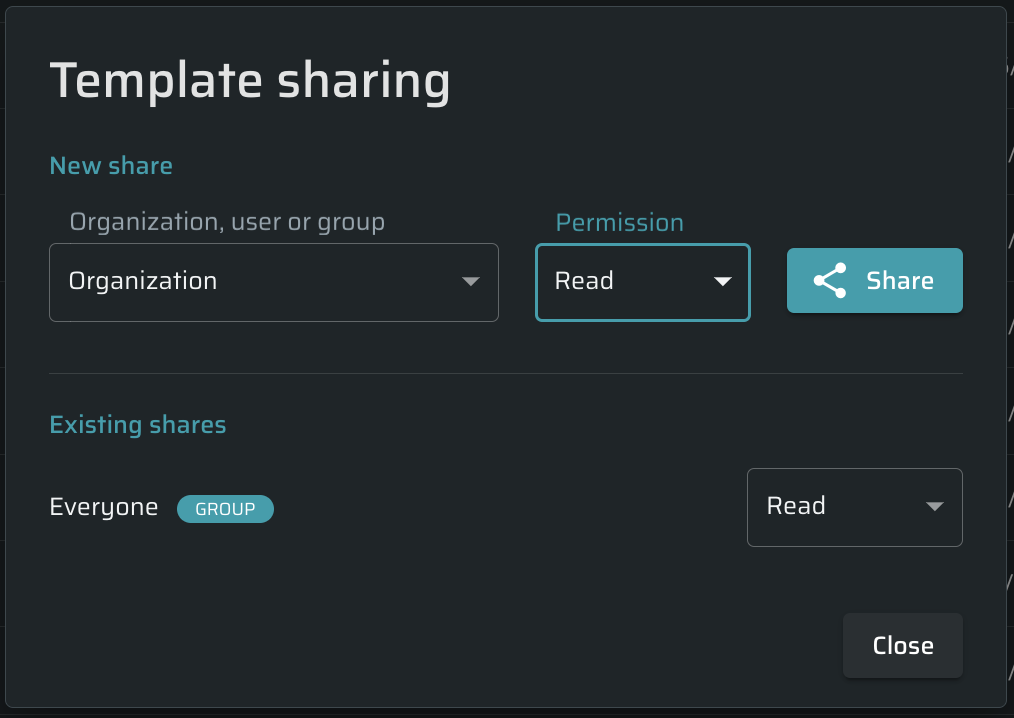
- Click Share to complete the process. A list of existing shares will be updated.
To stop sharing a template, open a menu next to the organization, user, or group and select None.
Deleting a template
To delete a template, follow these steps:
- In the Scan Templates list, click
 next to the template you want to delete.
 - Select the Delete option.
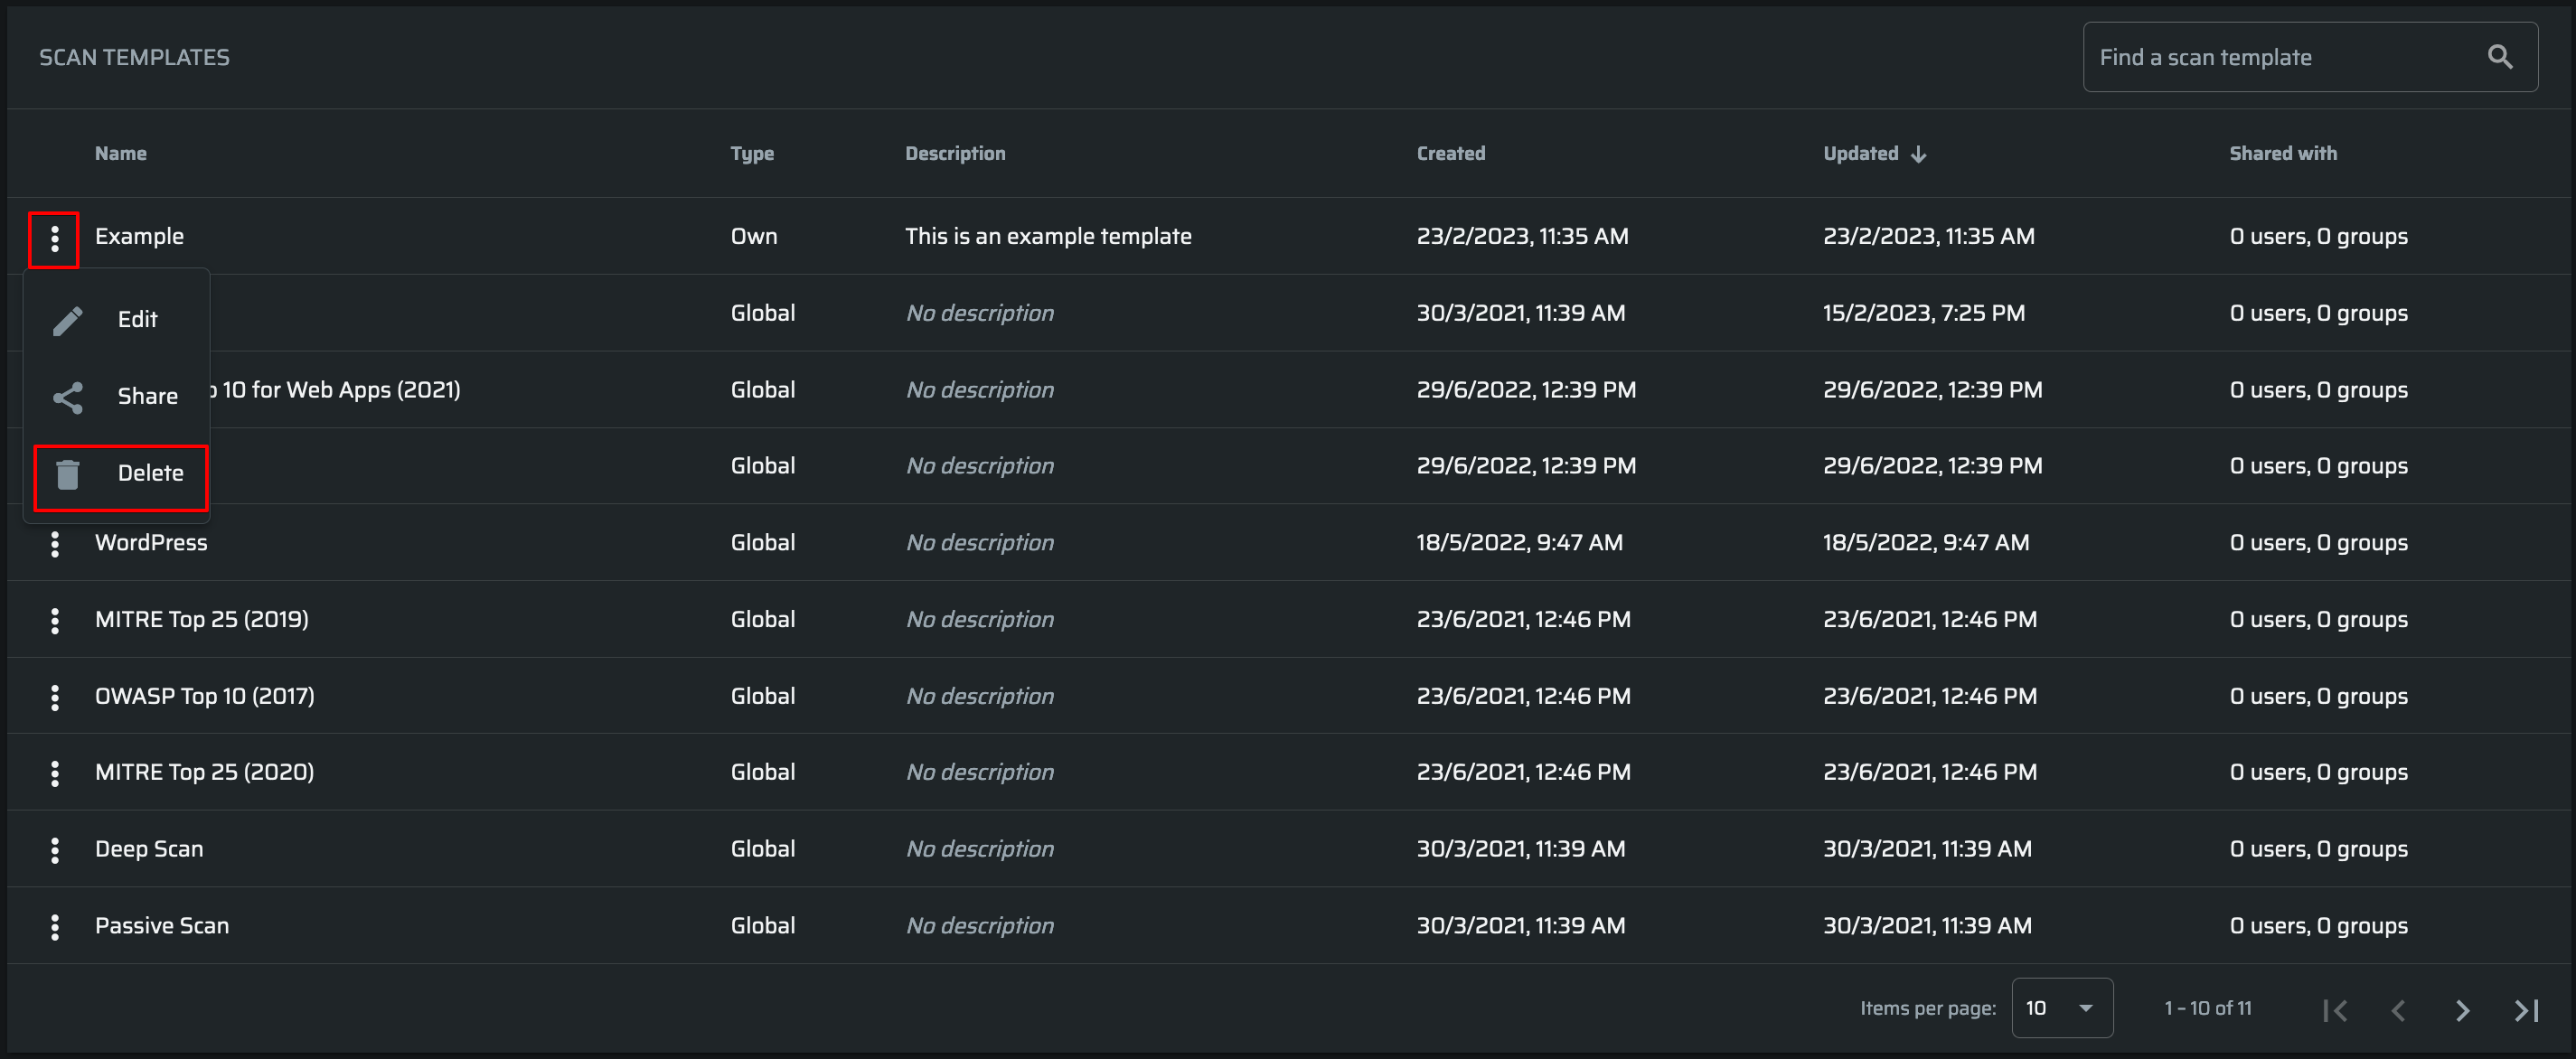
Important:The default templates cannot be deleted.
Updated about 2 months ago
