Managing Repeaters
The Bright Repeater is a scan proxy which provides a secure connection between the Bright cloud engine and a target on a local network. The Repeater mode enables you to securely scan targets on a local network, without having to allowlist the Bright IP address in your firewall for incoming traffic. See Repeater (Scan Proxy) for more information.
Creating (registering) a new repeater
To create (register) a new Repeater, follow these steps:
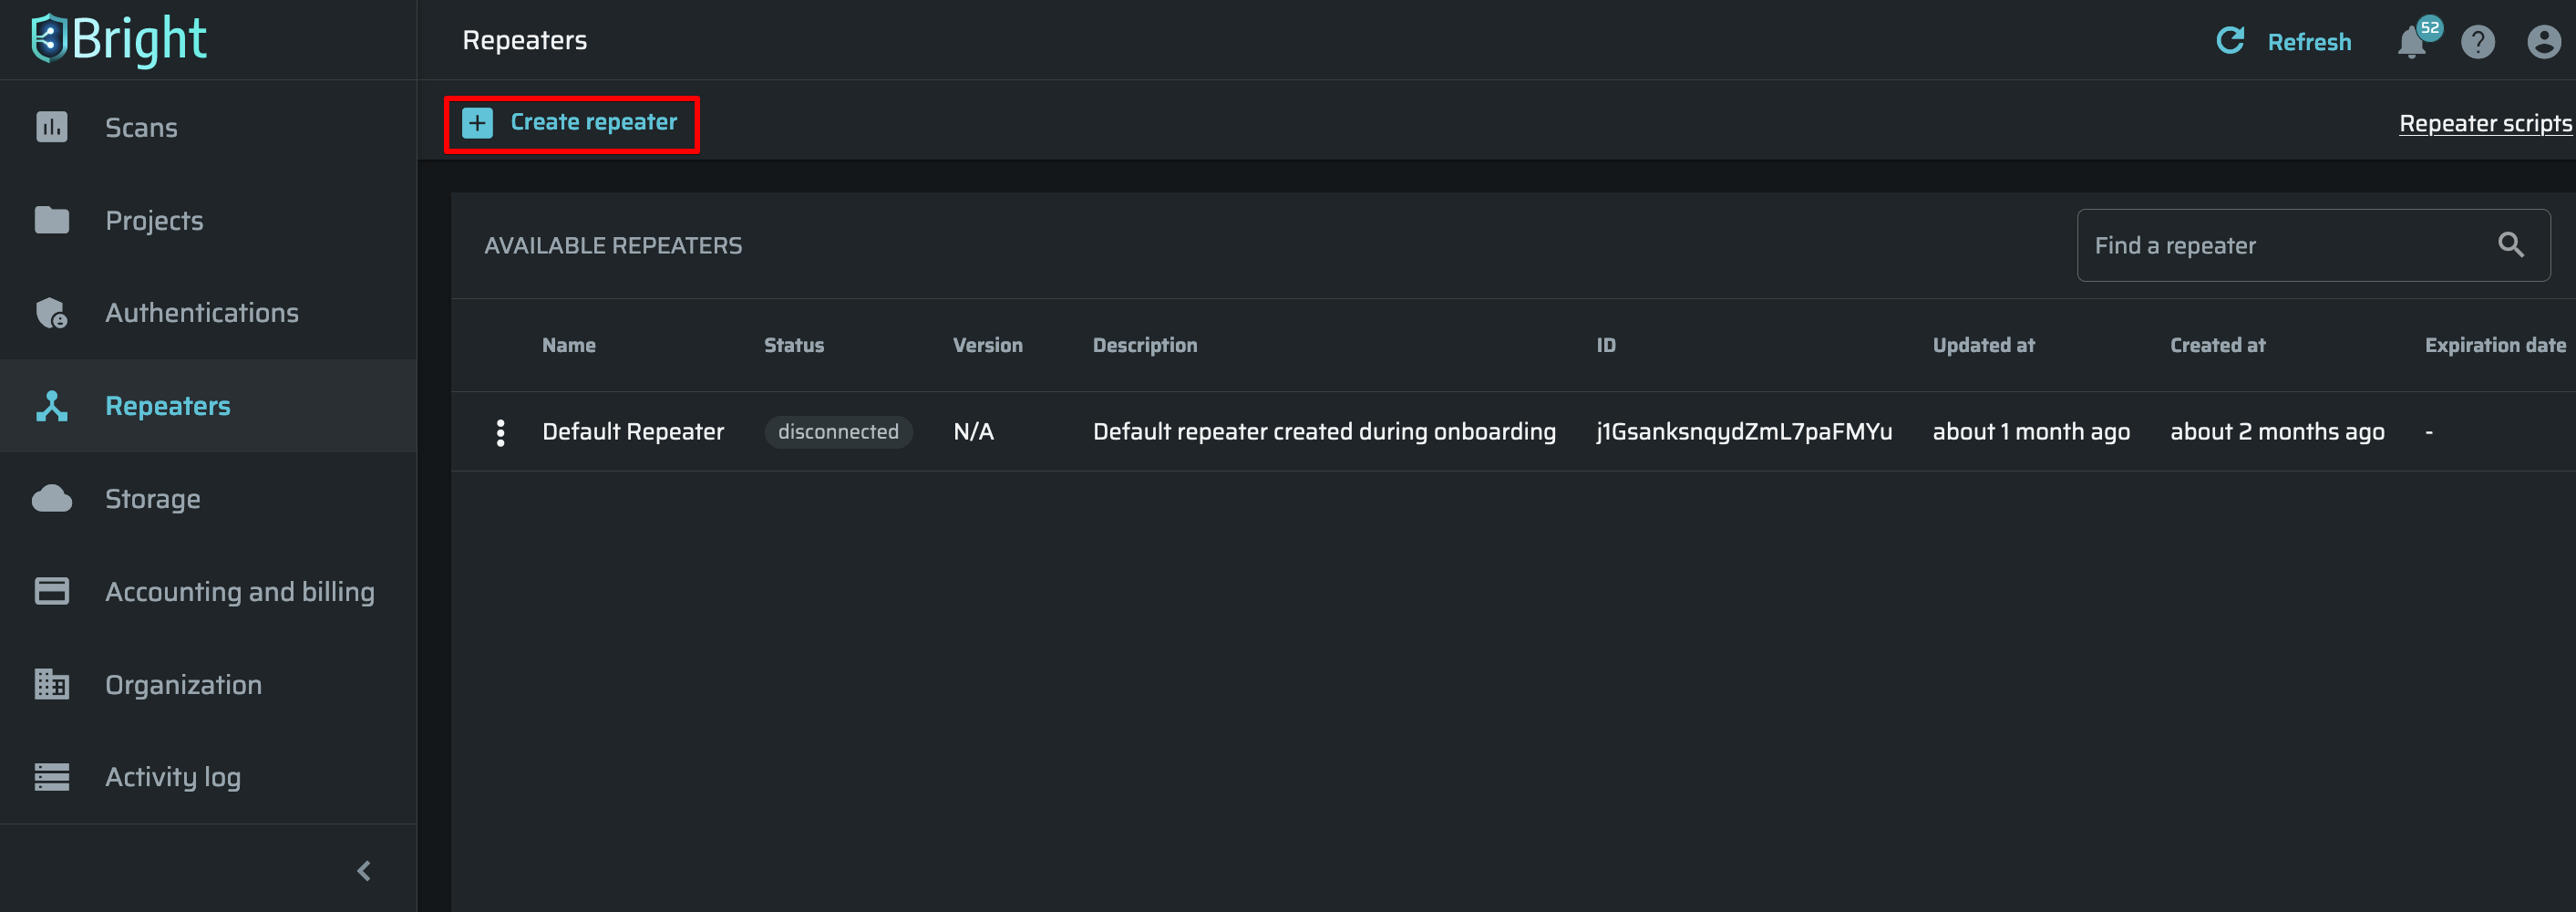
- Select the Repeaters option in the left pane to display the AVAILABLE REPEATERS list.
- In the upper left corner, click + Create Repeater.
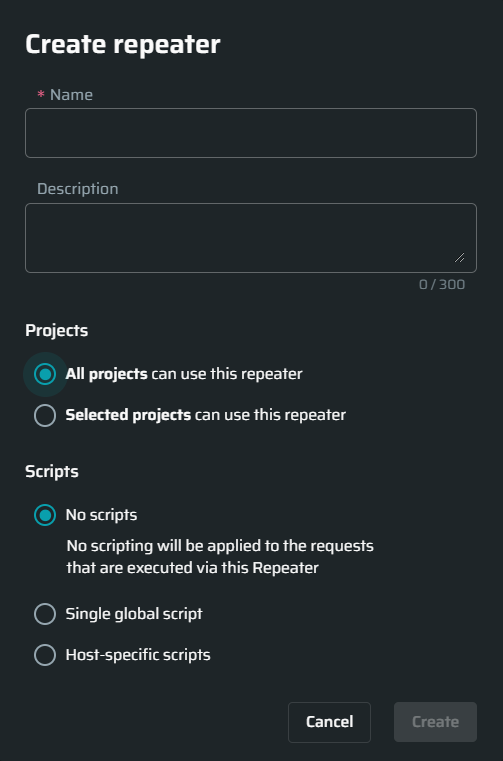
- In the Create Repeater dialog box, do the following:
a) In the Name field, enter a name for the Repeater.
b) (Optional). In the Description field, enter a short description of the Repeater.
c) In the Projects section, select either to create the Repeater for all projects or only for specific ones. If you select the second option, the created Repeater will only be available when configuring scans for the predefined projects.
d) (Optional). In the Scripts section, add a script to be used with the created Repeater. The scripts should be created in advance on the Scripts page. To learn more, read Using Repeater Scripts.
e) Click Add.
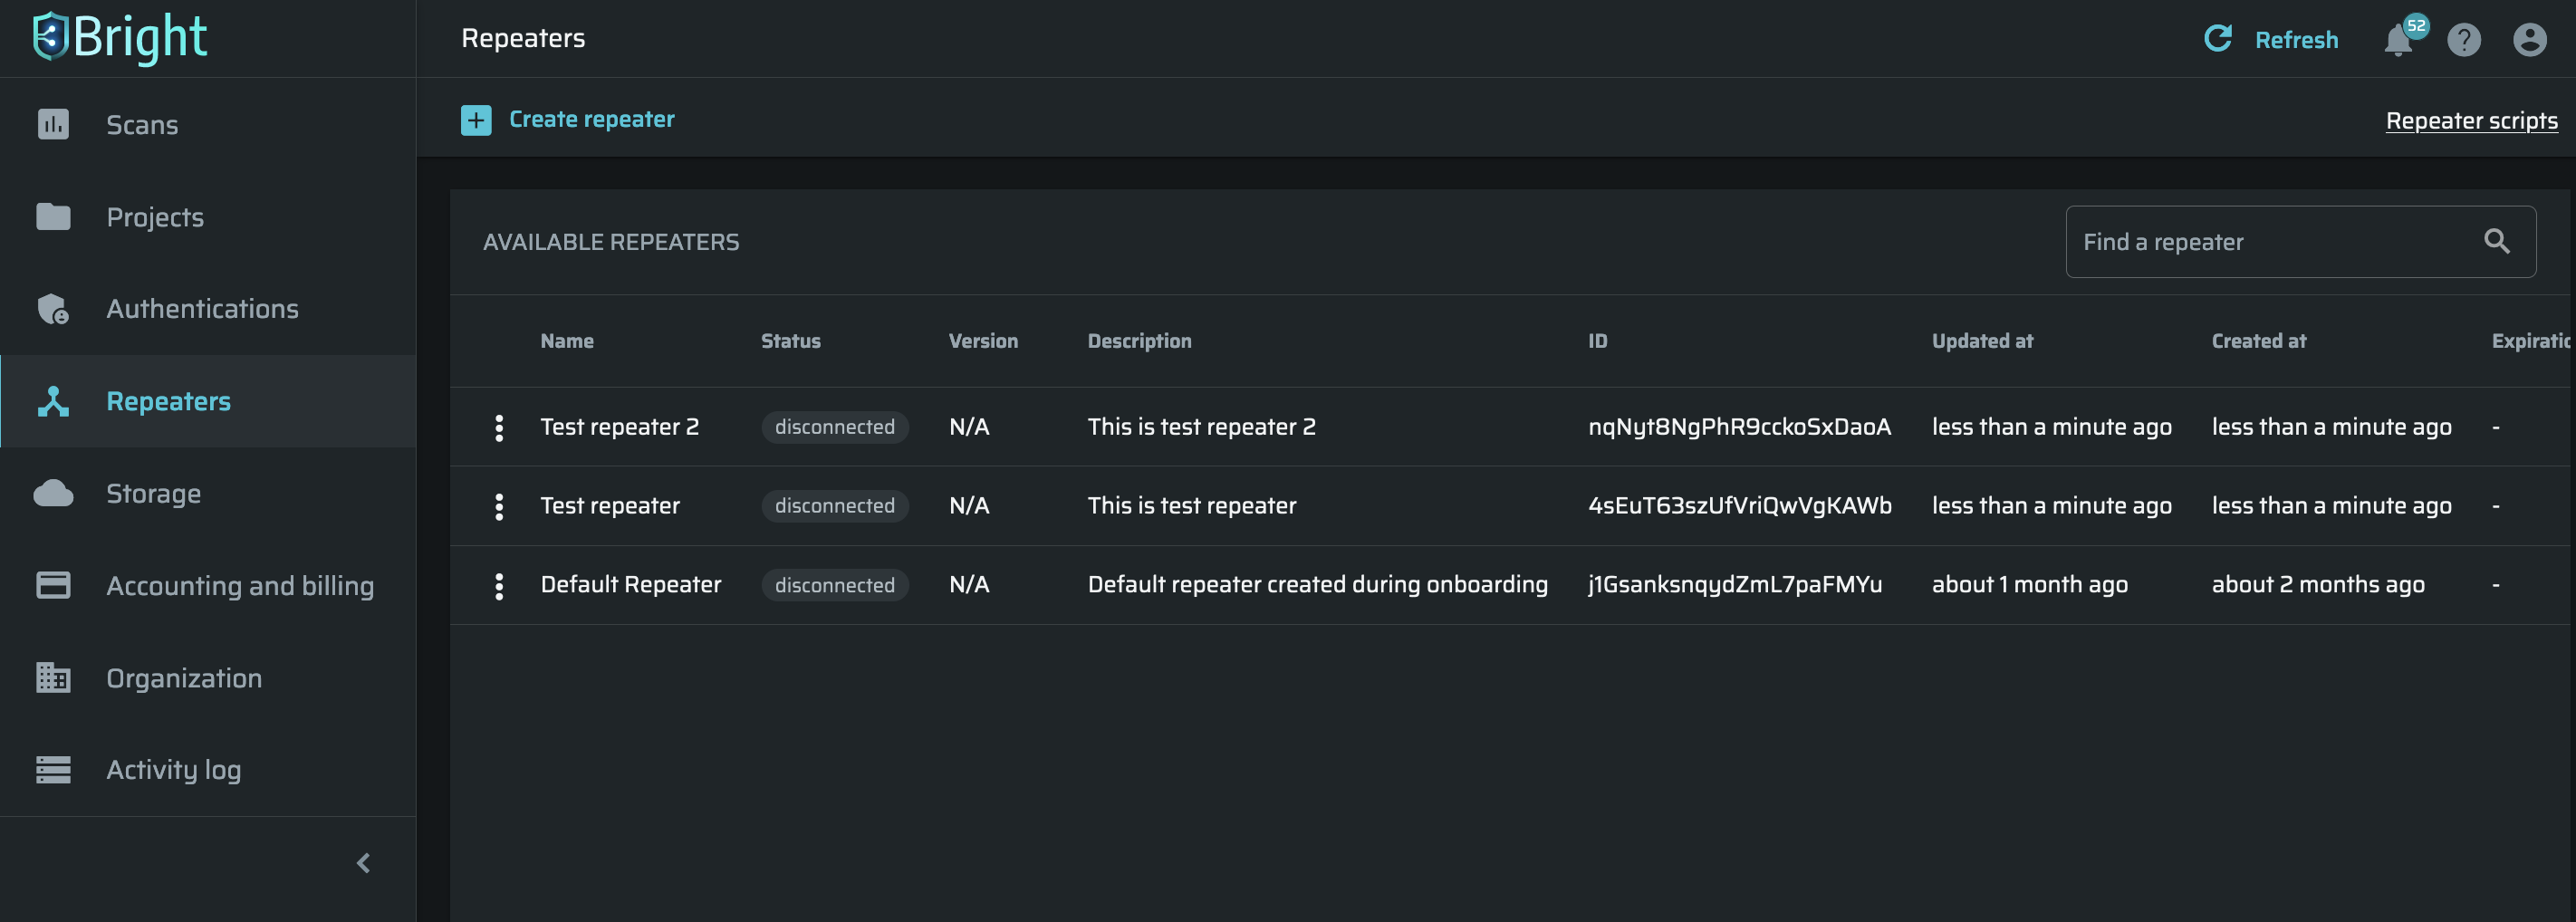
Reviewing all repeaters
To review the list of all existing repeaters, select the Repeaters option in the left pane. Each Repeater appears as a single row.
Editing repeater details
To edit Repeater details, follow these steps:
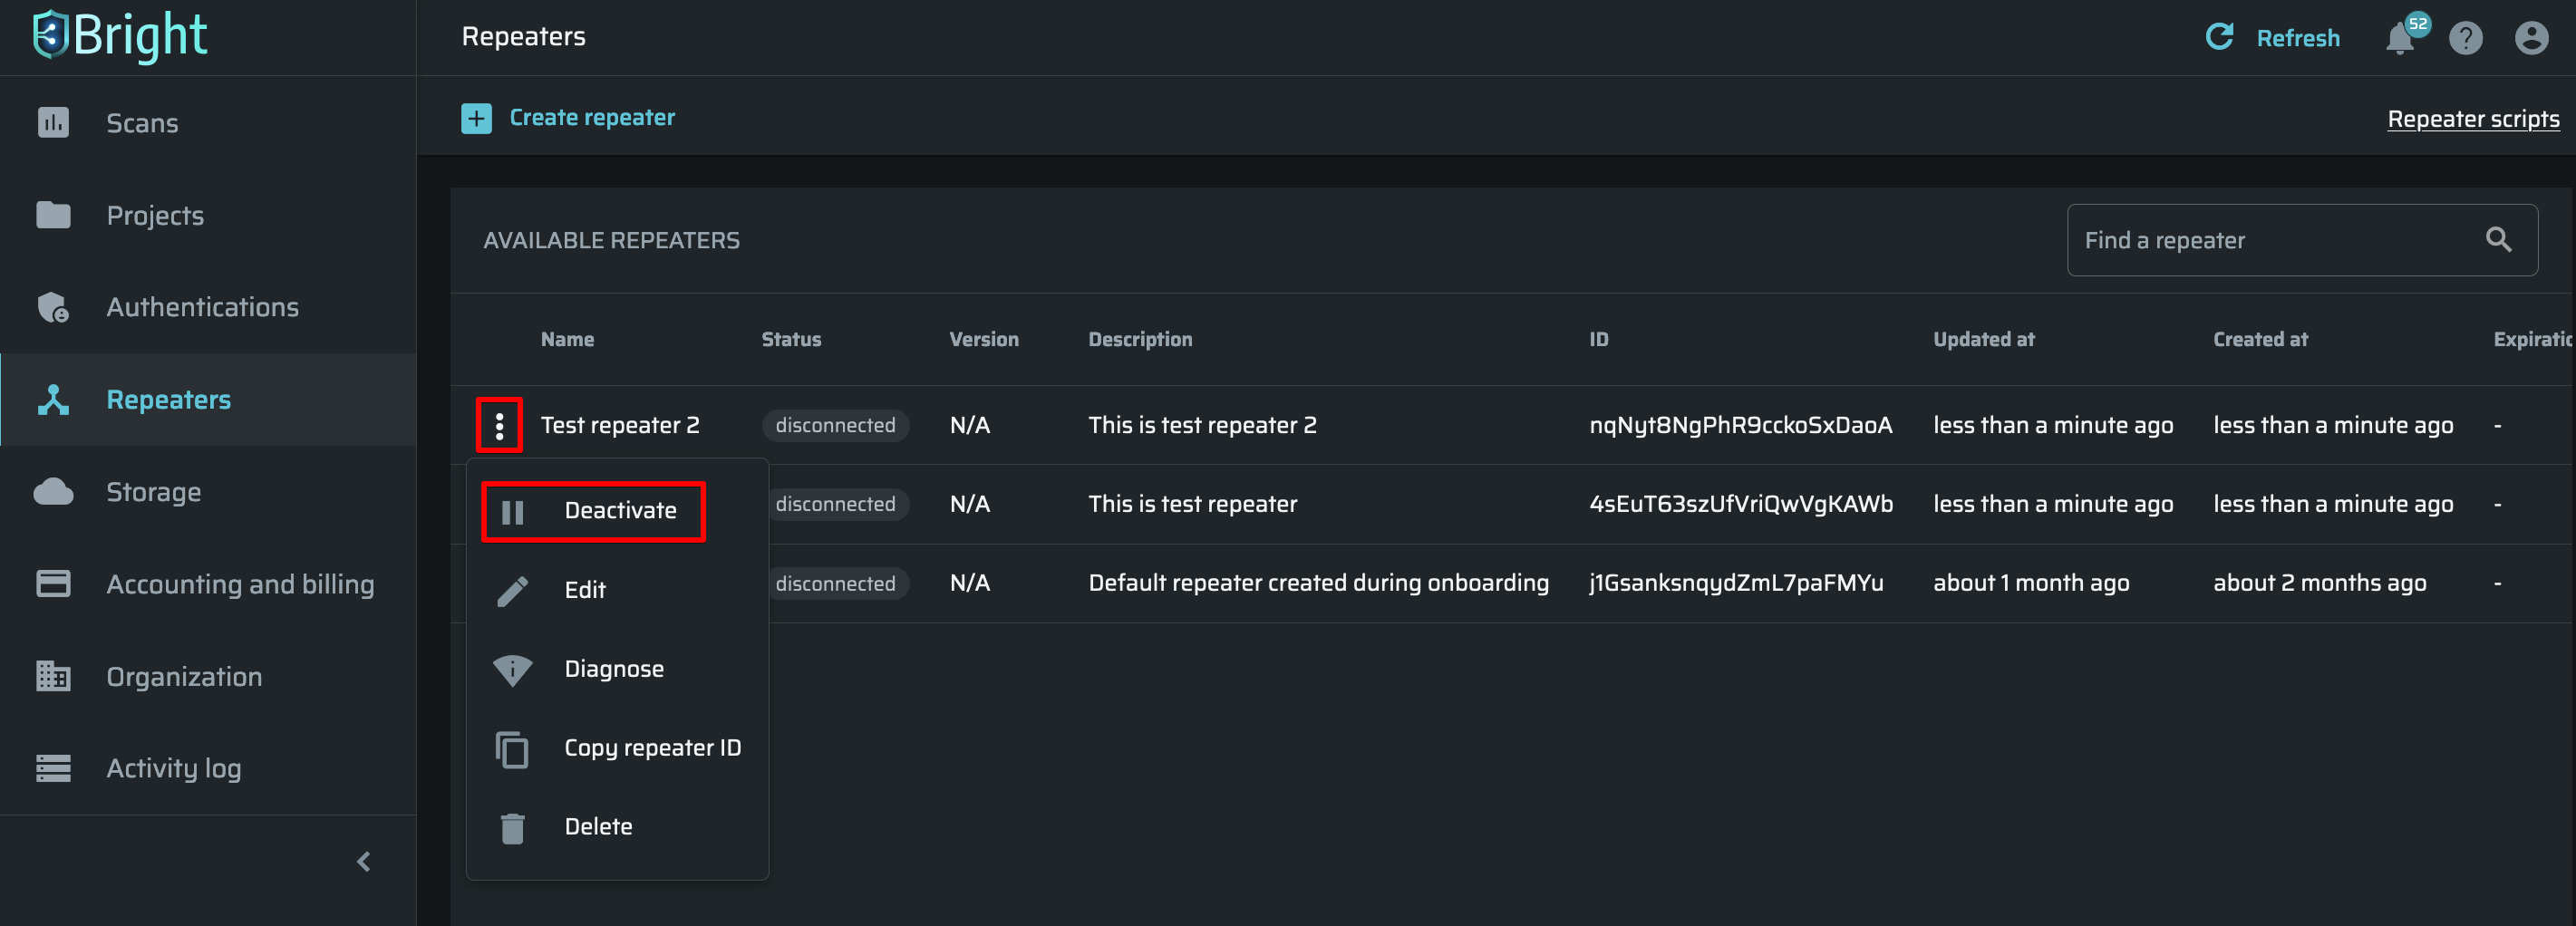
- Click the
 button next to a Repeater name and then select the Edit option.

- Modify the Repeater details as you need, and then click Update.
Deactivating the repeater
To deactivate the Repeater, click the ![]() button next to the Repeater name, and then select the Deactivate option.
button next to the Repeater name, and then select the Deactivate option.
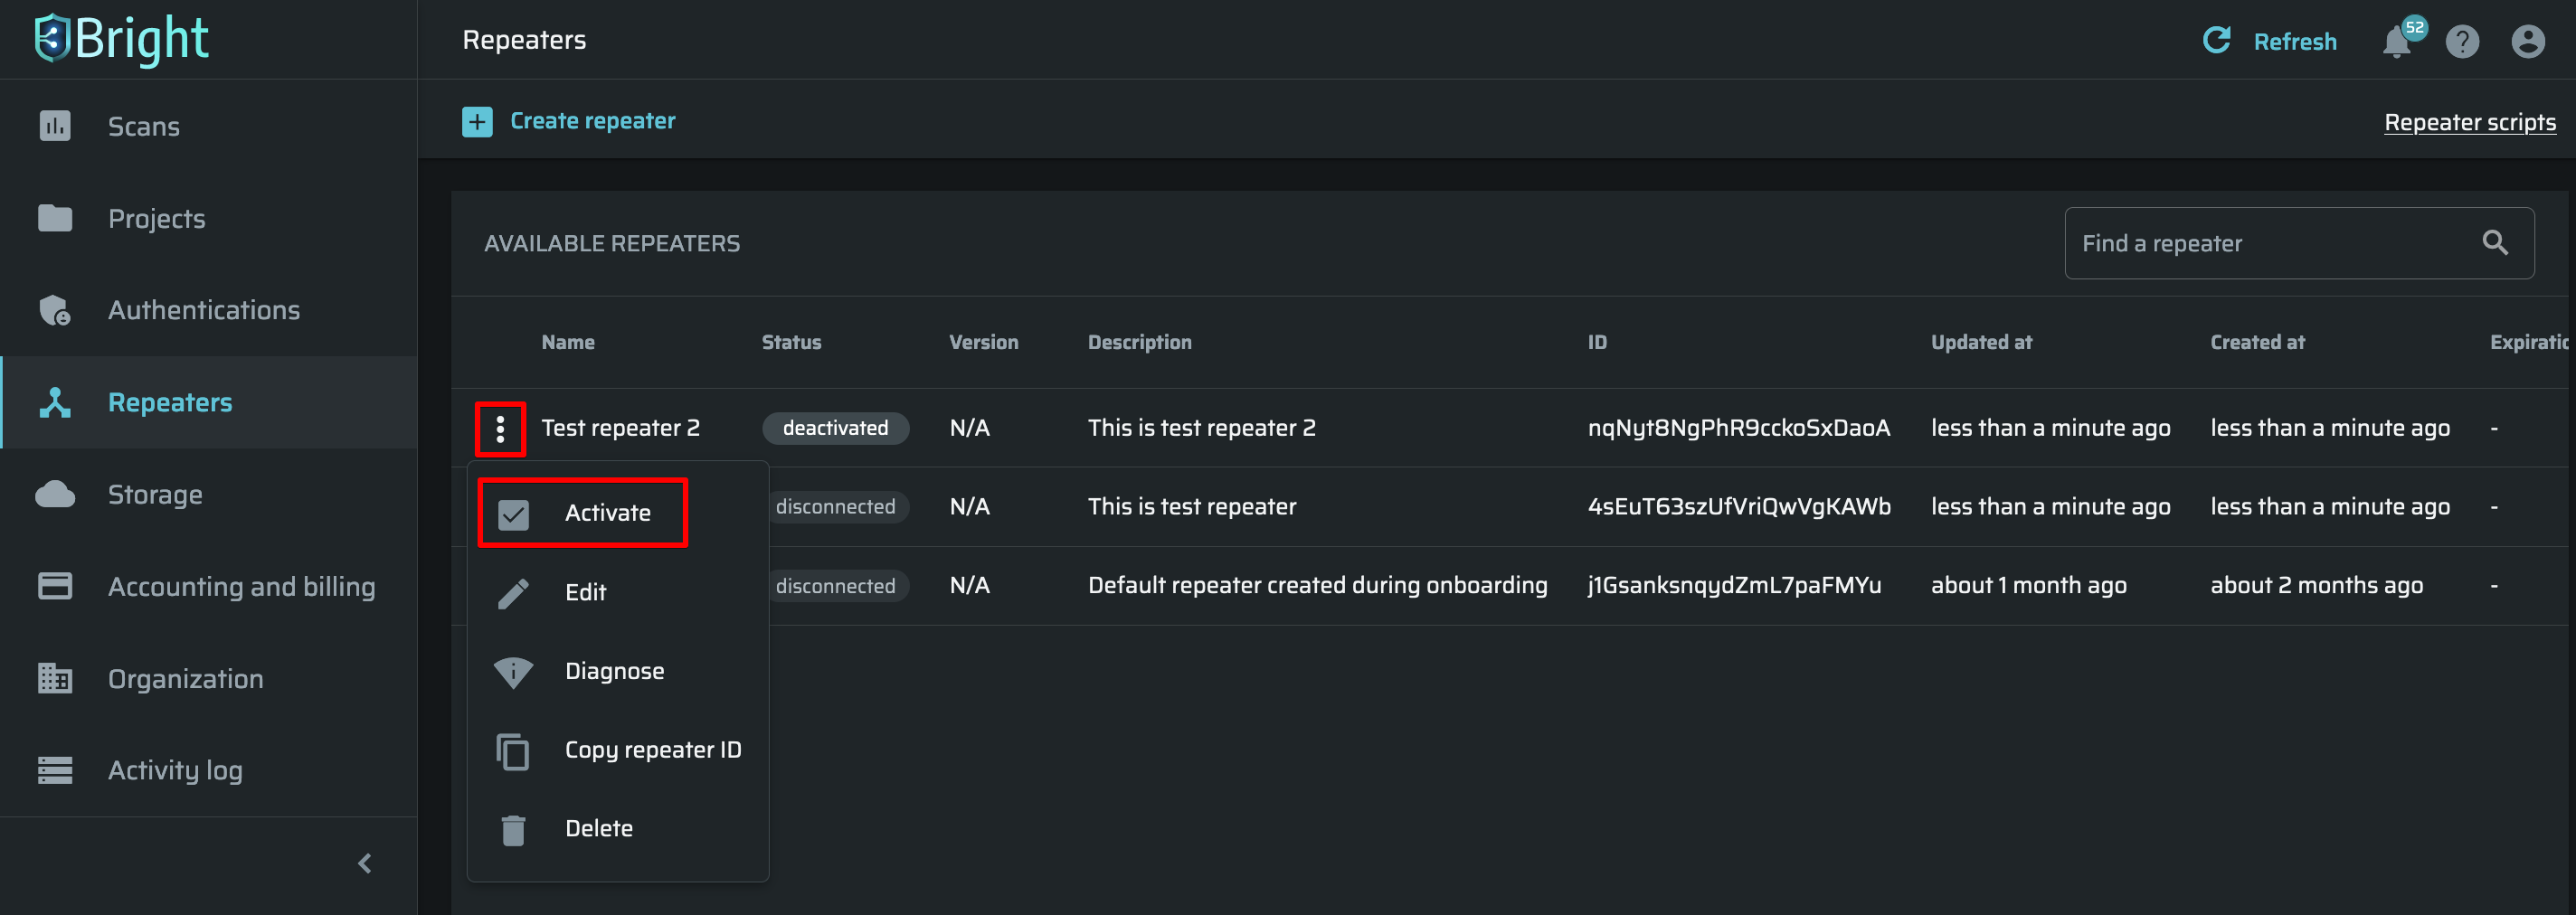
Activating the repeater
To activate the Repeater, click the ![]() button next to the Repeater name, and then select the Activate option.
button next to the Repeater name, and then select the Activate option.
Diagnosing network connection
You can check if a created (registered) Repeater can successfully connect to all target hosts on your local network. The Repeater diagnostics allows you to reveal and fix the network connection problems before you run a scan.
Prerequisites
- You have created the Repeater in the Bright app.
- You have registered the Repeater in your local network using the Bright CLI.
To run the connection diagnostics, follow these steps:
- Click next to the Repeater connected to your network, and then select Diagnose.
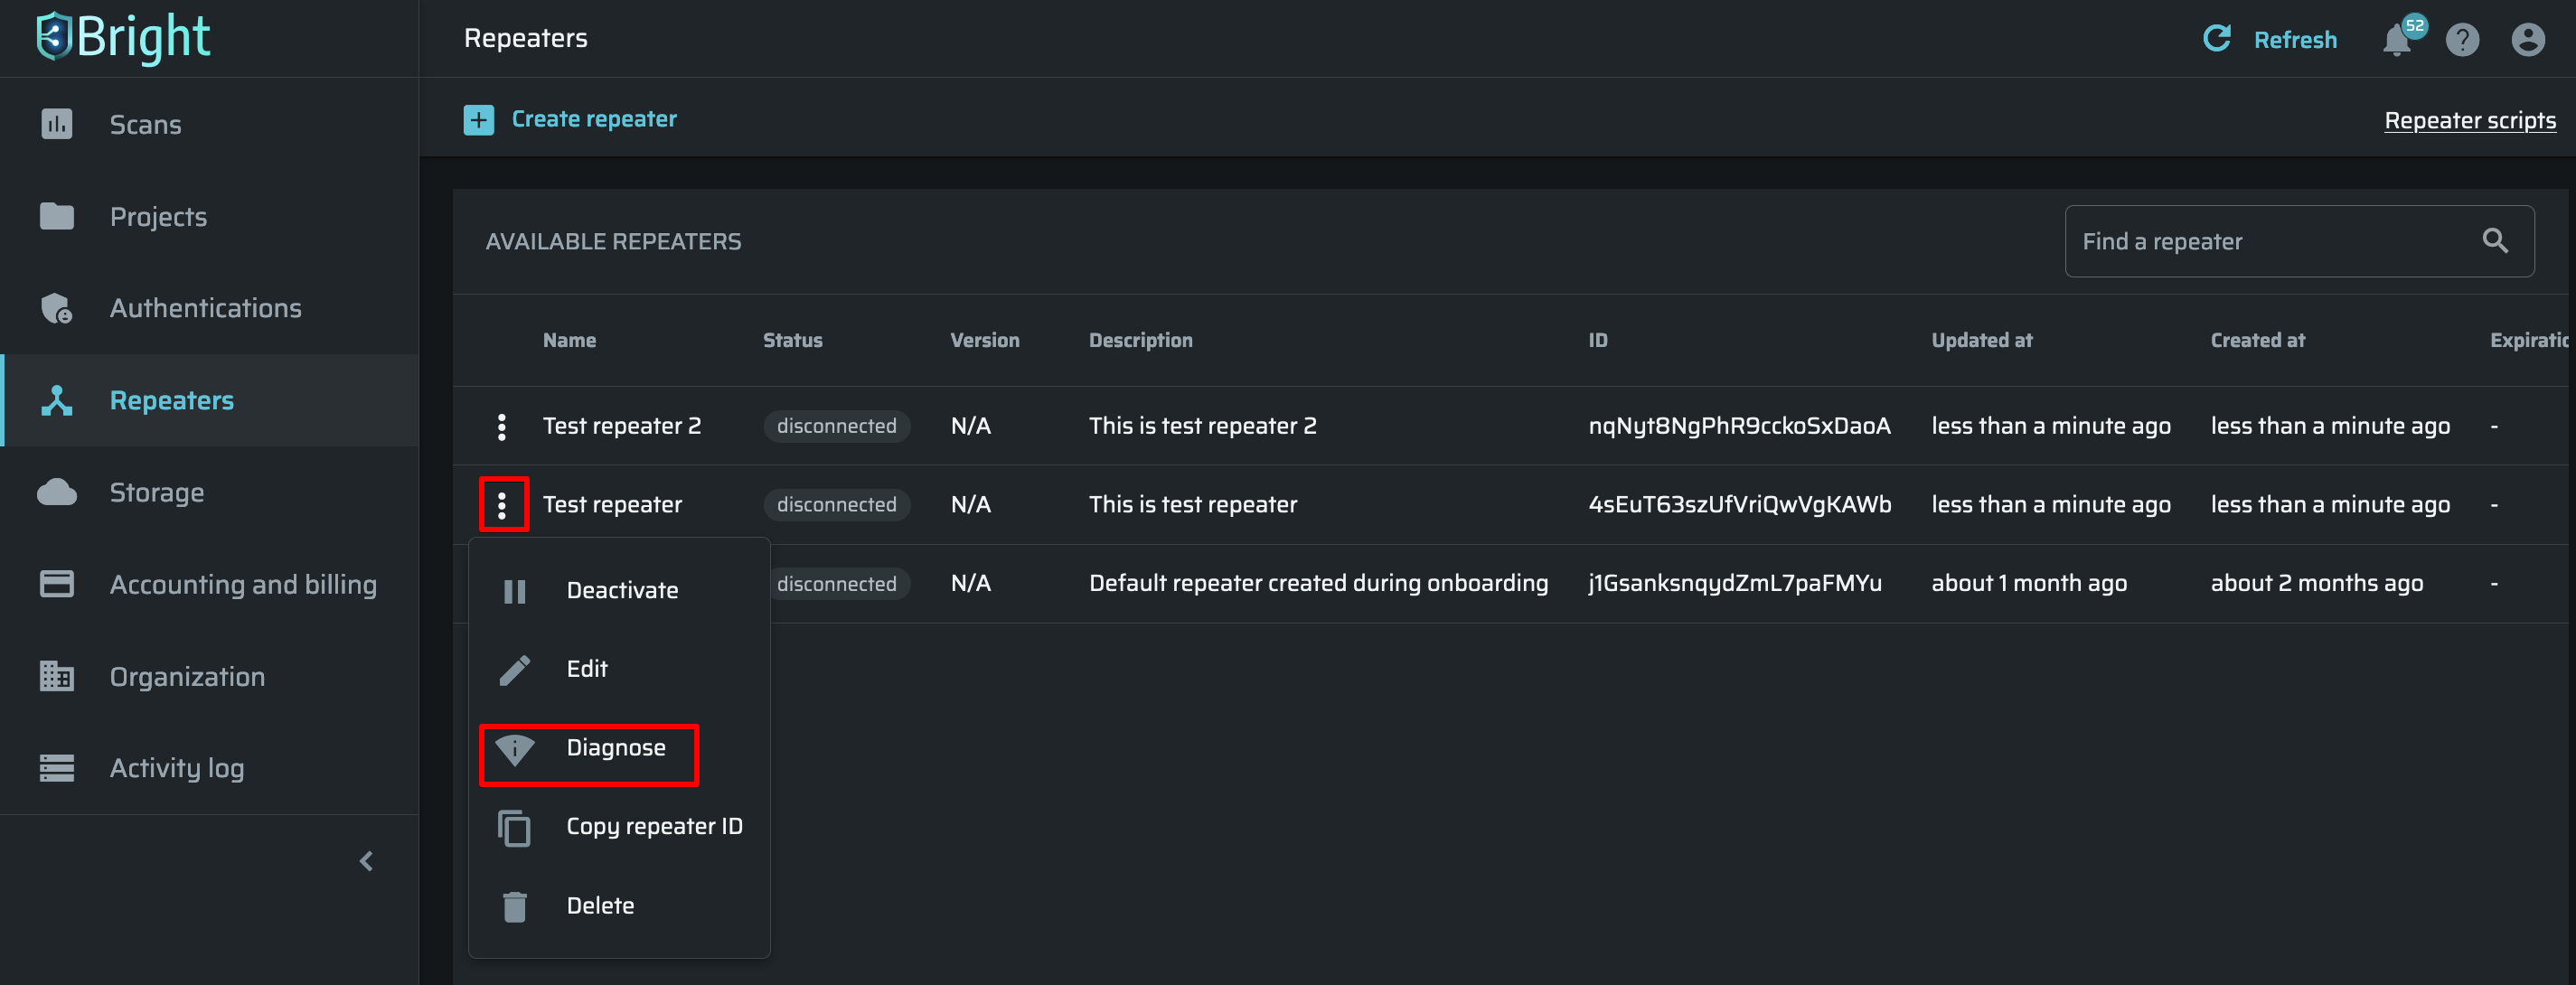
- Under the Repeater name, select one of the following options:
- Ping (Multiple URLs) - Enables testing of the network connectivity on a single or multiple targets. You are only required to enter the URL(s) of your internal (local) target application(s) to initialize the diagnostics. You can add up to 1000 target hosts separated with a newline, semicolon or comma.
- Traceroute (Single URL) - Provides a full IP trace on a specific target. It means that this option returns a list of all the IPs along the route of the request, thus allowing you to detect the connectivity bottlenecks. You simply need to specify the target hostname or IP address to initialize the diagnostics.
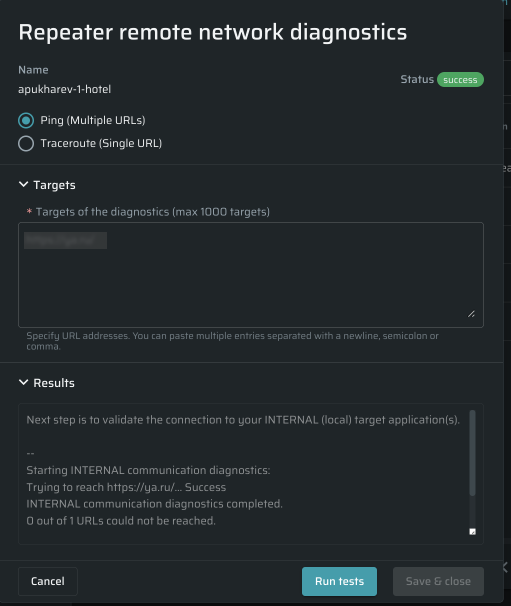
-
In the Targets field, specify the URL(s) of the diagnostics target(s).
-
Click Run tests.
The full results of the diagnostics will be provided in the Results section. You can also quickly check if the diagnostics passed successfully or not by the status displayed in the upper-right corner of the Repeater remote network diagnostics dialog box.
Deleting the repeater
To delete the Repeater, follow these steps:
- Click to the left of the Repeater name.
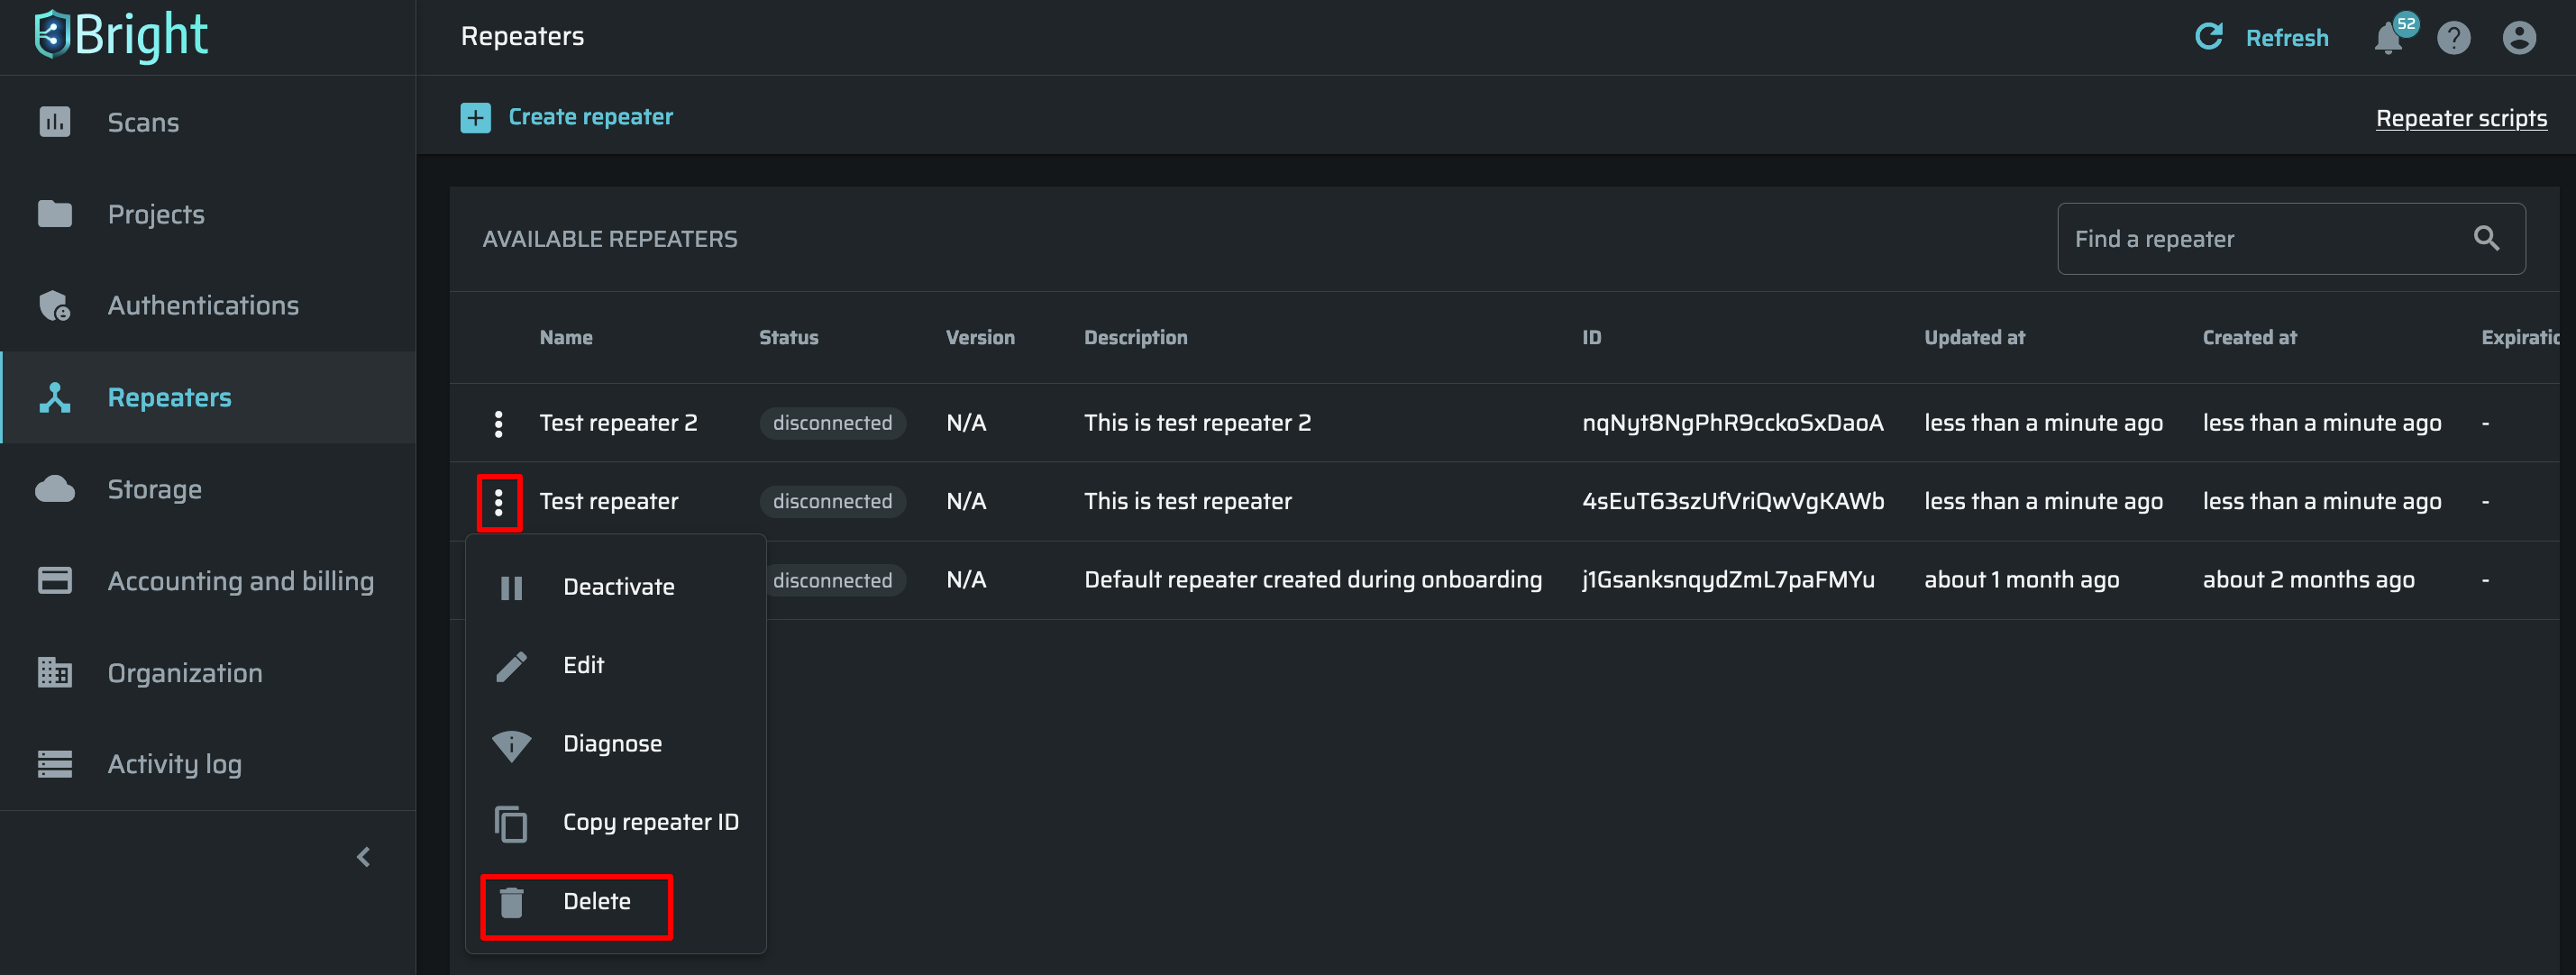
- Select the Delete option, and then click Yes.
Updated about 2 months ago