Managing Organization Users
Adding user to organization
To add a user, follow these steps:
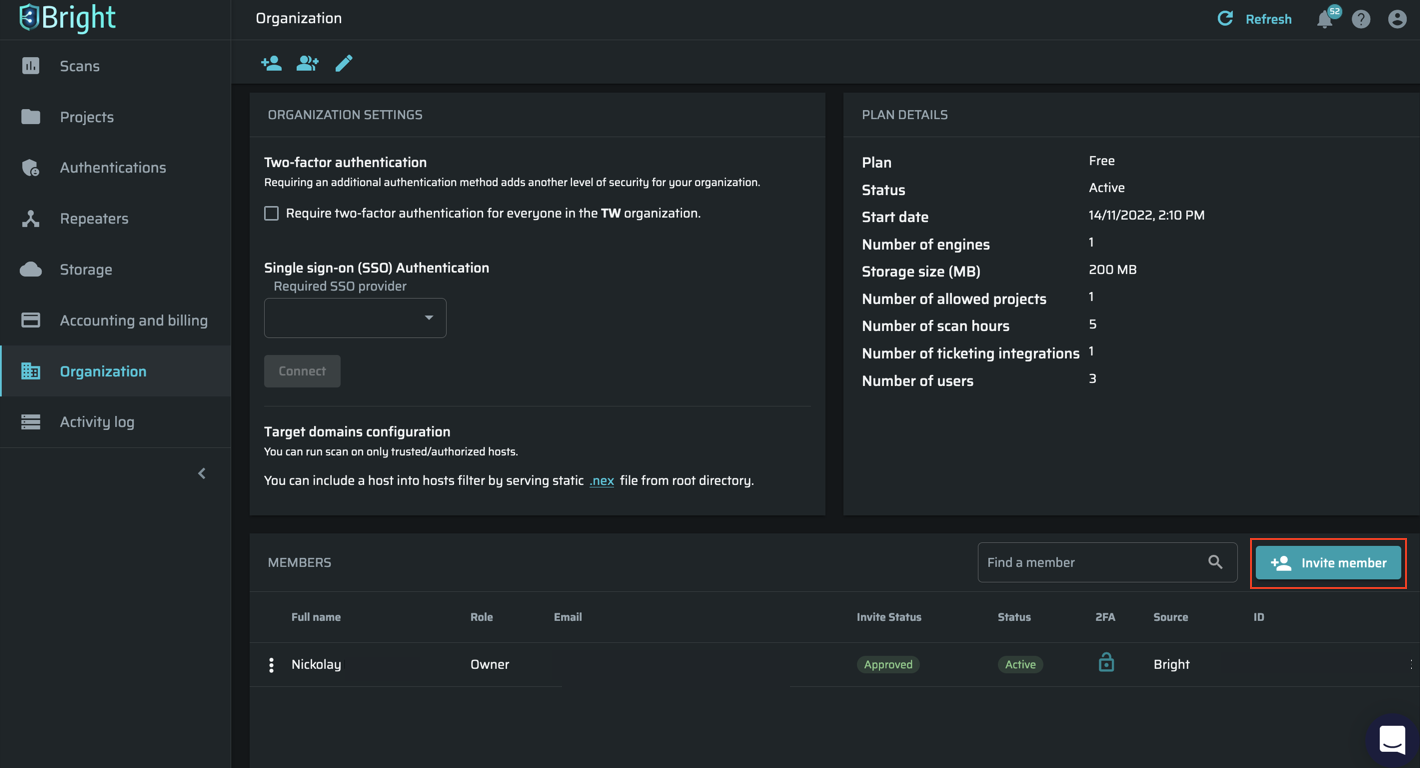
- In the upper-right corner of the MEMBERS section, click Invite Member.

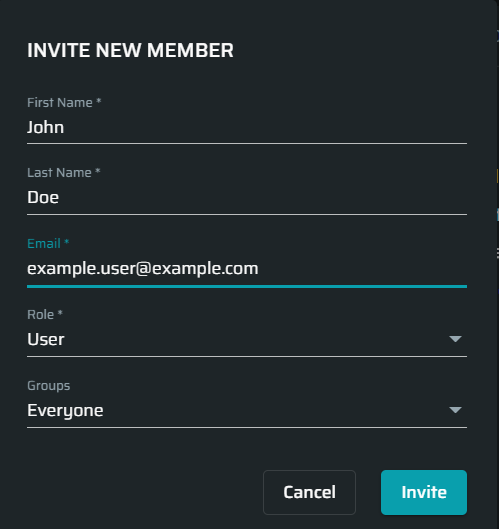
- Update the user’s information and role in the organization.

You can assign one of the following roles to the user:
- User – Has access to scans.
- Admin – Can add, modify and delete groups and members, as well as make billing and plan changes.
- Owner – Has unrestricted access to the entire organization.
- Team Leader – Can manage memberships and modify settings of the groups that they are members of.
- Billing Manager – Can manage subscription and billing settings.
- Guest - Can only view scan results (if granted access to the project), but cannot create or delete scans.
- Custom roles - The roles with specific access permissions, created by an Admin or an Owner.
- Click Invite.
Viewing user profile
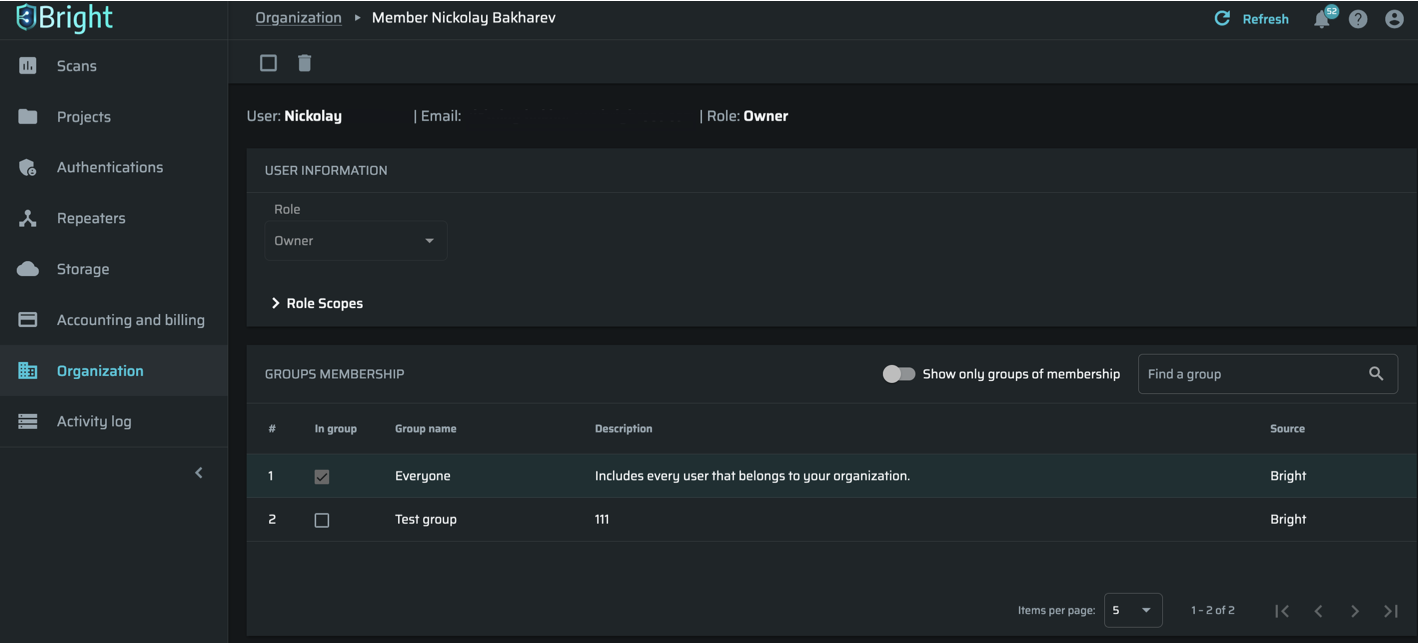
A user’s profile allows you to view the following information:
- User’s name and email
- Assigned role and granted access scopes
- Membership in the groups of the organization
To view a user’s profile, in the MEMBERS section, select the user you want to view the information about.

Deleting user
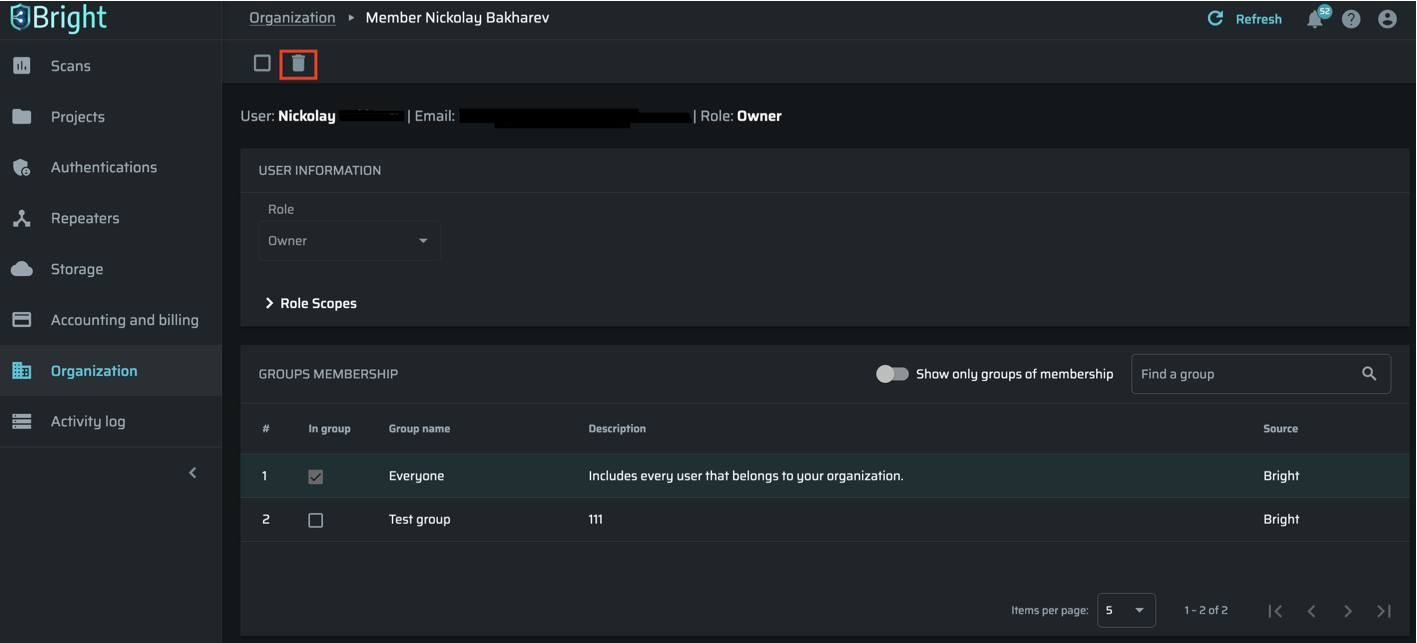
To delete a user, follow these steps:
-
In the MEMBERS section, click the row with the user to be deleted.
-
Click
 at the top of the screen.

- In the dialog box, click OK to confirm the deletion.
Warning:Users who have used personal email addresses during sign-up will have access to DAST after leaving the company. Please consider using a company email on registration to prevent sensitive data leaks.
Updated about 2 months ago
