Editing an Uploaded API Schema
The Bright Schema Editor (Linter) is a smart tool designed to parse, validate and edit an uploaded API schema, making it easy for you to configure high quality, efficient scans that will ensure the best results. The Schema Editor indicates the endpoints and root nodes configured incorrectly with warning and error icons, so that you easily detect problematic places in the schema at a first glance, and can quickly fix them.
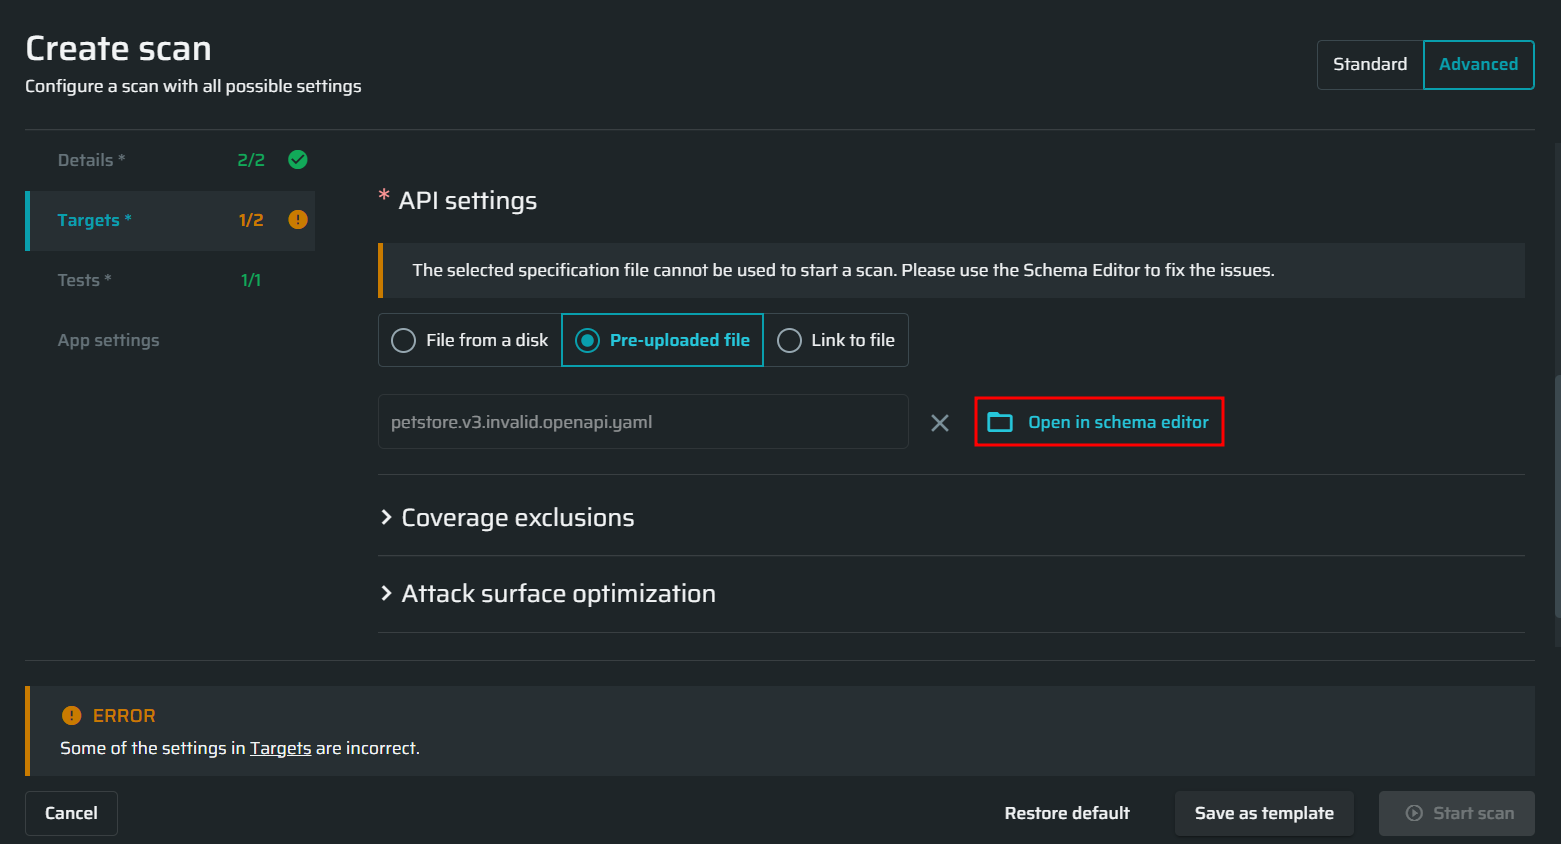
You may need to use the Schema Editor to edit misconfigured API files that you want to use for a scan. To learn how to identify the files with configuration issues, see Configuring an API Schema.
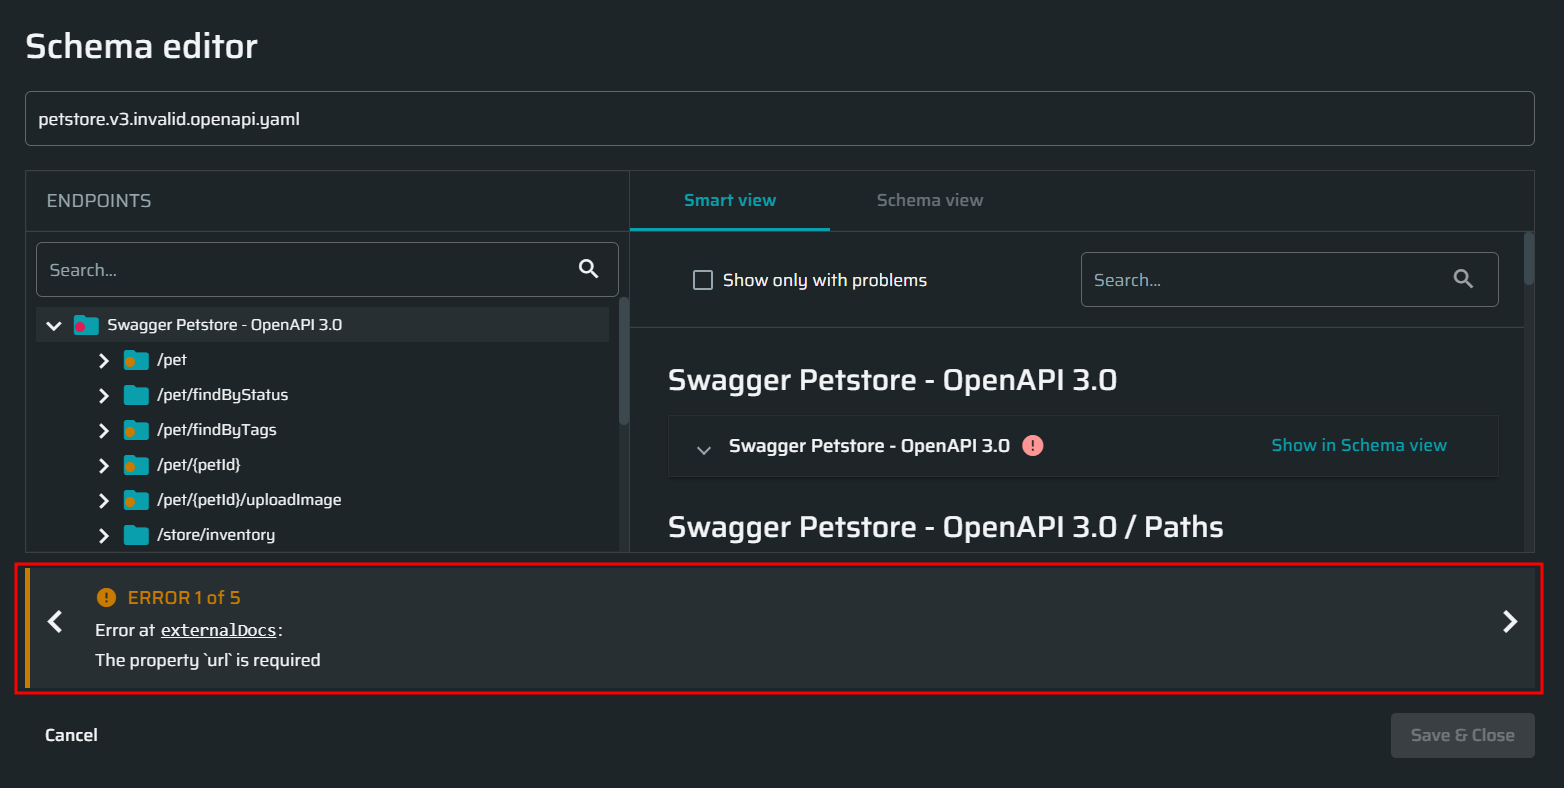
Bright assists you in fixing errors in the schema by providing the corresponding error messages, which contain the link to a specific place in the schema view where the error is found and a short description of the error cause. Using this information, you can quickly review the schema and adjust it to meet the standard specifications and specific Bright requirements.
Tip:The Schema Editor supports some features of standard parsers to simplify schema configuration. For example, for repeated nodes in the YAML files, you can identify the first occurrence of the node (object) by an anchor (mark with the ampersand - “&”). Each subsequent occurrence is serialized as an alias node (referenced with an asterisk - “*”) which refers back to this anchor. To get more information, see the YAML specification.
The Schema Editor allows you to view a schema in two modes: a raw schema view and a smart view. The smart view provides a clear breakdown of endpoints and represents all parameters as separate fields. The fields with incorrect or missing values are highlighted and accompanied by a corresponding warning or error message.
Step-by-Step guide
To edit an API schema uploaded for a scan, follow these steps:
- Click Open in schema editor next to the selected file.

-
Fix the configuration issues in the schema based on the error messages displayed at the bottom of the Schema Editor.
You will not be able to start a scan until you fix all the errors indicated with a red icon in the navigation tree and the smart view. The configuration issues that do not prevent running a scan are indicated with a yellow warning icon in the navigation tree and the smart view.
You can find the detailed information about configuration requirements and error types in the Troubleshooting section.

Note:Wording of the error cause may differ depending on the browser. The sample screenshots are made based on the Chrome browser.
Tips:
- You can easily switch between the error messages using the navigation buttons on the error popup.
- In the smart view, you can filter the endpoints to show only those with problems by selecting the relevant checkbox to the left of the Search bar.
- In the schema view, you can use the following keybindings for easy search and navigation:
- Ctrl-F / Cmd-F: Start searching
- Ctrl-G / Cmd-G: Find next
- Shift-Ctrl-G / Shift-Cmd-G: Find previous
- Shift-Ctrl-F / Cmd-Option-F: Replace
- Shift-Ctrl-R / Shift-Cmd-Option-F: - Replace all
- After you fix the configuration issues, click Save & Close to save the changes and proceed with the scan setup.
Updated about 2 months ago
