Configuring OIDC Connect (OAuth)
The OIDC (OAuth) authentication method is designed to configure the standard OAuth 2.0 flow, which requires the use of client or user secrets.
Related Links:
This topic describes only how to fill in fields in the Setup tab specific for OAuth. For general steps, see Creating Authentication).
Currently, only the Customer Credentials and Resource Owner Password grant types of the OIDC are supported.
Note
Before following the instructions below, ensure that your application and authenticated resources are accessible to the Bright engine, either directly from the Internet or via the Repeater.
From the Authentication type dropdown list, select OpenID Connect (OAuth), and then proceed to the authentication details.
Authentication details
In this section, set up a valid authentication request to be sent to the end-point API by completing the provided fields.
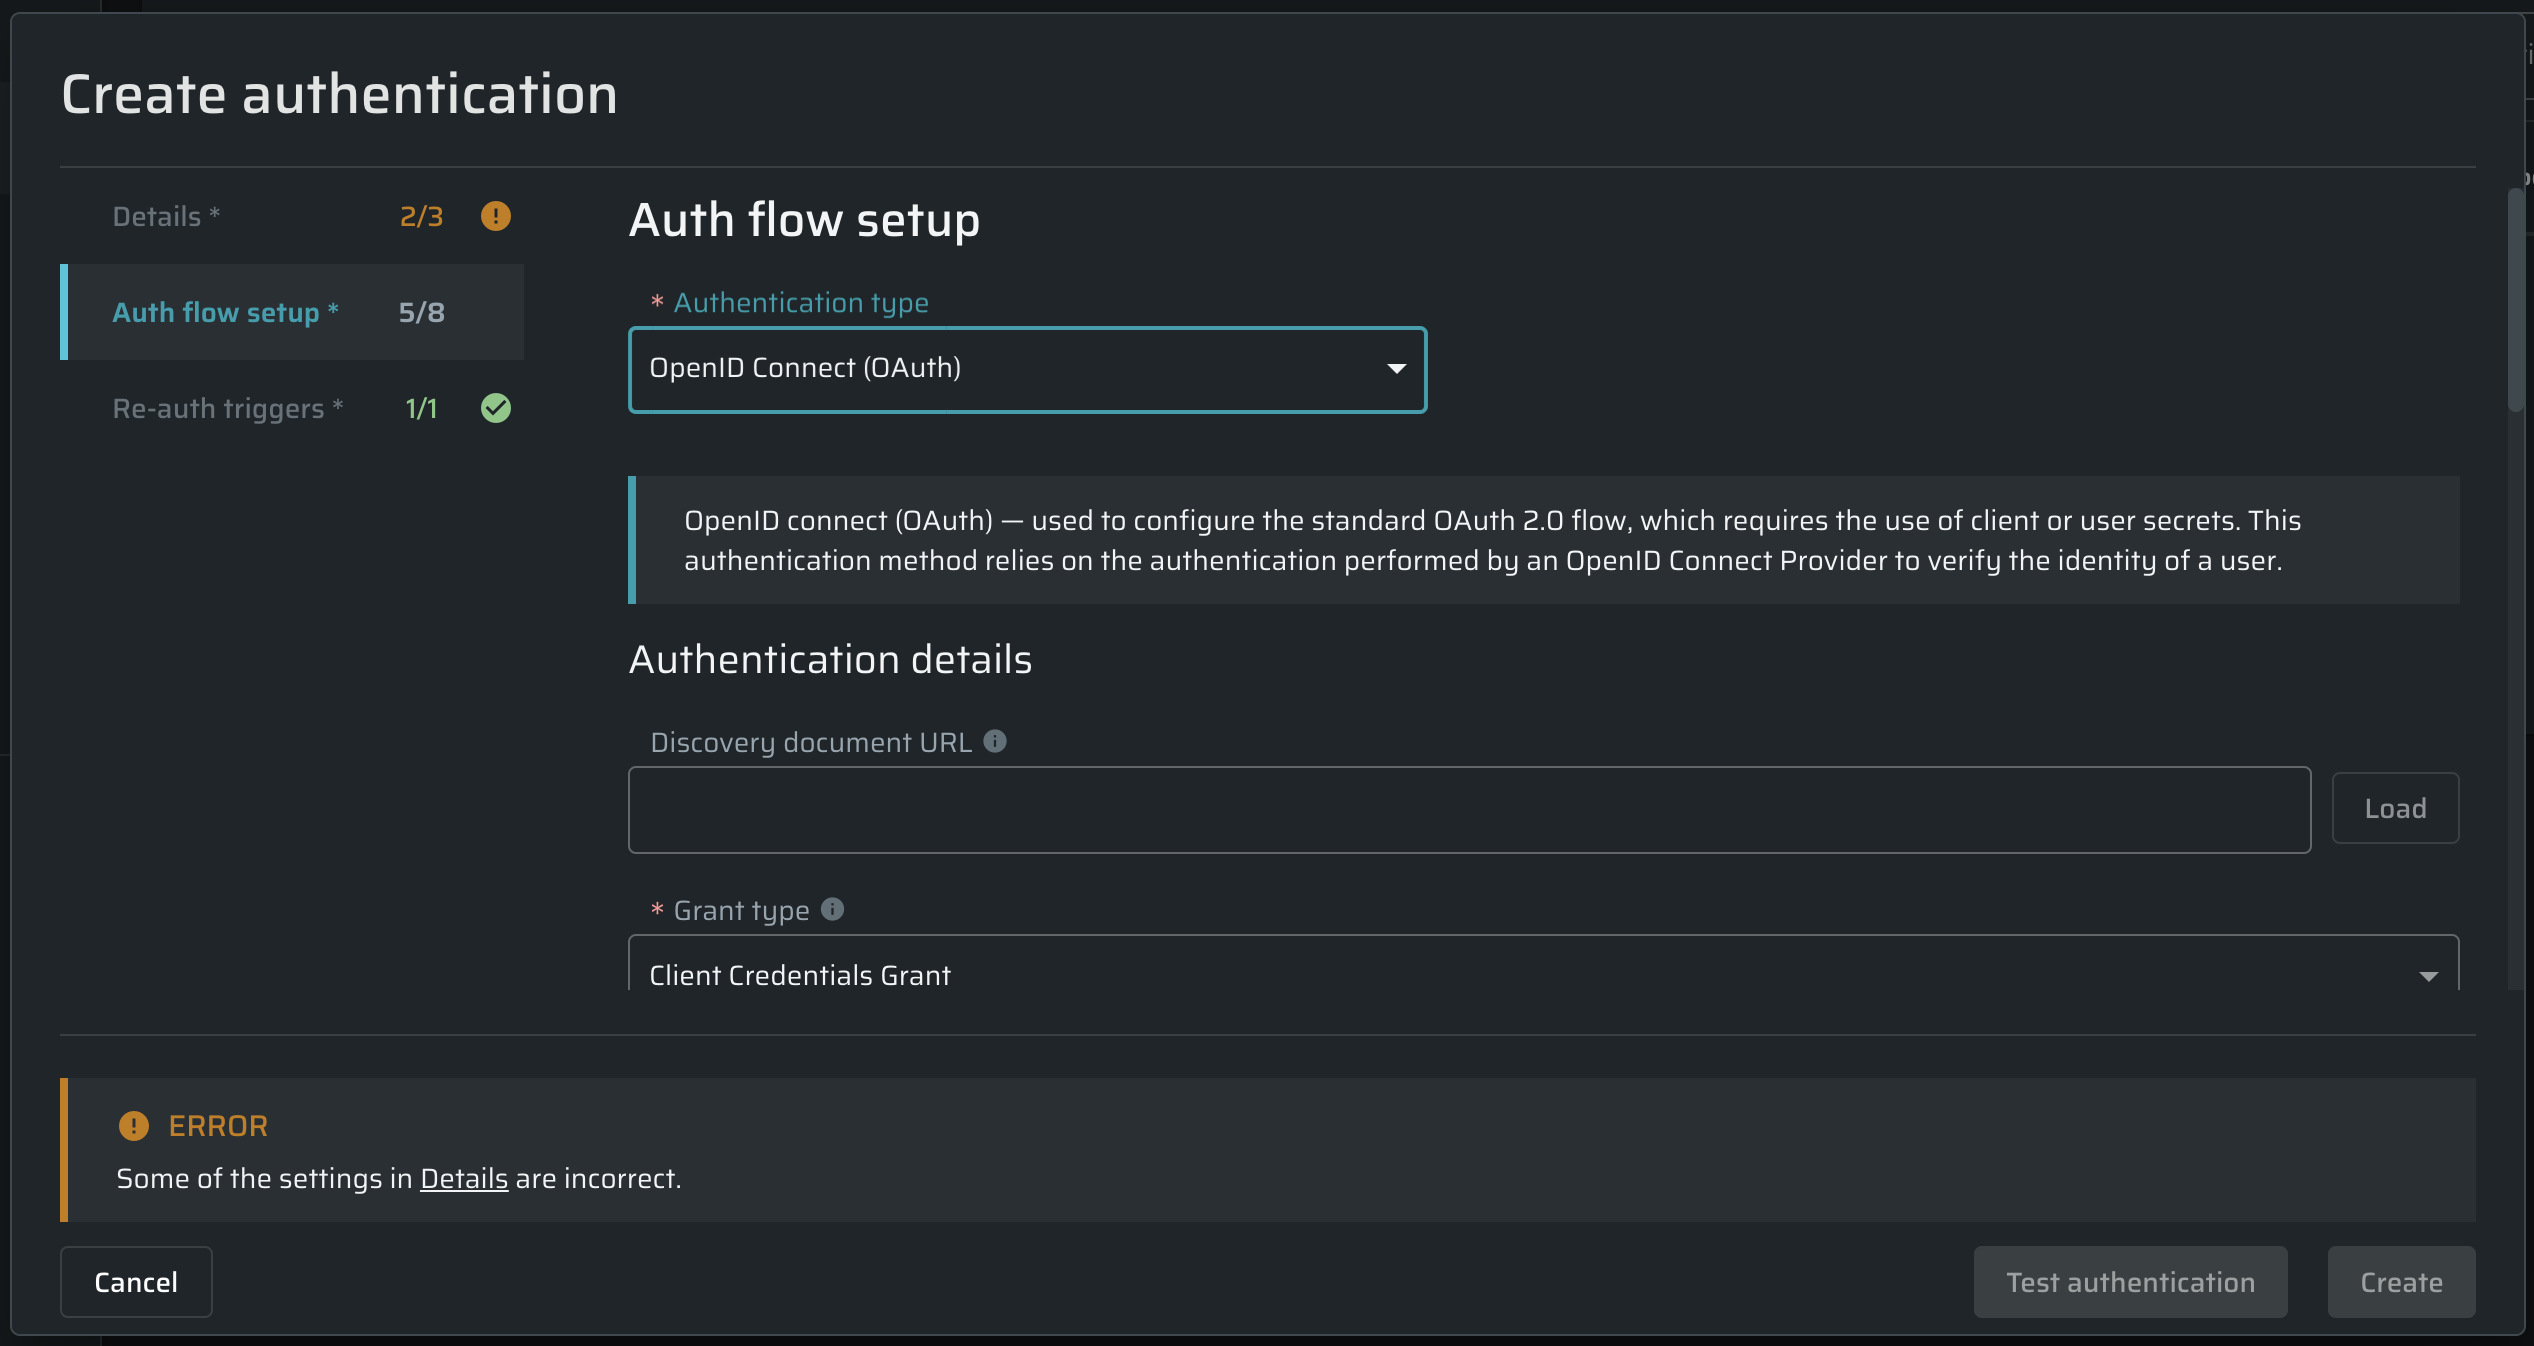
| Field | Guidelines |
|---|---|
| Discovery document URL | Provide a discovery document URL (https://your_host/.well-known/openid-configuration) to populate endpoint URLs automatically or leave this field empty to enter endpoint URLs manually. |
| Grant type | From the drop-down list, select the grant type you need: - Client Credentials Grant - Resource Owner Password Grant If you select the Resource Owner Password Grant, the Username and Password fields are added to the setup flow. |
| Token Endpoint | Obtain an access and/or ID token by presenting an authorization grant or refresh token. |
| Client ID | Enter your application client ID, unique client identifier preregistered in OpenID Provider. |
| Client Secret | Enter your application client secret, used to authenticate to the Token Endpoint. |
| Username | Enter the resource owner username. |
| Password | Enter the resource owner's password. |
| Scope | (Optional) Enter a space-separated list of scopes. |
| Audience | (Optional) Enter the intended recipient of the token. |
| Embed in | Select where to embed the token in the request. - If the Default option is selected, the token is embedded according to the OIDC specification. For example, a token can be embedded in the authorization header with the Bearer prefix. - If you select the Body option, specify the token encoder, content type, exact location in the body, and the token template string. - If you select the Header option, specify the token encoder, the name of the target header, and the token template string. |
Valid authentication response
In this section, select the options you want to use during the application scanning to determine that the authenticated resource has been reached. The options define how the application responds in case a full authentication flow passes successfully.

Tip:
Bright allows testing a scan before saving it. For details, see the Testing Authentication.
Updated almost 2 years ago